• Win a Free Custom Engraved Brass Coin!!!
    As a way to introduce our brass coins to the community, we will raffle off a free coin during the month of August. Follow link ABOVE for instructions for entering.

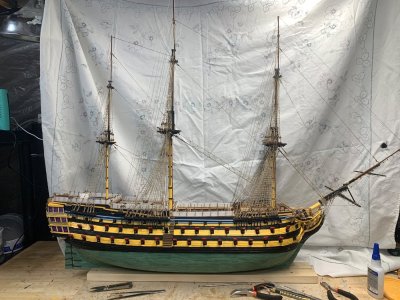
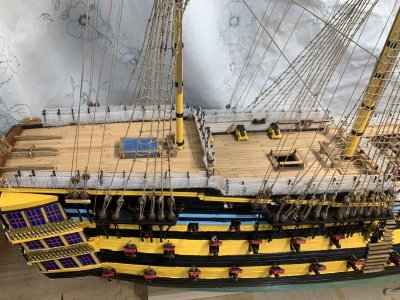
HMS Victory-Mamoli 1:90 Bruce Ives Build log

Well. It has been a while. Summer and grandchildren explain it all.

At the moment there are no grandchildren so I just spent a couple of hours continuing to work on the rigging. My friend with whom I visited the Victory in Portsmouth sooo many years ago is coming to visit and he keeps asking what progress I have made. And of course I rediscovered why I have so much trouble mentally and physically working on the rigging!

I have to change my attitude!! Working with the wooden and metal bits ( on every model I have worked on ) has given me much less trouble and has been much more satisfying. The problem is that there are very few of these left to do on this one …. and I do want to finish it.

So I am going to start a new model alongside and see if that helps. I will let you know how successful this strategy is.
 
That is a good question which I have set about to answer. It must be small because I don’t have much ( any ) room on my workbench and it must have minimal rigging. I have not yet built the Muscongus Bay lobster smack from the Model Shipways trio kit. I also have a vintage Midwest Maine lobster boat but it is too large.

The third option may disappoint you - I also have the Occre kit of the Lisboa streetcar. It may fit the bill perfectly. It has lots of bits and pieces to paint and assemble when I reach rigging overload.

I am going to think about it and let you know. What is certain is that I will continue with the Victory no matter how slow the progress is.

I hope it is ok that what I write here is more like a diary than a build log. It helps me a lot.
 
It almost feels like cheating. I have started working on the Occre streetcar Lisboa and I have made more progress on the Victory rigging than I have made in a long time! I am quite surprised. I will post a picture or two when the shrouds are complete.
 
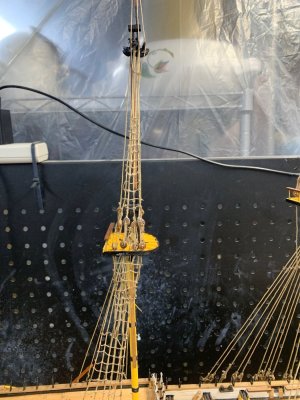
It has been a long time since I last worked on the Victory. However I had a chance to do so today and worked on ratlines. I now feel less intimidated by how much has to be done. It is not neat and is not correct but progress is encouraging. I am hoping that I will be able to ‘read ahead’ and work on other bits of the rigging without painting myself into corners so I can relieve the tedium and stop my fingers from cramping!!

I have been familiar with knots from my youth but I just found it difficult to miniaturize the clove hitch so there has been a lot of backtracking. I now know the moves and can push forward.
 
I am reading ahead. Working on the footropes to break the ratline routine. This seems to be working as I am making good progress. I have also found that the rigging diagrams seem to be mislabeled. In spots the foremast is rigged in two different ways and there is no reference to the same spots on the mainmast. I think I can figure this one out as the ‘heftier’ rigging must be on the mainmast. We will see. As always I am glad when I can find the time to work on this. IMG_2242.jpeg
 
Last edited:
I have been able to spend more time this week. Many more ratlines have been installed - but I am still working on the starboard side. It is a slow process. I will post pictures as long as nobody looks too closely …

I have also installed some hooks in what I hope are the right spots for future use and I have also installed some blocks and drilled the holes for many more. The variety helps keep me going!!

Speaking of blocks - there are some that are so small and iin such awkward places that there is no way I will be able to thread them. I have decided to leave these out. Accuracy will be sacrificed in order to make things possible. On the other hand there are blocks that are large enough and in spots I can manage ( I hope ). I will give these a go.

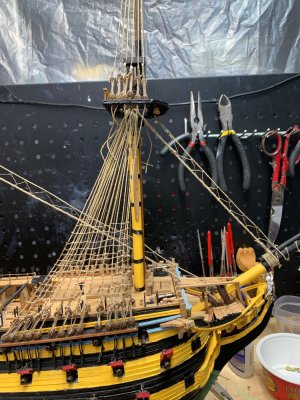
I made the commitment and installed the bowsprit. Now I need to be even more careful since I don’t have a lot of room and turning the model is an issue.

And of course, what I thought were mislabeled diagrams are just me misreading them. I should have known….

I told my partner that once the model is done there is no place in the house to display it. She said that she would clear if the mantle and it could go there - but I don’t think it’s big enough.
 
Last edited:
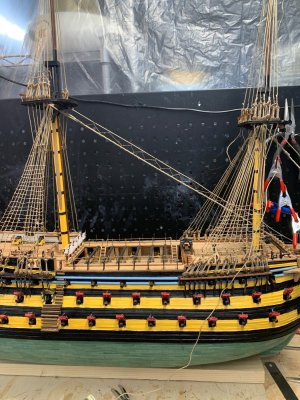
I have made a lot of progress. Only five more pages of rigging instructions to go …,

I have taken some serious shortcuts to get this far however. Many blocks have been left out.

I did however attempt one set of blocks with some success. And it didn’t take long and I didn’t drop anything! Since there are plenty more to go I may revise my block omission policy.

IMG_2756.jpeg

I estimate that I am half way through the ratlines. I have made a pledge that every time I work on a step in the instructions ( enjoyable ) I will do some ratlines ( not so much ). Unfortunately I have reached a stage where I can’t go much further adding things to the model without finishing them. Happily there is lots to do with the yardarms before they are attached to keep me distracted.

I made a mistake installing the shrouds on the foremast ( a forest vs trees issue ) which will make it impossible for me to do what is specified in the instructions there. I will have to improvise. I did not make the same mistake on the other two masts so I should be ok there.
 
Last edited:
I took a break and looked up online how sailors cursed back in the days of the Victory. I thought that if the model was not completely authentic at least the swearing could be. I was a bit disappointed in what I read since I’m pretty sure the lists I found are not complete.

The list of reasons for cursing ( dropping things, breaking things, not measuring things accurately not cutting things correctly etc. ) has become longer. The rigging is now complicated enough that I am finding it difficult to see it in depth. This has resulted more than once in my cutting the wrong thread in my attempts to trim the loose ends. And it will get worse! You would think I would learn. I just need to slow down and be more careful …
 
Well, I can't decide which of your mistakes I like the best. Everything you tell us about is a rerun of my own progress in ship modeling and is all too familiar. I like the trimming of dead ends of thread and clipping off a good thread by mistake. That is especially frustrating since now you have another thread to run. This always builds character and reinforces the determination to finish the model and not tell anyone about it. Cursing, of course, is altogether another art form that develops from this hobby. Developing a gentlemanly way of cursing requires a lot of fore-thought but straight out cussin' comes naturally for most of us. First you must decide if you want to be an Officer or an Enlisted crewman. The first is ,of course, an Officer and a Gentleman whose cursing is very refined and the second is the Able Seaman whose cursing is very crude but no less effective depending on the situation. At a formal Fox Hunt in England the Officer will say "Tally-ho the Foxes" whereas a person not well schooled in protocol will blurt out "There goes the SOB." On my very first sailing ship model back in the fifties I put the preformed sails on the main mast backwards and behind the mast. When I noticed the problem I decided to leave the sails where they were and nobody ever said one word about it. It was definitely a "There goes the SOB" moment.
 
I am very happy that I seem to be putting myself in such good company. And thank you for your extensive response - you are very encouraging.

To my knowledge I haven’t put anything major on backwards - yet … Indeed making mistakes does increase my determination to finish the model and tell nobody about them. I just don’t want to go backwards too often as there is a long way forward still to go.

As for the cursing, I am attempting to add more nautical words and phrases to my limited but familiar well used list. And it is not gentlemanly!!
 
I find it therapeutic to curse at times, but I try to do it in Italian or Gaelic as none of my neighbors understands either one. My wife even went so far as to buy me the Irish license plate below for my golf cart to express my frustration on some days (most?) on the golf course.
Allan

1761243582605.jpeg
 
There should be a dictionary for curse words for model ship builders and ,of course, a separate one for golfers. Everyone knows golfers are the champion cussers.
 
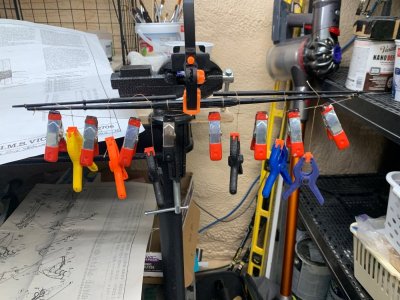
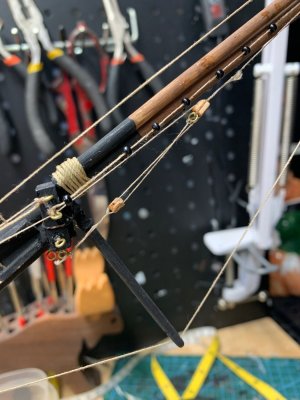
I didn’t predict that it was going to get even more difficult!! I have moved on to adding the spars and now I don’t even have enough space to get my fumble fingers to where they need to be. I am getting better at sorting out the instructions and, as before, I am leaving out some steps or using shortcuts ( o boy there is no way I can do that … ) and attempting others ( I can give that a shot and see what happens … ). And some egregious errors have been made. But if you don’t look to closely or expect accuracy it doesn’t look too bad.
 
The first instruction is to follow the instructions. However since that usually goes by the wayside as not understandable you'll do as you wish no matter what. That's the way I do things too. However I would like to suggest that you get yourself a looooong tweezers and a looooong pair of snips ( look for surgical tools) for cutting lines where you can't reach them with fumble fingers. (I thought I was the only one who had them.) Also make some long piano wire tools with little hooks on one end and some with a groove filed at one end. These are invaluable for some of the rigging work. Man this boat has a lot of rigging too. As in my Great Republic I hope I live long enough to finish the sob. Your model looks very good and will improve as you add the rigging. That's the part I hate the most and find the most gratifying.
How's everything in Ontario these days? Must be getting cold by now. Pete
 
Last edited:
Well. It has been a while. Summer and grandchildren explain it all.

At the moment there are no grandchildren so I just spent a couple of hours continuing to work on the rigging. My friend with whom I visited the Victory in Portsmouth sooo many years ago is coming to visit and he keeps asking what progress I have made. And of course I rediscovered why I have so much trouble mentally and physically working on the rigging!

I have to change my attitude!! Working with the wooden and metal bits ( on every model I have worked on ) has given me much less trouble and has been much more satisfying. The problem is that there are very few of these left to do on this one …. and I do want to finish it.

So I am going to start a new model alongside and see if that helps. I will let you know how successful this strategy is.
It always helps to take a break specially with so complicated model as the Victory. By all means start another model to distract you from the tedious chore of rigging. It works too. I work on my model railroad when I get antsy with the GR.
 
Back
Top