Thanks for the tip Alan!! Once I started using reasonable quality bits my problems were reduced. There are now places where the directions say to drill holes in already tiny pieces and it doesn’t matter what kind of drill I have I won’t be able to do it without breaking the pieces. I will have to see what I can do to work around this when I get there. We will see.
-

Win a Free Custom Engraved Brass Coin!!!
As a way to introduce our brass coins to the community, we will raffle off a free coin during the month of August. Follow link ABOVE for instructions for entering.
-

PRE-ORDER SHIPS IN SCALE TODAY!
The beloved Ships in Scale Magazine is back and charting a new course for 2026!
Discover new skills, new techniques, and new inspirations in every issue.
NOTE THAT OUR FIRST ISSUE WILL BE JAN/FEB 2026
You are using an out of date browser. It may not display this or other websites correctly.
You should upgrade or use an alternative browser.
You should upgrade or use an alternative browser.
HMS Victory-Mamoli 1:90 Bruce Ives Build log
The instructions for the bowsprit are cryptic to me and this has slowed me down. I will make some decisions and move on. Otherwise I will get nowhere.
I have also decided not to do some shaping of small pieces because I am afraid of breaking them.
I have also decided not to do some shaping of small pieces because I am afraid of breaking them.
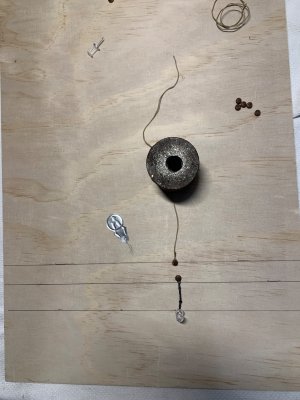
I made my first foray into creating the rigging and it was not a success. I don’t have any issues regarding what to do but the size of the parts and thread presents a challenge. I clearly need a gizmo that will hold things extended and still while I work on it. I already have ideas and will post when I come up with something.
This does not delay things of course because there is plenty of other things to do.
Things are complicated a bit because the city is replacing water meters and the one in our house is right in my little workshop area. Not all bad because I have taken the opportunity to do a thorough cleanup. There will be lots of recycling to put out tomorrow!!
I have finished the masts and bowsprit but no fittings are attached yet. I have also made big progress on the other spars but have more to go. I will post some pictures once I have recovered the space to do this.
As always, I am really enjoying this project and it is providing a welcome distraction from unfortunate world events.
One of the tasks I had back when I was working was to do IT effort estimates. I estimate that building the shrouds will take less than a day in effort hours. This is the glass half full perspective. If I had been a surgeon things might be different!!
I moved on to this even though there are lots of things to catch up on because I know I can do those tasks but I have no experience building rigging. I want to establish that I can actually do it. Based on what I have built so far, the rigging will be structurally correct but messy. I can live with that. I have built a simple template in an attempt to make the building easier and to try to keep the sizes right.
I moved on to this even though there are lots of things to catch up on because I know I can do those tasks but I have no experience building rigging. I want to establish that I can actually do it. Based on what I have built so far, the rigging will be structurally correct but messy. I can live with that. I have built a simple template in an attempt to make the building easier and to try to keep the sizes right.

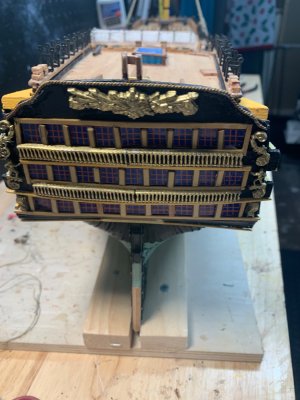
Helo Brucelves. Please accept my comment. You have attached the Shield backwards, The Flour De Liz goes on the upper side, you put it on the bottom side.I put the decorations on the transom today to give me a sense of accomplishment. It doesn’t look exactly like the diagram in the instructions and I am sure it doesn’t look much like the real ship!! However it doesn’t look too bad. View attachment 494808
Kind regards
Eduardo Tubino
Haha. That is funny. Thank you for pointing this out!! I am going to take a look to see if I can fix it without too much damage.Helo Brucelves. Please accept my comment. You have attached the Shield backwards, The Flour De Liz goes on the upper side, you put it on the bottom side.
Kind regards
Eduardo Tubino
I tried to take it off and I had no trouble. In fact it was so easy it was probably going to fall off anyways. I can now put it back on correctly thanks to your comment.
Last edited:
There was a specific order of dressing on the actual ships that is amenable to rigging a model. There may be other sources as well,, but it can be found in detail in James Lees' Masting and Rigging English Ships of War which is a great book to have in the library for anyone rigging kit or scratch English war ship modelsI am still intimidated by the instructions as well as some of the contructs the instruction diagrams show. Like 1mm pieces drilled with holes. And the sheer magnitude of ropes to place. I am doing my best to choose a logical order
Allan.
Hi Allan. Thanks for the reference. I will look for this book in my area libraries.There was a specific order of dressing on the actual ships that is amenable to rigging a model. There may be other sources as well,, but it can be found in detail in James Lees' Masting and Rigging English Ships of War which is a great book to have in the library for anyone rigging kit or scratch English war ship models
Allan.
Since I wrote the comment about being intimidated I have been able to make a lot of progress both on the model itself and ‘psychologically’. I have been able to identify the path that is set in the instructions and will follow it as best I can. And I have discovered that I can actually work with the rigging pieces and threads. I was not sure I could do this.
I reglued the piece the right side up thanks to Eduardo.Haha. That is funny. Thank you for pointing this out!! I am going to take a look to see if I can fix it without too much damage.
I tried to take it off and I had no trouble. In fact it was so easy it was probably going to fall off anyways. I can now put it back on correctly thanks to your comment.

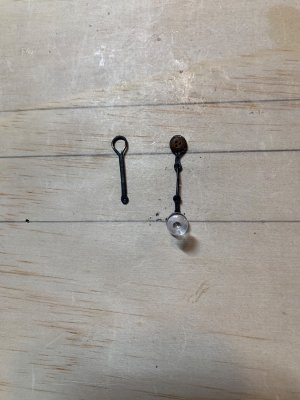
It is interesting that the instructions refer to one piece ( on the left ), but another set of pieces are supplied with the kit. This consists of three pieces put together ( on the right ). For some reason, the kit supplied two of the pieces on the left. The combination on the right was in a bag with a piece of paper with a picture of how to put them together.

There you go! Keep going, I´m following your progress and you are doing very well. This is a beautiful ship BrucelveI reglued the piece the right side up thanks to Eduardo. View attachment 499710
I am working on the rigging and also finishing up the guns, gunports and stairs on the port side. It is handy to have different things to do.
Do you have a copy of Longridge's book, "The Anatomy of Nelson's Ships"? If you don't, you should try to get one. I have found it to be a valuable resource on building the VICTORY. I wish I had had it when I built this this same kit. I am building the Corel cross-section and this book has provided me with lots of ideas for additions (several I have incorporated) to make this a much better model than it would have been straight out of the box. Two other books you might want to get are, "Ship Modeling Simplified," by Frank Mastini (has an Italian to English dictionary) and "Historic Ship Models," by Wolfram zu Monfeld. It has lots of examples of rigging methods and styles as does the Mastini book. These should be available on Amazon.
Did you drill the holes for the eyebolts under the cap?The pieces are getting smaller and smaller. And easier to break. The main mast is almost done. I hope I haven’t missed anything or created issues for later. Putting in the masts and bowsprit brings to mind having to tear down a wall to get a boat you have spent the winter building to the outdoors. I have already told my wife that the model, once complete, can be displayed in the garage ….View attachment 497908View attachment 497909
Hi. I am embarrassed to say that I am not sure what you mean.Did you drill the holes for the eyebolts under the cap?
I did some reading and the answer is no. Looks like this may be a corner I have painted myself into …. I was expecting to do this multiple times and here we are. The holes are in the instructions but later on. I will see what I can do.
Last edited:
May I suggest, if you have not already done so, attach a 1x1 strip across the channel after inserting the deadeyes and before you attach the shrouds to them. This will keep them from inadvertently/accidentally popping out when you don't want them to pop out.So far so good. As promised the rigging that I have built so far is correct but messy - much like the rest of the model!!View attachment 499624
According to Longridge, pages 166, 190 and193, there should be four eye bolts under each cap, two in each corner at the end through which the top masts (2nd mast section) fit and are at the a 45 degree angle. Two more eye bolts are placed in the middle of the cap, parallel to the sort sides of the cap. This is the same for the main and mizzen masts. The only difference being the dimensions of the caps themselves and the sizes of the cut outs. These eye bolts are for attaching blocks for running rigging. I hope this helps.... I found Mamoli's instructions to be a bit confusing at times. Having a E - I translation helped. I got through it but it would have been nice to have Mr. Longridge for company while I was building my version. You are doing well and getting the hang of it.Hi. I am embarrassed to say that I am not sure what you mean.
I did some reading and the answer is no. Looks like this may be a corner I have painted myself into …. I was expecting to do this multiple times and here we are. The holes are in the instructions but later on. I will see what I can do.
Unless I misinterpret you regarding the 1by1, this is going to be my next step! I don’t want anything ( more ) to pop out!May I suggest, if you have not already done so, attach a 1x1 strip across the channel after inserting the deadeyes and before you attach the shrouds to them. This will keep them from inadvertently/accidentally popping out when you don't want them to pop out.
According to Longridge, pages 166, 190 and193, there should be four eye bolts under each cap, two in each corner at the end through which the top masts (2nd mast section) fit and are at the a 45 degree angle. Two more eye bolts are placed in the middle of the cap, parallel to the sort sides of the cap. This is the same for the main and mizzen masts. The only difference being the dimensions of the caps themselves and the sizes of the cut outs. These eye bolts are for attaching blocks for running rigging. I hope this helps.... I found Mamoli's instructions to be a bit confusing at times. Having a E - I translation helped. I got through it but it would have been nice to have Mr. Longridge for company while I was building my version. You are doing well and getting the hang of it.
More advice and kind words from people who have a lot more experience than I do. I find it extremely encouraging.
Thank you very much for your kind words and encouragement.There you go! Keep going, I´m following your progress and you are doing very well. This is a beautiful ship Brucelve


