• "Thank you for your Donations and Support"
    As we close this Annual Donations Drive, I want to thank you all for your Generosity in Donating to Ships of Scale. It is Greatly Apreciated !!!
    Ships of Scale continues to explore exciting things to offer to the Ship Building Community.

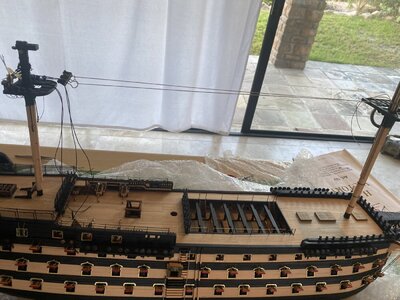
HMS Victory Mantua 1:78 (first build) by Grant Tyler

Thanks to all who have helped me determine the rake measurements. Unfortunately this may take a while- like my fear of painting the waterline (took weeks to get there) setting the masts is big for me. It is such a visible “mess up” if I get it wrong.

So - I decided to serve and lash some shrouds to my mast who’s is Clearly not set yet.I served some more shrouds using my incredible LEGO machineo_O (still trying to find correct sized gears for a better make) and did some lashings.

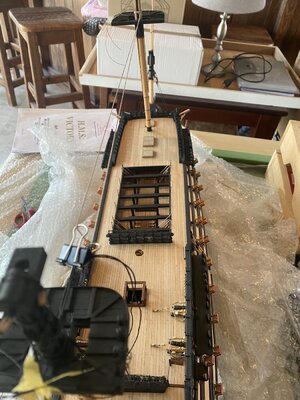
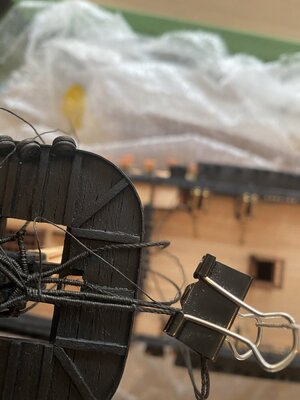
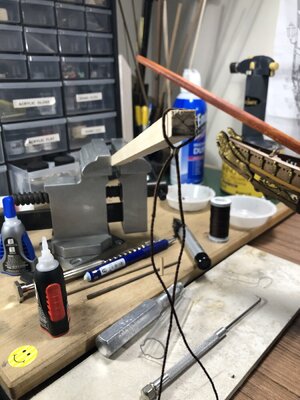
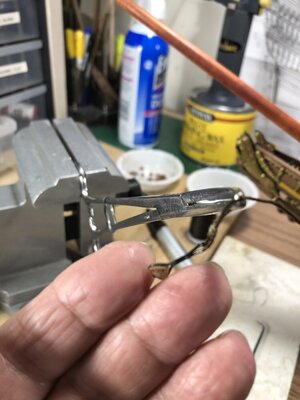
This is how I did my lashings- I found I needed the shrouds to have some tension and held tight while I used tweezers to lash. This is the system I came up with to achieve this- One of Grants crazies) ROTF Photo self explanatory.
EBDD38BF-EBE0-4B76-8295-A016F997CC5D.jpeg
4AC2B25E-DDE2-4D85-A5E4-2493D36686C9.jpeg
34DB32ED-B361-48E5-8812-8EE1EFDBD557.jpeg
I tied a standard knot to start, wind 6 turns ( I made this number up to keep them standard- sort of fits the scale to my eye) and then do a half hitch at the end . PVA glue the start and finish. When dry trim off the excess.

The result:
BB0DC16C-C020-4A8D-81B7-114A1889E938.jpeg
7C5FE945-4013-4BE9-B34B-E0174189D9AB.jpeg
In the top result photo the red line shows a shroud where I measured incorrectly. The served portion is too long and doesn’t line up under the cross tress with the others. I have left it on. I am hopeful that as the Shrouds move up the mast it will fit in.

The circles in the second photo show little tags and the half hitch is visible- is this the best Tie off method( maybe Grants lack of detail ability is the problem here) ? Not sure if there is a better way?

Cheers
Grant
 
I would think that is really hard to do well on the mast itself. I was able to create this loop off my model on a spare piece of round stock because my mast cap is not placed yet (and my older ship has a much simpler rigging in that area).

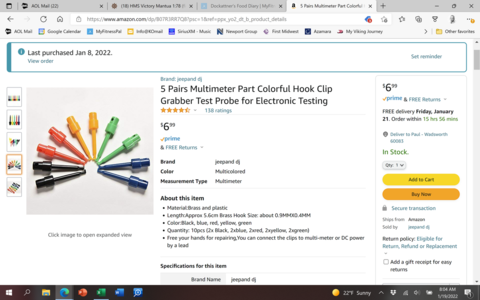
Can you find one of these in SA? It helps hold the ropes in place while doing the seizing. Its spring-loaded and a metal hook comes out the pointy end and then retracts holding everything in place...it is my official go-to tool thus far.

Screenshot 2022-01-19 08.04.25.png
 
I would think that is really hard to do well on the mast itself. I was able to create this loop off my model on a spare piece of round stock because my mast cap is not placed yet (and my older ship has a much simpler rigging in that area).

Can you find one of these in SA? It helps hold the ropes in place while doing the seizing. Its spring-loaded and a metal hook comes out the pointy end and then retracts holding everything in place...it is my official go-to tool thus far.

View attachment 284154
Thanks Paul- those look cool. I’m pretty sure we must have them. I will ask my riding mate who owns a large electric supply company. He will know. Cheers
 
Here is what I use as holders off ship.

View attachment 284156View attachment 284157
Please excuse the mess in the background.
Hello Daniel. Those I can get from a on line store here. I will order a pair. I think they will be useful across many applications. You and Paul been a big help. Cheers- PS your work shipyard is no way a mess. My son is moving flats and my ship yard is full of couches, microwaves, lamps etc etc.
 
Hi Grant!

Angular degree, measured from the keel: Foremast 0, Mainmast 2, Mizzenmast 3,5. Before gluing the ship's masts, check whether you still need to place blocks under the tops. Now you can still drill well, in the installed state it is difficult to do. The rigging on mounted masts is comfortable at this model size, but on a "Victory" very extensive.

Best regards
Thomas
Thank you
 
Hi Grant!

Angular degree, measured from the keel: Foremast 0, Mainmast 2, Mizzenmast 3,5. Before gluing the ship's masts, check whether you still need to place blocks under the tops. Now you can still drill well, in the installed state it is difficult to do. The rigging on mounted masts is comfortable at this model size, but on a "Victory" very extensive.

Best regards
Thomas
Thanks Thomas for the measurements. I am only doing standing and running rigging. The kit rigging plan is very limited and has no blocks under the tops. I’m not following any authoritative references merely adding in rigging lines (over and above kit) which improve the look and feel of the ship (personally). Thanks for your advice and I will add the blocks under the tops prior to mast fitment should I include this rigging. I still have no idea what lines run through these blocks (maybe sheets for sails?).

Thanks - always appreciate advice from guys who know what they are doing. Cheers
Hi @Thomas Marocke you got me thinking- it would appear that these blocks are used for the upper yard lines. Please correct me if I’m wrong. If so then I will have to include them. Going to have to buy more blocks somewhere.
 
Hi @Thomas Marocke you got me thinking- it would appear that these blocks are used for the upper yard lines. Please correct me if I’m wrong. If so then I will have to include them. Going to have to buy more blocks somewhere.
Warning: rookie offering advice. On my ship the blocks you are talking about are indeed lift lines for the ends of the yards.

FYI: Thomas is a model building genius - do whatever he says.
 
Rookie accepts your adviceROTF
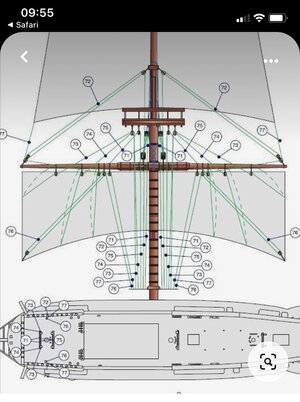
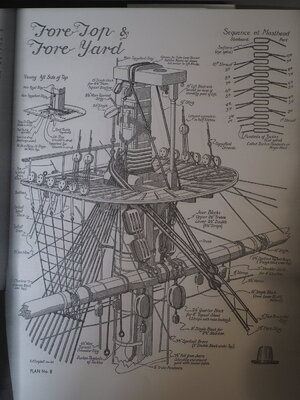
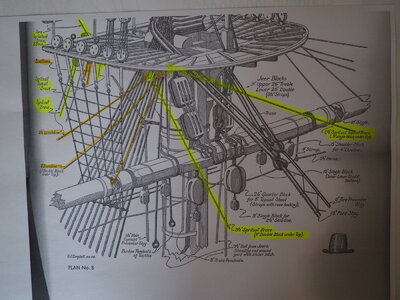
Rookie doing research: the pic below a shows the blocks under tops being mainly for sheet lines. The decision for me is wether to include these if I do not intend to do sails. If I do where does the line start from and what to do with the excess rope with no sails?

In the mean time I will continue with the fitting and serving of the shrouds. Still got many “pillars “ for the stern balcony to make- Eish.
05F42BDB-DECA-4765-AC8C-6FF965E3DEA8.jpeg
 
Hi Grant!

P1200659.JPG

P1200660.JPG
The buntlines and leechlines with their sheaves can be omitted without a sail. If they are still shown, the rope ends are tied in a knot and tightened to the rope sheave. However, the sheaves for the braces should be mounted.

There is so much to consider - but that's the fun of it.;) Without sails, rigging is already much easier.
Thomas
 
Hi Grant!

View attachment 284382

View attachment 284381
The buntlines and leechlines with their sheaves can be omitted without a sail. If they are still shown, the rope ends are tied in a knot and tightened to the rope sheave. However, the sheaves for the braces should be mounted.

There is so much to consider - but that's the fun of it.;) Without sails, rigging is already much easier.
Thomas
Thank you Thomas. This helps so much. Much appreciated.
 
Grant,
Watching your build log, I know you stated this was your first log, I think you can be elevated from rookie status however.
Very nice work.

Ron
Cheers Ron. Your comments are sincerely appreciated. I am going to claim Rookie status until my Victory is complete;) let’s me get away with”murder” so to speak....I think I’m going to take a long time to finishROTF. Jokes aside Thank you
 
Thanks to all who have helped me determine the rake measurements. Unfortunately this may take a while- like my fear of painting the waterline (took weeks to get there) setting the masts is big for me. It is such a visible “mess up” if I get it wrong.

So - I decided to serve and lash some shrouds to my mast who’s is Clearly not set yet.I served some more shrouds using my incredible LEGO machineo_O (still trying to find correct sized gears for a better make) and did some lashings.

This is how I did my lashings- I found I needed the shrouds to have some tension and held tight while I used tweezers to lash. This is the system I came up with to achieve this- One of Grants crazies) ROTF Photo self explanatory.
View attachment 284138
View attachment 284139
View attachment 284137
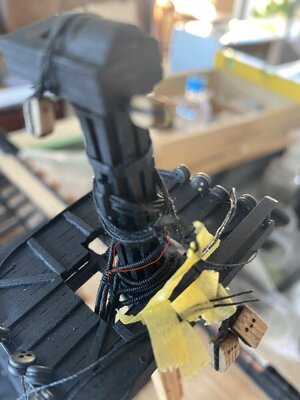
I tied a standard knot to start, wind 6 turns ( I made this number up to keep them standard- sort of fits the scale to my eye) and then do a half hitch at the end . PVA glue the start and finish. When dry trim off the excess.

The result:
View attachment 284141
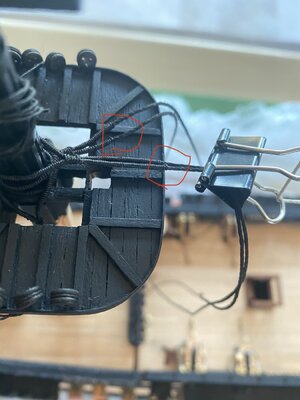
View attachment 284140
In the top result photo the red line shows a shroud where I measured incorrectly. The served portion is too long and doesn’t line up under the cross tress with the others. I have left it on. I am hopeful that as the Shrouds move up the mast it will fit in.

The circles in the second photo show little tags and the half hitch is visible- is this the best Tie off method( maybe Grants lack of detail ability is the problem here) ? Not sure if there is a better way?

Cheers
Grant
Looks perfectly reasonable to me Grant, good work Thumbsup
 
Good morning. First I need to thank @zoly99sask for arranging for me to get blocks etc from him. If we can pull this off some of my supply issues to SA will be solved. Need to get one bulk order in and some planning is needed here before I send request. (The quality from Zoly is brilliant- you can see that from his site and Paul’s build).

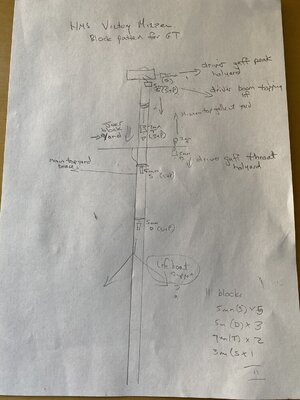
I drew a rough drawing of my lower mizzen mast to see what blocks need to be attached prior to fitting. I also drew it up not to include sails but running rigging only- again thanks to all who have contributed to my understanding (limited) still but getting there. You may think this is weird but the rigging plans provided are severely limited even for me.
BD7734A0-97DE-49D5-955A-01B3A4C66F1E.jpeg

What is interesting is that the main top yard brace is not under the top on the lower Mizzen but lower down on mast itself. I think this is because these lines will run against the top itself?

Anyway time to build.

Cheers
Grant
 
Back
Top