Thank you Heinrich. Yep that will be a day to remember for sure. CheersGrant that is a lot of work that you have done and it looks marvelous. Just keep at it and the day when they will all be installed, will arrive sooner than what you think.
-

Win a Free Custom Engraved Brass Coin!!!
As a way to introduce our brass coins to the community, we will raffle off a free coin during the month of August. Follow link ABOVE for instructions for entering.
You are using an out of date browser. It may not display this or other websites correctly.
You should upgrade or use an alternative browser.
You should upgrade or use an alternative browser.
HMS Victory Mantua 1:78 (first build) by Grant Tyler
- Thread starter GrantTyler
- Start date
- Watchers 102
Good morning. I am “over “ yards, studding booms, driver booms, spritsail booms and yards, etc..... .
.
Decided to do some of my new and beautiful blocks Zoly sent me.
Sequential building- such a key element to getting the rigging right. It is clear that all the blocks and support rigging on the masts must be done prior to seating the masts. I did not do this on the Mizzen and I see challenges ahead here- Marks beers will be essential .
.
Firstly- I am glad I chose the boxwood blocks they match the color fit perfectly.
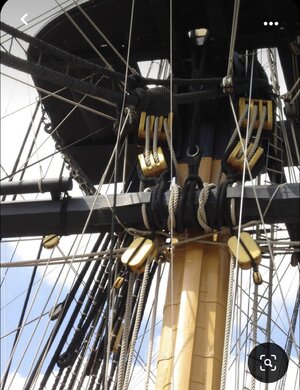
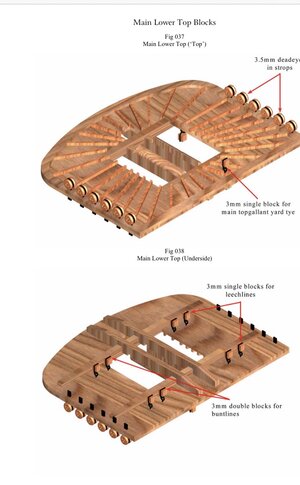
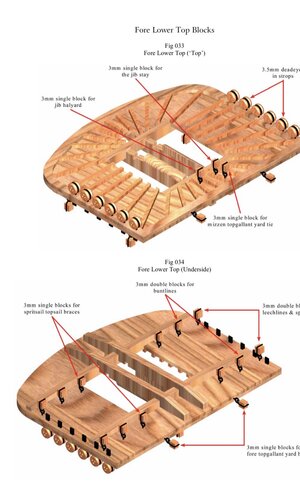
Here are the plans to place the blocks below the crows nest and the lines for which these blocks are used . The foremast and mainmast. I used 5mm blocks rather than the 3mm to fit my scale.
I borrowed these from Caldercraft . They are pretty accurate.
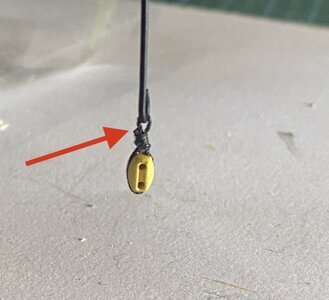
My process: The blocks are seized to the hooks. I still cannot get my “snip” perfect- arrow.
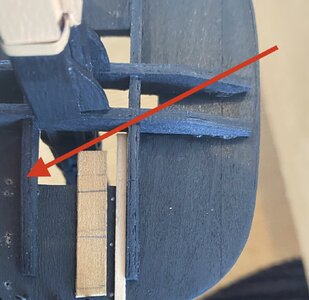
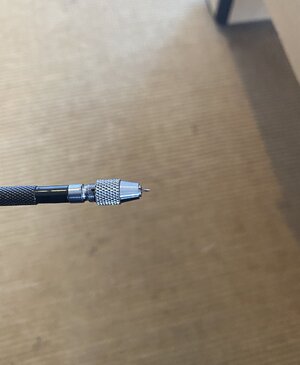
Made measurements on small piece of wood and a 1.8mm spacer to ensure the placement was correct. I drilled the initial hole incorrectly (arrow) before I decided to use this technique- seen in photo. To ensure the hole did not pierce the top of the crows nest I set my drill bit to 2mm. Used CA glue to hold the hooks in place- like so many parts of my build I hope this is strong enough.
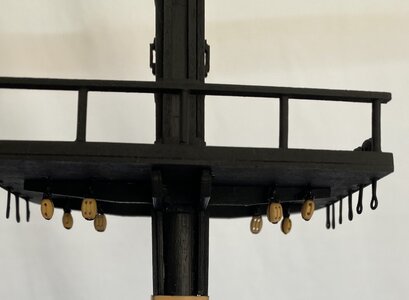
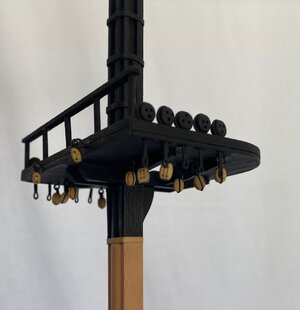
Photo of the main and then fore masts. Interesting to see how many more there are on the foremast. Clearly due to spritsails.
Off to make some money to buy “Marks” beers for my fridge. Cheers Grant
Decided to do some of my new and beautiful blocks Zoly sent me.
Sequential building- such a key element to getting the rigging right. It is clear that all the blocks and support rigging on the masts must be done prior to seating the masts. I did not do this on the Mizzen and I see challenges ahead here- Marks beers will be essential
Firstly- I am glad I chose the boxwood blocks they match the color fit perfectly.

Here are the plans to place the blocks below the crows nest and the lines for which these blocks are used . The foremast and mainmast. I used 5mm blocks rather than the 3mm to fit my scale.
I borrowed these from Caldercraft

My process: The blocks are seized to the hooks. I still cannot get my “snip” perfect- arrow.

Made measurements on small piece of wood and a 1.8mm spacer to ensure the placement was correct. I drilled the initial hole incorrectly (arrow) before I decided to use this technique- seen in photo. To ensure the hole did not pierce the top of the crows nest I set my drill bit to 2mm. Used CA glue to hold the hooks in place- like so many parts of my build I hope this is strong enough.
Photo of the main and then fore masts. Interesting to see how many more there are on the foremast. Clearly due to spritsails.


Off to make some money to buy “Marks” beers for my fridge. Cheers Grant

Oops- no idea why those posted twice- happens when post on your phone.

Hi Grant, good looking blocks, great choice of wood too!
I agree with our colleagues. And good call on the boxwood blocks.
I feel your pain with this Grant. I believe you can get cutters just for that sort of thing, I saw it on a blog somewhere. The worst is when your snipper isn't sharp enough and only half cuts the line and leaves the remainder frayed. Super glue is usually my way out of those situationsI still cannot get my “snip” perfect
Uh oh, I hope I haven't started a nasty trend hereMarks beers will be essential

Last edited:
Hello Mark. I do have AL rigging clippers- they work pretty well. I think I am more concerned about cutting the knot so don’t get them close enough and leave a little excess. I do finish with drop of CA. Re your trend....I think that has probably been well established by modelers around the worldI feel your pain with this Grant. I believe you can get cutters just for that sort of thing, I saw it on a blog somewhere. The worst is when your snipper isn't sharp enough and only half cuts the line and leaves the remainder frayed. Super glue is usually my way out of those situations
Uh oh, I hope I haven't started a nasty trend here
 .
.Good morning. Been a little busy at the office lately so it was good to work on HMS Victory this am.
I decided to make the lower U blocks and rigging for the main stay. Many challenges where encounted as I tried to get it a little more authentic.
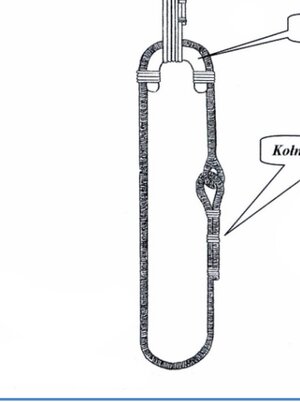
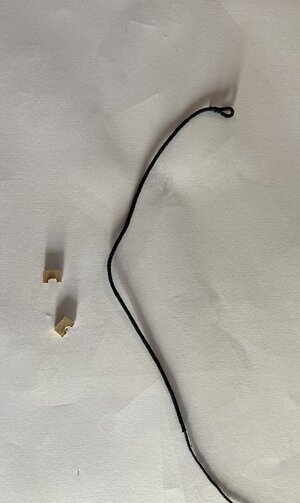
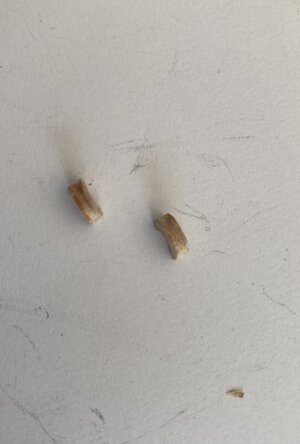
Making the blocks : I used a 6x1.5mm x1mm birch wood and drill a 3mm hole in center- cut it in half. Then shaped with needle files.
The 1mm rope was seized with 0.2mm thread and a loop at one end was lashed.
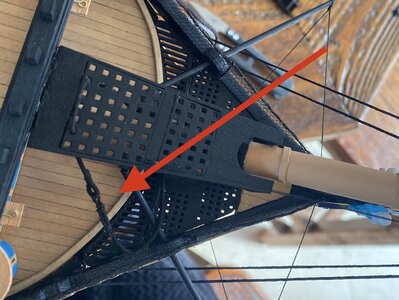
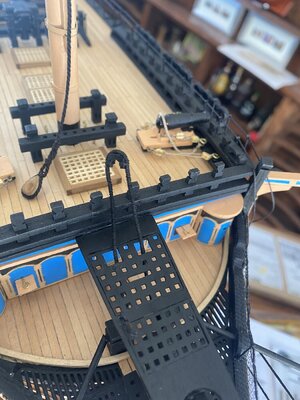
My Marine walk created a problem as I made this per instructions (with look through mod) however it actually needs some squareS cut in it. I was not going to redo this. The little squares where not big enough and created a symmetrical issue with the lines. Did what I could.
Lashed the second loop Around the bowsprit(had to do on model- was not the best).
The U blocks I made where lashed to the seized rope.
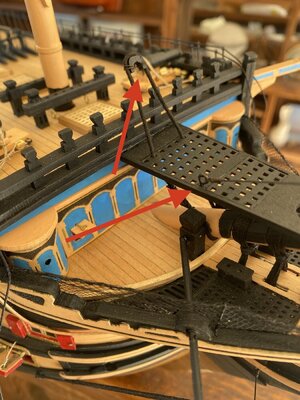
I added the Rope rail from the Marine walk to bowsprit cap. (Second arrow)
I attempted my first mouse, more like a scruffy rat . This is for the forestay. A 3mm dowel was cut, shaped and center drilled for the stay to pass through. The stay and mouse were seized.
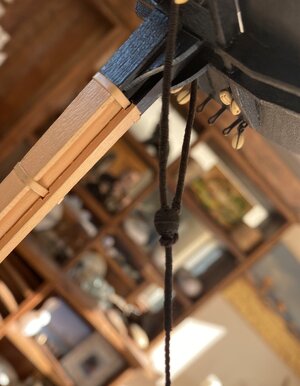
I fitted the heart deadeye (A modified AL product). Loosely tied to the U blocks I made many moons earlier). Nothing tied off as I clearly have loads to do prior fitting the masts.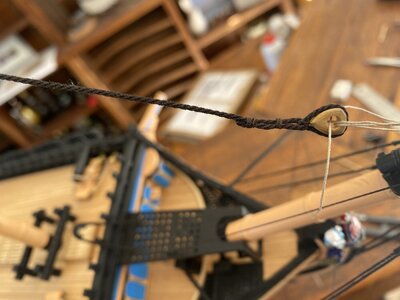
Have stunning weekend.
Cheers Grant
I decided to make the lower U blocks and rigging for the main stay. Many challenges where encounted as I tried to get it a little more authentic.

Making the blocks : I used a 6x1.5mm x1mm birch wood and drill a 3mm hole in center- cut it in half. Then shaped with needle files.
The 1mm rope was seized with 0.2mm thread and a loop at one end was lashed.


My Marine walk created a problem as I made this per instructions (with look through mod) however it actually needs some squareS cut in it. I was not going to redo this. The little squares where not big enough and created a symmetrical issue with the lines. Did what I could.
Lashed the second loop Around the bowsprit(had to do on model- was not the best).

The U blocks I made where lashed to the seized rope.

I added the Rope rail from the Marine walk to bowsprit cap. (Second arrow)
I attempted my first mouse, more like a scruffy rat
 . This is for the forestay. A 3mm dowel was cut, shaped and center drilled for the stay to pass through. The stay and mouse were seized.
I fitted the heart deadeye (A modified AL product). Loosely tied to the U blocks I made many moons earlier). Nothing tied off as I clearly have loads to do prior fitting the masts.

Have stunning weekend.
Cheers Grant
Ah, the fine detail in your rigging is the icing on the cake Grant. I'm loving it!
A really very nice go at it, Grant. I'm impressed with your pursuit! I can see why so many people attempt the Vic - lots of eye-candy on this ship. So well done my friend!
THE BUTCHER OF THE MARINE WALK.....A really very nice go at it, Grant. I'm impressed with your pursuit! I can see why so many people attempt the Vic - lots of eye-candy on this ship. So well done my friend!
thank you @Heinrich , @dockattner @Daniel20. I couldn’t deal with the lack of “symmetry” with the lines of the lower block ropes through the Marine walk. I knew this was a fragile “ modification” I made earlier so was hesitant to take off and make the square holes. But gave it a go. I did break it, but only slightly (arrow) and cut in wrong place
 .The rectangle for the Main preventer stay was also made. Managed to repair and the reinsertion went better than expected although not a good as initially made.
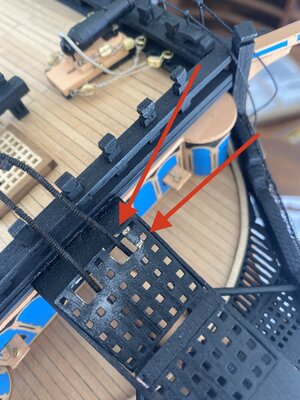
So much better. Just have to finish off the paint and apply thin Matt poly.
Thanks Heinrich- more accurate with the Victory too. I did have some serious discussion with her today I have to admit. Gave me attitude- like a 16 year old...Much better indeed - visually and psychologically for the builder!

The preventor stay blocks done. I tied a rope on these to get the angle and setting correct when fitted.
Seizing? I clearly am doing it with not enough tension or too loosely. On the shrouds on the Mizzen I did them tighter, but the thread is not really visible when just viewing the model. Decided to go more visual and it doesn’t hold so well. Live and learn.....
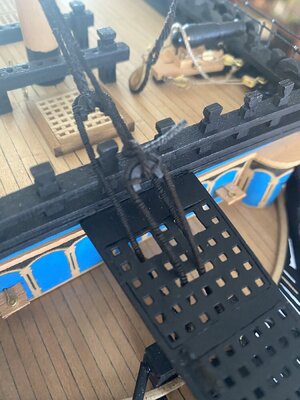
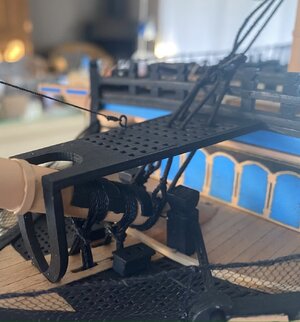
A difficult couple of hours with her today. Satisfied tho and it is time to visit my fridge for a cold castle ....cheers Mark
Seizing? I clearly am doing it with not enough tension or too loosely. On the shrouds on the Mizzen I did them tighter, but the thread is not really visible when just viewing the model. Decided to go more visual and it doesn’t hold so well. Live and learn.....


A difficult couple of hours with her today. Satisfied tho and it is time to visit my fridge for a cold castle
 ....cheers Mark
Amazing to watch here and your eye for detail is inspiring. I'm paint and going very slow with painting to try and get the right finish. It doesn't feel like I'm making much progress but who knows. Lol anyway keep it up and I can't wait to see more of yours!!!The preventor stay blocks done. I tied a rope on these to get the angle and setting correct when fitted.
Seizing? I clearly am doing it with not enough tension or too loosely. On the shrouds on the Mizzen I did them tighter, but the thread is not really visible when just viewing the model. Decided to go more visual and it doesn’t hold so well. Live and learn.....
View attachment 300373View attachment 300374
A difficult couple of hours with her today. Satisfied tho and it is time to visit my fridge for a cold castle....cheers Mark

Good morning Rob. Thanks. Slow is always better as so many guys who know what they are doing tell me. When I bought this kit I thought 6-8 months build-Amazing to watch here and your eye for detail is inspiring. I'm paint and going very slow with painting to try and get the right finish. It doesn't feel like I'm making much progress but who knows. Lol anyway keep it up and I can't wait to see more of yours!!!

 . And then as I went I was influenced by guys here and wanted to keep adding more detail. At times I think only the builder will notice these however it is fun researching and adding these. Enjoy your build.
Excellent work Grant. I'm enjoying watching you work through and resolving issues, it's working out a treat. You deserve that castleThe preventor stay blocks done. I tied a rope on these to get the angle and setting correct when fitted.
Seizing? I clearly am doing it with not enough tension or too loosely. On the shrouds on the Mizzen I did them tighter, but the thread is not really visible when just viewing the model. Decided to go more visual and it doesn’t hold so well. Live and learn.....
View attachment 300373View attachment 300374
A difficult couple of hours with her today. Satisfied tho and it is time to visit my fridge for a cold castle....cheers Mark


