• Win a Free Custom Engraved Brass Coin!!!
    As a way to introduce our brass coins to the community, we will raffle off a free coin during the month of August. Follow link ABOVE for instructions for entering.

HMS Victory of Caldercraft by Wil

37 The Serving Tool

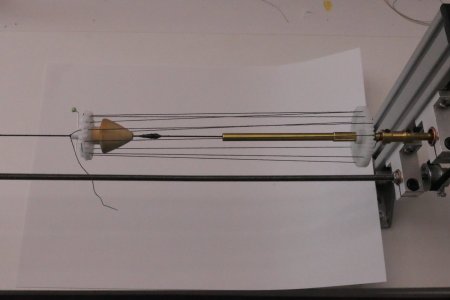
In the meantime, I have been working on building a serving machine, based on the example of Stephan (Steef66), who wrote an article about this. A very good tutorial by Stephan can also be found on SOS: https://shipsofscale.com/sosforums/threads/serving-tool.7615/

A very clear explanation that works well as both a construction guide and a reference. Not too difficult for us handy types, provided you have the right materials.

This project was more or less my first independent experience with AliExpress. Many different components in various sizes. It seemed like a nice challenge to order everything this way. Well, I certainly found out. I’ll spare you the details, but from day one I was buried in emails from the Far East. Each email referred to just one component. It turned out that the order was shipped from multiple locations. I hadn’t paid enough attention during ordering and ended up with many different suppliers, each adding their own shipping costs. Some items were suddenly no longer deliverable because of “transport issues.” Getting a refund? Not a chance. Long story short: an expensive lesson. But well, that’s part of the experience now and then.

After several weeks everything finally arrived, and I could get started. My Victory will need a huge number of served lines, so this machine will be a very useful tool.

As a starting point, I used a full 1-meter M5 threaded rod. This results in about 80 cm of free length between the two halves of the machine. Perhaps a bit large, but better too big than too small. I have no idea yet how long the pieces I’ll need to serve will be. Plenty of workspace, at least.

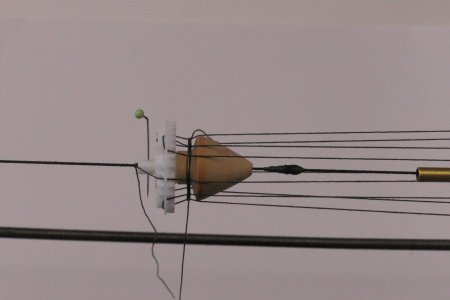
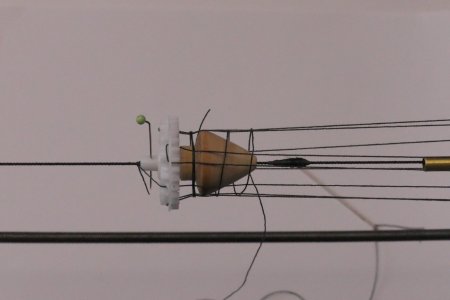
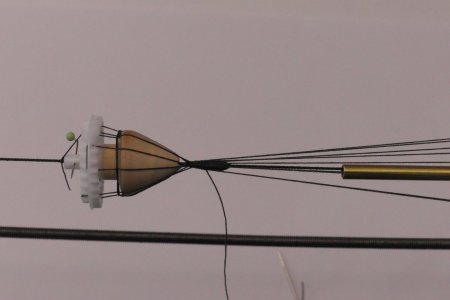
The machine is now finished, and this afternoon I served my first rope, see the photo series below.

View attachment 559378

View attachment 559379

View attachment 559380

View attachment 559381

View attachment 559382

View attachment 559383

View attachment 559384

And the final result, photographed with the macro lens:

View attachment 559385

What I still want to do is create a number of clamping aids to hold blocks and similar pieces. I already have a few ideas.

This week I also bought new blocks, because I am not satisfied with the ones included in the kit. Although Caldercraft supplies very good materials, this is definitely an area that could be improved.

Now the real work can begin.
  1. First, determine the correct settings per rope diameter for my ropewalk;
  2. Then twist the rope to the desired diameter and bake it;
  3. Add blocks and serving details;
  4. Install everything on the ship.
How many parts that were produced 'cross grain', & subsequently broke when you sneezed(!), have you reproduced from 'decent' wood?

Stuart
 
39 The Planning

Up through August, I’ve guided you through my experiences building the magnificent Victory. I have described my entire 3.5-year build process topic by topic.

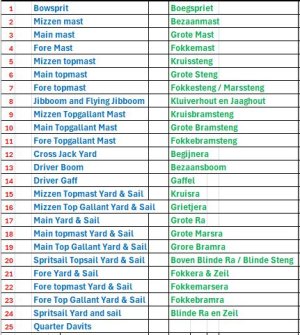
In chapter 35 I explained how I approached my study of rigging. This study has given me enormous insight into the various ropes, their dimensions, and their functions. In the end I divided all rigging into 25 separate projects, arranged in a logical sequence so that nothing is forgotten and everything remains accessible (I hope!). A shortened version is shown in the scheme below. For my Dutch followers I also included Dutch terminology.

39a projectvolgorde verkort.JPG

In other words: I am completely ready. I am not going to produce large amounts of rope in advance, but will determine what each project needs and then twist and bake those ropes. This keeps the process fun and varied. I suspect the journey will still be quite long, my feeling is that I’m only halfway through the Victory.

It is now the end of November, and as promised I will keep you up to date with my progress alongside the build. A lot has happened on my shipyard again, I can tell you. I certainly haven’t been idle. So we continue where we left off.
 
40 The Bowsprit

The story of the bowsprit cannot be told in a single chapter, because its construction is phased and runs parallel to progress on the foremast. I’ll return to it later.

The first ropes on the ship are now installed: the gammoning on the bowsprit. It was fortunate that I had accidentally broken off the “marines’ walk” on the forecastle earlier. This gave me better access. The photo below shows what a fiddly job it turned out to be, straight through the bows.

Part 1 of project 1 is now finished. The rest of the bowsprit will be completed later together with progress on the standing rigging.

P1034371.JPG
 
41 The Standing Rigging, the Test

After the gammoning around the bowsprit, it was time for the “standing rigging,” starting with the lower sections of the three masts. The middle and top sections are currently in storage.
Projects 2, 3, and 4 consist of the pendants for the tackles, the shrouds, the ratlines, the futtock staves, the catharpin legs, and the futtock shrouds. I began with the mizzenmast, followed by the mainmast and the foremast. The various ropes were also installed in this order.
I had already laid and tarred all the corresponding ropes for each project — a beautiful variety of thicknesses and colors.

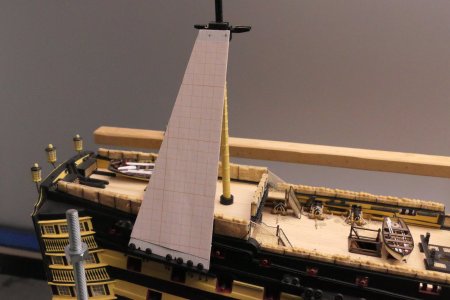
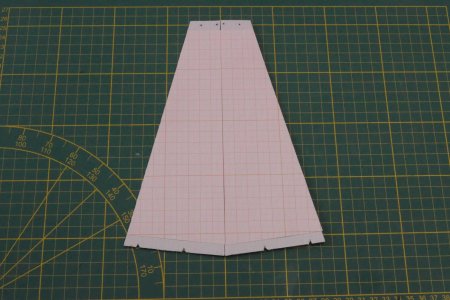
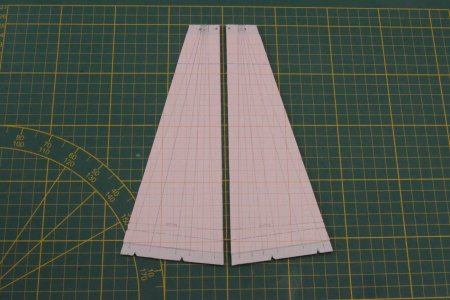
To get an idea of the dimensions of the shrouds, I made two cardboard templates, mirrored: one for port and one for starboard.

Using the guard rails I installed on my slipway, I drew a reference line on both templates, perfectly horizontal and at the same height on both sides. This after carefully adjusting the height of the rails.
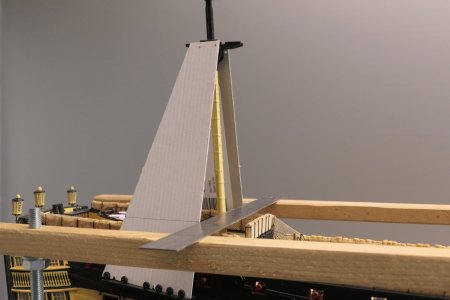
P1034355.JPG

P1034358.JPG

I then glued graph paper onto both templates, with the horizontal lines matching the real horizontal orientation in the model. These lines later served as the reference for the ratlines, which are spaced 6 mm apart — roughly 45 cm in full scale.
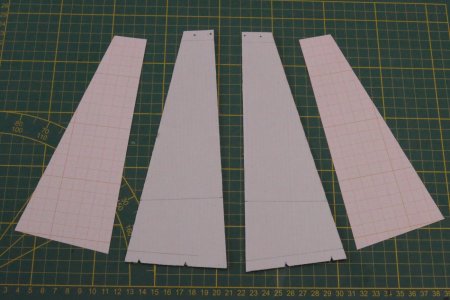
P1034359.JPG

In the model it looks like this:

P1034364.JPG

I then marked the shroud ropes at the centers of the lower deadeyes and the area where the shrouds will wrap around the mast. I also marked the centerline for the upper deadeyes and the location of the futtock staves.
P1034365.JPG

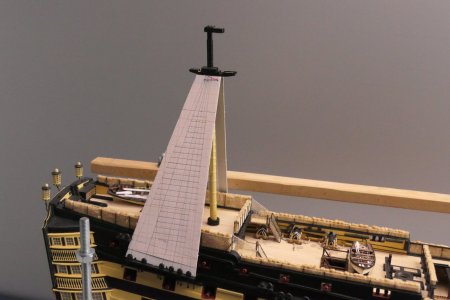
Finally, I drew in the ratlines. With a loose template like this, fitting and measuring is easy and very clear. In the model it appears as shown in the photo below. I fixed the templates at the top with a red thread, which I can remove later.
P1034367.JPG

In the last photo you can clearly see that I already installed the cap on the mast. When hanging the shrouds later, it will become clear whether this is obstructive and whether the loops will become too large. Otherwise, the caps will have to be removed. We shall see.

I explained how I prepared for my first rigging task: the standing rigging on the mizzenmast.
Until Stephan pointed out that I should first make a test piece. And it’s a good thing he did.

To compare with the situation on my actual model later, I first built a small mock-up of the mizzenmast setup, essentially the same configuration but more manageable.
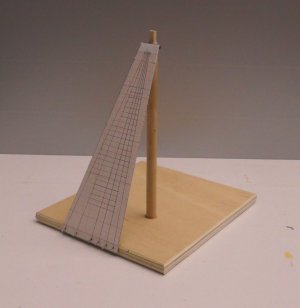
P1034372.JPG

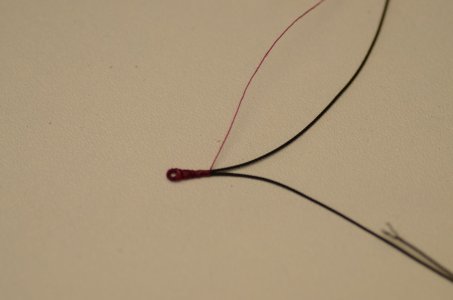
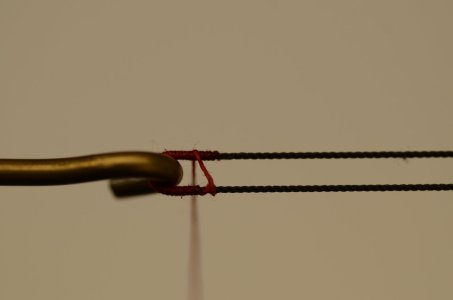
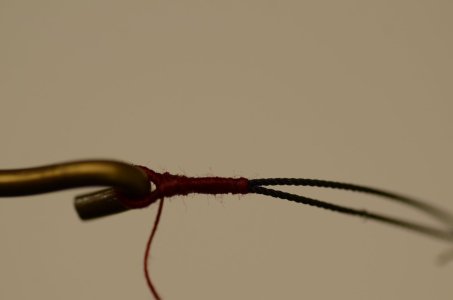
First challenge: making an eye splice, for the pendants where the tackles will later be attached. First, I wrapped a small section of rope and bent it around a brass hook. Then I twisted the two outgoing lines together. See photos:
_DSC0699.JPG

_DSC0700.JPG

_DSC0701.JPG

My first rigging task after the bowsprit is now a fact, but I can tell I still need more practice.

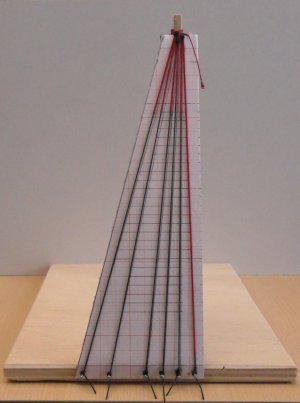
On to the shrouds. The foremost shroud must be completely parcelled. The upper sections of the other shrouds must be wrapped as well. To highlight the differences, I wrapped everything , including the pendant, with red thread. Installed on the model, it looks like this:
P1034375.JPG

For the rope diameters I tried to match the dimensions listed in McKay’s table as closely as possible. For the seizings that gather the shrouds near the mast top, I used rope that turned out to be too thick. They are bulky and interfere with each other.

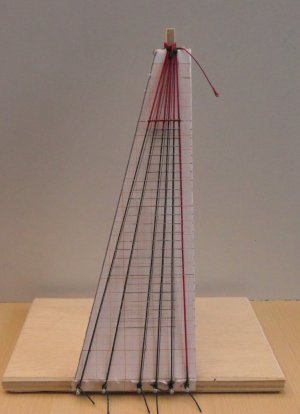
Then I installed the ratlines using thin beige thread. This was manageable thanks to the graph paper in the background providing alignment. Lastly, I added the futtock stave. The result so far:
P1034379.JPG

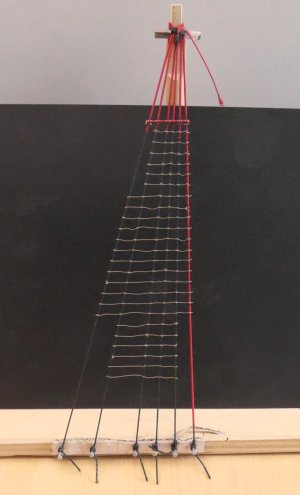
When I removed the graph paper to get an impression of the final look, I was somewhat shocked, especially after placing black paper in the background.
P1034383.JPG

The actual appearance of the ratlines had not fully registered with me before that moment, and it wasn’t pretty.
Tying ratlines is not difficult in itself, but achieving a consistent look, with ratlines that sag slightly instead of being too tight, is a whole different story.

Short summary of the materials used for the mizzenmast test

• Burton pendants: z-laid 3×3, 0.55 mm
• Shrouds: s-laid 3×9, 0.90 mm. I used s-lay rope to visually match the other, thicker shrouds made from s-laid cables.
• Futtock stave: brass rod 0.7 mm wrapped with thread
• Ratlines: z-laid 3×1 beige, 0.2 mm
• All ropes except the wrapping thread were hand-laid.

There is still a lot to improve before I can be truly satisfied. So I will make another test piece on this mock-up, incorporating the following lessons learned:

Points for improvement

• I tend to tie knots and seizings too tightly. This makes corrections nearly impossible, so I must work looser.
• I pulled the seizings on the shrouds as high as possible. This isn’t necessary. They can sit lower, creating a better distribution.
• The eye splice of the pendant is too bulky. Maybe a larger hole or another method. To be tested.
• Graph paper as a background for ratlines is unsuitable, too little contrast. Black paper is much better.
• Much more focus on tying the ratlines: far more precise, and especially avoid tightening intermediate knots too much so they can be adjusted.
• Fix each ratline knot immediately with a tiny drop of CA glue.
• I still don’t know which knot or seizing should attach the futtock stave to the shrouds.

Second test piece

Over the past week and a half, I created a new test based on the lessons learned.
I rebuilt the same mock-up, including the woodwork, so that I could compare before and after side by side.
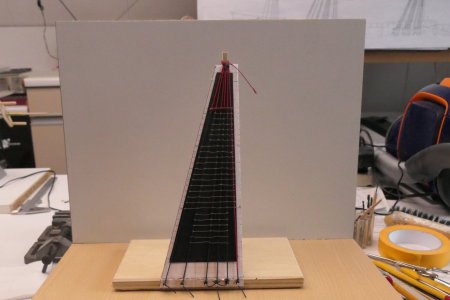
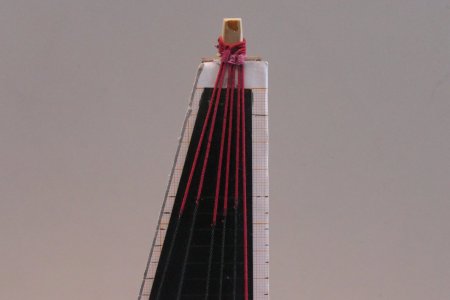
P1034385.JPG

P1034389.JPG

The situation around the mast top has clearly improved, although I’m still not entirely satisfied with the seizings.
For this test I again used different colored threads for the wrapping and seizings. This makes every flaw stand out, with black, it will be far less noticeable.

After installing the shrouds, I could begin tying the ratlines. Using pencil marks on the black background made the alignment much easier and much calmer to work with.
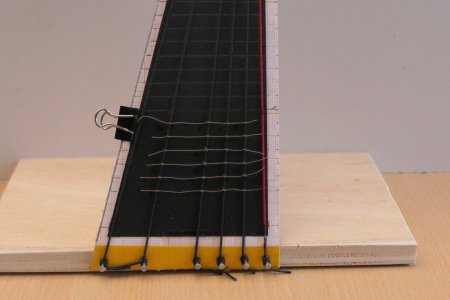
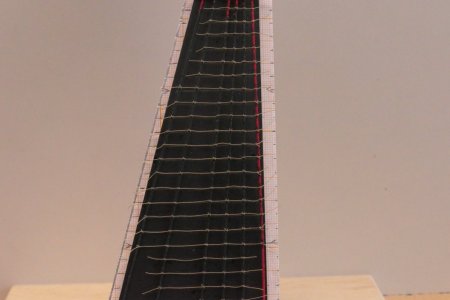
P1034390.JPG

P1034394.JPG

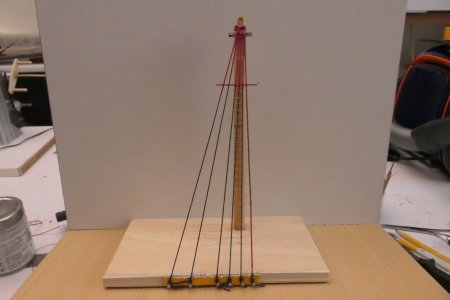
When you remove the black background, you get a view much closer to how it will appear on the model. Since the ratlines are only 0.2 mm thick, they are barely visible like this.
To compare results properly, I again placed a black sheet behind them for visibility:
P1034395.JPG

All in all, I am satisfied with the progress, let’s call it a successful test.
The next step is to apply all these lessons to the actual model.
 
I'm going to tease you a little :) . The beginning and end are tied to the shrouds with a binding, and the ratlines have an eye. 19th-century method
Stephan, teasing is fine, no problem at all.
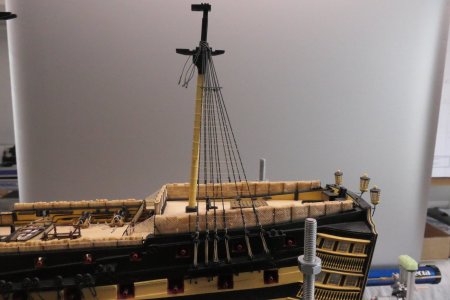
I know that in reality the ratlines are attached to the shrouds with a loop and a strap. But at this scale that’s not doable. Besides, you’d end up with even more knots and cut-off ends showing.
 
42 The Standing Rigging, in Real Life

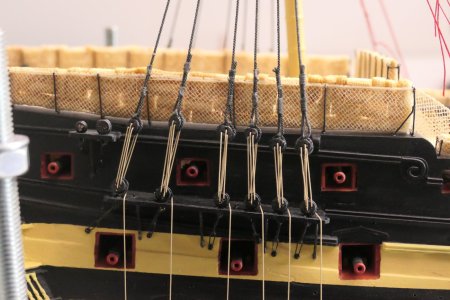
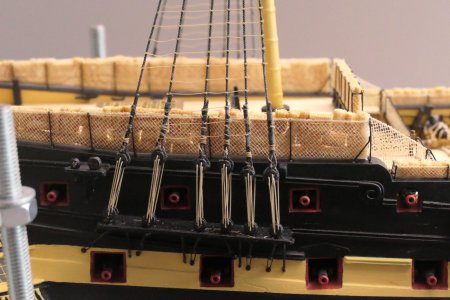
During the discussions in my Dutch build log, Stephan advised me to use thicker thread for serving the rigging. I have now bought thicker thread. However, I had already served the shrouds for the mizzen mast, and I prefer to leave them as they are. I fear that adjusting them now would disrupt the proportions between the rope diameters. But for the mainmast and foremast I did use the thicker serving thread. In the photo below you can see the first pairs of shrouds, one for port and one for starboard. The foremost shroud is fully served along its entire length.

P1034405.JPG

The biggest challenge here is ultimately getting the deadeyes nicely aligned.

In the photo below, you can see that I have already reeved the lanyards through the deadeyes of the first pair of shrouds, loosely for the moment. What immediately stands out is the twisting of the lanyards of the second shroud. This happens as soon as I put the slightest tension on the lanyards.

Question: How can this be prevented?
Should I first twist the shroud a few turns against its lay direction before reeving the lanyards?

P1034406.JPG

In the second pair of shrouds you can see that I use two small brass fixtures, bent at a right angle at the end. With these, I fix the upper deadeye in position, after which I wrap the shroud around it and hold it under light tension. With two tiny drops of CA glue on the left and right side of the deadeye, I then fix the deadeye in place. This determines the exact length of the shroud.

It is also immediately noticeable that the lower deadeye of the third shroud is not mounted perfectly in the correct orientation. I originally glued it by eye, and now I am paying the price. Perhaps it won’t be too noticeable once all the lanyards are installed and tightened. These are the smallest deadeyes, about 4 mm in diameter, so even the slightest misalignment becomes visible. Nothing can be done about it now.

A short experience:
Yesterday I spent an entire evening installing the 3rd and 4th shrouds on both port and starboard. My chosen working method simply did not work. I crawled across the room on my hands and knees multiple times looking for escaped deadeyes. After 2.5 hours of struggling, I had nothing to show for it except total frustration.
This morning I got up, tore everything down again, and started over this evening with an adjusted method. This time it worked perfectly. Fortunately!


P1034407.JPG

I think it’s good to change activities every now and then. I already experienced that while building the hull, but rigging is another story altogether. It is fiddly work, something I still need to get used to.

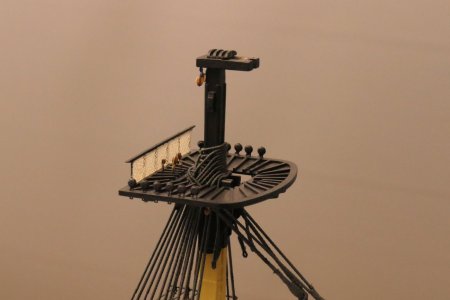
So I dived into the build manual again to check off what I had already completed. That’s when I ran into the tops (masts platforms). I have a few questions about them:

Question 1:
In Zu Mondfeld’s book, on page 215, there is a drawing of a top from around 1800. On the long straight side, a railing is shown. I’ve seen this on other models as well.
Question: Should the Victory also have this?

Question 2:
Various blocks must be hung under the tops. The build instructions prescribe eye bolts to which the blocks are tied. But I’ve also seen solutions where a rope loop from the block is passed through the platform’s deck, secured with a wooden peg above. This latter method seems more logical for the period in which the ship was built.
Can anyone comment on this?

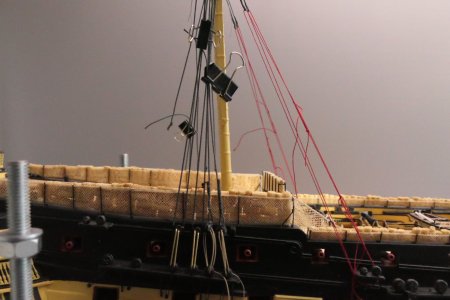
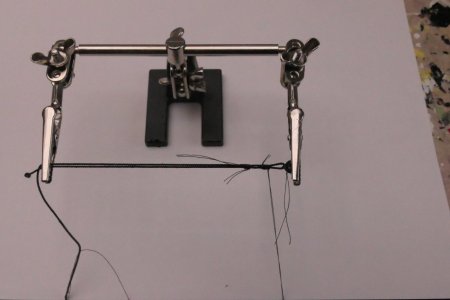
In the weeks that followed I focused on completing the mizzen shrouds. After adopting the improved method with the deadeyes, making the shrouds went smoothly. On AliExpress I had come across the small third-hand tool shown below, very handy once it arrived. A compact tool that really delivers, resulting in neatly organized knots.

P1034412.JPG

P1034414.JPG

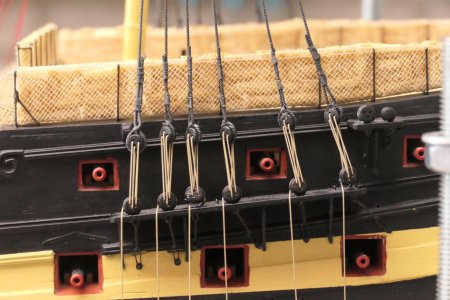
Soon all shrouds were hanging from the mast, all lightly tensioned. In the first photo, however, you can see that the upper deadeyes on the starboard side are not perfectly aligned. Later, when tensioning the shrouds, this improved somewhat, but not entirely to my liking. Something to pay extra attention to next time. On the port side (second photo), things turned out better. The twisting of the lanyards is still very visible.

P1034416.JPG

P1034417.JPG

Another thing that stands out is that the rope ends above the deadeyes are too long and look rather bulky. This needs refinement.

Then I started tying the ratlines. The photo below shows how I work: additional lighting to clearly see the contrast between the ratlines and the pencil lines on the black background. Again, the railing around the ship is very important, both to protect the netting and to support my arms during this intensive work. I do all work on my model standing up, which I really like.

P1034420.JPG

The end result of an evening’s work is shown below. Everything still needs to be finished, for example trimming the loose ends. PS: After tying each ratline, I secure every knot with a tiny drop of CA glue.

To counteract the twisting of the lanyards, I came up with the following idea: insert a sufficiently thick strip of wood—here 3 mm—between the lanyards. The twists in the lanyards are then transferred into the shrouds, evenly distributed along their entire length. The glued ratlines effectively lock the shrouds into a stiff flat plane. After removing the strip, the lanyards remain relatively straight.

P1034430.JPG

The lower ratlines are not yet successful. Mainly because the finishing of the rope ends above the deadeyes is still too bulky. I don’t think they should lie on top of one another like this.

P1034425.JPG

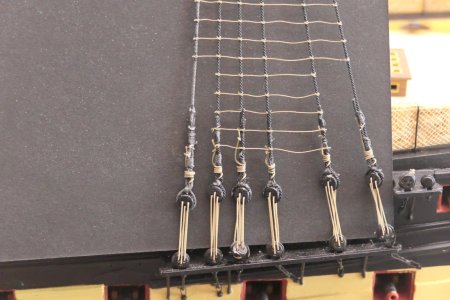
The final result for the mizzen mast is shown below. I am not fully satisfied, but repeatedly tearing everything down won’t get me anywhere either.

P1034427.JPG

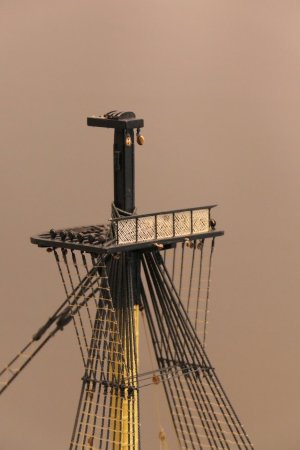
Meanwhile, I also designed a railing for the tops. A bit of painting and a net later, and it’s done.

P1056404.JPG

photos 32 – 6404
 
But at this scale that’s not doable. Besides, you’d end up with even more knots and cut-off ends showing.
Difficult to do. But doable.
But Johann got the patience of Job.
Almost nobody does the loops, even at a bigger scale.
So, go one counting knots in the most exiting part of rigging. Ratlines....
 
Difficult to do. But doable.
But Johann got the patience of Job.
Almost nobody does the loops, even at a bigger scale.
So, go one counting knots in the most exiting part of rigging. Ratlines....
I pre-tension my shrouds by threading the lanyard thru the bottom deadeye hole, pulling it down to its required location. In doing this the shroud twists, I then hold the position whilst threading the lanyard, which results in no more twisting. Sometimes it does require more adjustment - but it works for me.
 
42 The Standing Rigging, in Real Life

During the discussions in my Dutch build log, Stephan advised me to use thicker thread for serving the rigging. I have now bought thicker thread. However, I had already served the shrouds for the mizzen mast, and I prefer to leave them as they are. I fear that adjusting them now would disrupt the proportions between the rope diameters. But for the mainmast and foremast I did use the thicker serving thread. In the photo below you can see the first pairs of shrouds, one for port and one for starboard. The foremost shroud is fully served along its entire length.

View attachment 562092

The biggest challenge here is ultimately getting the deadeyes nicely aligned.

In the photo below, you can see that I have already reeved the lanyards through the deadeyes of the first pair of shrouds, loosely for the moment. What immediately stands out is the twisting of the lanyards of the second shroud. This happens as soon as I put the slightest tension on the lanyards.

Question: How can this be prevented?
Should I first twist the shroud a few turns against its lay direction before reeving the lanyards?

View attachment 562093

In the second pair of shrouds you can see that I use two small brass fixtures, bent at a right angle at the end. With these, I fix the upper deadeye in position, after which I wrap the shroud around it and hold it under light tension. With two tiny drops of CA glue on the left and right side of the deadeye, I then fix the deadeye in place. This determines the exact length of the shroud.

It is also immediately noticeable that the lower deadeye of the third shroud is not mounted perfectly in the correct orientation. I originally glued it by eye, and now I am paying the price. Perhaps it won’t be too noticeable once all the lanyards are installed and tightened. These are the smallest deadeyes, about 4 mm in diameter, so even the slightest misalignment becomes visible. Nothing can be done about it now.

A short experience:
Yesterday I spent an entire evening installing the 3rd and 4th shrouds on both port and starboard. My chosen working method simply did not work. I crawled across the room on my hands and knees multiple times looking for escaped deadeyes. After 2.5 hours of struggling, I had nothing to show for it except total frustration.
This morning I got up, tore everything down again, and started over this evening with an adjusted method. This time it worked perfectly. Fortunately!


View attachment 562094

I think it’s good to change activities every now and then. I already experienced that while building the hull, but rigging is another story altogether. It is fiddly work, something I still need to get used to.

So I dived into the build manual again to check off what I had already completed. That’s when I ran into the tops (masts platforms). I have a few questions about them:

Question 1:
In Zu Mondfeld’s book, on page 215, there is a drawing of a top from around 1800. On the long straight side, a railing is shown. I’ve seen this on other models as well.
Question: Should the Victory also have this?

Question 2:
Various blocks must be hung under the tops. The build instructions prescribe eye bolts to which the blocks are tied. But I’ve also seen solutions where a rope loop from the block is passed through the platform’s deck, secured with a wooden peg above. This latter method seems more logical for the period in which the ship was built.
Can anyone comment on this?

In the weeks that followed I focused on completing the mizzen shrouds. After adopting the improved method with the deadeyes, making the shrouds went smoothly. On AliExpress I had come across the small third-hand tool shown below, very handy once it arrived. A compact tool that really delivers, resulting in neatly organized knots.

View attachment 562095

View attachment 562096

Soon all shrouds were hanging from the mast, all lightly tensioned. In the first photo, however, you can see that the upper deadeyes on the starboard side are not perfectly aligned. Later, when tensioning the shrouds, this improved somewhat, but not entirely to my liking. Something to pay extra attention to next time. On the port side (second photo), things turned out better. The twisting of the lanyards is still very visible.

View attachment 562097

View attachment 562098

Another thing that stands out is that the rope ends above the deadeyes are too long and look rather bulky. This needs refinement.

Then I started tying the ratlines. The photo below shows how I work: additional lighting to clearly see the contrast between the ratlines and the pencil lines on the black background. Again, the railing around the ship is very important, both to protect the netting and to support my arms during this intensive work. I do all work on my model standing up, which I really like.

View attachment 562099

The end result of an evening’s work is shown below. Everything still needs to be finished, for example trimming the loose ends. PS: After tying each ratline, I secure every knot with a tiny drop of CA glue.

To counteract the twisting of the lanyards, I came up with the following idea: insert a sufficiently thick strip of wood—here 3 mm—between the lanyards. The twists in the lanyards are then transferred into the shrouds, evenly distributed along their entire length. The glued ratlines effectively lock the shrouds into a stiff flat plane. After removing the strip, the lanyards remain relatively straight.

View attachment 562100

The lower ratlines are not yet successful. Mainly because the finishing of the rope ends above the deadeyes is still too bulky. I don’t think they should lie on top of one another like this.

View attachment 562101

The final result for the mizzen mast is shown below. I am not fully satisfied, but repeatedly tearing everything down won’t get me anywhere either.

View attachment 562102

Meanwhile, I also designed a railing for the tops. A bit of painting and a net later, and it’s done.

View attachment 562103

photos 32 – 6404
Good morning. A fine example of how to do rigging. Your serving of the shrouds is fabulous. I also really like the way you did the hammocks in the netting- adds loads of character to your Victory. Cheers Grant
 
43 The Mouse

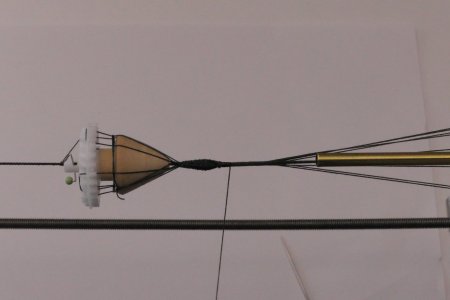
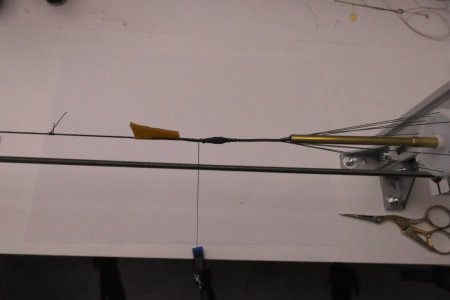
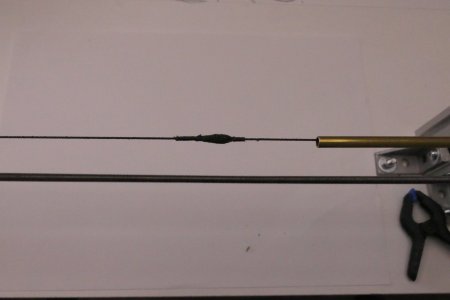
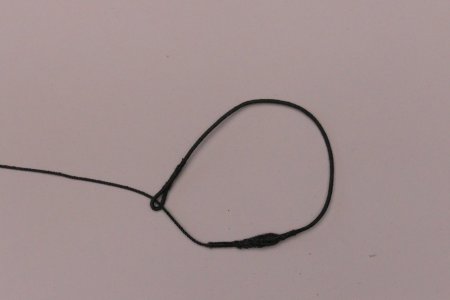
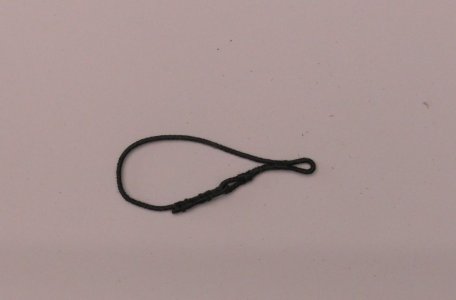
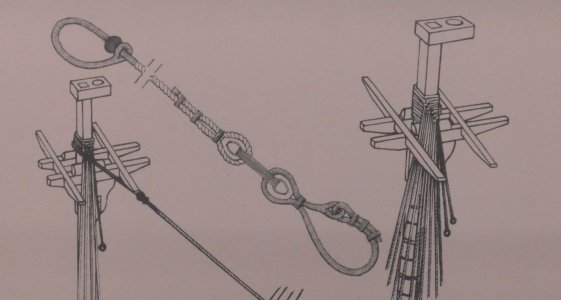
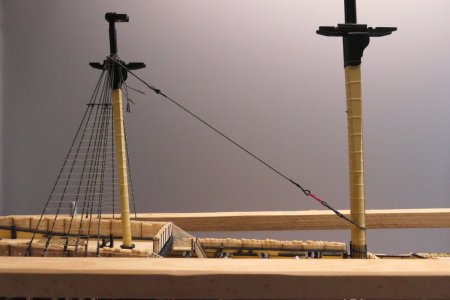
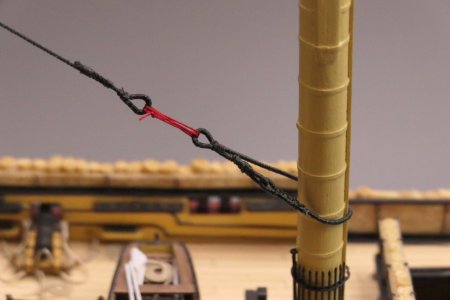
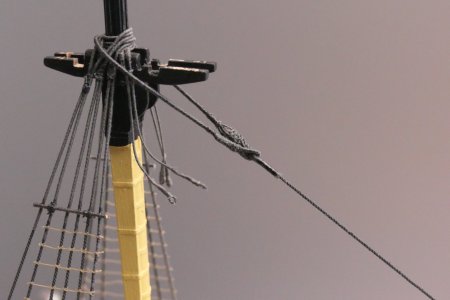
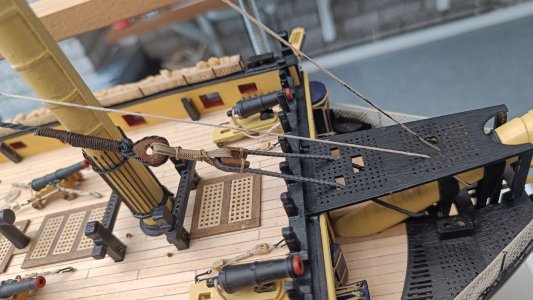
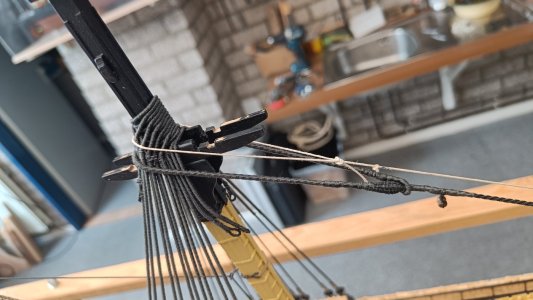
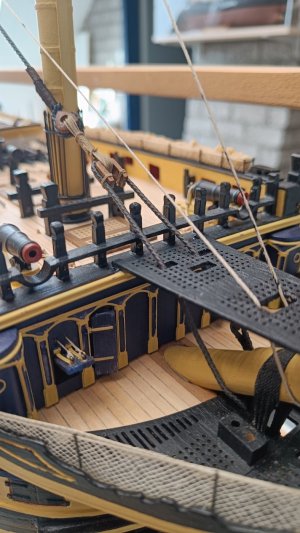
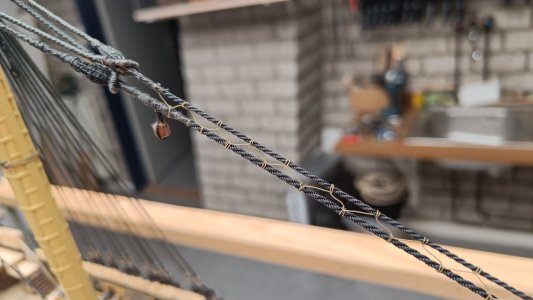
The last part of the ropework for the mizzenmast is the mizzen stay. This includes making the famous mouse. Once again I studied Stephan’s method carefully, he described the process in detail in one of his articles.

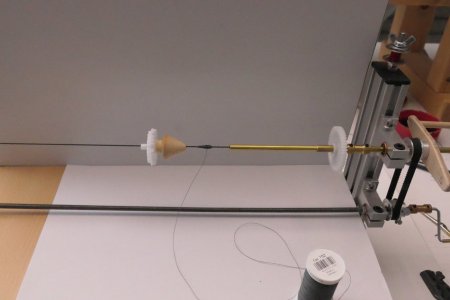
For the required components (gears) I dismantled an old printer. Luckily it contained parts I could use. The wooden cone I made from a piece of broomstick. The core of the mouse was formed by winding black thread around the stay rope into the desired shape.

The result is shown below.

P1034436.JPG

Weaving the mouse went very well, as you can see in the photos:

P1034437.JPG

P1034438.JPG

P1034439.JPG

P1034440.JPG

P1034441.JPG

P1034443.JPG

P1034446.JPG

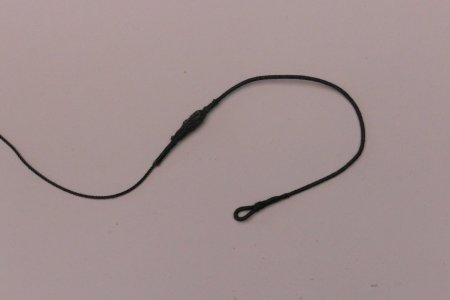
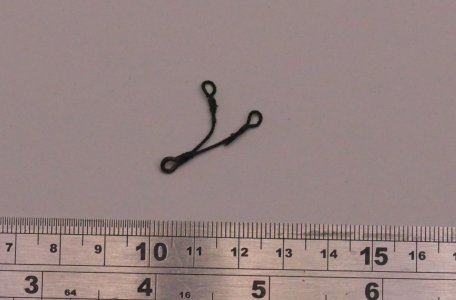
At the end of the stay a rope eye splice is made.

P1034450.JPG

P1034451.JPG

And for now, merry Christmas and a happy new year for all of you Bottle
 
Last edited:
Back
Top