
Hallo Peter, i am every time fascinated when you post photos of your model - many thanks for sharing with us

-

SUBSCRIBE TO SHIPS IN SCALE TODAY!
The beloved Ships in Scale Magazine is back and charting a new course for 2026!
Discover new skills, new techniques, and new inspirations in every issue.
NOTE THAT OUR NEXT ISSUE WILL BE July/August 2026 -

Win a Free Custom Engraved Brass Coin!!!
As a way to introduce our brass coins to the community, we will raffle off a free coin during the month of August. Follow link ABOVE for instructions for entering.
You are using an out of date browser. It may not display this or other websites correctly.
You should upgrade or use an alternative browser.
You should upgrade or use an alternative browser.
Hohenzollernmodell 1660-1670 Scale 1/21
- Thread starter Olympic1911
- Start date
- Watchers 32

Lovely work on your model Peter.
Bill
Bill

Fabulous work Peter and great to see your model on SoS.With regard to treating your shrouds,I know Alexey Banarov uses a mix of 500ml of Turpentine and 500ml of Paraffin to an apple size lump of Bitumen to produce the mix he applies to his rigging.This may dry faster than your version but I am not sure it will create the full on tarred look you are after.
Kind Regards
Nigel
Kind Regards
Nigel
- Joined
- Sep 23, 2018
- Messages
- 97
- Points
- 253

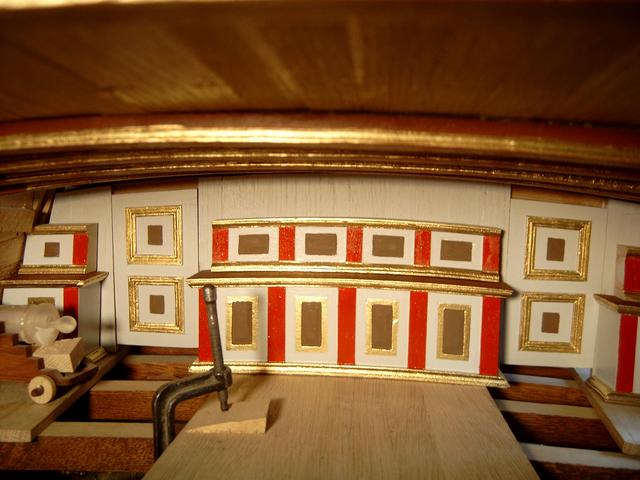
Here's a Picture of the great cabin of the historic model that was destroyed in WWII

And here's a Picture of the great cabin of my model still under construction:
Regards
Peter
And here's a Picture of the great cabin of my model still under construction:
Regards
Peter
Great job!!
WOW - looking very good.
One question: how can you access this area for your work? Is the deck / roof movable, so you can work from the top?
One question: how can you access this area for your work? Is the deck / roof movable, so you can work from the top?
- Joined
- Sep 23, 2018
- Messages
- 97
- Points
- 253
Beautiful work Peter,I can't wait to see the result when the carved details are added.
Kind Regards
Nigel
Kind Regards
Nigel
- Joined
- Sep 23, 2018
- Messages
- 97
- Points
- 253
Hi everyone, it's now high time for another update!
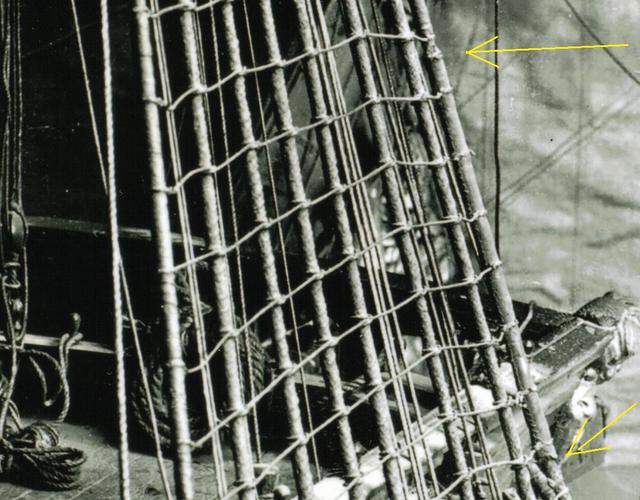
Looking closely you can see here that the foremost pair of shrouds were covered with a protective leather sleeve, the arrows point to this sleeve's upper and bottom edges . This was to protect the shrouds against damage from the sails constantly rubbing against them.
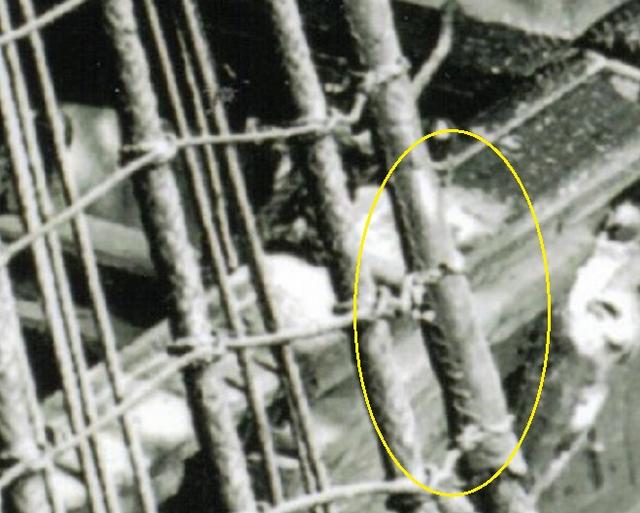
Here's a close-up, you can even see the stitches.
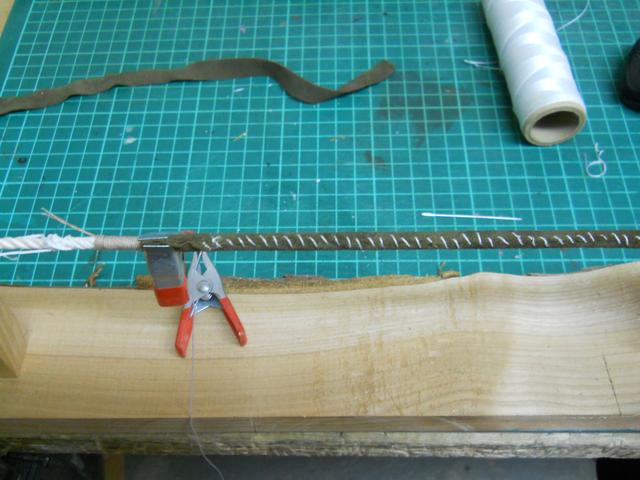
Here I rigged a piece of shroud between two wooden blocks to sew a leather sleeve around them. Not what I'd call tidy stitches but this is only a test-run.
Here the shroud with the sleeve rigged up on the model.
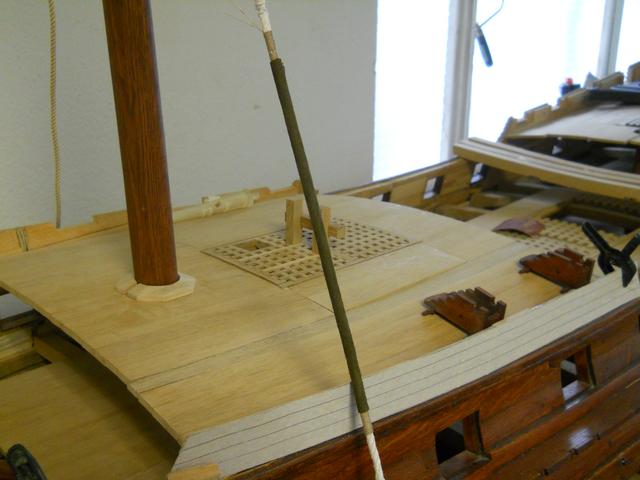
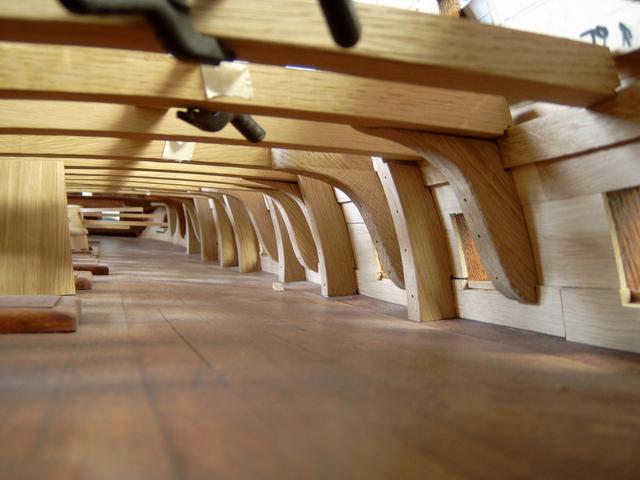
In the meantime I continued working on knees and riders on the lower gun-deck, you can see them here on hull sides. In all there were some 40 of these on this deck. In the distance you can see the partitioning to the Konstapelkammer (the powder-room) und in front of that the large capstan.
Knees and riders on the port-side are completed. You can make out drill-holes for iron bolts. To the left is the chimney of the galley-stove.
Here I'm preparing cardboard templates for a sandpit. It is said that before battle the decks were wetted and covered with sand to make them less slippery from the amount of blood on deck. Sand was also obviously used to put out fires.
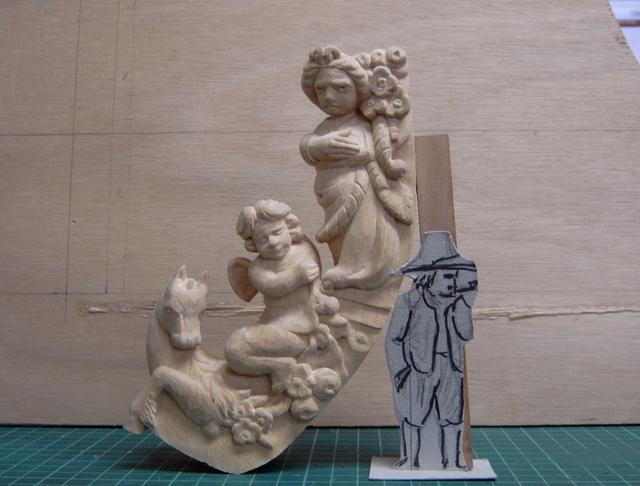
The sculptor has been busy too and has yet again excelled himself.
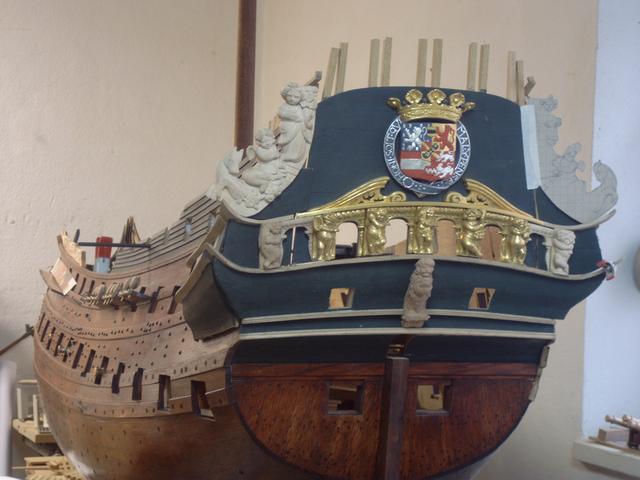
A close-up view of the new sculpture
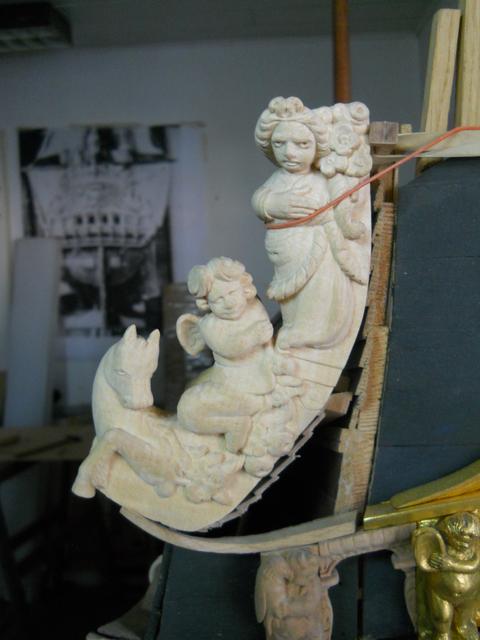
Here with Mr. Scale standing next to the sculpture for comparison. In reality this wooden sculpture would have been some 3,5 meters high! Amazing!
Thanks for dropping in!")
Peter
Looking closely you can see here that the foremost pair of shrouds were covered with a protective leather sleeve, the arrows point to this sleeve's upper and bottom edges . This was to protect the shrouds against damage from the sails constantly rubbing against them.
Here's a close-up, you can even see the stitches.
Here I rigged a piece of shroud between two wooden blocks to sew a leather sleeve around them. Not what I'd call tidy stitches but this is only a test-run.
Here the shroud with the sleeve rigged up on the model.
In the meantime I continued working on knees and riders on the lower gun-deck, you can see them here on hull sides. In all there were some 40 of these on this deck. In the distance you can see the partitioning to the Konstapelkammer (the powder-room) und in front of that the large capstan.
Knees and riders on the port-side are completed. You can make out drill-holes for iron bolts. To the left is the chimney of the galley-stove.
Here I'm preparing cardboard templates for a sandpit. It is said that before battle the decks were wetted and covered with sand to make them less slippery from the amount of blood on deck. Sand was also obviously used to put out fires.
The sculptor has been busy too and has yet again excelled himself.
A close-up view of the new sculpture
Here with Mr. Scale standing next to the sculpture for comparison. In reality this wooden sculpture would have been some 3,5 meters high! Amazing!
Thanks for dropping in!
Peter

Great work again Peter. Tomorrow I will be visiting shipmodel days at the Batavia yard, are you there sgsin with your model?
- Joined
- Sep 23, 2018
- Messages
- 97
- Points
- 253
I'm sorry, not this time Maarten, hopefully next year.Great work again Peter. Tomorrow I will be visiting shipmodel days at the Batavia yard, are you there sgsin with your model?
Peter
Hallo Peter,
Yes it was really time for an update - would like to see your work much more often....
Very good progress, I know, that you have an eye for all the details, which most of us are not thinking about (f.e. the leather protection) - WOW
and great carving -
Yes it was really time for an update - would like to see your work much more often....
Very good progress, I know, that you have an eye for all the details, which most of us are not thinking about (f.e. the leather protection) - WOW
and great carving -
- Joined
- Sep 23, 2018
- Messages
- 97
- Points
- 253
Hallo Peter,
great summary of the original model, the history and details of the model, your intention and your built - Great film
- Now a lot of members will see your model with a different eye..... Many Thanks
great summary of the original model, the history and details of the model, your intention and your built - Great film
- Now a lot of members will see your model with a different eye..... Many Thanks
- Joined
- Apr 10, 2019
- Messages
- 221
- Points
- 253

Hallo Peter,
hat off. Your model is realy extra ordinary. All the details, the carvings are wounderfull. Congratulation
Willi (schifferlbauer)
hat off. Your model is realy extra ordinary. All the details, the carvings are wounderfull. Congratulation
Willi (schifferlbauer)
- Joined
- Sep 23, 2018
- Messages
- 97
- Points
- 253
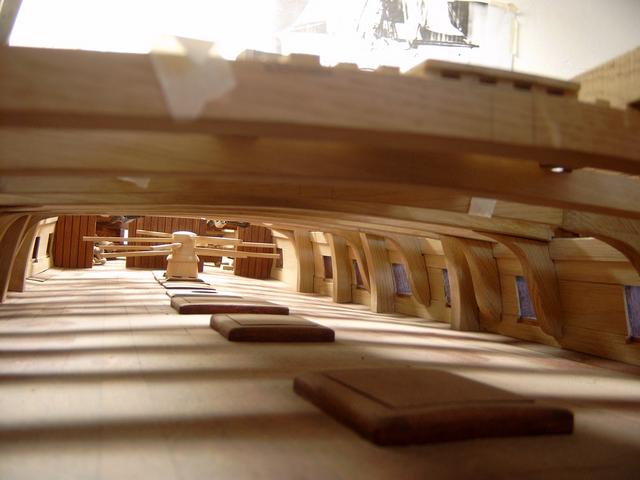
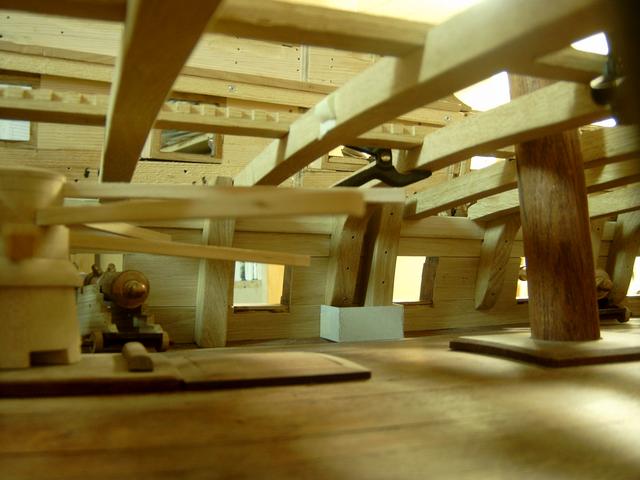
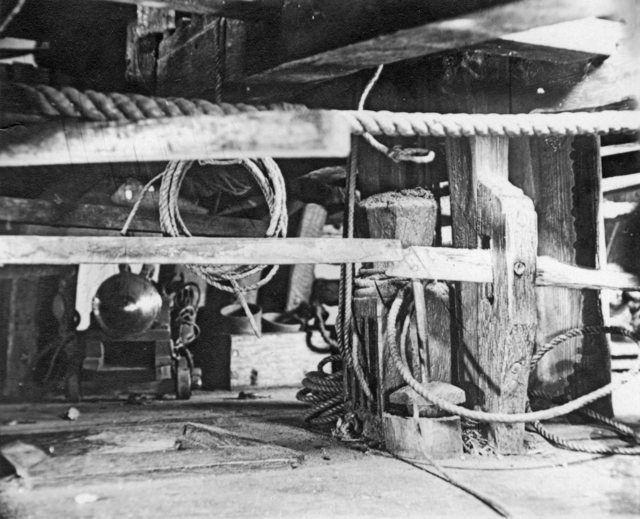
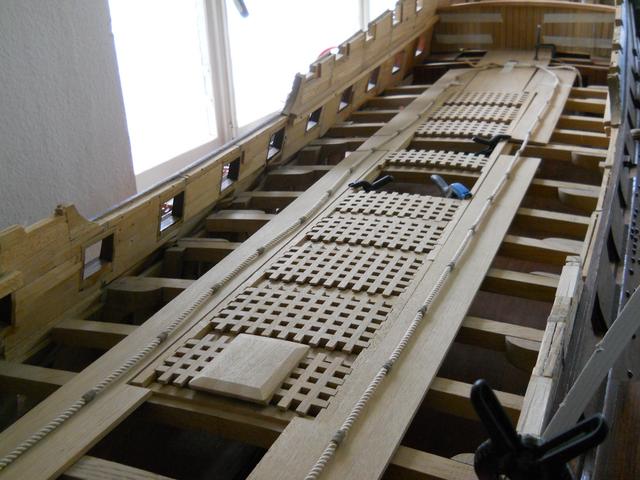
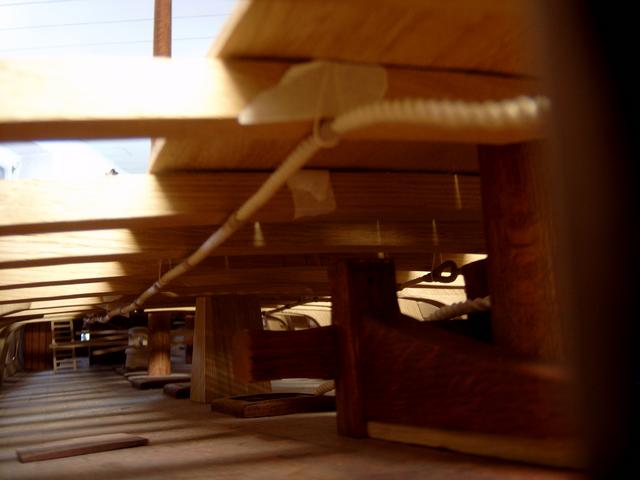
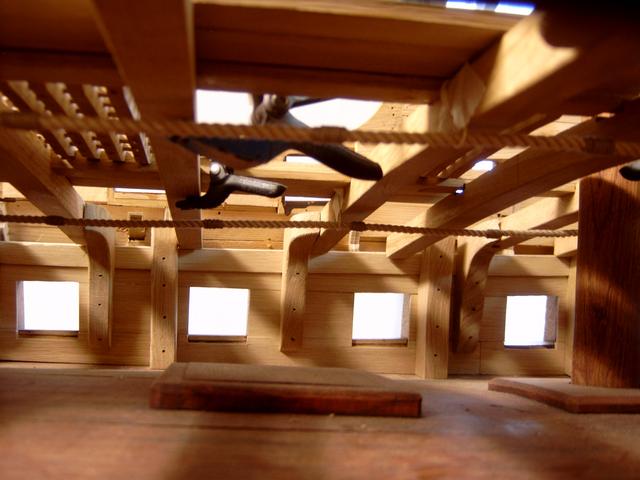
This is a view looking through the second port-side lower deck gunport. The foremast can be seen to the left, the large object dominating the image is the riding-bitt to which the anchor cables are secured while the ship is under way. The thick cable at the top is the messenger. This is an endless circular rope which runs from the bow then aft to the mizzen mast then back to the bow. When it is not in use (like in this image) it is hung up onto the deck-beams, when in use it would be released from the deck-beams and laid out onto the deck. The lower thick cable is one of the anchor cables. Two stoppers can be seen, one is lying on the deck to the left, the other is standing upright in front of the riding-bitt. Both have come lose throughout the centuries they should be lashed onto the anchor cable, securing it to prevent an anchor from dropping to ocean floor (dragging its cable behind) and getting lost should an anchor come lose in heavy weather or in battle.
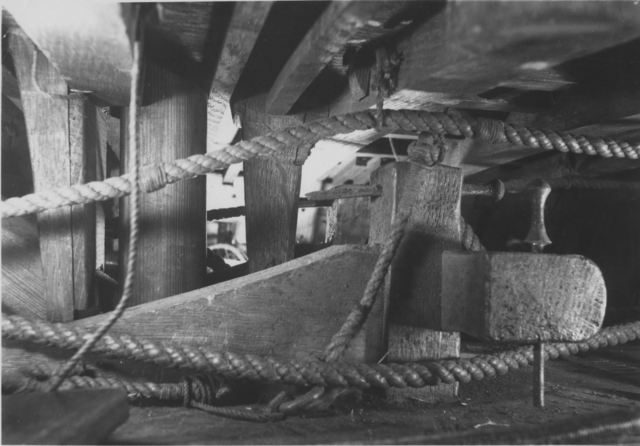
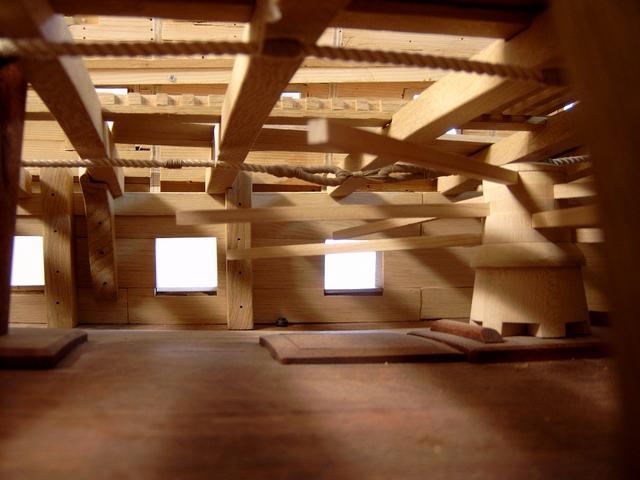
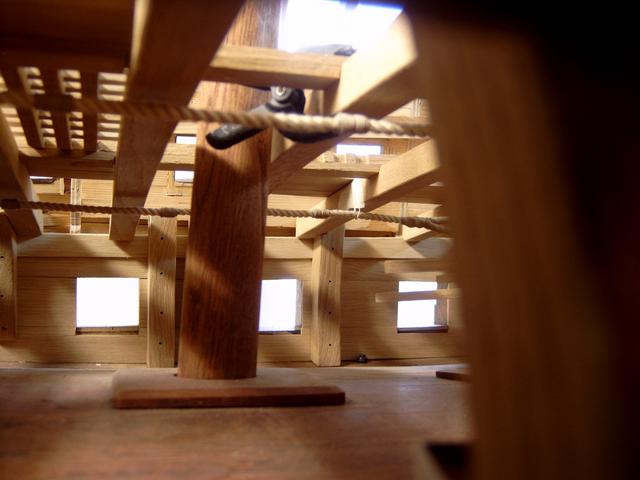
This is a starboard side view through a lower deck gun-port, looking at the mainmast. The messenger can also be seen here, hung up onto the deck-beams.
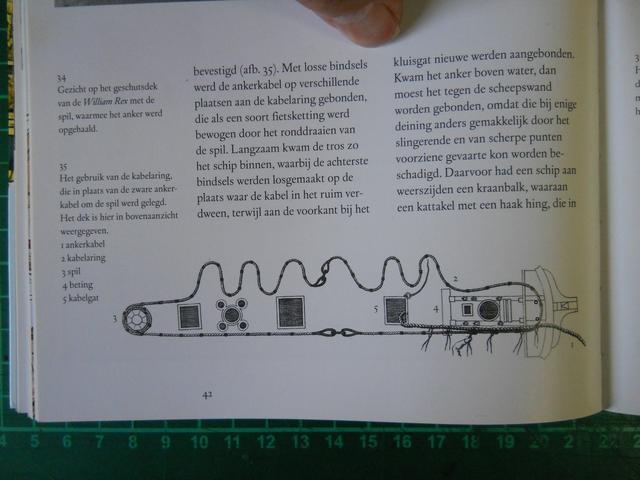
This is how the messenger works. At "3" the messenger is passed several times around the capstan while at the bow (far right) it passes two rollers. When rotating the capstan the messenger follows the rotation, tight on the starboard side (bottom) and lose on the port (top). The anchor-cable can be seen being hauled in at "1". Just as it passes through the hawse-hole it is lashed sideways onto the messenger with "nippers" and is pulled inwards. once the first nipper reaches the cable-locker it is removed and lashed to the cable again at the hawse-hole, thus moving it from the last in line to the first. This is an endless process until the anchor is raised and stowed.
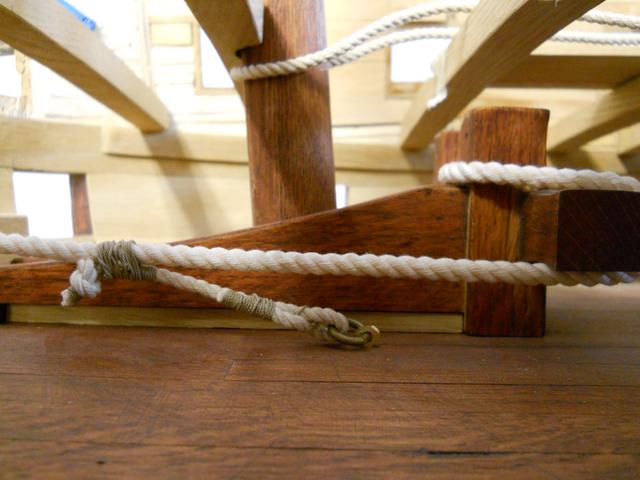
Here's one of my stoppers. The model would require two of these on the port- and five on the starboard- side.
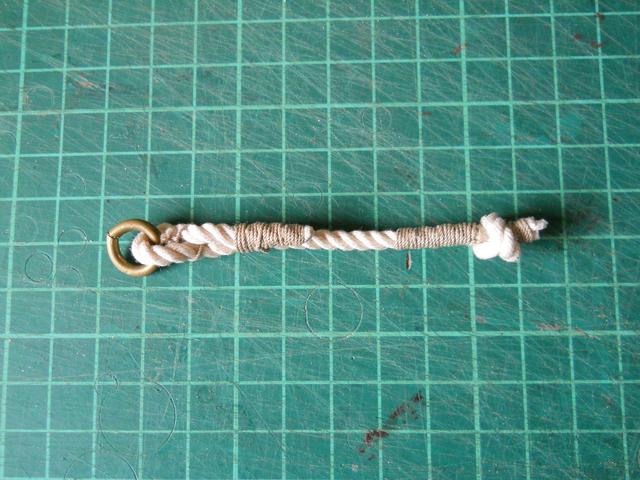
Which stopper-knot the Dutch used in the seventeenth century is not known but it looks a great deal like the Mattew-Walker so I decided to use that one.
Here the anchor-cable is secured to the deck by a stopper. At least two of the were required for each cable, three for larger anchors.
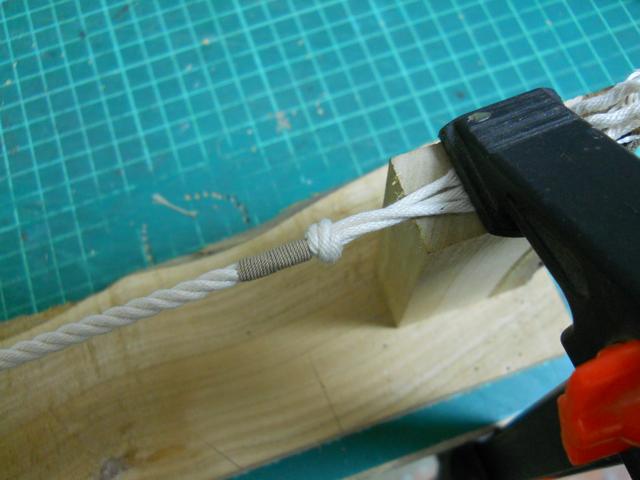
This picture was taken last week, work on the messenger is progressing well. Contemporary sources call the wrappings "Mouses" - not mice! As all contemporary illustrations show the messenger made of two long cables I decided to do this too, so these two cables are lashed together with eye-splices.
A close-up view of a mouse

The process of splicing an eye
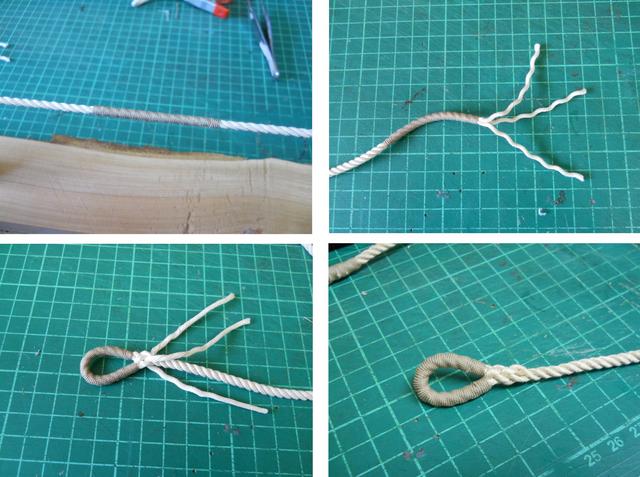
The finished and served eye-splice
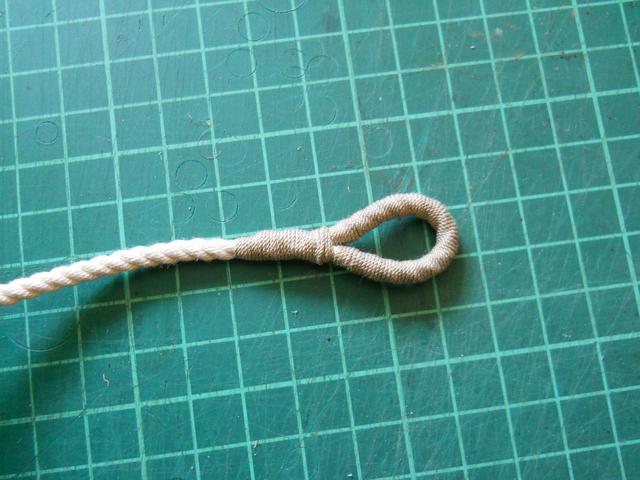
Here two messenger eye-splices are lashed together.

And here the finished messenger ready for tarring
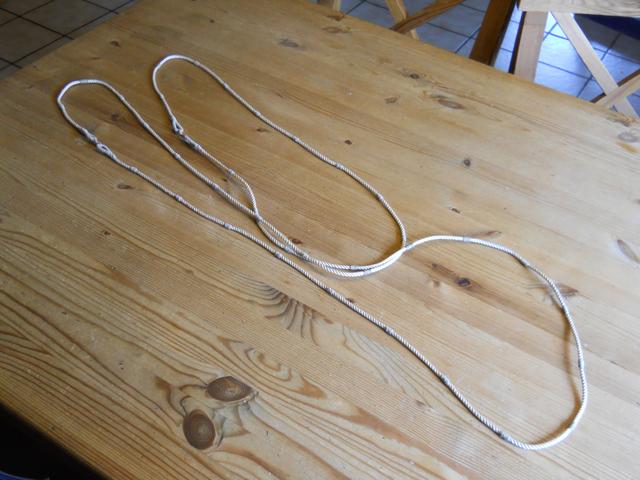
The following images show the messenger on my model hung up onto the deck-beams.
Peter
This is a starboard side view through a lower deck gun-port, looking at the mainmast. The messenger can also be seen here, hung up onto the deck-beams.
This is how the messenger works. At "3" the messenger is passed several times around the capstan while at the bow (far right) it passes two rollers. When rotating the capstan the messenger follows the rotation, tight on the starboard side (bottom) and lose on the port (top). The anchor-cable can be seen being hauled in at "1". Just as it passes through the hawse-hole it is lashed sideways onto the messenger with "nippers" and is pulled inwards. once the first nipper reaches the cable-locker it is removed and lashed to the cable again at the hawse-hole, thus moving it from the last in line to the first. This is an endless process until the anchor is raised and stowed.
Here's one of my stoppers. The model would require two of these on the port- and five on the starboard- side.
Which stopper-knot the Dutch used in the seventeenth century is not known but it looks a great deal like the Mattew-Walker so I decided to use that one.
Here the anchor-cable is secured to the deck by a stopper. At least two of the were required for each cable, three for larger anchors.
This picture was taken last week, work on the messenger is progressing well. Contemporary sources call the wrappings "Mouses" - not mice! As all contemporary illustrations show the messenger made of two long cables I decided to do this too, so these two cables are lashed together with eye-splices.
A close-up view of a mouse
The process of splicing an eye
The finished and served eye-splice
Here two messenger eye-splices are lashed together.
And here the finished messenger ready for tarring
The following images show the messenger on my model hung up onto the deck-beams.
Peter
Wonderful execution (very-well authentically detailed made) and many thanks from all of us for the great explanation and excursion into history. 
Hallo Peter,
did you make some more progress on your model?
Would be very interesting to see ....
did you make some more progress on your model?
Would be very interesting to see ....

Beautiful work, Peter !
- Joined
- Sep 23, 2018
- Messages
- 97
- Points
- 253
Yes, there has been some progress in the past weeks. I've been meaning to post an update for a while now. I am currently in England enjoying a weeks holiday with my family. Will be back on Friday and will be happy to update the thread after my return.