I agree here with Maarten (as usual) that you have to finalize the complete deck furnishing before closing it for the next one.
Off course it is also up to the content of the kit and how the guns are prepared and in which detail they are available, means with carriage or as dummies.
There are kits available, where the guns of the lower decks are only dummies, means only a wooden board inside the deck, so no carriage, and against this a cannon dummie is installed from outside through the gunport.
But it seems, when I check the advertisment for the kit, there are complete carriages with the kit.

But I think, that this photo is showing not a correct construction status, but only the content of the kit.
I do not think, that you can install all the guns with carriage of the main gun deck after you closed the decks and also the hull.
You have to check theoretical, which elements of tackles etc. of the gundeck will be visible later on through your gunports, gratings etc.......
Also you have to take into account at which stage you have to or want to make the hull planking, because also with this you are limited with accessibility.
I think a hull planking with already installed guns will be not possible.....so maybe a way to install the carriages before and later on the gun barrels afterwards through the gunports.
But definitely the deck planking first

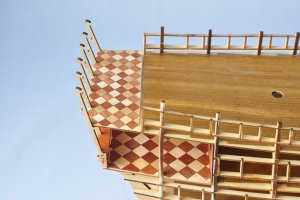
BTW they used a three shift pattern for the deck planking, so when I see the planks of the kit on your photo, it will be a nice work. I would start first with planking with the kingsplank in the centerline of the deck and from this work to starboard and larboard.
Like Maarten mentioned the simulation of caulking is done very often with a black marker. You should try first, if the the paint of the marker is not bleeding into the wood, often it is helping to sand a little bit the edge of the plank with a very fine sanding paper, with this bleeding / penetration of color ican be reduced.
You also can try to blacken only one side, means at the longitudinal joint between two planks only one plank is coloured, or maybe both, than the caulking is a little bit more domminant.
Another way to make the caulking is to use a very thin black paper with low weight (gram/m2). I do this very often. With this way a very fine, thin and accurate line of caulking can be simulated. One way is to take a package of planks and glue them with the edgestowards a black paper, after drying the glue you can diveide the planks with cutting through the black paper.......
I just found a nice description here which is describing with some photos the way: http://leggshipmodeling.blogspot.co.at/2009/11/caulked-deck-for-wooden-ship-model.html
Some others are macking only a fine soft pencil on the edge of the planks after they are installed. But here I think the use of varnish will be definiteloy necessary which will seep into the slight fine space........
Maybe the best is to make a small testfield, but this should be done until the end (including varnish if you want to use it) so you can find out, which fits for you best and fits also to the scale and appearance of the vessel....
BTW: These are the tools Maarten explained......I like these details very much, but it is a huge work to produce and fix, expecially if your vessel has a lot of guns.
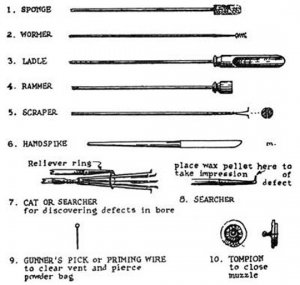
Sorry, for the long text, originally I didn´t want to write a novel....but I hope it is helping....also thanks to Maarten
Off course it is also up to the content of the kit and how the guns are prepared and in which detail they are available, means with carriage or as dummies.
There are kits available, where the guns of the lower decks are only dummies, means only a wooden board inside the deck, so no carriage, and against this a cannon dummie is installed from outside through the gunport.
But it seems, when I check the advertisment for the kit, there are complete carriages with the kit.

But I think, that this photo is showing not a correct construction status, but only the content of the kit.
I do not think, that you can install all the guns with carriage of the main gun deck after you closed the decks and also the hull.
You have to check theoretical, which elements of tackles etc. of the gundeck will be visible later on through your gunports, gratings etc.......
Also you have to take into account at which stage you have to or want to make the hull planking, because also with this you are limited with accessibility.
I think a hull planking with already installed guns will be not possible.....so maybe a way to install the carriages before and later on the gun barrels afterwards through the gunports.
But definitely the deck planking first


BTW they used a three shift pattern for the deck planking, so when I see the planks of the kit on your photo, it will be a nice work. I would start first with planking with the kingsplank in the centerline of the deck and from this work to starboard and larboard.
Like Maarten mentioned the simulation of caulking is done very often with a black marker. You should try first, if the the paint of the marker is not bleeding into the wood, often it is helping to sand a little bit the edge of the plank with a very fine sanding paper, with this bleeding / penetration of color ican be reduced.
You also can try to blacken only one side, means at the longitudinal joint between two planks only one plank is coloured, or maybe both, than the caulking is a little bit more domminant.
Another way to make the caulking is to use a very thin black paper with low weight (gram/m2). I do this very often. With this way a very fine, thin and accurate line of caulking can be simulated. One way is to take a package of planks and glue them with the edgestowards a black paper, after drying the glue you can diveide the planks with cutting through the black paper.......
I just found a nice description here which is describing with some photos the way: http://leggshipmodeling.blogspot.co.at/2009/11/caulked-deck-for-wooden-ship-model.html
Some others are macking only a fine soft pencil on the edge of the planks after they are installed. But here I think the use of varnish will be definiteloy necessary which will seep into the slight fine space........
Maybe the best is to make a small testfield, but this should be done until the end (including varnish if you want to use it) so you can find out, which fits for you best and fits also to the scale and appearance of the vessel....
BTW: These are the tools Maarten explained......I like these details very much, but it is a huge work to produce and fix, expecially if your vessel has a lot of guns.

Sorry, for the long text, originally I didn´t want to write a novel....but I hope it is helping....also thanks to Maarten


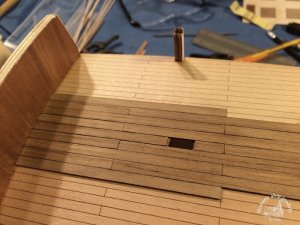
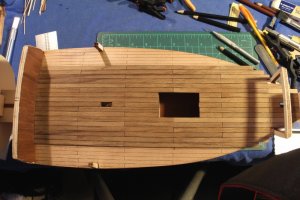

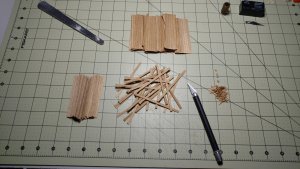
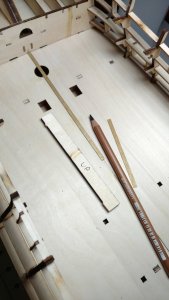
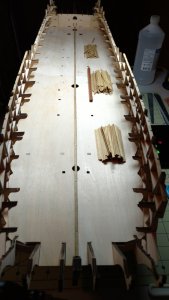
 , I'm finally getting back into the sing of things, here in the shipyard. During my weeks at work, Maarten sent me a link to another build of the Ingermanland that had great photos from start to finish, and within those photos I noticed something about the first deck. The planking only stretched from the center line to the ribs edge, and not all the way out to the edge of the false deck. So, instead of installing the bulwark and planking the hull first, I'm going to plank the first deck...first, so I can extend the planks all the way out, and then I will install the bulwark and plank the hull; returning to the next two decks once the hull planking is complete.