I'm doing a little catch up here, your headworks pieces are extraordinary, very pleasing to the eye. Equally impressive is your knowledge of the names of all the little pieces you're working on. Kind of like a doctor or a dentist should know the names of all the pieces they have to work on 
You are using an out of date browser. It may not display this or other websites correctly.
You should upgrade or use an alternative browser.
You should upgrade or use an alternative browser.
Kingfisher 1770 1:48 POF
- Thread starter dockattner
- Start date
- Watchers 143
Hello Friends,
Thanks for all the likes from my last posting! The headworks were brought to a conclusion this week (well, the figurehead remains to be attempted, but most everything else is done).
First up here is a 'seat of ease' (you can sort of see the discharge tube/box on the underside of the grating):
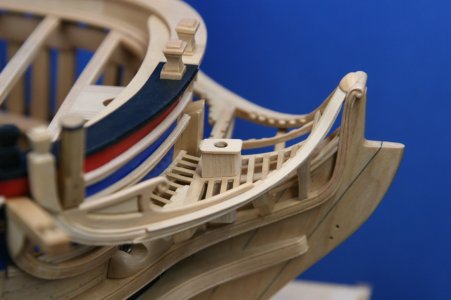
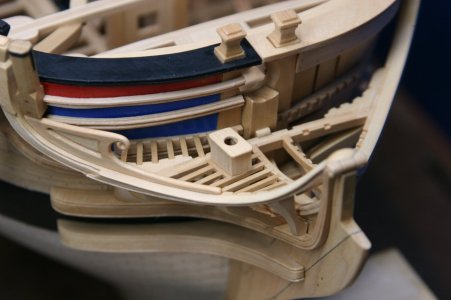
Next, I fabricated something called a boomkin. A boomkin is part of the system that controls the lower corner of the fore course (the lower square sail on the foremast).
I used some leftover boxwood to begin the fabrication:
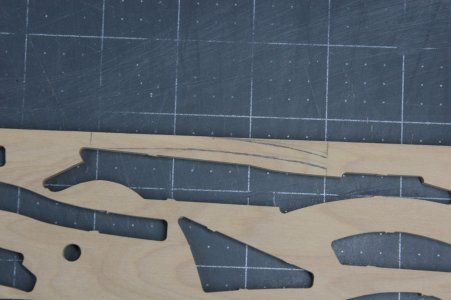
And then a knife and a plane to do some preliminary shaping:
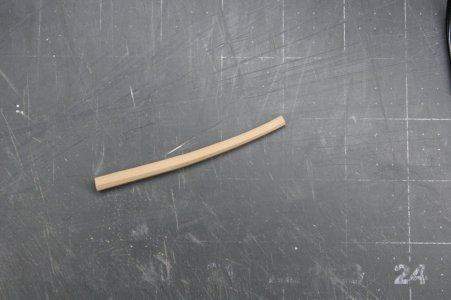
Finally, I hand sanded the #$%^& out of it until it was as round and smooth as I could get it:
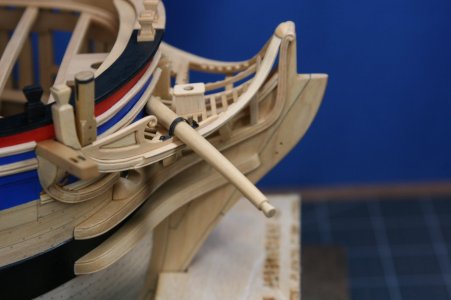
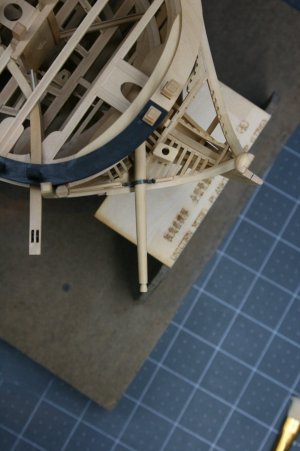
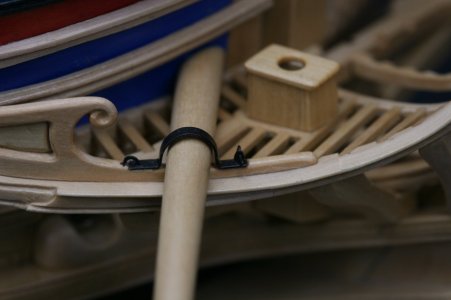
In the images above you can see the boomkin capsquare in place (just a supersized version of what you would find on a gun carriage). Here's a closer look:
Next up was a rather decorative block called a cat block. The cat block is a snatch block that sits on the cap rail (and, curiously, over/around one of the timberheads). Its fabrication is made somewhat more complicated by the fact that it curves to follow the turn of the rail):
First attempt:
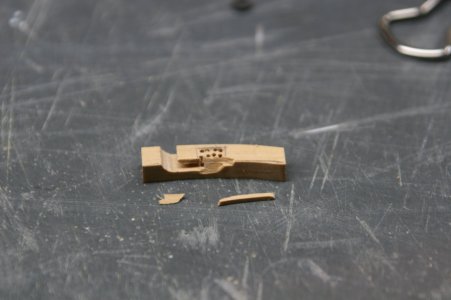
Success:
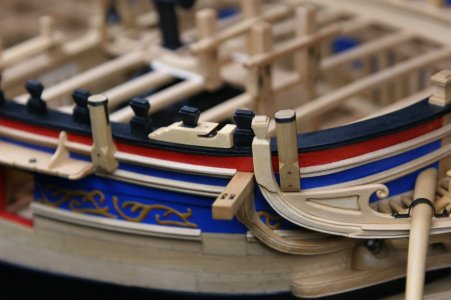
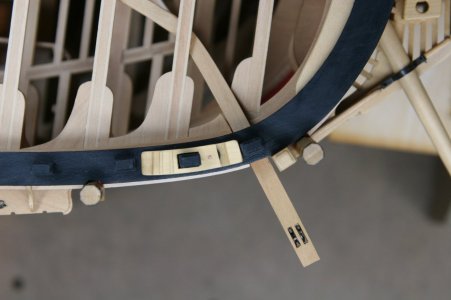
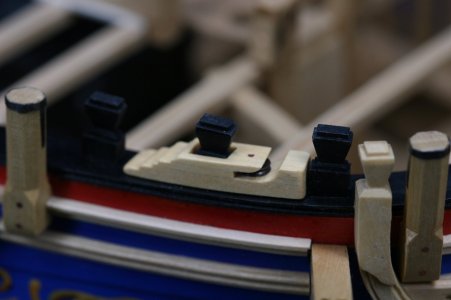
Finally, I added the berthing rail which acts as a framework for some safety netting. I don't think I'll add the net itself, but I did want to include the rail on my model:
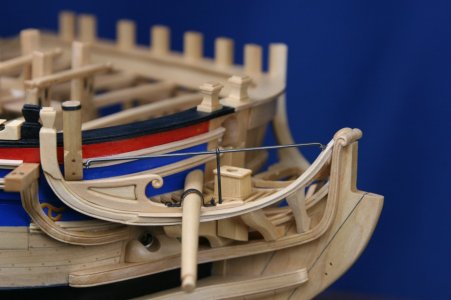
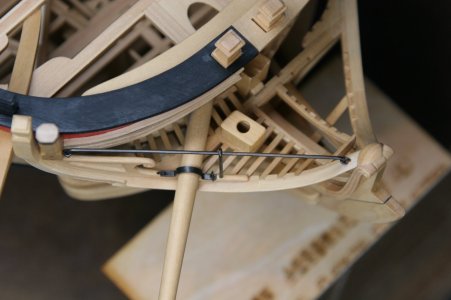
This is just round brass stock blackened with Casey's. I was somewhat surprised to see that the Casey's even blackened the solder joint I used to close the loop:
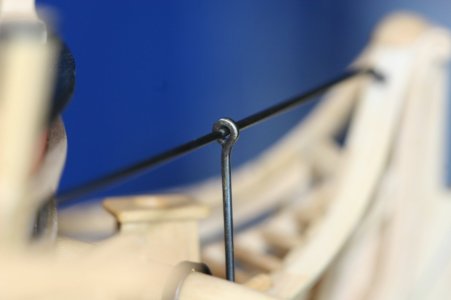
You have to love a product that works.
My attention will now turn to the waist area of the ship where I left some loose ends.
Thanks for all the likes from my last posting! The headworks were brought to a conclusion this week (well, the figurehead remains to be attempted, but most everything else is done).
First up here is a 'seat of ease' (you can sort of see the discharge tube/box on the underside of the grating):


Next, I fabricated something called a boomkin. A boomkin is part of the system that controls the lower corner of the fore course (the lower square sail on the foremast).
I used some leftover boxwood to begin the fabrication:

And then a knife and a plane to do some preliminary shaping:

Finally, I hand sanded the #$%^& out of it until it was as round and smooth as I could get it:


In the images above you can see the boomkin capsquare in place (just a supersized version of what you would find on a gun carriage). Here's a closer look:

Next up was a rather decorative block called a cat block. The cat block is a snatch block that sits on the cap rail (and, curiously, over/around one of the timberheads). Its fabrication is made somewhat more complicated by the fact that it curves to follow the turn of the rail):
First attempt:

Success:


Finally, I added the berthing rail which acts as a framework for some safety netting. I don't think I'll add the net itself, but I did want to include the rail on my model:


This is just round brass stock blackened with Casey's. I was somewhat surprised to see that the Casey's even blackened the solder joint I used to close the loop:

You have to love a product that works.
My attention will now turn to the waist area of the ship where I left some loose ends.
Last edited:
Thanks, Daniel. I was always strong in anatomyI'm doing a little catch up here, your headworks pieces are extraordinary, very pleasing to the eye. Equally impressive is your knowledge of the names of all the little pieces you're working on. Kind of like a doctor or a dentist should know the names of all the pieces they have to work on
Thank you, Heinrich. I assume the new semester will be starting up soon?
Beautiful and thoughtful work!Hello Friends,
Thanks for all the likes from my last posting! The headworks were brought to a conclusion this week (well, the figurehead remains to be attempted, but most everything else is done).
First up here is a 'seat of ease' (you can sort of see the discharge tube/box on the underside of the grating):
View attachment 494369
View attachment 494370
Next, I fabricated something called a boomkin. A boomkin is part of the system that controls the lower corner of the fore course (the lower square sail on the foremast).
I used some leftover boxwood to begin the fabrication:
View attachment 494371
And then a knife and a plane to do some preliminary shaping:
View attachment 494372
Finally, I hand sanded the #$%^& out of it until it was as round and smooth as I could get it:
View attachment 494373
View attachment 494374
In the images above you can see the boomkin capsquare in place (just a supersized version of what you would find on a gun carriage). Here's a closer look:
View attachment 494378
Next up was a rather decorative block call a cat block. The cat block is a snatch block that sits on the cap rail (and, curiously, over/around one of the timberheads). Its fabrication is made somewhat more complicated by the fact that it curves to follow the turn of the rail):
First attempt:
View attachment 494375
Success:
View attachment 494377
View attachment 494376
View attachment 494379
Finally, I added the berthing rail which acts as a framework for some safety netting. I don't think I'll add the net itself, but I did want to include the rail on my model:
View attachment 494380
View attachment 494381
This is just round brass stock blackened with Casey's. I was somewhat surprised to see that the Casey's even blackened the solder joint I used to close the loop:
View attachment 494382
You have to love a product that works.
My attention will now turn to the waist area of the ship where I left some loose ends.
Perfection AGAIN! Thanks for showing the initial "failure" on the cat-block. It's good to know you have a "learning curve" like the rest of us  ! My scrap bin is filled with failed experiments...
No luxuries for sailors, like "toilet paper" in this era! There probably was a bucket on a rope for rinsing and cleaning the discharge tube you reference.
The blackened rail turned out excellent. Something to grasp in heavy weather, while they "sit and think"...
No luxuries for sailors, like "toilet paper" in this era! There probably was a bucket on a rope for rinsing and cleaning the discharge tube you reference.
The blackened rail turned out excellent. Something to grasp in heavy weather, while they "sit and think"...
If you do get some, the key is prepping the metal well. If you don't, it will peal, scale or blotch. First very fine sandpaper, then a degreaser of some sort.Beautiful work, Paul. I am very glad that you have good luck with your blackening agent. I should see if I can find Casey's in China.
The key is in the prep work!
Thanks, Phil!Beautiful and thoughtful work!
Thank you, Brad. The addition of a bucket might be a nice conversation starter...Perfection AGAIN! Thanks for showing the initial "failure" on the cat-block. It's good to know you have a "learning curve" like the rest of us! My scrap bin is filled with failed experiments...
No luxuries for sailors, like "toilet paper" in this era! There probably was a bucket on a rope for rinsing and cleaning the discharge tube you reference.
The blackened rail turned out excellent. Something to grasp in heavy weather, while they "sit and think"...
Thank you, my friend!Welcome
Paweł, the work is beautiful, everything looks so realistic and delicate. Greetings Mirek
- Joined
- Oct 23, 2018
- Messages
- 736
- Points
- 353

Really wonderful details, Paul. I love to watch the details on your little lady.
You have added some really nice detailed parts, Paul. A pleasure for the eyes!Hello Friends,
Thanks for all the likes from my last posting! The headworks were brought to a conclusion this week (well, the figurehead remains to be attempted, but most everything else is done).
First up here is a 'seat of ease' (you can sort of see the discharge tube/box on the underside of the grating):
View attachment 494369
View attachment 494370
Next, I fabricated something called a boomkin. A boomkin is part of the system that controls the lower corner of the fore course (the lower square sail on the foremast).
I used some leftover boxwood to begin the fabrication:
View attachment 494371
And then a knife and a plane to do some preliminary shaping:
View attachment 494372
Finally, I hand sanded the #$%^& out of it until it was as round and smooth as I could get it:
View attachment 494373
View attachment 494374
In the images above you can see the boomkin capsquare in place (just a supersized version of what you would find on a gun carriage). Here's a closer look:
View attachment 494378
Next up was a rather decorative block call a cat block. The cat block is a snatch block that sits on the cap rail (and, curiously, over/around one of the timberheads). Its fabrication is made somewhat more complicated by the fact that it curves to follow the turn of the rail):
First attempt:
View attachment 494375
Success:
View attachment 494377
View attachment 494376
View attachment 494379
Finally, I added the berthing rail which acts as a framework for some safety netting. I don't think I'll add the net itself, but I did want to include the rail on my model:
View attachment 494380
View attachment 494381
This is just round brass stock blackened with Casey's. I was somewhat surprised to see that the Casey's even blackened the solder joint I used to close the loop:
View attachment 494382
You have to love a product that works.
My attention will now turn to the waist area of the ship where I left some loose ends.
Regards, Peter
Really wonderful details, Paul. I love to watch the details on your little lady.
Thanks, guys. These are fun little projects that don't take three months to finish.You have added some really nice detailed parts, Paul. A pleasure for the eyes!
Regards, Peter
So clean your work. Do you take sanding down to very fine grits to get such a smooth surface ? Is it the fine wood you’re using or both ?
Thanks, Tony. I rarely sand past 220 - and never past 320. This non-European boxwood (it's probably Castello Boxwood) finishes very nicely.So clean your work. Do you take sanding down to very fine grits to get such a smooth surface ? Is it the fine wood you’re using or both ?
Yes ok understood.Thanks, Tony. I rarely sand past 220 - and never past 320. This non-European boxwood (it's probably Castello Boxwood) finishes very nicely.
- Joined
- Jan 9, 2020
- Messages
- 10,522
- Points
- 938

We are still in Semester 1 - school will close on the 17th of January for a two-and-a-half weeks' winter break for the Chinese New Year. I am working around the clock to see if I can return to the shipyard during that time. SOS is left to run in the background.Thank you, Heinrich. I assume the new semester will be starting up soon?
Busy busy!We are still in Semester 1 - school will close on the 17th of January for a two-and-a-half weeks' winter break for the Chinese New Year. I am working around the clock to see if I can return to the shipyard during that time. SOS is left to run in the background.


