Oh, by the way, my early trials suggest otherwiseYour understanding of anatomy will help you a lot when it comes time to carve your figurehead.
You are using an out of date browser. It may not display this or other websites correctly.
You should upgrade or use an alternative browser.
You should upgrade or use an alternative browser.
Kingfisher 1770 1:48 POF
- Thread starter dockattner
- Start date
- Watchers 144
- Joined
- Jun 17, 2021
- Messages
- 2,680
- Points
- 588

Wow! Extraordinary work! You set the bar very high, indeed.Hello Friends,
Thanks for all the likes from my last posting! The headworks were brought to a conclusion this week (well, the figurehead remains to be attempted, but most everything else is done).
First up here is a 'seat of ease' (you can sort of see the discharge tube/box on the underside of the grating):
View attachment 494369
View attachment 494370
Next, I fabricated something called a boomkin. A boomkin is part of the system that controls the lower corner of the fore course (the lower square sail on the foremast).
I used some leftover boxwood to begin the fabrication:
View attachment 494371
And then a knife and a plane to do some preliminary shaping:
View attachment 494372
Finally, I hand sanded the #$%^& out of it until it was as round and smooth as I could get it:
View attachment 494373
View attachment 494374
In the images above you can see the boomkin capsquare in place (just a supersized version of what you would find on a gun carriage). Here's a closer look:
View attachment 494378
Next up was a rather decorative block called a cat block. The cat block is a snatch block that sits on the cap rail (and, curiously, over/around one of the timberheads). Its fabrication is made somewhat more complicated by the fact that it curves to follow the turn of the rail):
First attempt:
View attachment 494375
Success:
View attachment 494377
View attachment 494376
View attachment 494379
Finally, I added the berthing rail which acts as a framework for some safety netting. I don't think I'll add the net itself, but I did want to include the rail on my model:
View attachment 494380
View attachment 494381
This is just round brass stock blackened with Casey's. I was somewhat surprised to see that the Casey's even blackened the solder joint I used to close the loop:
View attachment 494382
You have to love a product that works.
My attention will now turn to the waist area of the ship where I left some loose ends.
You are very kind, Peter. My thanks!Wow! Extraordinary work! You set the bar very high, indeed.
I have them but only wear them for very tiny things right now. Reading glasses and strong lighting most of the time.Thanks, Paul! One last question; I'm assuming you wear dental loupes for your magnification?
Hello Friends,
Things more important than ship modeling (blasphemy!) have kept me away recently. In recent days, however, I've been able to steal away a few hours here and there to work on the chains.
A photo essay capturing a few of the steps:
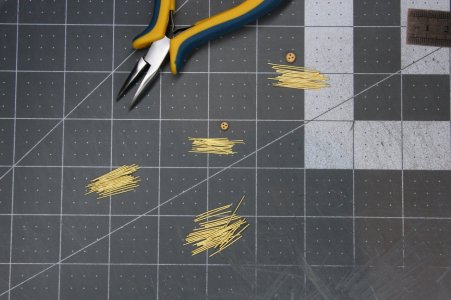
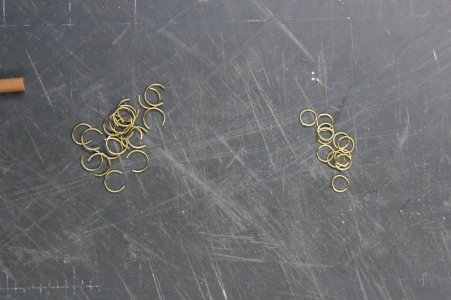
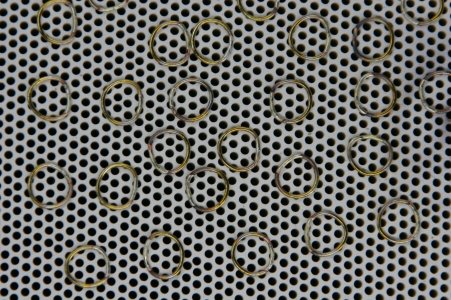
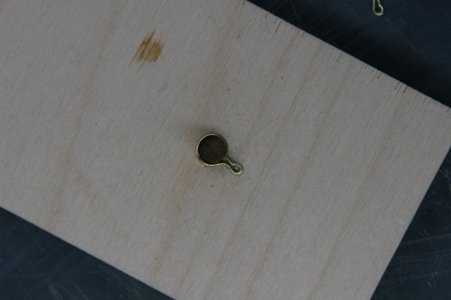
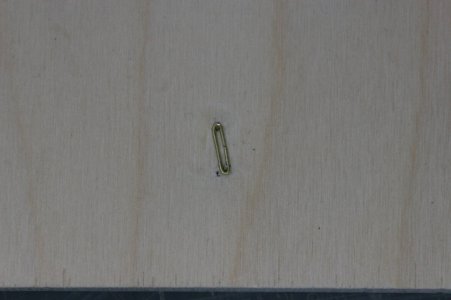
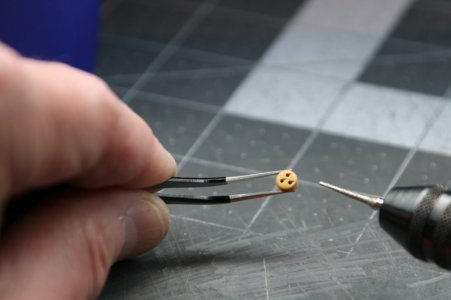
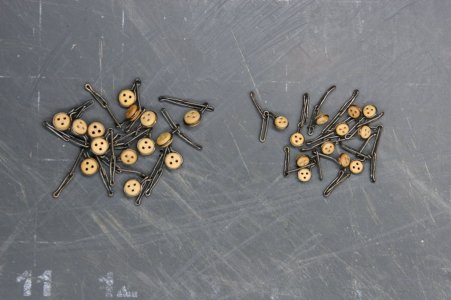
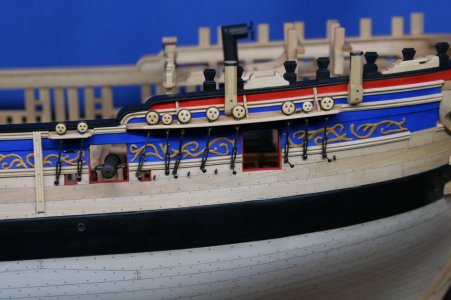
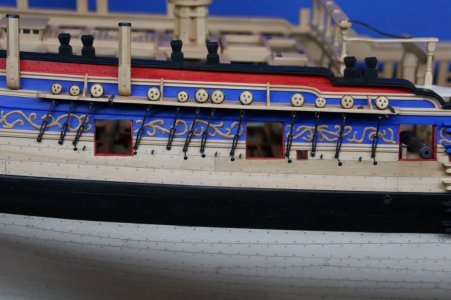
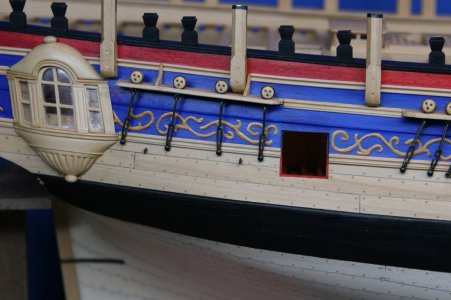
This remains a work in progress. The chains associated with the larger deadeyes still need something on the lower end called a preventer plate. About two weeks ago I ordered some dimensional brass strips from a supplier in Germany, and as of today my order is still in Germany. To that end I needed to move on to something else as I await the delivery.
That something else was an anchor.
The kit does include an anchor to be made from boxwood - and I suspect I could have managed to create something presentable out of wood. But I am always aware that I need to develop new skills, so I took a shot at making something from brass.
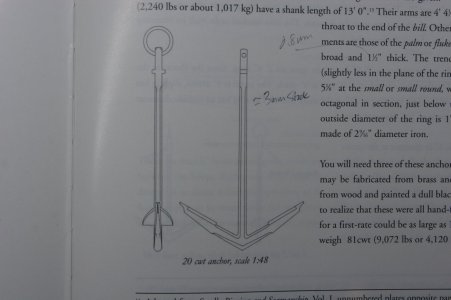
Here is a drawing from TFFM (Antscherl) showing a 20-cwt anchor (that's 2240 lbs. - just over a ton).
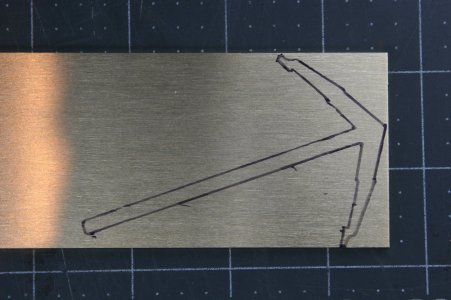
I transferred that image to a 3 mm thick sheet of brass and cut that out using a coping saw (fret saw?):
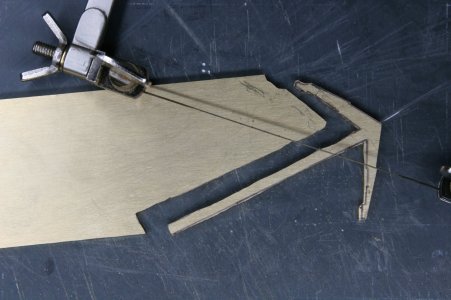
Since my saw work was pretty lousy (I also burned through about a dozen blades on this lark of a project), I needed to spend the next several hours cleaning this thing up:
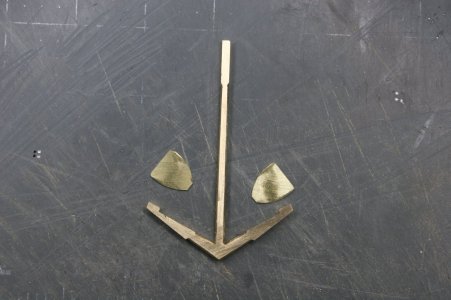
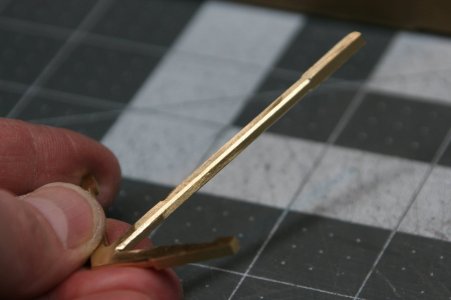
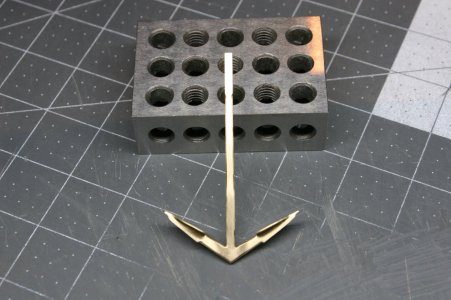
After a bit of soldering and some clean-up work:
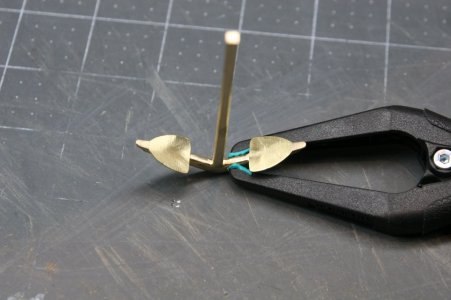
And that's it for now. My next opportunity at the workbench will take a shot at the anchor stock.
Things more important than ship modeling (blasphemy!) have kept me away recently. In recent days, however, I've been able to steal away a few hours here and there to work on the chains.
A photo essay capturing a few of the steps:


This remains a work in progress. The chains associated with the larger deadeyes still need something on the lower end called a preventer plate. About two weeks ago I ordered some dimensional brass strips from a supplier in Germany, and as of today my order is still in Germany. To that end I needed to move on to something else as I await the delivery.
That something else was an anchor.
The kit does include an anchor to be made from boxwood - and I suspect I could have managed to create something presentable out of wood. But I am always aware that I need to develop new skills, so I took a shot at making something from brass.
Here is a drawing from TFFM (Antscherl) showing a 20-cwt anchor (that's 2240 lbs. - just over a ton).

I transferred that image to a 3 mm thick sheet of brass and cut that out using a coping saw (fret saw?):


Since my saw work was pretty lousy (I also burned through about a dozen blades on this lark of a project), I needed to spend the next several hours cleaning this thing up:


After a bit of soldering and some clean-up work:


And that's it for now. My next opportunity at the workbench will take a shot at the anchor stock.
I must say that this went very well with your brass work, Paul. A very good looking anchor. Like the former mentioned Pippi quote: “I have never tried that before, so I think I should definitely be able to do that.” And it’s true again, just do it!But I am always aware that I need to develop new skills, so I took a shot at making something from brass.
The blackened chains are nicely lined and gives some extra contrasts and dimensions on the model.
Regards, Peter
Last edited:
Good morning Paul. Deadeyes, strops/ chains are a nice addition to an admiralty POF style model. I see many builds leave these off even on the enclosed side. Spot on. I was wondering why anyone would build a scratch anchor...........your shot at learning new skills look as if you are a learned anchor maker. Kudos. Cheers GrantHello Friends,
Things more important than ship modeling (blasphemy!) have kept me away recently. In recent days, however, I've been able to steal away a few hours here and there to work on the chains.
A photo essay capturing a few of the steps:
View attachment 496689
View attachment 496690
View attachment 496691
View attachment 496692
View attachment 496693
View attachment 496694
View attachment 496695
View attachment 496696
View attachment 496697
View attachment 496698
This remains a work in progress. The chains associated with the larger deadeyes still need something on the lower end called a preventer plate. About two weeks ago I ordered some dimensional brass strips from a supplier in Germany, and as of today my order is still in Germany. To that end I needed to move on to something else as I await the delivery.
That something else was an anchor.
The kit does include an anchor to be made from boxwood - and I suspect I could have managed to create something presentable out of wood. But I am always aware that I need to develop new skills, so I took a shot at making something from brass.
Here is a drawing from TFFM (Antscherl) showing a 20-cwt anchor (that's 2240 lbs. - just over a ton).
View attachment 496699
I transferred that image to a 3 mm thick sheet of brass and cut that out using a coping saw (fret saw?):
View attachment 496700
View attachment 496701
Since my saw work was pretty lousy (I also burned through about a dozen blades on this lark of a project), I needed to spend the next several hours cleaning this thing up:
View attachment 496702
View attachment 496703
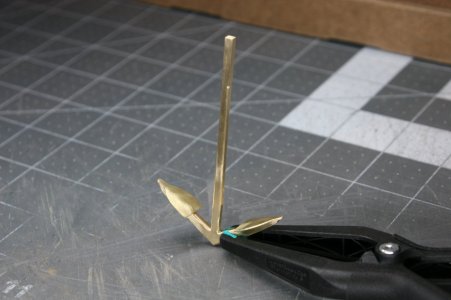
After a bit of soldering and some clean-up work:
View attachment 496704
View attachment 496705
View attachment 496706
And that's it for now. My next opportunity at the workbench will take a shot at the anchor stock.
Well-made chains and dead eye strops Paul but that anchor just wows me. Your welding/ soldering skills make it all possible.
Thanks, Heinrich. Lots of time spent with a file in my hand...Just super metalwork, Paul! The deadeye chains may be to die for but the piece-de-resistance must be that anchor! Lovely!
Thank you, Peter. I'm happy so far with the chains but wish they were done... Not as frustrating as rigging guns but fiddling with them was a bit too close to that experience. I think they were worth the effort though.I must say that this went very well with your brass work, Paul. A very good looking anchor. Like the former mentioned Pippi quote: “I have never tried that before, so I think I should definitely be able to do that.” And it’s true again, just do it!
The blackened chains are nicely lined and gives some extra contrasts and dimensions on the model.
Regards, Peter
Thanks, Grant! Sometimes an idea just gets in my head. I have seen anchors made successfully out of wood - but burnished brass should look good. We'll see if I can blacken it successfully - it will take a large vat of Brass Black (or maybe do it in halves?).Good morning Paul. Deadeyes, strops/ chains are a nice addition to an admiralty POF style model. I see many builds leave these off even on the enclosed side. Spot on. I was wondering why anyone would build a scratch anchor...........your shot at learning new skills look as if you are a learned anchor maker. Kudos. Cheers Grant
Hi Allan,The dead eye chain links look super. Are the pieces silver soldered or soft soldered? If the latter is there any particular temperature/brand/paste or chip solder that you prefer?
Thanks Paul
Allan
I have gotten to like silver solder paste that jewelers use. I'm at work now so when I get a chance I'll check to see which one I am using. I know this was done with the 'easy' temperature paste and a mini-torch. The challenge here was soldering pieces of different thicknesses...
Thank you, Daniel. The soldering was a bit scary because I was sure I was going to melt the flange (thinner) piece.Well-made chains and dead eye strops Paul but that anchor just wows me. Your welding/ soldering skills make it all possible.
Cutting the anchor from 3 mm brass sheet was super frustrating. For some reason a metal cutting blade on my scroll saw was just dulling almost immediately (proxxon blades so they weren't cheap ones) - plus it was crazy cold in my garage yesterday. I ended up using a hand saw and even then I could only get about a centimeter done before the blade broke (cheap blades in this case). My wife even came to check on my mental wellness at one point
 .
.Your perseverance paid off. I know when I am drilling into steel If I don't stop every few seconds and dip the bit into cold water the drill bit will very rapidly loose its cutting edge. Rapid heat buildup will dull any cutting edge.I ended up using a hand saw and even then I could only get about a centimeter done before the blade broke
My reaction to your recent posts mostly describes the fabrications of the chain and anchor. I can see, you are equally comfortable with the fretsaw and the butane torch. Once you start fabricating parts, you acquire that scratch-building bug and I already see signs of the one (the bug) in your blood. 
Despite some hidden challenges (we don't see or know), I can loudly say - you are enjoying fabricating parts, I guess the braces you made for your clients are always smiling!
Despite some hidden challenges (we don't see or know), I can loudly say - you are enjoying fabricating parts, I guess the braces you made for your clients are always smiling!
Well, it is true that I am having a lot of fun!My reaction to your recent posts mostly describes the fabrications of the chain and anchor. I can see, you are equally comfortable with the fretsaw and the butane torch. Once you start fabricating parts, you acquire that scratch-building bug and I already see signs of the one (the bug) in your blood.
Despite some hidden challenges (we don't see or know), I can loudly say - you are enjoying fabricating parts, I guess the braces you made for your clients are always smiling!
Everything progressing great!


