This is an interesting observation Uwe. While the kit includes CNC cut panels, all the parts are cut oversized, just like someone would do with a scratch build. To that end I am using a scratch builder's mindset. I just wish I could read and understand plans better. I honestly have a hard time figuring out what I am looking at half the time.My congratulations also from my side - it is looking very good - like a very good build scratch model, or a very very good build kit model
Defitely very good and accurate made -
You are using an out of date browser. It may not display this or other websites correctly.
You should upgrade or use an alternative browser.
You should upgrade or use an alternative browser.
Kingfisher 1770 1:48 POF
- Thread starter dockattner
- Start date
- Watchers 144
Neither am I getting any notifications of posts on this thread! Just catching up. Magnificent, Paul! Bravo!
Thank you Dave. I think you have this kit under your workbench. How about you bring it out and you can guide me? Fubbs can waitNeither am I getting any notifications of posts on this thread! Just catching up. Magnificent, Paul! Bravo!
 ...
...WOW, ABSOLUTELY WOW. VERY IMPRESSIVE WORK.
Jan
(Also not getting notifications, must be to much activity on SOS?)
Jan
(Also not getting notifications, must be to much activity on SOS?)
Good afternoon Paul…..I think your embarrassment is going to continue throughout this build - the kind comments are well deserved my friend. It is an incredible display of modelling excellence. Even “you owned this” does not cut it as far as these frames go. Cheers GrantGentlemen, I am rather embarrassed by your very kind comments.
Thank you kindly Jan, Grant!
Worth a Kindle purchase - it can't hurt! Thanks!
Paul, This is absolutely beautiful to look at! So clean my friend!
- Joined
- Sep 3, 2021
- Messages
- 4,907
- Points
- 688

Sodeju, this looks pretty close to perfect, Paul, my sincere compliments on a job well done.
You could probably point out a few nitty gritty details, not meeting your (rather high, IMHO) quality standards, but I think you've laid a pretty good foundation for your Kingfisher.
You could probably point out a few nitty gritty details, not meeting your (rather high, IMHO) quality standards, but I think you've laid a pretty good foundation for your Kingfisher.
Thank you very much for your nice posts, Bill and Johan!Sodeju, this looks pretty close to perfect, Paul, my sincere compliments on a job well done.Paul, This is absolutely beautiful to look at! So clean my friend!
You could probably point out a few nitty gritty details, not meeting your (rather high, IMHO) quality standards, but I think you've laid a pretty good foundation for your Kingfisher.
- Joined
- Jan 31, 2021
- Messages
- 565
- Points
- 353

Stunning work!I returned recently to the Lauck Street Kingfisher, and it was essentially more of the same: fitting frames - cutting fillers (recall that each of these must be customized because the space between the frames is not uniform) - and installing chocks at the tops of the frames (also requiring a custom thickness).
While the glacial pace made it hard to appreciate that progress was being made - in time the frames were all in place.
I won't declare victory quite yet because I still need to add the sills for the row-ports - and then there are chocks/spacers/fillers to be placed between every third frame or so along the vertical height of the frames (still need to study the plans better to understand that part).
But I was tired of framing and anything associated with framing so I spent a few days fairing the inside of the hull. I've said it before, but it bears repeating: sanding boxwood is no joke.
Anyway, having all the frames set is a significant milestone so I'll share some images.
View attachment 387459
View attachment 387460
View attachment 387463
View attachment 387464
It's difficult to take representative photos with a full size SLR camera so I took a few pictures with my cell phone:
View attachment 387471
View attachment 387472
View attachment 387473
View attachment 387474
View attachment 387470
Anyway, you get the idea...its faired on the inside...
Hello Paul,
I am super impressed by the wonderful work you have done over the past few days, weeks and months. Fantastic work, great line just wow.
I am super impressed by the wonderful work you have done over the past few days, weeks and months. Fantastic work, great line just wow.
Paul, Tobias, Shota - I wanted to thank you for visiting my build report and sharing such encouraging words. Much appreciated from each of you, my friends!
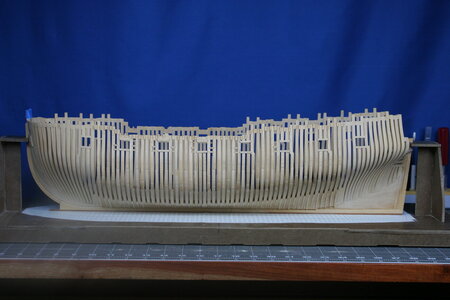
I returned recently to the Lauck Street Kingfisher, and it was essentially more of the same: fitting frames - cutting fillers (recall that each of these must be customized because the space between the frames is not uniform) - and installing chocks at the tops of the frames (also requiring a custom thickness).
While the glacial pace made it hard to appreciate that progress was being made - in time the frames were all in place.
I won't declare victory quite yet because I still need to add the sills for the row-ports - and then there are chocks/spacers/fillers to be placed between every third frame or so along the vertical height of the frames (still need to study the plans better to understand that part).
But I was tired of framing and anything associated with framing so I spent a few days fairing the inside of the hull. I've said it before, but it bears repeating: sanding boxwood is no joke.
Anyway, having all the frames set is a significant milestone so I'll share some images.
View attachment 387459
View attachment 387460
View attachment 387463
View attachment 387464
It's difficult to take representative photos with a full size SLR camera so I took a few pictures with my cell phone:
View attachment 387471
View attachment 387472
View attachment 387473
View attachment 387474
View attachment 387470
Anyway, you get the idea...its faired on the inside...
Such beautiful work Paul, so impressive.
- Joined
- Oct 9, 2020
- Messages
- 1,893
- Points
- 488

or for those familiar with the Marathon Man movie: "Is it safe?"don't think he would need one, Steph. When he graduated from dentistry school he was awarded the tool he is using today as part of his job and hobby as well
does it hurt? lol
lol
- Joined
- Jan 21, 2022
- Messages
- 716
- Points
- 353

Oh boy I missed such great achievement.I returned recently to the Lauck Street Kingfisher, and it was essentially more of the same: fitting frames - cutting fillers (recall that each of these must be customized because the space between the frames is not uniform) - and installing chocks at the tops of the frames (also requiring a custom thickness).
While the glacial pace made it hard to appreciate that progress was being made - in time the frames were all in place.
I won't declare victory quite yet because I still need to add the sills for the row-ports - and then there are chocks/spacers/fillers to be placed between every third frame or so along the vertical height of the frames (still need to study the plans better to understand that part).
But I was tired of framing and anything associated with framing so I spent a few days fairing the inside of the hull. I've said it before, but it bears repeating: sanding boxwood is no joke.
Anyway, having all the frames set is a significant milestone so I'll share some images.
View attachment 387459
View attachment 387460
View attachment 387463
View attachment 387464
It's difficult to take representative photos with a full size SLR camera so I took a few pictures with my cell phone:
View attachment 387471
View attachment 387472
View attachment 387473
View attachment 387474
View attachment 387470
Anyway, you get the idea...its faired on the inside...
Congratulations my friend
Looks great Paul! This appears to be a very promising model. Will you miss the rigging? 

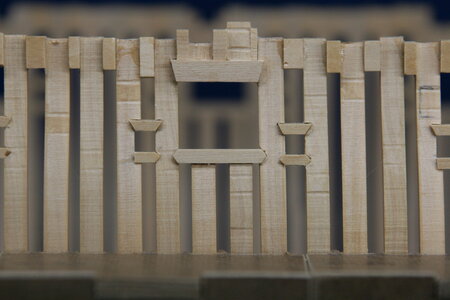
Roughed in sweep ports (16x of the little ones) and their upper and lower sills:

And then something really cool happened...

The sides of the framing jig are removable! Now I can place the chocks/spacers that run along the vertical height of alternating frame pairs. Very clever design by Mr. Hunt (@lauckstreet)!

And then something really cool happened...

The sides of the framing jig are removable! Now I can place the chocks/spacers that run along the vertical height of alternating frame pairs. Very clever design by Mr. Hunt (@lauckstreet)!
Last edited:


