Krick “Alert” U.S. Cutter, 1/25 scale

Take a look at this photo of the Alert built long time ago by Dirk


More details of the build you can find here in the other german buidling log, unfortunately not all photos are working any more
 
Take a look at this photo of the Alert built long time ago by Dirk


More details of the build you can find here in the other german buidling log, unfortunately not all photos are working any more
Uwe thank you for the great info. That will be a great help when I start rigging. I'm still trying to figure out how to rig the bowsprit downstays and where they attach to the hull. But that's a problem for another day.

Jan
 
The drafted plan versus reality:

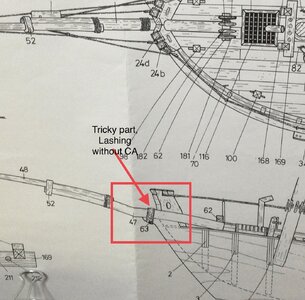
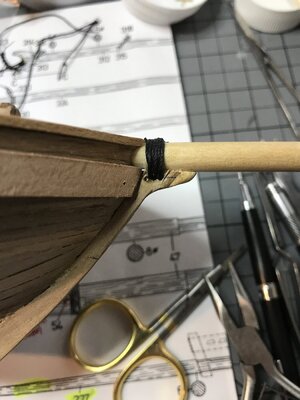
The plans show where the bowsprit is lashed to the hull. I thought that would be a simple chore. BUT, the Stem has a slight curve at bottom and try as I might I could not keep the lashing tight without resorting to glueing.

EF71C41C-0B21-44AA-B16B-FC96D5ACE202.jpeg

I decided on a simple solution. A pencil line at a slight angle just above the curved part of the Stem, provided a guide for drilling connecting holes. A couple of quick cuts with a #11 blade and viola I had a slot to pass the lashings through.

A5F4F37D-3917-455F-A2B0-9318448F14B0.jpeg

A little cosmetic work and I’ll call it good.

Jan
 
Hi Jan - I'll swap your cosmetic work for mine! ROTF
Hi Heinrich,

OK, Send it. By the time it gets here you'll have all the frames done on the Bluejacket, by the time I ship it back to you, you'll be on another project.:D:D

Seriously, it looks like a BIG problem for your build, but give it couple of days and the idea bulb will flash. Only you will ever know that there was a bit of a problem for that build step.

Jan
 
A minor experiment:

I borrowed a idea from Peter Voogt. He used a drafting pencil in part of his build. I wanted to simulate black iron nails holding down the ring for the carronade. I filled a .5mm hole with pieces of .5mm lead from my old drafting pencils.

DB091CC0-E1D4-47CA-8247-10033D39B11D.jpeg

Compared to the brass nail the pencil lead fillings look pretty good.

Jan
 
Knots:

I think everyone but me knows how to tie all those nautical knots, so I had to do little research. I found this website, there are a lot of ads but the gif presentation of how the knots are tied is great .

How to tie knots

Click on a knot title and watch as the knot is tied.

Jan
 
The lead pencil iron nails indeed look great Jan! And by the way - I have no idea how to tie any nautical knot. :)
 
Knots:

I think everyone but me knows how to tie all those nautical knots, so I had to do little research. I found this website, there are a lot of ads but the gif presentation of how the knots are tied is great .

How to tie knots

Click on a knot title and watch as the knot is tied.

Jan
Thanks for this link!

I did not realize there were sooooo... many knots. lol.
 
Last edited:
Wow what a day:

Today at wakeup it was snowing, an hour later it was sleeting and now its raining with the temperatures expected to drop below freezing by noon. So a good excuse to be in the shipyard.

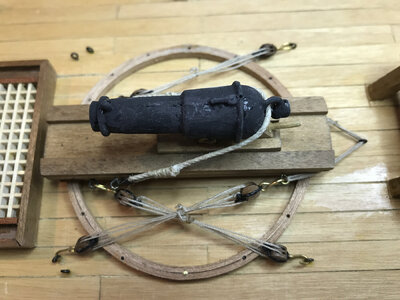
I started rigging the gun tackle for the Carronade, I noticed that the build plan had a slight omission.

View attachment 213844

The plan doesn't show any way to attach the rope to bottom of any of the blocks. Not a problem currently but would have been if I was just starting out on my first ship building adventure.

View attachment 213845

It took a couple of false starts but I managed to get a block set I liked. Only three more to do.

Jan

I'm finding a lot of the blocks on my build have the same issue, no tie off shown.
Only, I find out after I've installed the blocks and ready to rig :mad:.

On my next build I'll definitely be on the look out for this issue.

That carriage turn piece looks great!
 
I'm finding a lot of the blocks on my build have the same issue, no tie off shown.
Only, I find out after I've installed the blocks and ready to rig :mad:.

On my next build I'll definitely be on the look out for this issue.

That carriage turn piece looks great!
Hi Rowboat,

It’s a great kit, with good material. The build manual is in German, but there is also a two page English portion. The plans are a great for the most part but some portions are definitely sketchy. It’s been a great learning experience so far.

Jan
 
Masts:

This will be my third attempt of tapering and preparing masts. I’ve scoured the Forum, Internet and You Tube and frankly I still have no idea of how to go about the process. So it’s time for the master builders to layout their techniques, keeping in mind that I have only basic tools available.

Jan
 
I am joining you to watch this tutorial. :)
 
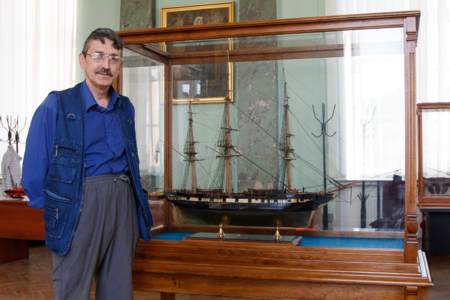
Here you go, Jan! You are asked for the master builders to step up. Meet the very famous Russian master Dr. Mike (Mikhail Bezverjnij) and his way of making masts.


1614389069048.png
Михаил Безверхний и его "Андромаха" Mihail Bezvexnij and his ship model Andromaha 2019
 
A minor experiment:

I borrowed a idea from Peter Voogt. He used a drafting pencil in part of his build. I wanted to simulate black iron nails holding down the ring for the carronade. I filled a .5mm hole with pieces of .5mm lead from my old drafting pencils.

View attachment 214483

Compared to the brass nail the pencil lead fillings look pretty good.

Jan
Hi Jan.
Another fine solution for the pencil!
I am glad I have posted. Sharing ideas!
Regards, Peter
 
Here you go, Jan! You are asked for the master builders to step up. Meet the very famous Russian master Dr. Mike (Mikhail Bezverjnij) and his way of making masts.


View attachment 216741
Михаил Безверхний и его "Андромаха" Mihail Bezvexnij and his ship model Andromaha 2019
Wow, that is a great video. Very impressive.

Jan
 
ARGH, the Masts:

There have been a few attempts at getting the masts right. all except for one have wound up as kindling, but I'm learning. I had to stop for a bit because of the Covid-19 shots. My left arm was just a wee bit sore first from the first dose and then again after the second dose.


AC18AF5D-3FA5-4938-9FEB-79AAF5629F3D_1_201_a.jpeg

My first couple attempts to shape a mast was using a mini plane to taper the dowel. That was a disaster, no amount of sanding provided a nice smooth mast and resulted in a trip to the Hardware store for new dowels. Having watched different videos showing how "EASY" this process was I also bought a couple square pieces the right length and once again used the mini plane to shave off the square edges and taper the dowel, as before the final sanding proved that the kindling pile had just gotten bigger. After my third trip to the hardware store the clerk indicated they had been selling a lot of these type of dowels recently. :D. Good thing I had to mask up to enter the store. :D

The above is the latest effort. I settled on moving my drill press so the chuck would clear end of my work bench, taped the end of the dowel, shucked it into the drill press and used different grits of sandpaper to get the taper. Messy and dusty, heavy duty gloves and N95 mask helped. I think this process will work, besides I think I have enough kindling.:cool:

Jan
 
Back
Top