Krick “Alert” U.S. Cutter, 1/25 scale

Hi Jan,
Thanks for the tip on the Tie-Fast. How are the helping hands working out? I like the look of those flexible arms. Thanks your making part with some cash!
My granddaughter would go nuts with that Yoda, cool project!
 
Hi Jan,
Thanks for the tip on the Tie-Fast. How are the helping hands working out? I like the look of those flexible arms. Thanks your making part with some cash!
My granddaughter would go nuts with that Yoda, cool project!
@BigMike. I"m a big LEGO fan. As I mentioned in an earlier post "Yoda" was a birthday present and a great distraction from my ship building. I've done another bunch of blocks using the Tie Fast tool. took a bit of getting used to, but it's working out quite well. I'm in the process of doing the anchor ropes on my Alert and will use the tool for the sizing/whipping? of those ropes. If I'm not embarrassed by the outcome I'll post the pictures. ;)

Jan
 
STUMPED:

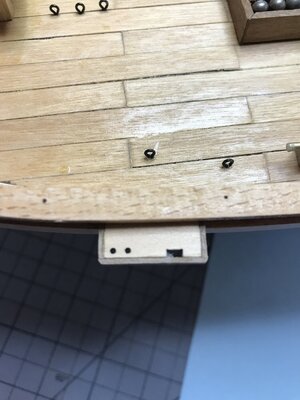
I've gone over all the plans in the kit looking for information on how the deadeye is attached to channel.

392095ED-7EDF-4707-8E99-B6408BCCFC59.jpeg

It should be simple enough. There are only four deadeyes, one per channel. BUT..........

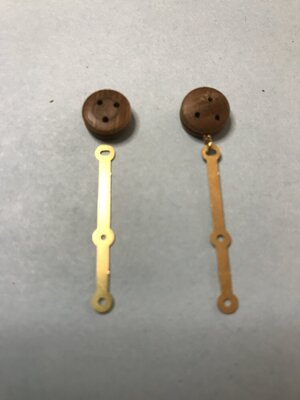
6C1520CB-B3B6-4BE5-ADBC-5B6BDD28CD42.jpeg

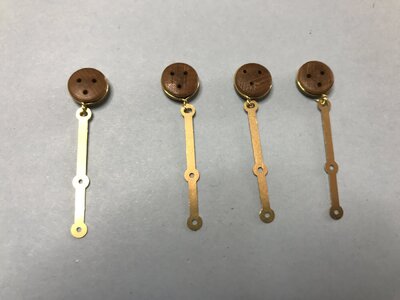
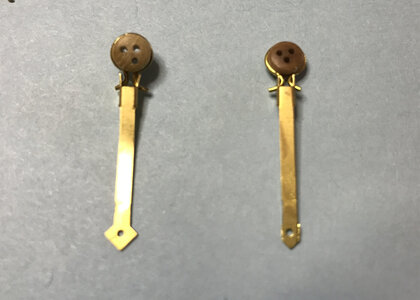
the deadeyes face out in the channel and the strap fits through the channel and is fastened to the hull. The left combo in the picture is what I'm working with. The right combo has an eye hook mounted in the deadeye and is connected to the strap. I have to say that combination doesn't exactly "float my boat".

I'm open to kibitz, suggestions, etc.

Jan
 
Last edited:
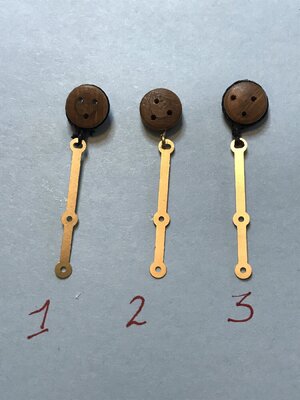
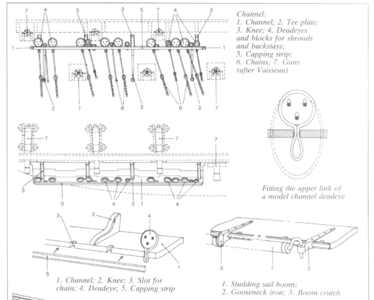
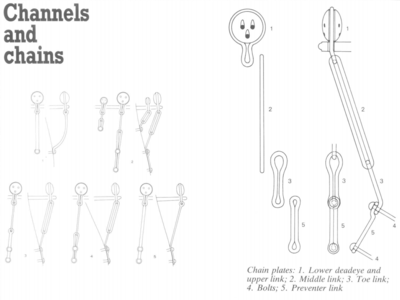
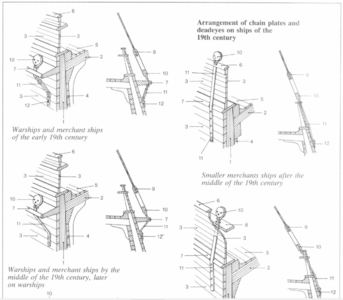
Hey, Jan. I am going with # 2. Bottom deadeyes always fixed to chainplates using metal and not thread. There are many variants of how they fixed. Take a look this image from Wolfram Mondield book

1618266027415.png

1618266102467.png

1618266154914.png

*** The images are from the book, and for educational purpoce only. Please do not redestribute.
 
Hey, Jan. I am going with # 2. Bottom deadeyes always fixed to chainplates using metal and not thread. There are many variants of how they fixed. Take a look this image from Wolfram Mondield book

View attachment 226946

View attachment 226947

View attachment 226948

*** The images are from the book, and for educational purpoce only. Please do not redestribute.
Thanks, that is great stuff. I do have that book if you want to edit images.
Now I also know what that strap is called ==Chainplate??

I guess my problem is that the "chainplate" supplied has a loop at the top that wants to be parallel with the deadeye. The only way that will work is something similar to # 2 example. Funny can't find anything on that combo on the plans or in the instructions.

Jan
 
Last edited:
I guess my problem is that the "chainplate" supplied has a loop at the top that wats to be parallel with the deadeye. The only way that will work is something similar to # 2 example. Funny can't find anything on that combo ion the plans or in the instructions.
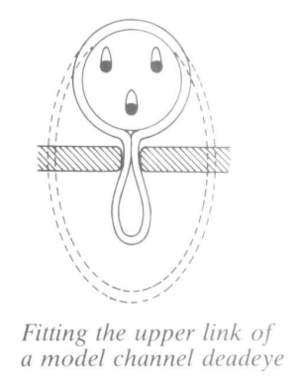
You can try to make a brass loop like this. Then sqeeze the end to form a plate, incert in to the loop from chaimplate and bend towards the back

1618274382146.png
 
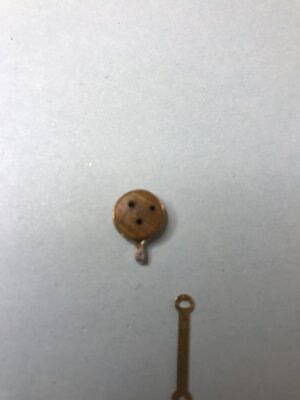
My effort. A wire twisted around the deadeye with enough of a lead left over to form a hook to attach the chainplate. I think this will work.
Your effort has been acknowledged! Depending on how much satisfaction you have with this method, I have another way of doing it (more authentic). Let me know if you interested, and will draw the sketch
 
Your effort has been acknowledged! Depending on how much satisfaction you have with this method, I have another way of doing it (more authentic). Let me know if you interested, and will draw the sketch
@Jimsky,

I’d be delighted to have more input. My solution is OK, BUT it’s not the classiest method. @ 1/25 scale it looks :rolleyes::rolleyes::rolleyes::rolleyes:. I think I need to try upgrade my soldering skills to get the “keyhole” shape you have in your sketch.

Jan
 
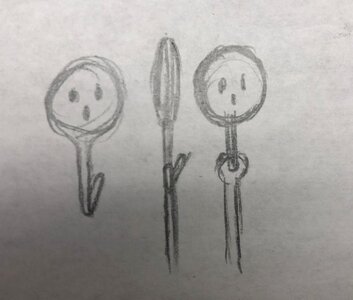
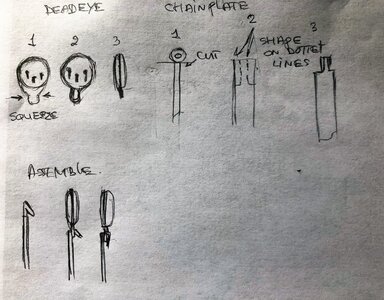
I hear you, Jan. So, here is the second method, The Idia to cut the top round part and shape the chainplate as shown in the sketch. This is actually one of the standard methods using to attach deadeye to chainplate.

IMG_1958(1).jpg
 
I hear you, Jan. So, here is the second method, The Idia to cut the top round part and shape the chainplate as shown in the sketch. This is actually one of the standard methods using to attach deadeye to chainplate.

View attachment 227391
That looks like an interesting solution. I'll give it a try.

B2DF57F9-16A3-4557-B170-7E3184929443_1_201_a.jpeg

Something similar to these would also be good. These are 1/50 scale, I was going to use them on my Enterprise build.


Jan
 
Last edited:
The Deadeye - Chainplate Experiment.

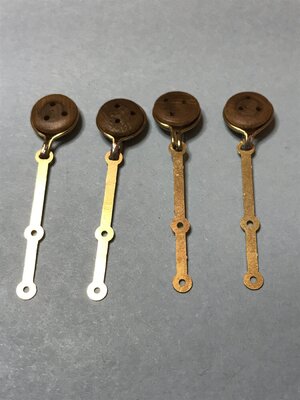
There are only four deadeyes that will connect to chainplates. The previous posts show some of my feeble efforts to do that. Jimsky has been a big help with sketches and advice. I think I've finally got it.

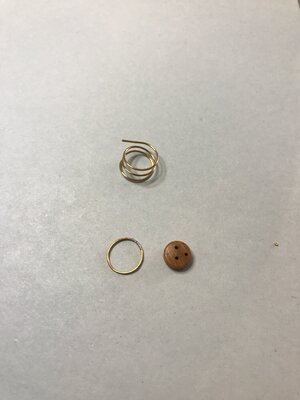
First thing to do was to create the strop, a piece of wire formed in a circle about one and half times bigger than the 9mm deadeye. To close the circle I dapped the ends with a bit of soldering paste and a spot solder.

67FA2800-E4D8-4E83-870D-507A7D9E1E76.jpeg

Everything looked good until I pressed the circle on the deadeye and tried to form a loop at the bottom to hold the chainplate. I wound up with two problems. One, the solder joint broke and two, the loop wasn't long enough.


D08459D2-E978-44FE-9C04-3D31B799B14D.jpeg

With that lesson learned it was on to try number ???

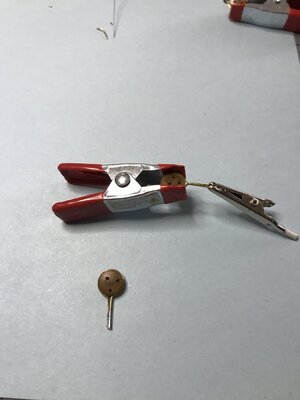
This time I made the loop around the deadeye and left a much longer section for the bottom loop. The picture shows the jig holding the second deadeye before soldering and the first that needs to be trimmed before the chainplate is attached.

A337D1B9-F370-4B52-BA01-DFF9D7533B52.jpeg

It took bit of time to get to this point and the process evolved from Jimsky's ideas.

Jan
 
Back
Top