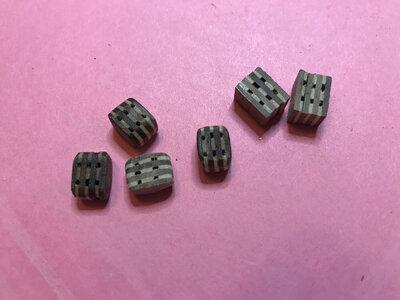
Krick “Alert” U.S. Cutter, 1/25 scale

Blocks, the Jan version:

It's a short/long story. The material that I had ordered to do my DIY blocks never arrived even though I had several e-mails stating that it was delivered. The vendor was kind enough to provide a refund, so I reverted to my initial test set of blocks and cobbled together enough odds and ends to make some final ones.

The start....

52F0B5DC-D3D7-4BAD-9E15-DEAE38C862A9_1_201_a.jpeg

Then...

9AEBE617-8DF5-4B4F-80FB-E7015D539F1E.jpeg

Put all the pieces together...

C519577A-D913-4362-9345-CCAE2FED294E.jpeg

One block done out of the four needed

FADCE78F-1468-446E-9FB5-7BC7877D0E23.jpeg

Jan
 
744BF0FF-B250-4614-AB63-903E0F5BF64B_1_201_a.jpeg

It took a few tries but I finally have four blocks for the Mainstay that are acceptable. But now I have a new problem. The black 1.75mm thread for the Mainstay wasn't included in the kit. I've ordered that size and once again must wait for the delivery.

Jan
 

Attachments

  • 744BF0FF-B250-4614-AB63-903E0F5BF64B_1_201_a.jpeg
    744BF0FF-B250-4614-AB63-903E0F5BF64B_1_201_a.jpeg
    201 KB · Views: 8
First of all, thank you’s for all the likes and comments.

Seems that I’m spending a lot of time waiting for ordered parts to arrive so I can continue the build. I’ve temporarily switched gears and started some more bits and pieces on the hull.

The rails at the stern took “several” tries to bend into their proper shape.

9F56AEEA-66BF-438B-9E31-E2DDDEC37790.jpeg


My next quandary is how to close the tops of twenty two tubes that hold the eye bolts. The plans show the the tube tops neatly crimped after the eye bolts are placed in the tube.

0CD3BF30-F0C1-47D0-A435-48DD05B8F6B6.jpeg

I’ve tried needle nosed pliers, but the “crimp” is uneven and the area winds up with marks from the plier jaws.

Jan
 
Last edited:
Blocks Continued:

Seems I'm stuck on this part of the build. I've read my way through many of the posted remarks on how to rig blocks and I'm currently in the "invent" mode trying to perfect making hooks and keeping the rigging on the blocks.

My tries so far.

3162F8AB-1BD1-4C9F-9E94-17F69CD4105D_1_201_a.jpeg

Starting from the left, the hook, a closed loop of rigging thread and a block. In then middle, the loop and hook added to the block. On the right the completed block rigging. Hopefully with practice my hooks will get better.

Jan
 
@Jimksy.

Indeed my attempts are on the poor side. But I hope by the time I finish the 30 plus hooks required I'll have some better examples. This is all new to me and I'm finding that some of the kit supplied material,( ie. eyebolts, blocks, rigging thread), is not the material I want to use for this build. The rigging thread that I ordered at the beginning of this week arrived in todays mail. I now have the 1.25, 1.5 and 1.75mm Black to do the standing rigging.

Jan
 
DIY Hooks for Blocks:

There are a number blocks that require hooks. So, today I've been experimenting with bending wire to get an idea of how to make those.

The first results:

BA148FD1-6DE3-42F0-AD34-53A07F96D1EF_1_201_a.jpeg

The more I make the better they seem to look. Looking at the plans there are two if not three different sizes required. My plan is to make the hooks as I need them.

Jan
 
Looking good Jan! You're a scratch builder now!
Paul, thanks for the compliment, but I’m still a long way from scratch building. I think I’ve learned a lot working on the last three completed builds. I’m now in the “ I think I can do better than that stage”. The current plan is to finish the Alert by next month and resume work on the Duyfken. I have two other kits on the shelf, a Sopwith Pup and the Chaperon sternwheeler. But other things néed my attention :cool: the pool is open, my flower gardens are blooming and need upkeep and the lawn refuses to stay at the height that it is mowed. Shipyard work time will only be during inclement weather:D:p

Jan
 
Back
Top