-

Win a Free Custom Engraved Brass Coin!!!
As a way to introduce our brass coins to the community, we will raffle off a free coin during the month of August. Follow link ABOVE for instructions for entering.
-

PRE-ORDER SHIPS IN SCALE TODAY!
The beloved Ships in Scale Magazine is back and charting a new course for 2026!
Discover new skills, new techniques, and new inspirations in every issue.
NOTE THAT OUR FIRST ISSUE WILL BE JAN/FEB 2026
You are using an out of date browser. It may not display this or other websites correctly.
You should upgrade or use an alternative browser.
You should upgrade or use an alternative browser.
Krick “Alert” U.S. Cutter, 1/25 scale
- Thread starter Pathfinder65
- Start date
- Watchers 23
-
- Tags
- krick u.s.cutter alert
Hi Heinrich,Those hooks and blocks look right at home on the ship. Way to go Jan!
I do like them, lots of fiddling involved to get that far. I'm looking forward to doing the rigging.
Jan
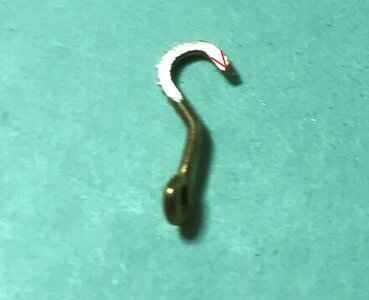
The left one is really the best - maybe you could try to make also a peak at the end (my red lines) - a lot of work, I know, but at the end it will look more realisticDIY Hooks for Blocks:
There are a number blocks that require hooks. So, today I've been experimenting with bending wire to get an idea of how to make those.
The first results:
View attachment 233809
The more I make the better they seem to look. Looking at the plans there are two if not three different sizes required. My plan is to make the hooks as I need them.
Jan
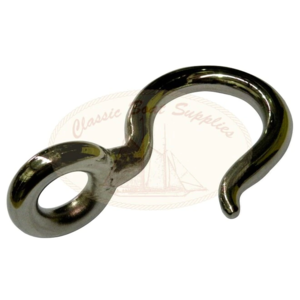
Great idea Uwe, I’ll try that on the next set, shouldn’t be to hard to do.The left one is really the best - maybe you could try to make also a peak at the end (my red lines) - a lot of work, I know, but at the end it will look more realistic
View attachment 234103 View attachment 234104
Jan
The Confession:
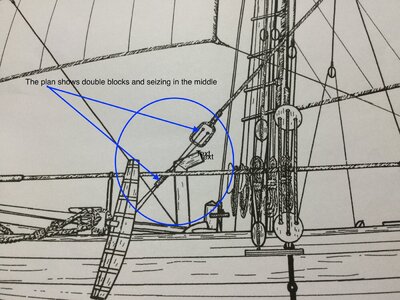
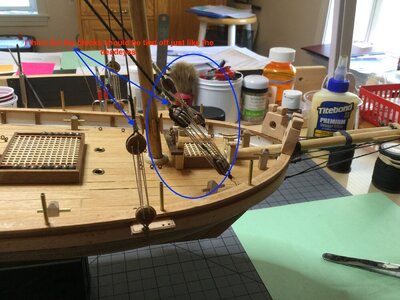
I‘ve started the standing rigging by working around the Main mast first. I rigged the Main Stays and Deadeyes according to the kit plans. The next step was to move on to rig the Fore Mast. Looking at the rigging plan I noticed that those Stays pass through the Bowsprit and tie off to the hull. WELL, THATS A PROBLEM. BIG NOVICE BUILDER ERROR. WEEKS AGO WHEN THE BOW SPRIT PORTION OF THE BUILD WAS DONE, A LOT OF TIME WAS SPENT FOLLOWING THAT BUILD PLAN AND “ADDING THE RIGGING” shown on THAT BUILD PLAN. So yesterdays “EUREKA “ moment occurred when I was looking at the actual rigging plan, that I noticed the previous Bowsprit rigging was wrong.
So I have to confess. ——- Uwe my friend, I think I flunked the “READING ALL THE PLANS” class.——-
The first part of solving this problem was to remove the “Before Bowsprit” rigging. Clean up my work bench. Turn out the light and head to the garage to pot some Geraniums.
To be continued.
Jan
Rainy Day Blues:
Well we've gone from sun and 70's to rainy, cold and highs of almost 50. I managed to get most of my outside chores done before the weather changed. So with the Admirals blessing I'm in the boatyard. One of the things I've been toying with was my DIY block spinner. My initial effort was to line an old pill bottle interior with sandpaper and spin it on my drill press to round the blocks more than the way they are supplied in the kit. That effort yielded a less than satisfactory result because the spinner was chucked in the drill press and the blocks were just sliding around in a horizontal plane. So now the DIY spinner been modified with four paddles added to the shaft, a bushing added to the cap( because of the friction of the rod rotating in the cap was making the cap hole bigger). Test number one was using typical 10mm triple blocks.
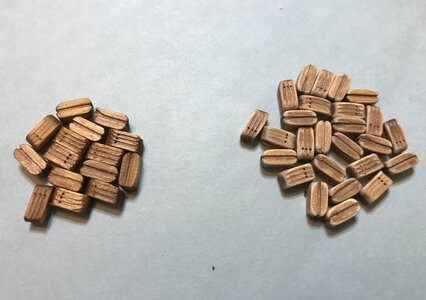
The blocks on the left are as is from the Vendor, the blocks on the right are the result of 2 to 3 min spin. The spin was done using a cordless drill on high speed and with the spinner in the horizontal position. Experimenting with the spin time will probably result in much better looking results.
The Spinner unit Version #2.
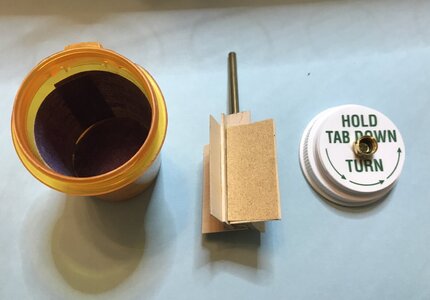
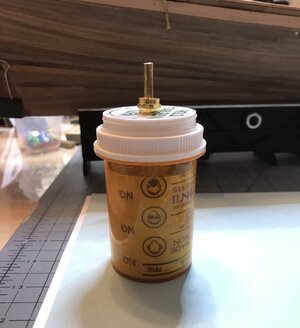
You may want to laugh at my components but I like finding uses for the odd stuff in my "Stash pile".
The canister is an old pill bottle, the paddle wheel core is made up as a box from four pieces of 10mm X 1.5mm boxwood, the four paddles are 55mm X 2mm X 1.5mm boxwood covered with 220 grit sandpaper, the rod is 5mm X 65mm piece of brass epoxied into the staged box. I used and old Video cable connector for the bushing.
Now it's on to next project that's on my rainy day list.
Jan
Well we've gone from sun and 70's to rainy, cold and highs of almost 50. I managed to get most of my outside chores done before the weather changed. So with the Admirals blessing I'm in the boatyard. One of the things I've been toying with was my DIY block spinner. My initial effort was to line an old pill bottle interior with sandpaper and spin it on my drill press to round the blocks more than the way they are supplied in the kit. That effort yielded a less than satisfactory result because the spinner was chucked in the drill press and the blocks were just sliding around in a horizontal plane. So now the DIY spinner been modified with four paddles added to the shaft, a bushing added to the cap( because of the friction of the rod rotating in the cap was making the cap hole bigger). Test number one was using typical 10mm triple blocks.

The blocks on the left are as is from the Vendor, the blocks on the right are the result of 2 to 3 min spin. The spin was done using a cordless drill on high speed and with the spinner in the horizontal position. Experimenting with the spin time will probably result in much better looking results.
The Spinner unit Version #2.


You may want to laugh at my components but I like finding uses for the odd stuff in my "Stash pile".
The canister is an old pill bottle, the paddle wheel core is made up as a box from four pieces of 10mm X 1.5mm boxwood, the four paddles are 55mm X 2mm X 1.5mm boxwood covered with 220 grit sandpaper, the rod is 5mm X 65mm piece of brass epoxied into the staged box. I used and old Video cable connector for the bushing.
Now it's on to next project that's on my rainy day list.
Jan
Last edited:
Hi Heinrich,There is certainly no lack of innovation in the Pathfinder Shipyard. I can't wait to see what the other "rainy day projects" entail.
Indeed, there is always something in the innovation Pathfinder Shop. Today’s rainy day session will be micro electronics for my railroad hobby. The “Alert” rigging crew has been temporarily laid off due to a lack of work materials. I’ve ordered Brass rods in various diameters to make additional hooks and eye bolts. The kit supplied eye bolts are OK at first glance but could be better
Reading the various forum threads, watching the master builders progress and their examples is truly an inspiration to try for a better outcome than just building a “kit” as is.
Jan
- Joined
- Jan 9, 2020
- Messages
- 10,566
- Points
- 938

Jan is it is admirable to see you are taking your aspirations to yet another level.  I wouldn't have expected anything else from my friend! The Haarlem crew is also in limbo at the moment, but hopefully not for too long.
 I wouldn't have expected anything else from my friend! The Haarlem crew is also in limbo at the moment, but hopefully not for too long.
Hi Jan,
I, too, have observed your interest in upgrading the kit and working toward a better build. Bravo! At your scale the effort is merited and will pay huge dividends.
I, too, have observed your interest in upgrading the kit and working toward a better build. Bravo! At your scale the effort is merited and will pay huge dividends.
What a great gift:
My neighbor makes custom jewelry and noticed my feeble attempts at making hooks and eyebolts. So...
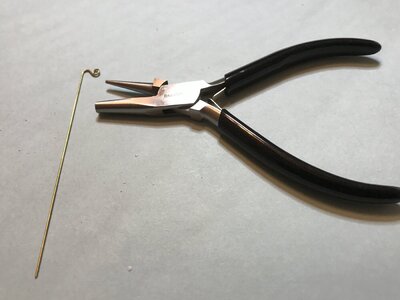
this fine tool was passed on to me. Don't know the proper name for it, but I've been going crazy making loops, circles and eyebolts. The loop is in a .75mm Brass rod from my "spare stuff stash". Much better than using rounded needle nose pliers. I'm looking forward to when my Brass rod order finally comes.
Jan
My neighbor makes custom jewelry and noticed my feeble attempts at making hooks and eyebolts. So...

this fine tool was passed on to me. Don't know the proper name for it, but I've been going crazy making loops, circles and eyebolts. The loop is in a .75mm Brass rod from my "spare stuff stash". Much better than using rounded needle nose pliers. I'm looking forward to when my Brass rod order finally comes.
Jan
Argh Humidity Calamity:
After four days of cold wet weather I noticed this. The Wale on both side of the hull is separating and buckling.
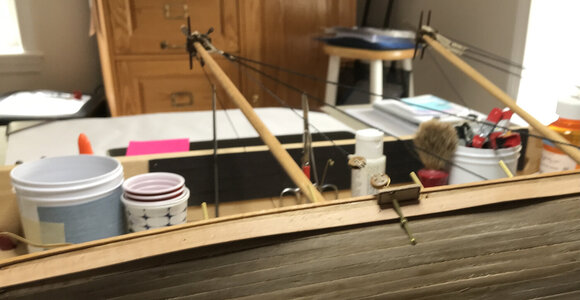
I have no clue what type of wood the Wales are. But they have buckled and separated from the planking underneath. I'm contemplating drilling small pilot holes and then resetting the Wales with glue and PINS.
Jan
After four days of cold wet weather I noticed this. The Wale on both side of the hull is separating and buckling.

I have no clue what type of wood the Wales are. But they have buckled and separated from the planking underneath. I'm contemplating drilling small pilot holes and then resetting the Wales with glue and PINS.
Jan
Last edited:
Ooohhh. That is not good. How do I get my Chinese glue to you?
Jan
It's always something isn't it, Jan?
That is true, MR. Murphy and his buds the "Gremlins" show up at the oddest time.It's always something isn't it, Jan?
I think this will be an easy fix, there isn't much in the way of the replacements. I would be very interested to know what type of wood this is.
Jan
I would be interested to know what type of glue did you use for the wales?

