-

Win a Free Custom Engraved Brass Coin!!!
As a way to introduce our brass coins to the community, we will raffle off a free coin during the month of August. Follow link ABOVE for instructions for entering.
-

PRE-ORDER SHIPS IN SCALE TODAY!
The beloved Ships in Scale Magazine is back and charting a new course for 2026!
Discover new skills, new techniques, and new inspirations in every issue.
NOTE THAT OUR FIRST ISSUE WILL BE JAN/FEB 2026
You are using an out of date browser. It may not display this or other websites correctly.
You should upgrade or use an alternative browser.
You should upgrade or use an alternative browser.
Krick “Alert” U.S. Cutter, 1/25 scale
- Thread starter Pathfinder65
- Start date
- Watchers 23
-
- Tags
- krick u.s.cutter alert
I would not have thought about boring out the canon. Great idea, looks good.
Another Tool:
I have to admit I didn’t know I needed this tool.
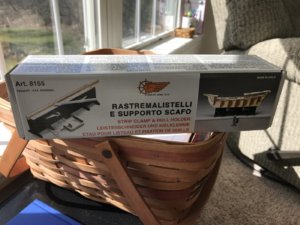
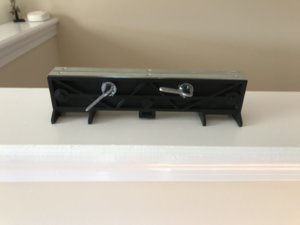
But it became obvious while trying add a slight taper to .5mm X 5mm planks that I needed someway to hold the planks. I tried holding the plank down and using a straight edge and a sharp blade, but the taper is so fine that I managed to ruin a few pieces.
The object of the planking exercise is to plank the top of the cabin.
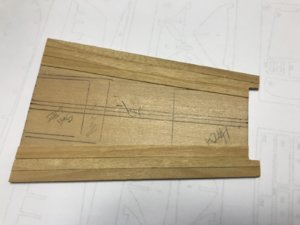
The tapering results using the tool and a mini plane are much better.
Jan
I have to admit I didn’t know I needed this tool.


But it became obvious while trying add a slight taper to .5mm X 5mm planks that I needed someway to hold the planks. I tried holding the plank down and using a straight edge and a sharp blade, but the taper is so fine that I managed to ruin a few pieces.
The object of the planking exercise is to plank the top of the cabin.

The tapering results using the tool and a mini plane are much better.
Jan
Kurt Konrath
Kurt Konrath
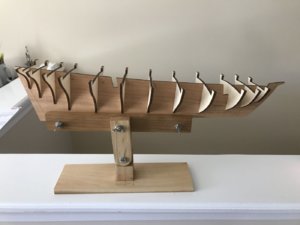
They also work as shown to hold the false keel of ship while working on bulkheads and decks
Kurt Konrath
Kurt Konrath
Your holder looks very good, and probably costs less.
Maybe we can get our staff or moderators (Donnie) to start a new section on forums called something like "Tools of the Trade" with a store bought and home built categories.
Then all of you very experienced members can share experience of what tools are good, not so good, or what is made cheaper or better than store bought.
I've been waiting for the delivery of transparancies to use with my inkjet printer;
The is the first test sheet,
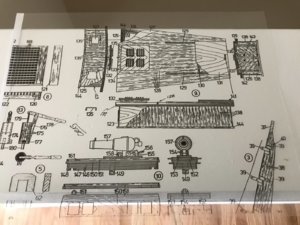
The copy came out better than I had hoped for.
Next will be a copy to transparency of the deck plan so I can mark the location of all the deck items. It will have to be done using three pages pages held together with Scotch tape.
I'll post that later.
Jan
The is the first test sheet,

The copy came out better than I had hoped for.
Next will be a copy to transparency of the deck plan so I can mark the location of all the deck items. It will have to be done using three pages pages held together with Scotch tape.
I'll post that later.
Jan
Last edited:
Little bit of error:
I’ve been fiddling around with a method to drill the holes for the guard rails in the skylight of the cabin. I made an inkjet transparency of that part of the build plan and attached it to the skylight blank. That was then clamped into my XY table and mounted to my Dremel drill press. The drilling of the first four of thirty two holes went well. And then, oops, aw chucks, darn, golly gee, etc. The next three holes were ........
I now need to do my favorite part of the build. “The do over”.
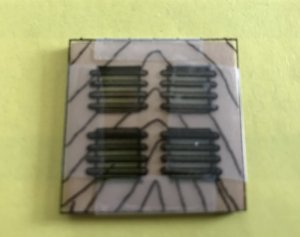
The transparency overlay.
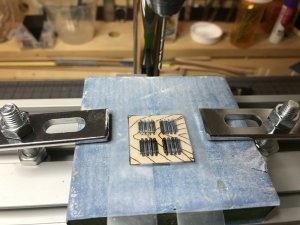
Ready for drilling.
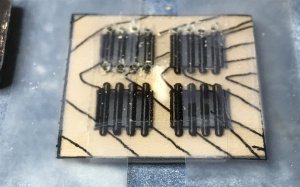
The oops moment.
Next is the do over, fill in the holes and try again.
Jan
I’ve been fiddling around with a method to drill the holes for the guard rails in the skylight of the cabin. I made an inkjet transparency of that part of the build plan and attached it to the skylight blank. That was then clamped into my XY table and mounted to my Dremel drill press. The drilling of the first four of thirty two holes went well. And then, oops, aw chucks, darn, golly gee, etc. The next three holes were ........
I now need to do my favorite part of the build. “The do over”.

The transparency overlay.

Ready for drilling.

The oops moment.
Next is the do over, fill in the holes and try again.
Jan
How funny, I have a do over as well.
Funny if you think about it, that would make a good Forum log --"Do Overs & Fixes"How funny, I have a do over as well.
Jan
Hatch gratings:
Had a bit of time this morning while waiting for the Postman, so picked something simple from the build plan. The hatches and gratings looked like a great start.
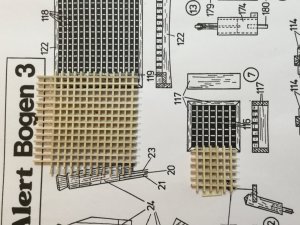
I assembled the small grating first, placed it on the plan to mark it and cut it to size. Next was the bigger hatch. I assembled the grating, 13 horizontal pieces and 14 vertical pieces. The assembly was laid on top of the plan to mark and cut it to size. Oops, a do over, did I count wrong, maybe the copier enlarged the copy of the plan, I dunno???
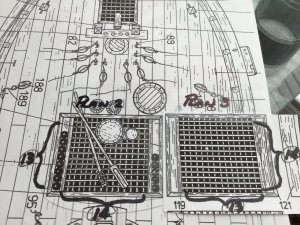
Close examination of the plan shows that the spacing of the larger hatch gratings is not same as the small hatch.
Its not a big problem, the final version of the hatch will a couple of mm bigger in each direction and will look good when placed on the deck.
Another lesson for me the novice builder on reading the plans and checking dimensions.
Jan
Had a bit of time this morning while waiting for the Postman, so picked something simple from the build plan. The hatches and gratings looked like a great start.

I assembled the small grating first, placed it on the plan to mark it and cut it to size. Next was the bigger hatch. I assembled the grating, 13 horizontal pieces and 14 vertical pieces. The assembly was laid on top of the plan to mark and cut it to size. Oops, a do over, did I count wrong, maybe the copier enlarged the copy of the plan, I dunno???
Close examination of the plan shows that the spacing of the larger hatch gratings is not same as the small hatch.
Its not a big problem, the final version of the hatch will a couple of mm bigger in each direction and will look good when placed on the deck.
Another lesson for me the novice builder on reading the plans and checking dimensions.
Jan
- Joined
- Jan 9, 2020
- Messages
- 10,566
- Points
- 938

Hi Jan. I am very wary of assembling loose components like the gratings before I can actually double check size against the actual space available on the ship, However, if is bigger than required, then all will be good!
Hi Heinrich,
I was surprised at the difference on the plans. I’ve made an overlay of the deck plan both as a hard copy as well as a transparency. I’m using that for measurements, the other plan has the size and shapes of the various deck pieces (furniture?).
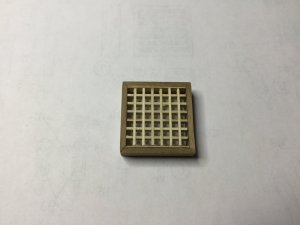
I‘m satisfied with the fit of this hatch. I had to do a little work around on the latticework, I scaled the dimensions from the plan and assembled them before building the frame. Probably should have done this the other way around. Frame and the latticework.
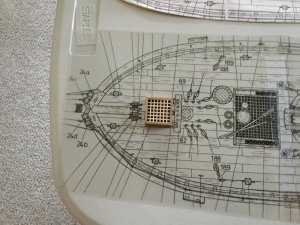
I think my build of the bigger hatch will be OK. I’ll have to fiddle with it to get the latticework right.
Jan
I was surprised at the difference on the plans. I’ve made an overlay of the deck plan both as a hard copy as well as a transparency. I’m using that for measurements, the other plan has the size and shapes of the various deck pieces (furniture?).

I‘m satisfied with the fit of this hatch. I had to do a little work around on the latticework, I scaled the dimensions from the plan and assembled them before building the frame. Probably should have done this the other way around. Frame and the latticework.

I think my build of the bigger hatch will be OK. I’ll have to fiddle with it to get the latticework right.
Jan
Kurt Konrath
Kurt Konrath
Great work and words of wisdom on checking plans before cutting!
I find it easier to make it smaller, but harder to make bigger after cutting stuff out!
I find it easier to make it smaller, but harder to make bigger after cutting stuff out!
Nice catch. That one might have gotten by me.
Todays Hours in the boatyard.
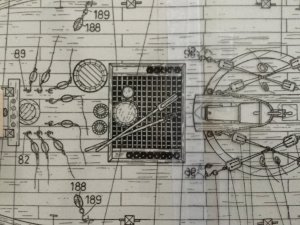
The hatch was on the agenda for today. I decided to work from plan 2 and scaled of the exterior box parts. The mitre corners were going to be a problem. I made several attempts and errors with the smaller hatch so I searched for a DIY method for cutting those corners with this hatch.
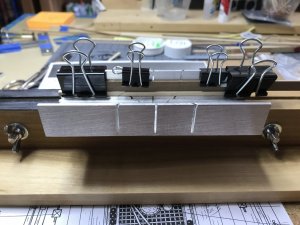
I need some way to hold this tool and settled on one of my keel holders.
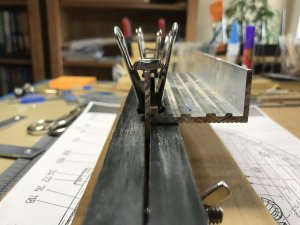
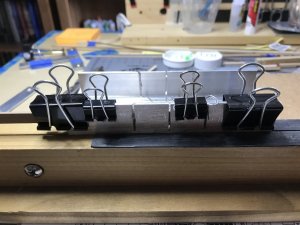
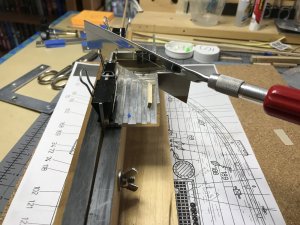
Next was some method hold the part to be cut. The big clips are holding a piece of scrap in the mitre box channel, the smaller clips are holding the 2 X 8 mm piece to be mitered. I didn't trust my skills and measured and cut each piece of Walnut individually. Each piece was marked "top, bottom side A or side B".
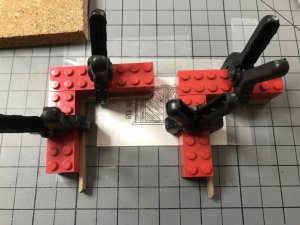
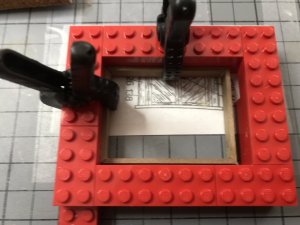
What would I do without Legos. they worked very well to hold the parts square while the glue dried.
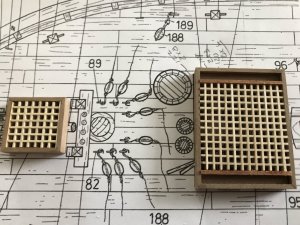
I'm very pleased with my result. When I noticed the difference between plan 2 and plan 3, I wondered if I could get this part of the build right.
Jan

The hatch was on the agenda for today. I decided to work from plan 2 and scaled of the exterior box parts. The mitre corners were going to be a problem. I made several attempts and errors with the smaller hatch so I searched for a DIY method for cutting those corners with this hatch.

I need some way to hold this tool and settled on one of my keel holders.


Next was some method hold the part to be cut. The big clips are holding a piece of scrap in the mitre box channel, the smaller clips are holding the 2 X 8 mm piece to be mitered. I didn't trust my skills and measured and cut each piece of Walnut individually. Each piece was marked "top, bottom side A or side B".


What would I do without Legos. they worked very well to hold the parts square while the glue dried.

I'm very pleased with my result. When I noticed the difference between plan 2 and plan 3, I wondered if I could get this part of the build right.
Jan
Thank you Heinrich. It certainly was a head scratcher.Very nice and accurate work, Jan. It just shows that proper preparation is always worth it in the end.
Jan


