Kyrenia Ship, 290 BCE Reconstruction POF Build Log PT-2 [COMPLETED BUILD]

The music on the video is from the soundtrack of the 1992 movie "1492 Conquest Of Paradise" by Vangelis, staring Gérard Depardieu as Christopher Columbus
Start of the actual build 10/7/21.
After looking at the instruction book pictures I will follow along as they seem to lead the tacks of the voyage and hopefully with some dead reckoning don't go on the shoals in the fog of uncertainty:
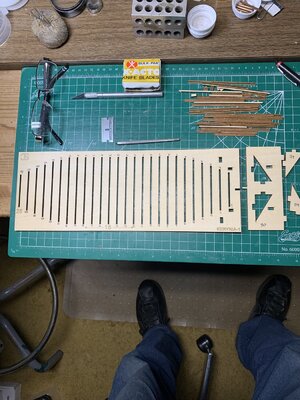
First the jig board for cutout on the first pages:
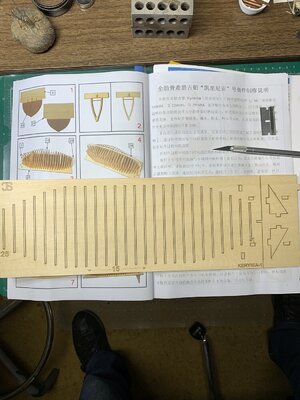
Kyrenia Jig Cutout.jpg

The laser cuts are very narrow and the connecting bridge pieces are about .5 mm so hard to find but after using a single edge razor blade to match the grooves switched to an Exacto blade 19:
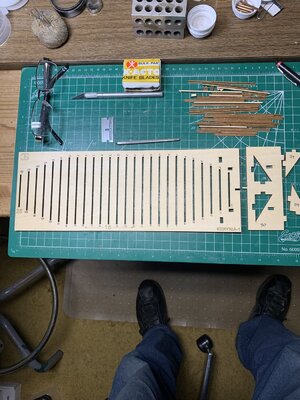
Kyrenia Jig Voided.jpg
Much more simple than most of the square riggers that I see being built in SoS.
Out of cutting sequence I'll show the keel and keelsson pieces:
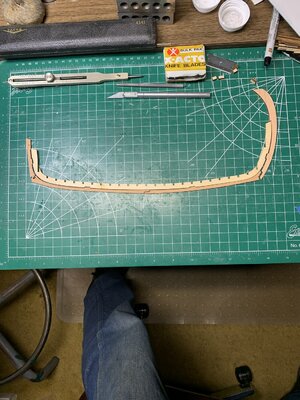
Kyreia keelson and Keel Pieces.jpg
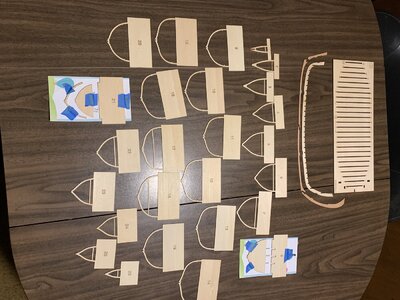
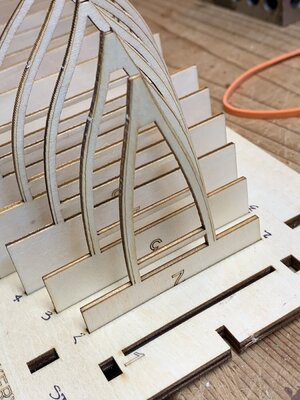
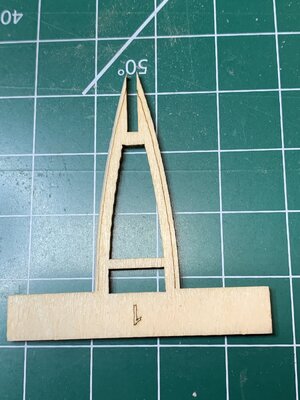
Now the structural frames pieces which are solid and not correct as the actual ship had it's structure in the hull shell with mortise and tennon strakes connectors and only spaced full frames with half frames form alternating sides part way across. I'll probably just to with the kit for now and see what works. The frames do have small fairing lines lasered for fairing. Two stations had the frames cut into separate parts which has me puzzled right now:Kyrenai Structure and Jig.jpg
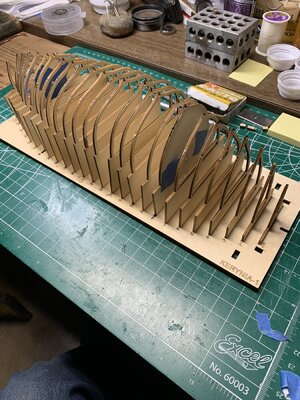
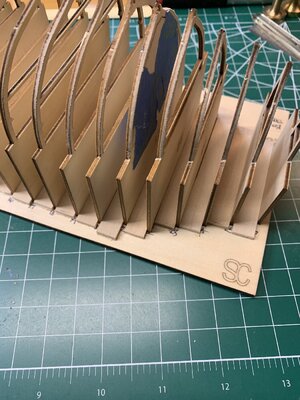
Next I placed the frames pieces into the jig for temporary stowage as I work along the fairing gently toward the laser lines and with those done will test and refair using a flexible full length strip to refine each frame. At this point I don't see a rabbit in the stem or stern post for setting the strakes' ends but will likely go back and do that before actually setting the strakes.Kyerania Loose Frames in Jig for fairing.jpg
Enough for now and let the fairing games begin!
 
The music on the video is from the soundtrack of the 1992 movie "1492 Conquest Of Paradise" by Vangelis, staring Gérard Depardieu as Christopher Columbus
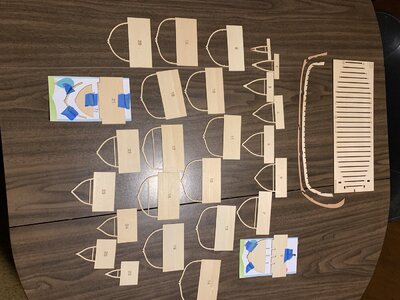
Time to put up some photos since opening the box and laying the pieces out.
Kyrenai Structure and Jig.jpg
Kyrenia Jig Voided.jpg
Kyrena Loose Frames in Jig.jpg
Fairing first Frame
Kyrenia Frame 1 fariing lines.jpg
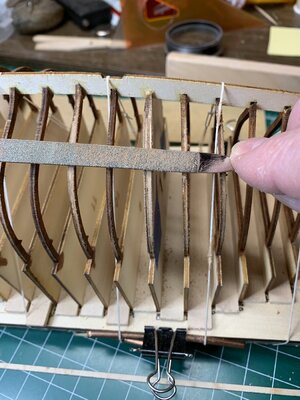
Being concerned about over filing I went back to the midships frames and worked to the ends as the fairing lines increased in width accordingly, for an initial filing. The laser cut jig frames' slots were too wide and made the standing frames floppy so I ripped some stock to slide in at the face of the jig to tighten things up as a temporary measure for using a temporary batten to better examine and further touch up the preliminary fairing.
Kyrenai Temp Frames Jig Spacers.jpg
Length was not important but shim width is so these were roughly cut to lengths.
Next step will be to place the keelson on top of the inverted frames, dry fitting and testing squareness befoe any glue is applied either to the frame base at the jig to later be cut off, or at the frame/keelson junction.
This is all preschool work compared with that of more complex models and experience builders.
Rich
 
The frames looking thin and most likely will require delicate processing, Hoping it is a good quality ply. What thickness it is? Enjoy the assembly.
I mic them at 2.33 mm. As plywood I don't have the fragility that the YQ BN group had in assembling their futtocks for those frames as assumed from watching their logs.
Rich
 
I mic them at 2.33 mm. As plywood I don't have the fragility that the YQ BN group had in assembling their futtocks for those frames as assumed from watching their logs.
Rich
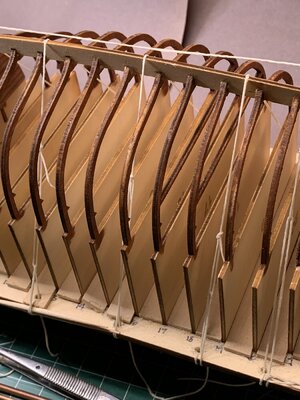
After initial fairing I tried placing the keelson with the frames per instructions' illustration and found some were too small to align and fit:
Kyrenia Tight Dry Fit Test.jpg
This also skewed the keelson off of line
Kyrenia Tight Dry Fit Test 2.jpg
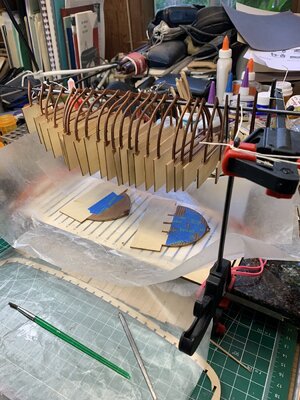
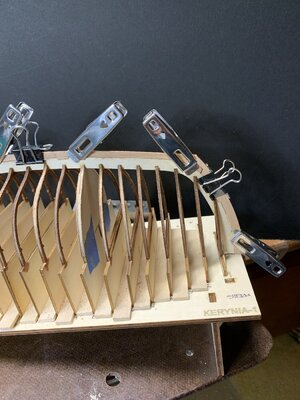
The rubber bands also added to a lateral torque. I then removed the rubber bands and the frames to check each mating combination and gently did some filing as necessary on the sides of the problem member until all would individually seat to full depth. With those removed I then stained the frames which will be visible from the inside of the open hold/deck against the lighter backside of the strakes.
Kyrenai Stained Frames.jpg
Using some bar clamps I made a crude frame with a spare carbon fiber quad kite rod to thread through them to hank and dry. Next will be a final mating check and then replacing the frames into the jig and mate them with the keelson if all goes well some glue will go into the seating area and tension applied to hold them tight to cure. I'll will raise the jig higher to be able to reach beneath to tighten an elastic cord from below near the center-line to avoid any lateral twisting above. This takes some care as the tops of the frames still have a bit of fore/aft movement so slow and small adjustments within the whole assembly will be necessary. Earthquakes, tsunamis, and tornadoes to be avoided. Rich
 
After initial fairing I tried placing the keelson with the frames per instructions' illustration and found some were too small to align and fit:
View attachment 261444
This also skewed the keelson off of line
View attachment 261445
The rubber bands also added to a lateral torque. I then removed the rubber bands and the frames to check each mating combination and gently did some filing as necessary on the sides of the problem member until all would individually seat to full depth. With those removed I then stained the frames which will be visible from the inside of the open hold/deck against the lighter backside of the strakes.
View attachment 261446
Using some bar clamps I made a crude frame with a spare carbon fiber quad kite rod to thread through them to hank and dry. Next will be a final mating check and then replacing the frames into the jig and mate them with the keelson if all goes well some glue will go into the seating area and tension applied to hold them tight to cure. I'll will raise the jig higher to be able to reach beneath to tighten an elastic cord from below near the center-line to avoid any lateral twisting above. This takes some care as the tops of the frames still have a bit of fore/aft movement so slow and small adjustments within the whole assembly will be necessary. Earthquakes, tsunamis, and tornadoes to be avoided. Rich
I have been calling this long spine for the ribs a Keelson even though it is underneath the frames. There is another four piece keel to be placed upon the now upturned edge that when inverted properly will be where a rabbit should have been placed or carved for last strake that I don't think in this boat is termed a garboard although that is what it is. Have to look more closely at the fit and anticipated last closing strake to the actual keel and decide whether to carve out a rabbit or not. Rich
 
I have been calling this long spine for the ribs a Keelson even though it is underneath the frames. There is another four piece keel to be placed upon the now upturned edge that when inverted properly will be where a rabbit should have been placed or carved for last strake that I don't think in this boat is termed a garboard although that is what it is. Have to look more closely at the fit and anticipated last closing strake to the actual keel and decide whether to carve out a rabbit or not. Rich
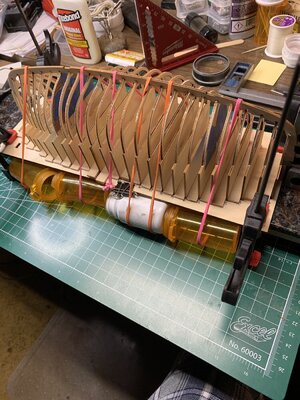
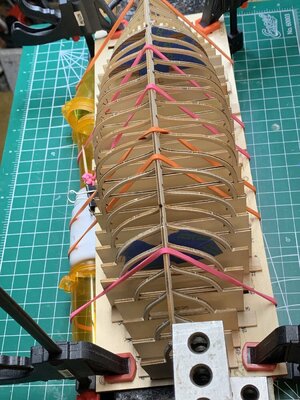
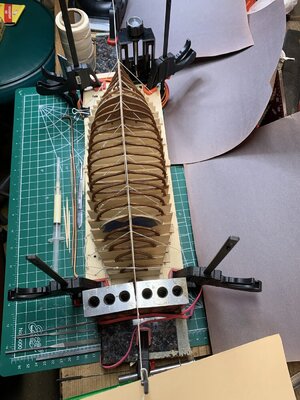
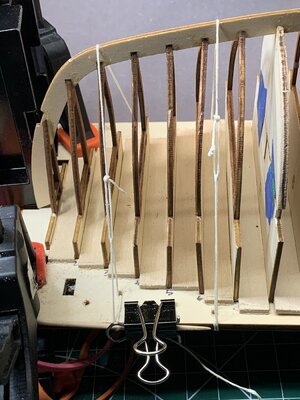
After final dry fit touchup filing the Frames were set and aligned under the longitudinal guide line which showed some rigs were slightly offset and need adjustments while being tied down:
Kyrenia Staained Ribs in Keelson Longitudinal Line VIew.jpg
I use a waxed candle wick string as the wax helps to secure knots. Needed some additional alignment support with mechanics blocks for the stern as will as my small vice for the stem.
Bowline loops provided a tieback for tension and securement through holes that I drilled in the side of the jig. The framing jig was clamped to a piece of polished stone that I use for carving and stamping leather projects.
Kyrenia Ribs Tension Lines.jpg
The sharply curved cutwater or stem was very slightly twisted requiring the added small vice as weight and vertical support for gluing the joints with Titebond. This side tonight and I'll rotate it to do the same touch point gluing tomorrow on the opposite side. Not the most noteworthy or competent work so I'll see the results when the next first wale and planing strakes begin working up to the keel. which is to be glued to the bottom edge of this keelson one part piece.Kyrenai Bow Ribs Set.jpg
 
After final dry fit touchup filing the Frames were set and aligned under the longitudinal guide line which showed some rigs were slightly offset and need adjustments while being tied down:
View attachment 261478
I use a waxed candle wick string as the wax helps to secure knots. Needed some additional alignment support with mechanics blocks for the stern as will as my small vice for the stem.
Bowline loops provided a tieback for tension and securement through holes that I drilled in the side of the jig. The framing jig was clamped to a piece of polished stone that I use for carving and stamping leather projects.
View attachment 261479
The sharply curved cutwater or stem was very slightly twisted requiring the added small vice as weight and vertical support for gluing the joints with Titebond. This side tonight and I'll rotate it to do the same touch point gluing tomorrow on the opposite side. Not the most noteworthy or competent work so I'll see the results when the next first wale and planing strakes begin working up to the keel. which is to be glued to the bottom edge of this keelson one part piece.View attachment 261480
Moving along nicely Rich!
 
Moving along nicely Rich!
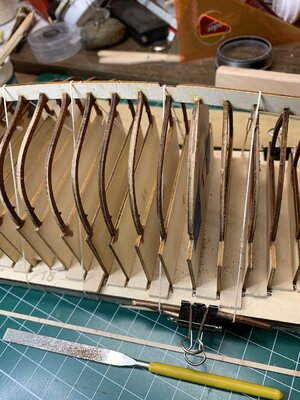
Cut the "umbilical cords" around the keelson and frames off after doing some preliminary fairing with a diamond file stroking vertically along the frame (which for my prior canoes and BN was longitudinally)Kyrenia Inital frames fairing.jpg
Kyr4enai diamond file fairing.jpg
It is obvious that the frames are not well aligned as the dark frame edge is too low with the filed light frames higher. Next I removed the frame jig from the stone working base and did some more fairing before working on the keel pieces for their mating and alignment. Starting aft and workng forward:

Kyrenai Keel dry fit check aft.jpg

Kyrenai dry fit midships.jpg
And at the stem you can see a CV patch where that "keyed dove tail" scarf broke when first mated so on a flat surface I fished the small broken piece in place and made the repair which mated the stem with the first aftward keel piece. WIth some adjustments in the dry fit the scarfs are OK except for the midships one which is not as tight as I would like.Kyrenai keel dry fit stem.jpg
Now I will remove the pieces and stain the upper areas of the stem and stern the same as the exposed interior frames. Below that the hull will be black somewhat simulating the lead sheathing that was applied in her later years to try and hold off ship worms and growth which recovery analysis said was only partiallly successful.. The used small copper nails very closely spaces around the edges of the overlapped lead sheets which were only a few mm thick. Once the stain is dry I'll secure the full length of keel. RIch
 
Ok Rich, it made you some trouble, but now is smoothing out... well done.

Christos
Thank you. I glued it in place this morning and will remove the clamps tonight. Now to figure out the Chinese instructions as the next piece visually isn't clear so I have asked for a translation from Heinrich. I'll post photos when the correct sequence and parts are confirmed. Don't want to have to recover from a mistake. Rich
 
Thank you. I glued it in place this morning and will remove the clamps tonight. Now to figure out the Chinese instructions as the next piece visually isn't clear so I have asked for a translation from Heinrich. I'll post photos when the correct sequence and parts are confirmed. Don't want to have to recover from a mistake. Rich
You can download a translation app on your phone. Then you just hold it over the text and it will translate for you in real time. We discussed this in the BN group build early on. ;)
 
Thank you. I'll give it a try. Rich
Not being I-phone 10 savvy about downloading apps, I am not sure which or how to download a camera type translation app. Please give me some hints or links to do this as i was stymied by my own attempt. We can go PM for this.
Thank you. I'll give it a try. Rich
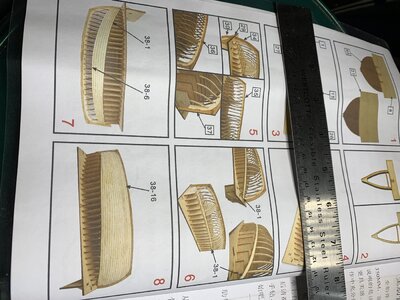
After some fiddling around got the translation ap installed to use the camera. Interesting translation of some characters into words which are not clear to meaning but sufficient with reference to the plans and instructions in comparison with the shapes of the laser cut planks to work it out. . . I hope but only after turning those boards over. Continuing my work today starting in Step 6 and the #38 first plank:
Instructions #38 Illustrations.jpg

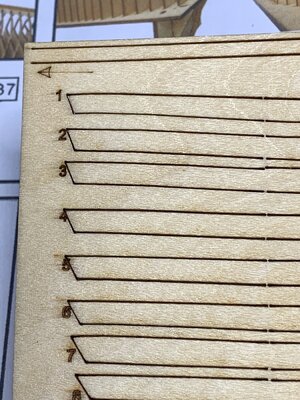
The board had an arrow in one corner pointing to the end which was not clear whether it was bow or stern. The translator turned the instruction to read it was pointing to the boat !!!! yes but which end? That was solved by looking at the width of the planks and the width of the belt to be laid: wider at the stern and narrow at the narrow stem. In the next photo you can see that pesky small arrow.
Kyrnia Planks Board.jpg
Now turning it over and after some light sanding on what is now the exterior plank side the first one cut out for an isopropyl alcohol bath and a light heat bending conforming to the frames with curves in two directions and dry fit tests before final gluing and clamping:Kyrnia First Plank Set.jpgKyrania first plank clamps.jpg
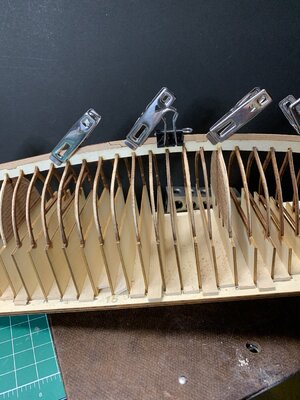
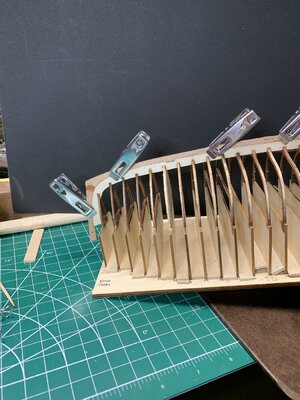
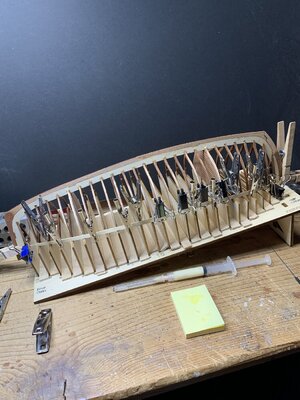
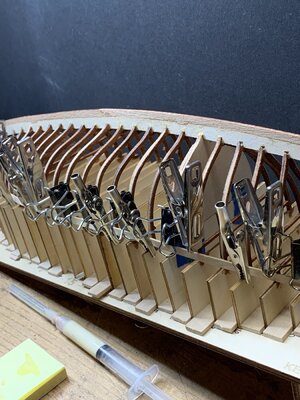
Had to use combinations of binder clamps, allegator clamps, wide jaw clamps, and modified clothes pins. I don't want to use pins through the planks for the holes that they create. The binder clamps work very well on a POB being able to grasp the bulkhead but not very good with narrow frames. It will sit overnight and the first plank on the opposite side applied tomorrow. This process with precut planks is tricky as they are cut to a precise length without any marks on the stem or stern so longitudinal adjustment is needed. I much perfer making my own planks in sections as it is easier to terminate them at the ends. I am also assuming that I will have to taper the edges of the planks going around the convex frames and in the other way in the concave up to the garboard maiting with the keel. No rabbits here so careful end filing is needed to seat the planks to the stem and transom "risers". We'll see how all of this progresses. Rich (PT-2)
 
Look up your mail. You got mail.

Christos
Well, the planking is underway. . . slowly and not as tightly set as I would prefer. The laser cut wood planks are not particularly friendly or compliant to the isopropyl alcohol bath and heat bending for the hull profile along that strake. I am not worried though as I will sand and scrape the hull as well as using the syringe application of Titebond and sanding dust procedure to fill any gaps as before in my strip canoes and Bluenose model. These are being set on both sides alternatively so that I can verify alignment at both ends. I'll not post any more until the final closing planksKyrenia boat planking beginning.jpg up by the keel.
 
Your planking looks very good. So I suggest keep up the fine work you are doing there. The only critical point I can guess is when you are going to cut the upper part. There you have to be carefull. But untill now the build is proceeding fine dispite the incidents due to the language.
 
Your planking looks very good. So I suggest keep up the fine work you are doing there. The only critical point I can guess is when you are going to cut the upper part. There you have to be carefull. But untill now the build is proceeding fine dispite the incidents due to the language.
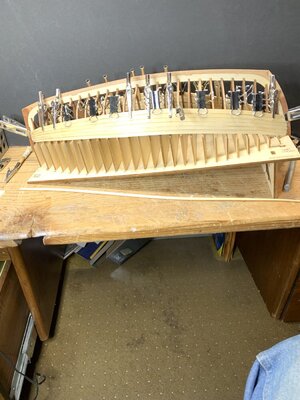
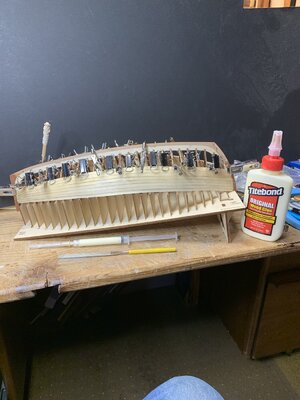
Thank you for the warning about the last closing part. It will likely be similar to the cut/file and test fit several times in the same manner that I had to close the last strip on both of the stripper canoes (17" and 19") that I first made as training exercises for planking. Those were on bulkheads and these on frames so the purchase with the binder clips is more delicate and necessitating the alligator clips. In any event when closed I will sand/scrape the hull to even out irregularities while also closing any gaps between the planks which I have learned that archaeologists call strakes. I'll go head and post my half done status photo for the log.
Kyrenia Hull Half Planked.jpg
As I approach the keel the binder clips will have to abandoned and other means employed.
Rich
 
Back
Top