Kyrenia Ship, 290 BCE Reconstruction POF Build Log PT-2 [COMPLETED BUILD]

View attachment 263006
As I approach the keel the binder clips will have to abandoned and other means employed.
Rich
I have been using strakes and planks interchangeably but when going back to my Illustrated Glossary of Ship and Boat Terms by J. Richard Steffley, The Oxford Handbook of Marine Archaeology, I found the following definition: "Strake [Streake]. A continuous line of planks, running from bow to stern."

As the kit provides only single full length pieces I should call them planks onto which I will scribe butted ended planks of a scaled length from what I fine elsewhere. Then also considering making faux peg ends for the mortise and tenon hull construction which should only take time to lay out and impress.
Rich
 
A COUPLE OF QUESTIONS RICH, WHERE DID YOU GET THE SYRINGE THAT YOU ARE USING AND WHAT IS THE MIXTURE THAT YOU PREPARE, INTERESTED IN THAT METHOD ALSO WHAT IS HOLDING ME UP IN DOING THIS ONE IS THE FACT THAT THEY USE PLY FOR THE FINISH FRAMES ON THE INTERIOR , THAT WILL STOP ME FROM DOING THIS ONE, GOD BLESS STAY SAFE ALL DON
 
A COUPLE OF QUESTIONS RICH, WHERE DID YOU GET THE SYRINGE THAT YOU ARE USING AND WHAT IS THE MIXTURE THAT YOU PREPARE, INTERESTED IN THAT METHOD ALSO WHAT IS HOLDING ME UP IN DOING THIS ONE IS THE FACT THAT THEY USE PLY FOR THE FINISH FRAMES ON THE INTERIOR , THAT WILL STOP ME FROM DOING THIS ONE, GOD BLESS STAY SAFE ALL DON
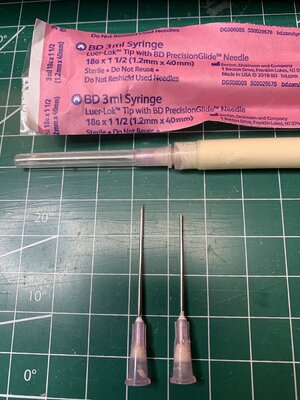
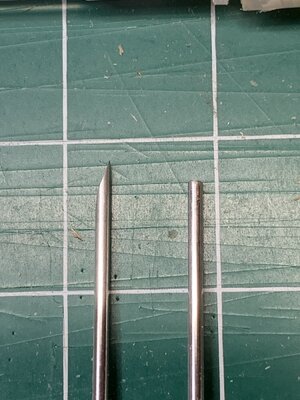
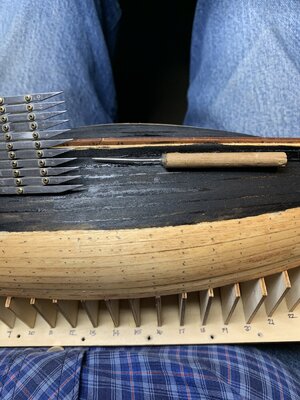
I went to our pharmacy and asked for ones that diabetics may use with a long needle. After some discussion he gave me BD 3 ml syringe, 18G x 1 1/2 (1.2 mm x 40 mm) with a twist off needle. They were very cheap so I bought 5 and ground the pointed end off to a flat end which you see. I use the pointed end needles for filling narrow slots before applying a sanding dust to make the fill, sanded orbitally, to press in the sawdust and at the same time create more. The patch is then sanded as needed.
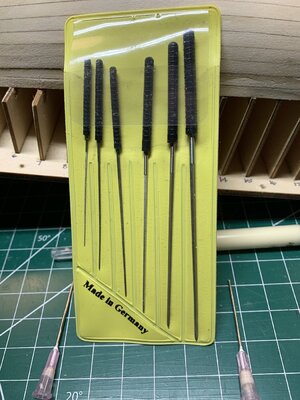
I have a set of small squared needle type probes to clear out the needle as needed. Save the needle cover for the syringe between each use. To fill it I twist off the needle and place the syringe into the adhesive bottle to draw out a new load when it gets to the bottom.
Rich
No glue mixture but straight out of the Titebond Original Wood Glue bottle. RIch
 
View attachment 263006
As I approach the keel the binder clips will have to abandoned and other means employed.
Rich
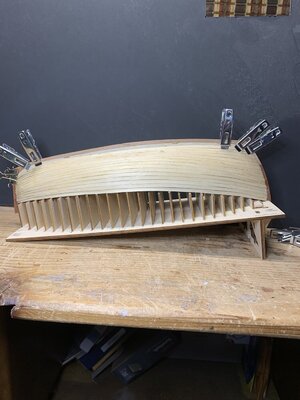
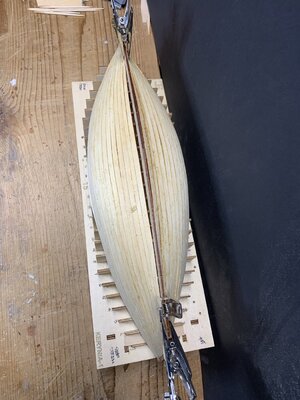
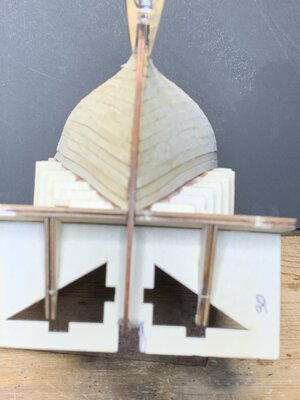
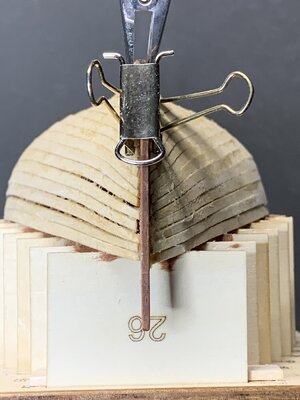
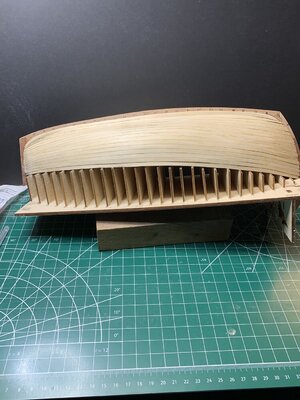
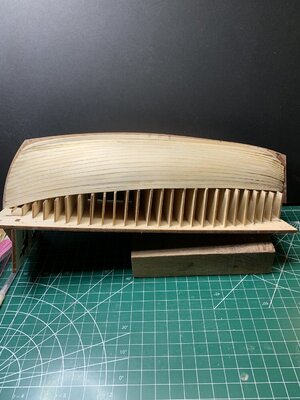
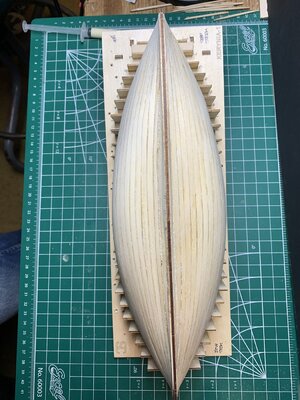
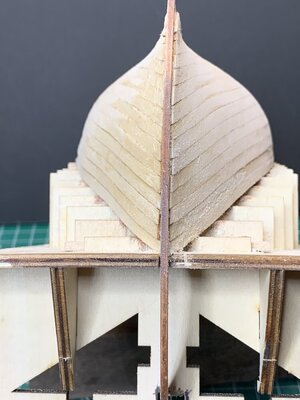
Now with 15 of 16 planks "set" (a generous term but better than tossed down) I will show my dirty laundry at this stage. Not what I wanted and worse than I thought when I see the gaps and misalignments. Last plank tomorrow will require a lot of shaping before being set in place. Then the massive sanding/scraping and gaps filling dance will begin. Luckily the lower part of the hull is painted black simulating the lead sheathing that was applied as a repair later in her life but even before launching in my case.
Hold on to your seats. I am flagilating myself as it is but a build log is just that and should be honest IMHO.
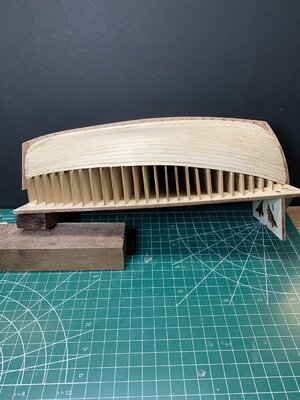
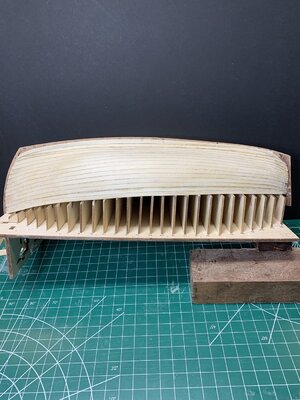
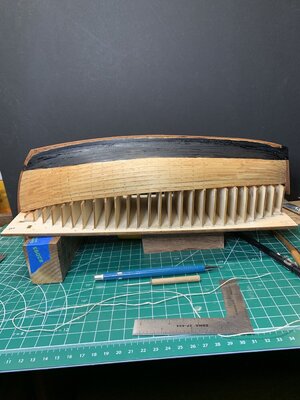
First a port elevation"Kyernia 15 of 16 Port planks.jpg
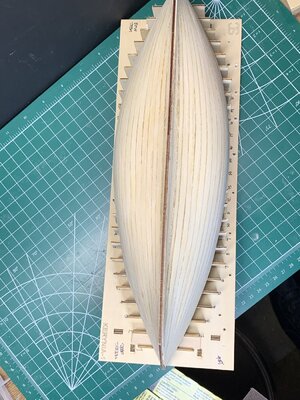
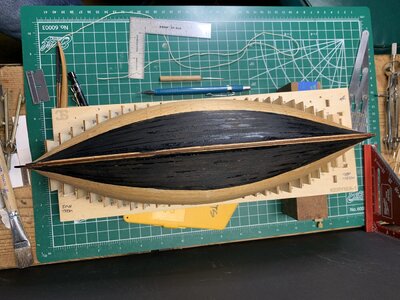
Now an overhead keel view:
Kyerenia 15 of 16 planks Keel viw.jpg
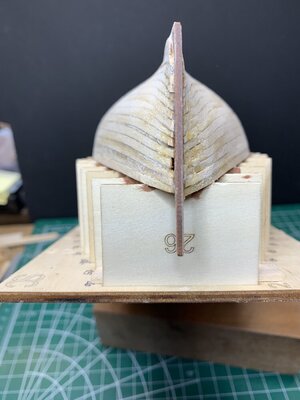
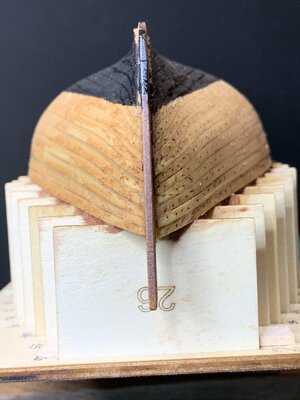
Here is the stern view:
Kyernia 15 of 16 planks Stern View.jpg
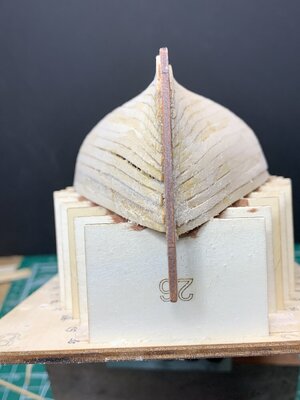
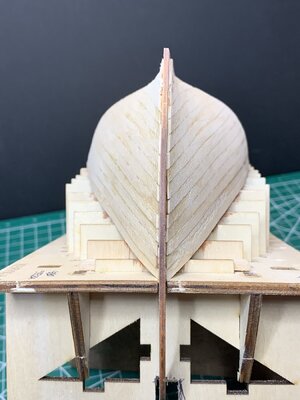
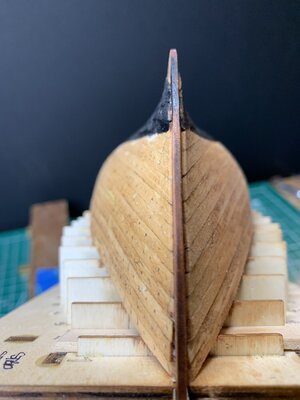
And the bow view:
Kyernai 15 of 16 Planks Bow View.jpg
I am puzzled why the port (left) side planks did not lay better on the frame than the stbd. (right) side did as I would apply one and then the opposite right afterwards. I repeatedly was doing something that I did not realize that was different and throwing things off. Lots of sanding/filing to flush those edges and faces out before the gaps filling. Nope, I will not spackle/paste over those nor will I call it caulking since it will be variable in widths. Depending upon your global location I'll say from here in Oregon, "Good night y'all" Hopefully your days will produce better results than my own pursuit of this. Rich (PT-2)
 
View attachment 263006
As I approach the keel the binder clips will have to abandoned and other means employed.
Rich

@Messis - You were very correct in the difficulty in getting the last three planks in place as #14 is very narrow and confusing which is bow or stern and the curve that it has to take in being set as it looks almost a mirror image of itself about the center point. #!5 went in but had to be hand held as I didn't have any clamps for midships and could only clamp the ends. #16 will be a multiple try dry-fit until a think it will close to the face of the keel. It would have been better to have a rabbit as an edge bedding. I don't think that I could carve one out as the keel wood is very hard and not well anchored to the keelson and most likely would break off unless I could get creative to make a hull bed of some type as well as a backer board resisting the keel carving pressure. That would be a full project in itself. Rich (PT-2)
 
Waiting to see your sanding... am sure you will repair all small abnormalities.
Today planks #16 were set after some filing and sanding to get each one to seat as best as I could so that after setting the sanding dance could begin.
Going back to a prior question and posting about the syringe that I use for both applying Titebond glue to set parts and another needle for repair of narrow cracks I'll go back in more detail:
First a view of the syringe package and the two needles:
Syringe for glue and the needles.jpg
Now the needles One Sharp as packaged and one ground blunt for general adhesive applications:
Syringe needels one filed blunt.jpg
Needle clearing broach set:Syringe Needle Clearing Broach Set.jpg
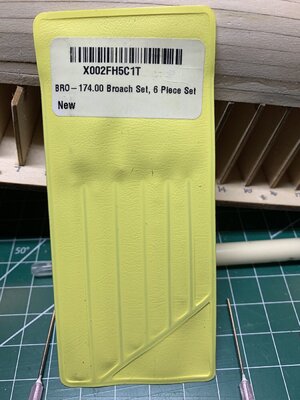
Broach set back label:
Syringe Broach Set Back Lable.jpg
Now on to today's first sanding run with a couple of planks cracks initial fill for additional sanding:
Starboard Plank #16 set:
Kyrenia Plank #16  Stbd Set.jpg
Port Elevation with #16 plank set:
Kyrenai Plank #16 Port Set.jpg
Keel Overhead view"
Kyrenia Keel Overhead View Planks Set.jpg
Stern view after a bit of sanding not cleared off:
Kyrenia Stern view Some Sanding done.jpg
Bow View with some sanding not cleaned off:
Kyrenia Bow View Some Sanding done.jpg
Now a couple of days sanding and patching the voids before staining the planking.
 
Sorry I didn’t catch this build since you started.
I checked it out today in it’s entirety and I LOVE IT.
I signed myself to follow it and for sure it will be very enjoyable.
Because of your build and the way you and Messis explained it, I am very incline to purchase a kit for myself.
I will have all the knowledge of two Great model builders.
Don’t let us wait too long for your next step.
I am still hand stitching the bolt rope of my Galilee boat. Very tediously job sewing is.
 
Last edited:
Sorry I didn’t catch this build since you started.
I checked it out today in it’s entirety and I LOVE IT.
I signed myself to follow it and for sure it will be very enjoyable.
Because of your build and the way you and Messis explained it, I am very incline to purchase a kit for myself.
I will have all the knowledge of two Great model builders.
Don’t let us wait too long for your next step.
I am still hand stitching the bolt rope of my Galilee boat. Very tediously job sewing is.
I well recall the time and patience to hand sew the perimeter bolt rope as the 8 sails on my BN are large. Remember to keep your stitches very close to avoid later raveling problems. Rich
 
I well recall the time and patience to hand sew the perimeter bolt rope as the 8 sails on my BN are large. Remember to keep your stitches very close to avoid later raveling problems. Rich
After about 4 or 5 hours of sanding and gaps repair the plank edges better flush together. As I did not remove all of the laser char some of that shows in the planks edges as well as the adhesive/sawdust fills which will remain as such. I'll have to see how those show when a light stain is applied following a stain prep. Approximately 1/3 of the hull bottom is to be painted black so those will not visually matter there. I'll let the hull sit for a while as I try some stain variations on the left over board from which the planks were removed.
So here is the status as of 10.18:
Starboard View
Kyrenia Stbd 10.18 view.jpg
Port ViewKyrenai POrt 10.18 view.jpg
Keel View
Kyrenia Keel 10.18 View.jpg
Bow View
Kyrenia Bow 10.18 View.jpg
Transom View
Kyrenai Transsom 10.18 View.jpg
Without side by side prior to current comparative views it is hard to see the progress that has passed under the bow but the feel in the hands and general visual make the progress evident.
Some filing is needed to trim down the "garboard" plank #16 from the bottom edge of the keel and further fill small cracks/joints and generally go to a finer sand paper from the 110 and 220 grits now.
Then the bow and stern plank ends need attention before deciding upon the stain application.
After that the step is to cut the hull off of the jig flush with the uppermost #1 plank. I am waiting for a more narrow Japanese razor saw to arrive for that task which Peter is so skilled at doing. My present one is much too wide to work with the concave curve of the sheer.
No gale storms so far just some high seas which were ridden out fairly well. Keeping an eye to the weather. Rich (PT-2)
 
After about 4 or 5 hours of sanding and gaps repair the plank edges better flush together. As I did not remove all of the laser char some of that shows in the planks edges as well as the adhesive/sawdust fills which will remain as such. I'll have to see how those show when a light stain is applied following a stain prep. Approximately 1/3 of the hull bottom is to be painted black so those will not visually matter there. I'll let the hull sit for a while as I try some stain variations on the left over board from which the planks were removed.
So here is the status as of 10.18:
Starboard View
View attachment 263610
Port ViewView attachment 263611
Keel View
View attachment 263612
Bow View
View attachment 263613
Transom View
View attachment 263614
Without side by side prior to current comparative views it is hard to see the progress that has passed under the bow but the feel in the hands and general visual make the progress evident.
Some filing is needed to trim down the "garboard" plank #16 from the bottom edge of the keel and further fill small cracks/joints and generally go to a finer sand paper from the 110 and 220 grits now.
Then the bow and stern plank ends need attention before deciding upon the stain application.
After that the step is to cut the hull off of the jig flush with the uppermost #1 plank. I am waiting for a more narrow Japanese razor saw to arrive for that task which Peter is so skilled at doing. My present one is much too wide to work with the concave curve of the sheer.
No gale storms so far just some high seas which were ridden out fairly well. Keeping an eye to the weather. Rich (PT-2)
Looking good Rich!
 
What glue did you use for your planking Rich? At the bow it seems to be more of a glue issue than incorrect planking. The planks also follow the curvature nicely but simply seemed to have pulled apart at the bow during the gluing and / or clamping.
 
I think what you can do is glue a few wedges in the gaps. Then I always file the boards where they meet the keel. You can file a little bit of a taper at the ends. Even close to a chisel point as long as you don’t go to far! ;)
 
I think what you can do is glue a few wedges in the gaps. Then I always file the boards where they meet the keel. You can file a little bit of a taper at the ends. Even close to a chisel point as long as you don’t go to far! ;)
I think that in the first few planks I did not file/taper the ends enough and also that the clamp did not seat properly but in hiding the end I could not see that. We can see that above/after the first problem boards the seating is tighter where it should be. I also paid more attention to the heat bending of the boards but across the laser cut width it was difficult. The Titebond should be sufficient but in the middle section I recall adding some CVA with a toothpick before the final clamp setting. Sometimes I also held it tight for some time with my fingers/nails to see that a bond had been created.
I may try the suggestion to carve/file down a small wedge to put into the large end gap and then file the plank face down some more. . . rather than a glue/sawdust filler.
Thanks for the recommendations. I try to learn as I go. Rich
After inserting the suggested bow plank gap wedge and more sanding/filling I applied a stain pre-coat before a stain mix of 10 Golden Pecan to 1 Golden Mahogany to the upper 2/3 of the hull. Once soaked in a wiped off I put on a first coat of semi-gloss black which mainly went into the wood except where there were adhesive and sawdust patches which are glossy. This this morning I tried to poke and pencil impress the faux pegs of the tennons of the hull mortise and tennon structural system. Tryied to stay with the 1:43 scale for the actual spacing of these which did not work out at all. I abandoned that and went to a regular longitudinal and mid plank spacing fore and aft of the miserable scaled spacing on the stbd side. Next moving to the port I have begun frames spacing using a string around the hull and over the frames marked on the keel side which is why it is not painted at this stage. When those are completed I'll go back to do two 1/3 intervals pegs for each plank. This will be the presentation side of the boat.
Lots of touch up and work ahead but it is progressing in this "let it all hang out build log".
First is a Stbd . Kyrenia 10.19 Stbd View.jpg
Now the Keel view with bare keel:
Kyrenia10.19 Keel View.jpg
side elevation with the hull still inverted in the build jig:
Next the Bow view:Kyrenia 10.19 Bow View.jpg
And the Stern view:
Kyrenia 10.19 Stern View.jpg
Now the faux tennon pegs in the first scaled layout that was abandoned mid-shi;s:
Kyrenia 10.19 Stbd Fwd Simulated Pegs.jpg
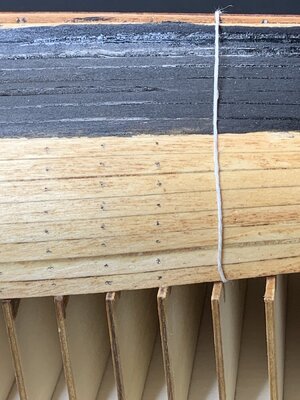
Lastly is the opposite side with initial "boundary" frame spaced guide pegs and the guide string along the fame side and mark on keel:
Kyrenia 10.19 Port Pegs layout start and guide string.jpg
AS I have mentioned before, I like using thin candle wick waxed string as it ties into a "locked" knot very easily.
Several hours of faux pegs tomorrow and then reconsideration of that black hull bottom as I don't want a gloss finish but have to get more onto this "flat black" appearing wood. The edge will be the tricky part as masking did not work very well with some paint running under the edge with the irregularities on the planks surfaces and edge joints. I will likely use a very fine long bristle artists brush to "drag" out the paint on that line so that I can see what is happening and not be surprised when a masking tape line is removed.
 
After inserting the suggested bow plank gap wedge and more sanding/filling I applied a stain pre-coat before a stain mix of 10 Golden Pecan to 1 Golden Mahogany to the upper 2/3 of the hull. Once soaked in a wiped off I put on a first coat of semi-gloss black which mainly went into the wood except where there were adhesive and sawdust patches which are glossy. This this morning I tried to poke and pencil impress the faux pegs of the tennons of the hull mortise and tennon structural system. Tryied to stay with the 1:43 scale for the actual spacing of these which did not work out at all. I abandoned that and went to a regular longitudinal and mid plank spacing fore and aft of the miserable scaled spacing on the stbd side. Next moving to the port I have begun frames spacing using a string around the hull and over the frames marked on the keel side which is why it is not painted at this stage. When those are completed I'll go back to do two 1/3 intervals pegs for each plank. This will be the presentation side of the boat.
Lots of touch up and work ahead but it is progressing in this "let it all hang out build log".
First is a Stbd . View attachment 263798
Now the Keel view with bare keel:
View attachment 263799
side elevation with the hull still inverted in the build jig:
Next the Bow view:View attachment 263800
And the Stern view:
View attachment 263801
Now the faux tennon pegs in the first scaled layout that was abandoned mid-shi;s:
View attachment 263802
Lastly is the opposite side with initial "boundary" frame spaced guide pegs and the guide string along the fame side and mark on keel:
View attachment 263803
AS I have mentioned before, I like using thin candle wick waxed string as it ties into a "locked" knot very easily.
Several hours of faux pegs tomorrow and then reconsideration of that black hull bottom as I don't want a gloss finish but have to get more onto this "flat black" appearing wood. The edge will be the tricky part as masking did not work very well with some paint running under the edge with the irregularities on the planks surfaces and edge joints. I will likely use a very fine long bristle artists brush to "drag" out the paint on that line so that I can see what is happening and not be surprised when a masking tape line is removed.
Thanks to everyone for their views and comments! Being a Late Bronze Age boat it shows years of wear before it is launched from my yard, and certainly not up to the standards of the shipwrights of those years long ago. I"ll keep following the bowline wherever it may lead and take advantage of seeing the scenery around me along the way, thanks to your logs and posts. Rich
 
Thanks to everyone for their views and comments! Being a Late Bronze Age boat it shows years of wear before it is launched from my yard, and certainly not up to the standards of the shipwrights of those years long ago. I"ll keep following the bowline wherever it may lead and take advantage of seeing the scenery around me along the way, thanks to your logs and posts. Rich
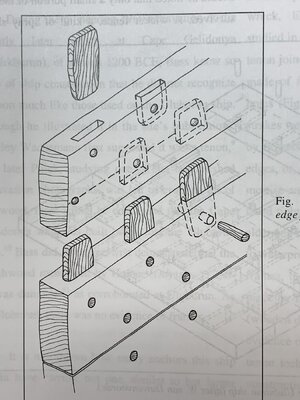
Taking a look-back at the pegs used in the mortise and tennon pegged system of hull construction where those closely spaced tennons provided the structural strength and frames were only about 1/2 full and 1/2 only 2/3 across the hull/keel.
Structural frames came afterwards:
Pegged Mortise and Tennon Hull Shell Construction.jpg
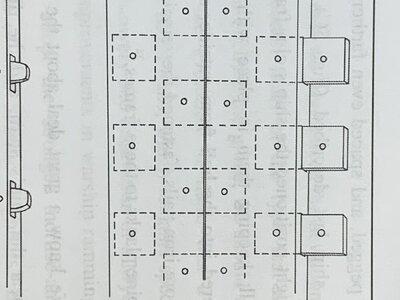
Here is the staggered correct pattern that I tried but with the kit cut planks had to be abandoned:
Pegged Mortise and Tennon Spacing Pattern.jpg
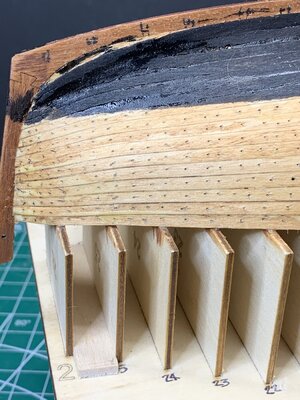
I went to a layout on each plank using the frames as side points to be divided into three sections using my variable 10-point dividers and the needle punch for holes followed by a pencil insertion light blackening. Actual pegs were only about 2" diameter which as the 1:43 scale is small. Visually these will suffice for the purpose and display viewing distance which is fixed:
Kyrenia Pegs Spacing on Planks.jpg
Many more on this side before going back to complete and provide a second coat of black.
 
Back
Top