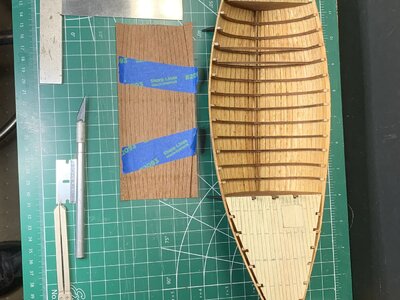
Kyrenia Ship, 290 BCE Reconstruction POF Build Log PT-2 [COMPLETED BUILD]

Taking a look-back at the pegs used in the mortise and tennon pegged system of hull construction where those closely spaced tennons provided the structural strength and frames were only about 1/2 full and 1/2 only 2/3 across the hull/keel.
Structural frames came afterwards:
View attachment 263985
Here is the staggered correct pattern that I tried but with the kit cut planks had to be abandoned:
View attachment 263986
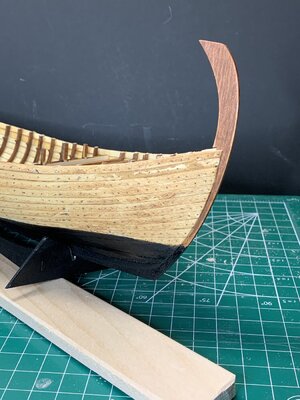
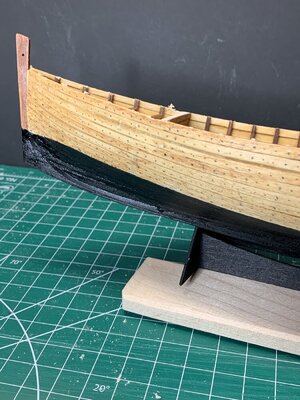
I went to a layout on each plank using the frames as side points to be divided into three sections using my variable 10-point dividers and the needle punch for holes followed by a pencil insertion light blackening. Actual pegs were only about 2" diameter which as the 1:43 scale is small. Visually these will suffice for the purpose and display viewing distance which is fixed:
View attachment 263987
Many more on this side before going back to complete and provide a second coat of black.
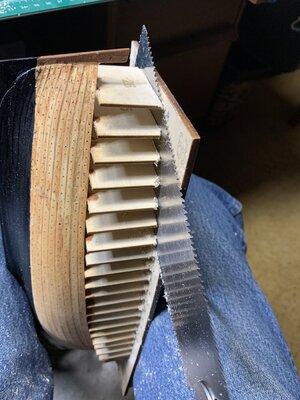
Peg holes done so time to move forward. First need to deliver the child from it's womb:
Kyernia Pegs done delivery time.jpg
Sharp instrumentsKyrenia Delivery Instruments.jpgKyrenia Delivery Instruments.jpg with close action for this delicate work:
Now some smaller for circumcisions all around:
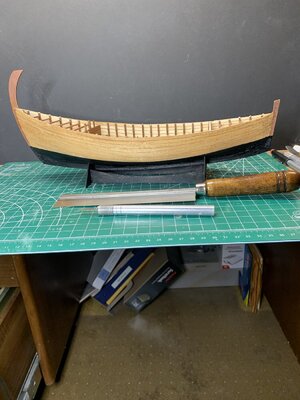
Kyrenia Smaller Circumcision instruments.jpg
Now to seal pre-stain and stain the exposed interior:
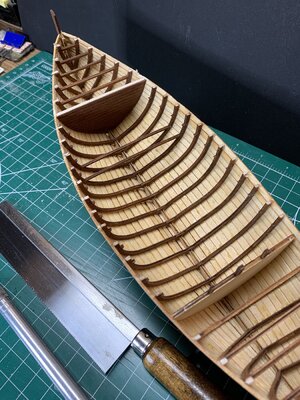
Kyernia hull cast loose prestain.jpg
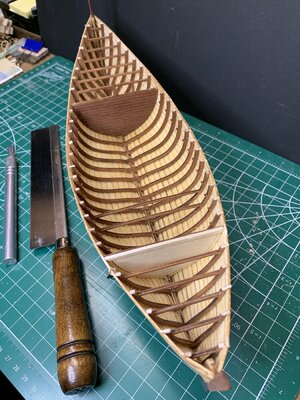
Lets see the full interior length:
Kyrenai full inside hull.jpg
There was no evidence at the wreck site/recovery of bulkheads but the kit has them so I'll go ahead and keep both. Now let;s look at the Port forward area and short stem:
Kyrenia Port Fwd.jpg
And the Port Aft end with taller transom piece:Kyrenai Port Aft.jpg
These stem and transom pieces shapes are taken from ancient pottery shards with iconography of these but as such are speculative with only the artists presentation which is not materially supported from wrecks' recoveries and analysis.
Next will be to file the frames' upper ends and follow the instructions placing planks on top of the frames/keelson and some inner wales followed by the gunnel's. fore and aft triangular sub decks and planks.
 
Very nice job. It is turning an excellent model. I went through the log and your pictures provide a lot of tips to modelers. Thank you !!!

Daniel
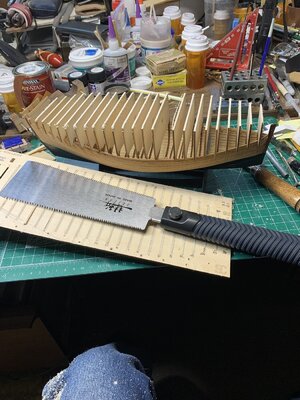
Wouldn't you know it. . . a more narrow and flexible/smaller Japanese razor saw that I wanted to use to cut the hull out of the jig arrived after I had already done that with the large one previously posted with that severance.
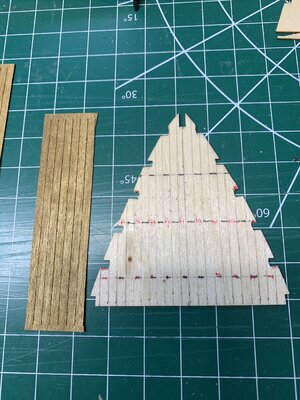
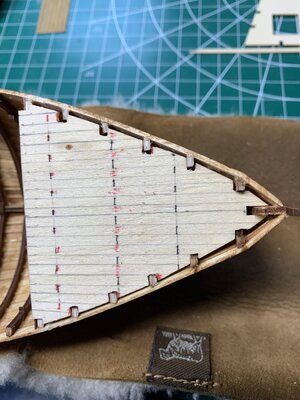
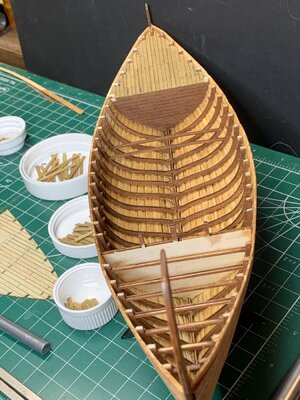
Now, with the frames's tops filed to the top of the strakes, I have turned my attention to the foredeck area. The subdeck notched piece did not precisely match the frames so some filing was needed, without worry as this piece is covered by the laser cut pieces 2.46 mm x 0.46 mm width and thickness.
Marking the planks and ends onto the sub-deck and a pattern correction I have:
Kyrenia fore sub deci.jpg
Checking once again for the fit with the corrected notches:
Kyrenia Sub Deck loose fit.jpg
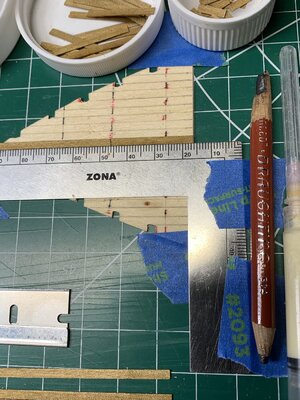
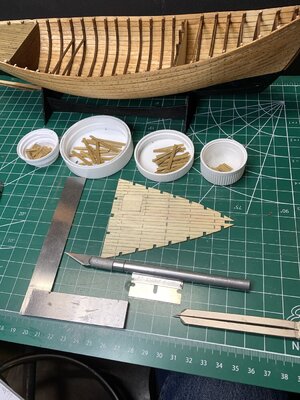
Now to cutting the planks to rough lengths to match the pattern:
Kyrenia Center Line Plank and tools.jpg
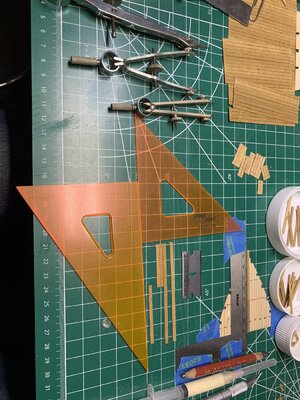
And the related tools. Note for edge blackening I use an artists pencil Drafting 314 which is very soft and easy to apply to the thin edges and ends:
Kyrenia Decking Lengths' Tools.jpgKyrenia Decking Lengths' Tools.jpg
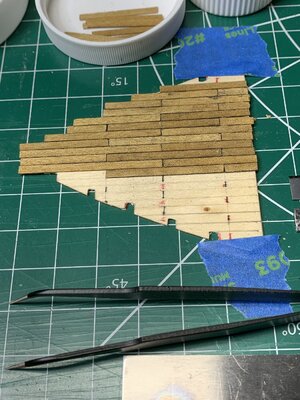
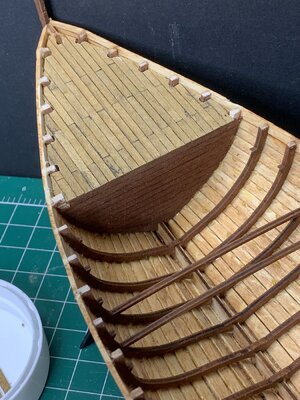
Here is an in progress view of how they are laying out being set with the Titebond adhesive in the syringe with a blunted needle, not the sharp one:
Kyrenai Fore Deck in Progress.jpg
Note that I have extended some planks longer than the sub-deck so that I can by trial and revision file them to the correct matching profile of the hull strakes and frames' tops extensions. Some small triangular ends around the foreface of those frames may break off and require fixes. The wood of teh decking is very brittle as well as thin and splits easily. Moving forward. . . plank by plank. After deck next. Rich
 
I would flip the deck over and with the false deck as template first cut off the excess planks with an Xacto before final sanding. Just a thought.
 
I would flip the deck over and with the false deck as template first cut off the excess planks with an Xacto before final sanding. Just a thought.
That flip is exactly what I will be doing as the deck pieces are too brittle to work from the top. It will be like a yo-yo over and over, front to back and back again . . . . . I thought about trying to scribe the mating lines onto a cardstock template to assist in this. Thank for your suggestion though. The wood is too brittle to cut cross grain, even with a new sharp razor (I go through these like toilet paper from the stock of my order of 100.) New insights and suggestions are always appreciated. Rich
 
That flip is exactly what I will be doing as the deck pieces are too brittle to work from the top. It will be like a yo-yo over and over, front to back and back again . . . . . I thought about trying to scribe the mating lines onto a cardstock template to assist in this. Thank for your suggestion though. The wood is too brittle to cut cross grain, even with a new sharp razor (I go through these like toilet paper from the stock of my order of 100.) New insights and suggestions are always appreciated. Rich
I use a chopper on thin pieces. Or use your xacto as a chopper. Don’t cut across the grain, push the blade straight down and chop the board. That way it doesn’t split or chip.
 
I use a chopper on thin pieces. Or use your xacto as a chopper. Don’t cut across the grain, push the blade straight down and chop the board. That way it doesn’t split or chip.
I'll pull out some new sharp 19 blades and do that. I was trying to do it with the single edge razor but was not getting sufficient pressure without precise cuts. Thanks. Rich
 
I'll pull out some new sharp 19 blades and do that. I was trying to do it with the single edge razor but was not getting sufficient pressure without precise cuts. Thanks. Rich

Use a scissor to cut the excess wood plank following the border of the deck.

I used yesterday, on a similar work, the scissor I use to cut brass sheets. It did a perfect work.

Daniel
 
Last edited:
To cut wood strips I use this:


I have the small and the long size one. They do a fantastic and precise job.

Daniel
 
Thanks to each of you for your suggestions and recommendations. Rich
After using a few new sharp X-acto No. 11 blades to "chop" the remaining deck planks I set them in place and followed by trial and error cutting/filing and resizing the subdeck and planks to match the frames I was able to set it in place.
Kyrenia Fore Deck placement.jpg

Now a bit closer to the kit fore bulkhead closer piece which is not correct to be closed:Kyrenia Foredeck and Bulkhead.jpg
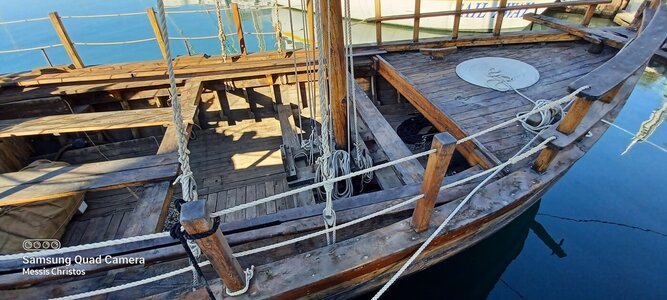
Messis sent me a photo of this same area from a Stbd view showing it should be open:
Kyrenia II Looking into Fwd Hull and Mast Base.jpg
We can see from this what this area should be for accessability. The kit after bulkhead is also closed which is also open. Too late to cut it open and shape the frames. Oh well. . . .
Next I have the after subdeck marked off and cut the planks to length:
Kyrenai After Subdeck and sized planks.jpg
I also rough trimmed a sheet of midships floor planks (ceiling but incomplete as such) to go onto the frames between the two bulkheads. I may do that allowing the glue to dry while I work on the after deck assembly.
Kyrenia Aft Subdeck for trimming and mid hull floor pieces.jpg
One more day's log work done. Rich
 
I totally agree with Christos, you are doing a very fine job assembling this model despite the translation troubles. Why would you need the instruction? Please keep up with the progress. Waiting for new photos...
 
I am pretty sure that by the replica is open in order to use the space when the ship was sailing at the beginning years of its completition. I believe by the real ship the area wasnt open. There was only a hatch on the deck although it was a store space then as well. So I did by my model back then, you can see that on the video.

So it is correct the way it turned out to be. Think if those spaces were open the danger that the cargo would slip in and destroy or isolate there food or tools. And worst would have been if the space was used to cook. Is believed that they were sleeping under the foredeck and cooking under the afterdeck, so those spaces I believe were closed.
Messis, your observations and usage make sense. I wonder if they were opened and closed by removable boards facilitating those changes and not a permanent bulkhead that the model kit provides? Your after deck facing photo does show some vertical boards but I thought they were just set there out of the way for some work aboard. This is an interesting venture with my added side historical research into the scope of the Bronze Age seafaring and conditions. RIch
 
Messis, your observations and usage make sense. I wonder if they were opened and closed by removable boards facilitating those changes and not a permanent bulkhead that the model kit provides? Your after deck facing photo does show some vertical boards but I thought they were just set there out of the way for some work aboard. This is an interesting venture with my added side historical research into the scope of the Bronze Age seafaring and conditions. RIch
P.S. The wreck recovery did find eating utensils for a crew of four and a large copper pot for cooking.
 
Yes I know. What you see on the replica, the vertical boards closing the compartment was put there a year ago.
 
Back
Top