La Candelaria - Occre Build log

Joined
Sep 11, 2023
Messages
222
Points
143

Location
Fond du Lac,WI.
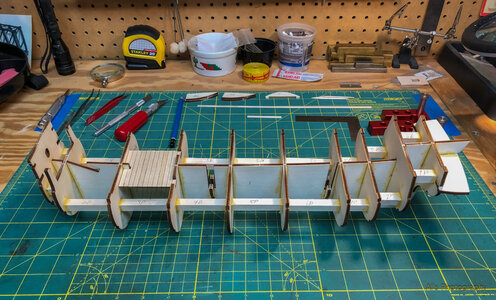
Hi everyone. I started my first ship, La Candelaria, & all feedback is welcomed.

IMG_5802.jpg
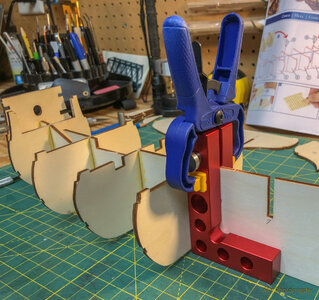
Dry fitting bulkheads to false keel & machinist square. IMG_5806.jpg
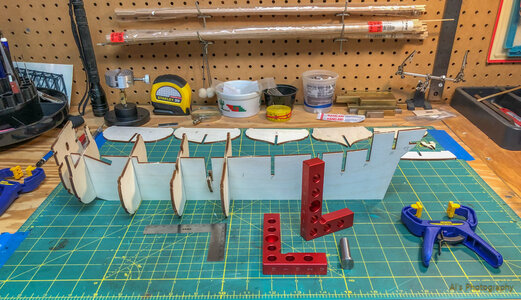
Squares locked in place against bulkhead. The bulkheads are a loose fit & by pushing the squares tightly up against them automatically aligns the bulkheads vertically & perpendicular to the keel.IMG_5810.jpg
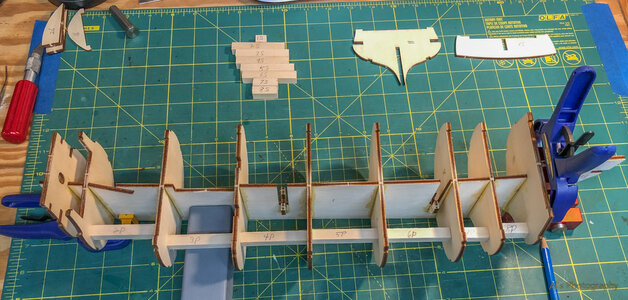
Bulkhead supports dry fitted into place. The gray block is used to square up the supports. Once this phase is complete I'll start on the deck. To be continued........IMG_5812.jpg
 
Last edited:
Looking good
I would glue left and right between two bulkheads in the same time - so - left - right - left - right and so on
not one complete side and afterwards the other side
with this you avoid a tension in your false keel
 
Looking good
I would glue left and right between two bulkheads in the same time - so - left - right - left - right and so on
not one complete side and afterwards the other side
with this you avoid a tension in your false keel
Good tip which I didn't think of but will take note of it.
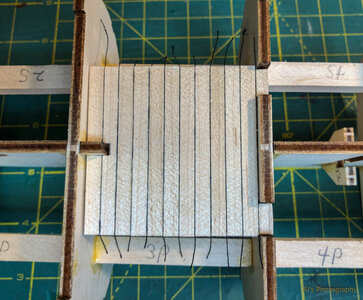
Supports are in & the main deck fits nicely in place.
I experimented simulating chalking with some scrap lumber & decided that using sewing thread looked the most realistic as you can see on the mortar deck. It needs to be trimmed, tree nails added & stained. Chalking the main deck in this manner will be tedious. Any thoughts on this technique?

IMG_5870.jpg

IMG_5869.jpg
 
Hi everyone. I started my first ship, La Candelaria, & all feedback is welcomed.
View attachment 396079
Dry fitting bulkheads to false keel & machinist square. View attachment 396081
Squares locked in place against bulkhead. The bulkheads are a loose fit & by pushing the squares tightly up against them automatically aligns the bulkheads vertically & perpendicular to the keel.View attachment 396083
Bulkhead supports dry fitted into place. The gray block is used to square up the supports. Once this phase is complete I'll start on the deck. To be continued........View attachment 396084
Good start Mate.
I built this model for more than 20 years ago. Have still the building instructions. As some of the Heavy guys have already made comments, so for the moment no more comment for now, but I am pretty sure that you will as most kit builders soon add the decks -before planking the hull first- you will later find out my comments.
 
Last edited:
Good tip which I didn't think of but will take note of it.
Supports are in & the main deck fits nicely in place.
I experimented simulating chalking with some scrap lumber & decided that using sewing thread looked the most realistic as you can see on the mortar deck. It needs to be trimmed, tree nails added & stained. Chalking the main deck in this manner will be tedious. Any thoughts on this technique?

View attachment 396515

View attachment 396516
For a model this size, I would never use or add Tree Nails -out of scale a sharp pencil you should do better
 
Small comment - first I wanted to correct you with the planking direction - but it is the floor of the mortars, or? So, according the information by Occre, it is correct
Very good progress
 
Point well taken. I experimented with tree nails (tooth picks) on a piece of 5mm scrap & they do look rather big.
The wood material for the planking seems to be relatively soft. In this soft wood you press a toothstick, so the original hole is dispressed by the toothpick and the treennail is bigger than wanted.

One way could be the treatment of the peak of the toothpick by a drawplate, so that the peak has a consistant diamater

Take a look into my actual building log (scale 1:48 with 0,5mm treenails)


another possibility would be also not to use toothpicks, but drill the hole, maybe with 0,4 or 0,5mm and fill the holes with a wood putty.
I did this on my Bonhomme Richard section model with relatively good results
Yes, the tooth pick used by itself does expand the balsa wood. A drawplate is an option as I see by your tutorial & I seen others using it.
I've been experimenting with colored wood putty the last 2 days & like the effect especially after staining the planks on scrap wood.
My model is 1:85 scale with planks 5mm wide & the smallist drill bit I have now is .762mm/.031(too big). I ordered a set with smaller bits so I'll wait & see on that.
I've also tried the pencil method by first pricking a hole. This seems to work OK too. Thanks......Al.

When I did mine, I used a 0.6mm (0.024”) bit on the quarterdeck with “stock” toothpicks that I admittedly tapped in a bit too hard. For the main deck I dropped down to a 0.4mm (0.016”) bit, and when I resharpened the toothpicks I went with a much shallower angle and VERY lightly tapped them it, and they came out much better looking.
Kevin Kenny has a good series on YT building HMS Thorn where he details using split bamboo skewers through a draw plate to make tree nails that looks good… I’ll probably try that next time.
Good to know Frank & I'll keep on testing until I'm satisfied. Thanks.........Al.
 
Point well taken. I experimented with tree nails (tooth picks) on a piece of 5mm scrap & they do look rather big.
Good morning Alan. Welcome and enjoy your first build. I agree, I used toothpicks on my Cazador build and even shaved down they came out too big. At this scale the treenails are tiny. Cheers Grant
 
If the results are not more or less in scale, and in 1:85 it will be very hard to get (drills are braking very often according my own experience :eek: ) it is often better not to show any treenails on the deck - sometimes it is better not to make something ......
at the end it is all a question of personal taste of the owner of the project
 
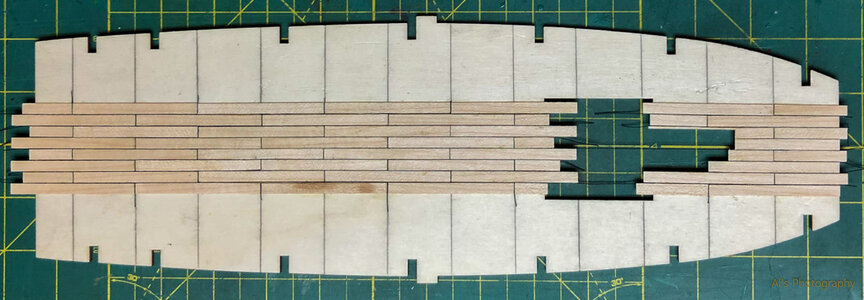
Planking is progressing on the main deck with thread (chalking) being applied along & on the ends of the planks.
It may be hard to see in this photo but I should have used a little larger dia. thread & some of the gaps are a little wider then what I wanted.
Overall, at this scale of 1:85 I'm OK with it.IMG_5888.jpg
 
Good tip which I didn't think of but will take note of it.
Supports are in & the main deck fits nicely in place.
I experimented simulating chalking with some scrap lumber & decided that using sewing thread looked the most realistic as you can see on the mortar deck. It needs to be trimmed, tree nails added & stained. Chalking the main deck in this manner will be tedious. Any thoughts on this technique?

View attachment 396515

View attachment 396516
Really love the look of the thread!
 
This morning I discovered my first big mistake & it's because I did not pay close enough attention to the instructions. It is correctable for the most part but it will still be noticeable.
Looking at the deck planking you will see where the deck attaches to the the bulkheads. Well, you should not be able to see the bulkhead tabs. Yup, I went & trimmed out the 12 notches on the deck & now I need to patch those notches. I can do it but it will be noticeable.
Looking at the photo you'll see I have a walnut trim piece attached which is meant to be there at a latter stage. That will cover the majority of my blunder.
So, how will I attack this boo boo? Here's my plan & if anyone has a better solution please chime in.
#1: Stain & seal the mortar deck before attaching the main deck. I originally intended to stain & seal the main deck before installation.
#2: Install the main deck.
#3: Patch 12 bulkhead tabs(notches) with deck planking. The wood grain will not match.
#4: Apply vertical planks to bulkhead that meets main deck at stern.
#5: Stain & seal main deck.
I'm not discouraged at all but I hate messing up. Thanks.........Al.IMG_5895.jpg
 
Back
Top