-

Win a Free Custom Engraved Brass Coin!!!
As a way to introduce our brass coins to the community, we will raffle off a free coin during the month of August. Follow link ABOVE for instructions for entering.
-

PRE-ORDER SHIPS IN SCALE TODAY!
The beloved Ships in Scale Magazine is back and charting a new course for 2026!
Discover new skills, new techniques, and new inspirations in every issue.
NOTE THAT OUR FIRST ISSUE WILL BE JAN/FEB 2026
You are using an out of date browser. It may not display this or other websites correctly.
You should upgrade or use an alternative browser.
You should upgrade or use an alternative browser.
La Candelaria - Occre Build log
- Thread starter Alan56
- Start date
- Watchers 21
-
- Tags
- la candelaria occre
Yes, I spent the better part of this weekend doing just that on the first bulwark. The bending method shown above worked very nice. I had to fit the bulwark onto the ship numerous times so I could draw in pencil lines for the planks & also check fitment as I proceeded, Especially at the forecastle & quarter decks. Lots of fun trimming out those tiny square cutouts.Do you plan on pre-planking the bulwarks before installing them?
Photos show some of my progress & the final results.


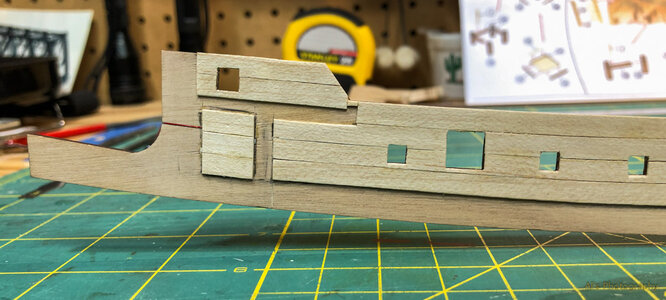
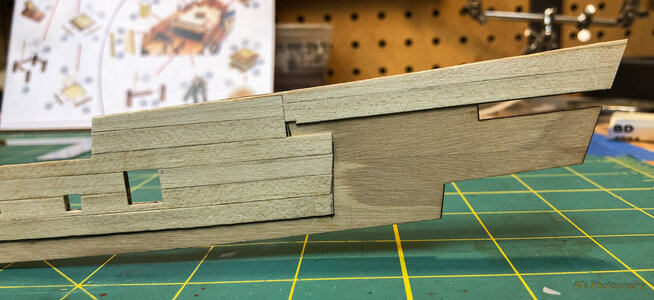
Yes, I spent the better part of this weekend doing just that on the first bulwark. The bending method shown above worked very nice. I had to fit the bulwark onto the ship numerous times so I could draw in pencil lines for the planks & also check fitment as I proceeded, Especially at the forecastle & quarter decks. Lots of fun trimming out those tiny square cutouts.
Photos show some of my progress & the final results.
Looks really good... can't wait to see how it looks mounted.
If you think those cutouts were fun, wait until we get to our hundred gunners....

Alan, I think I may have found something... at least I found something that someone else found. 
I was perusing a few build logs during lunch at work today, and I came across KiethW's build of the HMS Royal William, and he showed some ship's boats that he got from Vanguard Models.... they look sharp. The smallest one they make is 86mm without rudder, and our boats measure 85mm.
It's post #35 in his build:
EDIT: oars are separate on the pull-down menu

 vanguardmodels.co.uk
I was perusing a few build logs during lunch at work today, and I came across KiethW's build of the HMS Royal William, and he showed some ship's boats that he got from Vanguard Models.... they look sharp. The smallest one they make is 86mm without rudder, and our boats measure 85mm.
It's post #35 in his build:
HMS Royal William 1719, Euromodel, 1:72
Wonderful Keith! I fancy this ship myself so I'll pull up a chair as you get caught up with your postings...
shipsofscale.com
EDIT: oars are separate on the pull-down menu

Ship’s Boats (various types)
We are pleased to be able to offer you a varied and expanding range of 1:64 ship’s boats, as standalone kits. All of these, whilst built around a disposable MDF frame, are made from high grade pear wood, and incorporate laser-cut plank strips, and photo etch parts, such as oarlocks*, boat hooks*...
 vanguardmodels.co.uk
Last edited:
Thanks Frank for the info. WOW, those boats are beautiful & I'll keep them in mind. I also found these boats from Model Expo (they have an 81mm) a few weeks ago but the ones from Vangaurd look even more detailed & are closer in size to ours.
https://modelexpo-online.com/Lifeboat-Kits
https://modelexpo-online.com/Lifeboat-Kits
Very nice... I am right behind you. I'll probably do an update tomorrow. Well, later today... I'm up late. Very gratifying to see it finally taking some shape!
Don't know if you caught it in the instructions, but be aware that the first planks that go on each side in those guide notches are thicker than the rest of the planks to account for that depth difference. I bring it up because John Aliprantis made that mistake in his build.
Don't know if you caught it in the instructions, but be aware that the first planks that go on each side in those guide notches are thicker than the rest of the planks to account for that depth difference. I bring it up because John Aliprantis made that mistake in his build.
Yes, I watched the same video & was saying "John you need to use the 3mm planks"
I spent the last few days building a wood steam box that I'll use for bending planks on the hull plus other projects I have in mind. I also made a pin board for forming the planks once they've been steamed. Big thanks to Philski for the inspiration on this project, especially the pin board which I basically copied.
I've been practicing steaming some 2mm planks which I have on the pin board below. I steamed them for 15 minutes & they were quite pliable. I can steam multiple boards at a time & stack them on top of each other in the pins. I then tried the 3mm master planks & found them much harder to bend so I'll need to try again & steam them for a longer period. Actually I cracked one trying to bend it (Frank W had the same issue) but luckily it was near the end so theirs enough material for a second chance. Soon as I finish sanding the hull I'll start planking.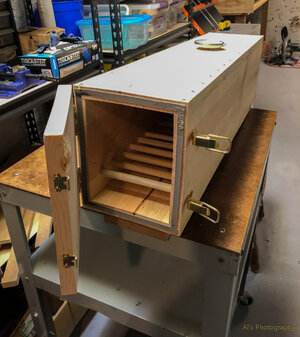
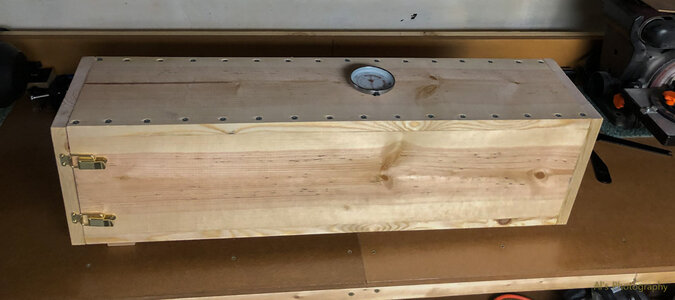
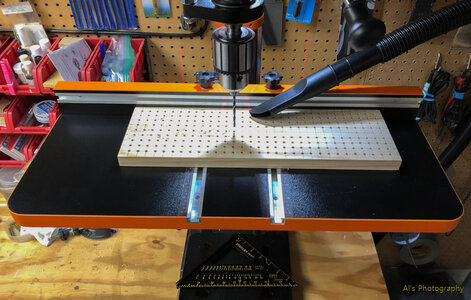
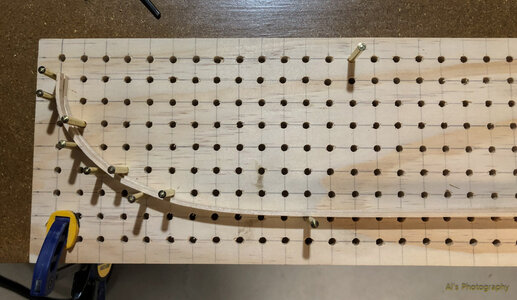
I've been practicing steaming some 2mm planks which I have on the pin board below. I steamed them for 15 minutes & they were quite pliable. I can steam multiple boards at a time & stack them on top of each other in the pins. I then tried the 3mm master planks & found them much harder to bend so I'll need to try again & steam them for a longer period. Actually I cracked one trying to bend it (Frank W had the same issue) but luckily it was near the end so theirs enough material for a second chance. Soon as I finish sanding the hull I'll start planking.


Good morning Alan. An impressive steam box. A brilliant idea for bending many planks now and into the future. Cheers GrantI spent the last few days building a wood steam box that I'll use for bending planks on the hull plus other projects I have in mind. I also made a pin board for forming the planks once they've been steamed. Big thanks to Philski for the inspiration on this project, especially the pin board which I basically copied.
I've been practicing steaming some 2mm planks which I have on the pin board below. I steamed them for 15 minutes & they were quite pliable. I can steam multiple boards at a time & stack them on top of each other in the pins. I then tried the 3mm master planks & found them much harder to bend so I'll need to try again & steam them for a longer period. Actually I cracked one trying to bend it (Frank W had the same issue) but luckily it was near the end so theirs enough material for a second chance. Soon as I finish sanding the hull I'll start planking.View attachment 402207View attachment 402208View attachment 402209View attachment 402210
This forum is full of all sorts of great ideas...
Well I finally installed the filler boards on the bow between the 1st & 2nd bulkheads ( needed to add wood filler where I was light on material).Then came sanding & forming the bow & stern, checking & rechecking to be sure I have a smooth transition from one bulkhead to the next & through to the end points. Once I'm satisfied with my plank bending techniques I'll start laying planks. 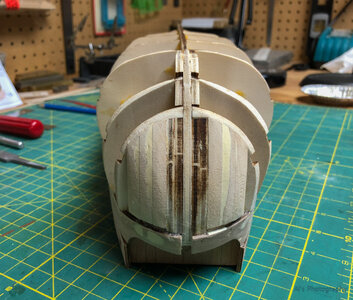
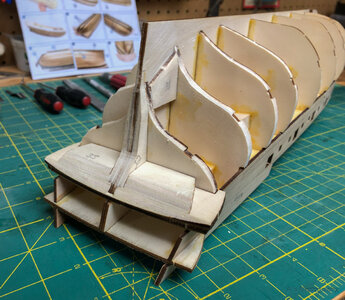


Well I finally installed the filler boards on the bow between the 1st & 2nd bulkheads ( needed to add wood filler where I was light on material).Then came sanding & forming the bow & stern, checking & rechecking to be sure I have a smooth transition from one bulkhead to the next & through to the end points. Once I'm satisfied with my plank bending techniques I'll start laying planks. View attachment 402395
I’m at work, so I can’t post a pic of what I’m trying to say, so hopefully this comes across.
I’m just a hair ahead of you, and on the stern (parts 33/pic 12), I had beveled the same way you did. When I started shaping my first belt plank directly beneath the bulwark, it will need to make a very tight near-90 degree twist off that last bulkhead to sit flush on the stern. In order to get it to sit correctly, you’re going to need to round over those hard outside edges, beveling toward the top of the bulkhead as well… you’ll see how that plank lays in pic 29. Also, take the gallery bottom (part 111/pic 56), lay it in place, and draw a pencil line behind it so you see what kind of clearance you need to leave yourself to later install that part.
EDIT: On a side note, even though Philski said it wasn’t really necessary, as a newbie-bender you’re going to be glad you put the filler block in the bow.
Last edited:
Thanks for the tip on sanding the edges at the stern.I’m at work, so I can’t post a pic of what I’m trying to say, so hopefully this comes across.
I’m just a hair ahead of you, and on the stern (parts 33/pic 12), I had beveled the same way you did. When I started shaping my first belt plank directly beneath the bulwark, it will need to make a very tight near-90 degree twist off that last bulkhead to sit flush on the stern. In order to get it to sit correctly, you’re going to need to round over those hard outside edges, beveling toward the top of the bulkhead as well… you’ll see how that plank lays in pic 29. Also, take the gallery bottom (part 111/pic 56), lay it in place, and draw a pencil line behind it so you see what kind of clearance you need to leave yourself to later install that part.
EDIT: On a side note, even though Philski said it wasn’t really necessary, as a newbie-bender you’re going to be glad you put the filler block in the bow.
Hallo @Alan56Hi everyone. I started my first ship, La Candelaria, & all feedback is welcomed.
Dry fitting bulkheads to false keel & machinist square.
Squares locked in place against bulkhead. The bulkheads are a loose fit & by pushing the squares tightly up against them automatically aligns the bulkheads vertically & perpendicular to the keel.
Bulkhead supports dry fitted into place. The gray block is used to square up the supports. Once this phase is complete I'll start on the deck. To be continued.....
we wish you all the BEST and a HAPPY BIRTHDAY

Enjoy your special day
Best wishes for a great birthday Alan!
Happy Birthday! 


