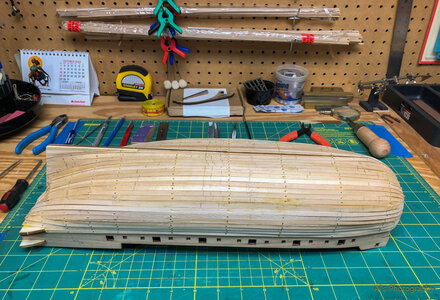
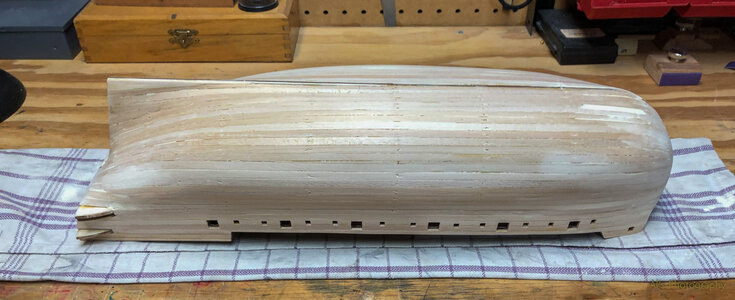
Thanks guys. I appreciate the kind words. Still working on 1st layer hull planking & will update that step when completed. Almost done.....Al.
-

Win a Free Custom Engraved Brass Coin!!!
As a way to introduce our brass coins to the community, we will raffle off a free coin during the month of August. Follow link ABOVE for instructions for entering.
-

PRE-ORDER SHIPS IN SCALE TODAY!
The beloved Ships in Scale Magazine is back and charting a new course for 2026!
Discover new skills, new techniques, and new inspirations in every issue.
NOTE THAT OUR FIRST ISSUE WILL BE JAN/FEB 2026
You are using an out of date browser. It may not display this or other websites correctly.
You should upgrade or use an alternative browser.
You should upgrade or use an alternative browser.
La Candelaria - Occre Build log
- Thread starter Alan56
- Start date
- Watchers 21
-
- Tags
- la candelaria occre
Congratulations Alan! A major accomplishment. I see some sanding in your future!
Great job, Alan on the first planking. Congrats on yet another milestone!
On my 2nd. ship I plan on cutting the time to 50 hours54 hours ? You think too longSo far, so good.
Looking good, but there's something you may want to check before planking further... not a fault of yours. Since I don't know the official part name, I'll post a description over on my build after I go down and grab a few pics.
Last edited:
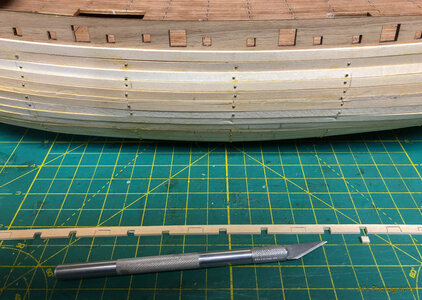
So the sanding begins. Yes the nails need to be pulled but first I wanted to start at the stern & see how the back plate ( not sure of the correct name for this part) aliens with the planks & bulwarks. A little sanding needed to be done on the bulwarks as well as the planks. From here I'll finish planking the bulwarks, pull the nails & sand,sand & sand. You'll notice I have a block of wood under the quarter deck & clamped to protect the fragile bulwarks while sanding.
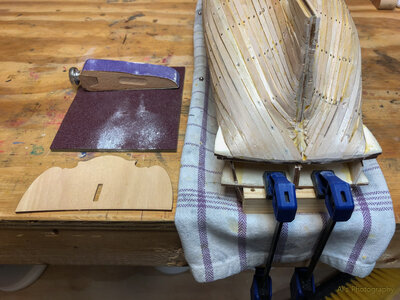

Happy sanding 

I'm in the process of planking the bulwarks & trimming out the ports. I thought about trimming out the ports after I glued the planks in place but found it easier to dry fit the plank over the ports & trace out the holes with a pencil then trim them on my mat. Once glued in place I'll use a fine file to finish them off.
Question......I know what the gun ports are but what is the purpose for the small ports?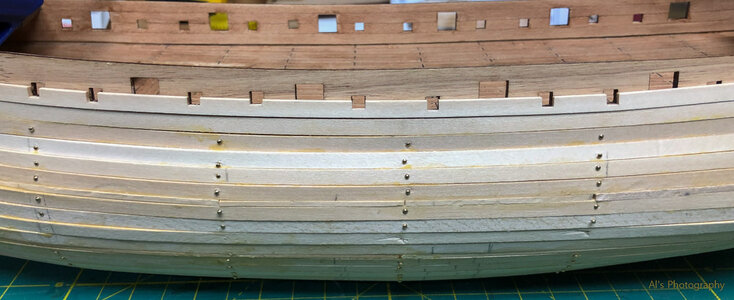
Question......I know what the gun ports are but what is the purpose for the small ports?


I'm in the process of planking the bulwarks & trimming out the ports. I thought about trimming out the ports after I glued the planks in place but found it easier to dry fit the plank over the ports & trace out the holes with a pencil then trim them on my mat. Once glued in place I'll use a fine file to finish them off.
Question......I know what the gun ports are but what is the purpose for the small ports? View attachment 406971View attachment 406972
I was wondering that myself… only thing I could think of was that they were for oars to maneuver the ship, but no large oars are provisioned for in the kit.
I had two thoughts when I went in… either scratch build some large oars and have them strapped down on the rack that the ship’s boat is on, or delete those ports altogether, which is why I held off on planking the interior of the bulwarks. I wanted to see the look of the ship with just the gun ports cut out on the exterior planking, which is what I’m working on right now.
I guess these smaller ones were used for the oars - so called sweep portsI'm in the process of planking the bulwarks & trimming out the ports. I thought about trimming out the ports after I glued the planks in place but found it easier to dry fit the plank over the ports & trace out the holes with a pencil then trim them on my mat. Once glued in place I'll use a fine file to finish them off.
Question......I know what the gun ports are but what is the purpose for the small ports? View attachment 406971View attachment 406972
some smaller ships, like sloops, 20 gunner frigates etc, but also bomb vessel had oars to manouver near the shore
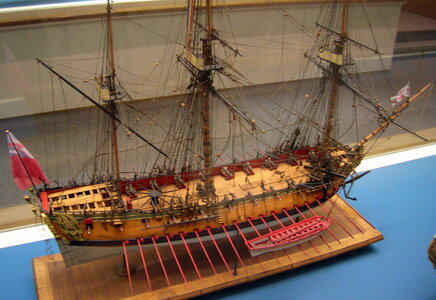
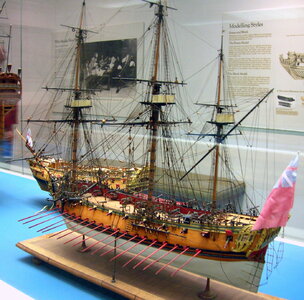
The shown model has the sweep port on the extra deck, but most of the time were two sweep port between the gunports - so the oarmen worked between the guns
For example by Granado, I am working in moment has them also
Excellent explanation Uwek!!! Thank you. Love the models you shown also.I guess these smaller ones were used for the oars - so called sweep ports
some smaller ships, like sloops, 20 gunner frigates etc, but also bomb vessel had oars to manouver near the shore
View attachment 406981
View attachment 406982
The shown model has the sweep port on the extra deck, but most of the time were two sweep port between the gunports - so the oarmen worked between the guns
For example by Granado, I am working in moment has them also
Spent the last 2 days sanding the hull & besides some small touch ups & inspection from various angles I should be done. I actually really enjoyed the sanding process & am amazed by how rock solid the ship feels in my hands.
Isn't that an awesome feeling?? I just finished my sanding last night, and while I can't say I "enjoyed" it as much as you, it certainly wasn't as bad as I was dreading. I'm going to do the planking on the interior of the bulwarks before I proceed with the exterior planking, though.
Something I saw in an older thread... I forget whose it was so I'm sorry I can't give credit, but it was mentioned to stain the first layer from the belt line down with walnut so if you happen to have a small gap in your planks somewhere, the blonde wood underneath won't be shining through like the North Star.
Last edited:
It sure is nice to see it sanded down & faired. Next up is installing the waterways on the inside of the bulwarks then lining the exterior of the bulwarks with sycamore. After that comes the walnut on the hull.Isn't that an awesome feeling?? I just finished my sanding last night, and while I can't say I "enjoyed" it as much as you, it certainly wasn't as bad as I was dreading. I'm going to do the planking on the interior of the bulwarks before I proceed with the exterior planking, though.
Something I saw in an older thread... I forget whose it was so I'm sorry I can't give credit, but it was mentioned to stain the first layer from the belt line down with walnut so if you happen to have a small gap in your planks somewhere, the blonde wood underneath won't be shining through like the North Star.
You prepared a very good basis - looking very good
BTW: I love to touch my bodies -> ships hull bodies off course
BTW: I love to touch my bodies -> ships hull bodies off course
Thanks Uwek, always nice to get feedback from experienced ship builders.You prepared a very good basis - looking very good
BTW: I love to touch my bodies -> ships hull bodies off course
I'm almost ready for the 2nd planking but first I need to research the correct or best way to lay down those planks. I ordered Planking Techniques for Model Ship Builders by Donald Dressel to help me with this critical step.


