La Candelaria - Occre Build log

This morning I discovered my first big mistake & it's because I did not pay close enough attention to the instructions. It is correctable for the most part but it will still be noticeable.
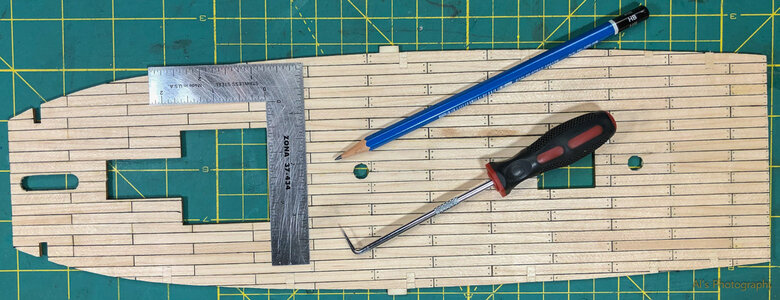
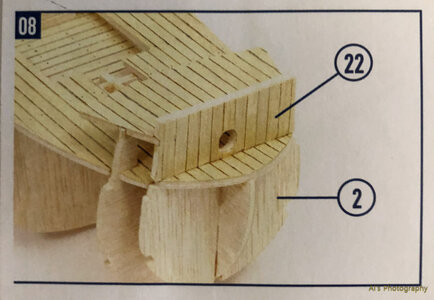
Looking at the deck planking you will see where the deck attaches to the the bulkheads. Well, you should not be able to see the bulkhead tabs. Yup, I went & trimmed out the 12 notches on the deck & now I need to patch those notches. I can do it but it will be noticeable.
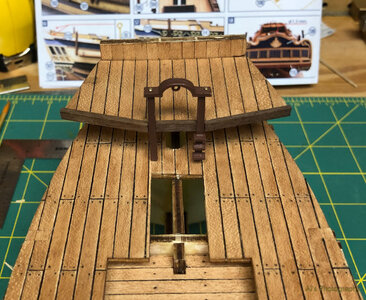
Looking at the photo you'll see I have a walnut trim piece attached which is meant to be there at a latter stage. That will cover the majority of my blunder.
So, how will I attack this boo boo? Here's my plan & if anyone has a better solution please chime in.
#1: Stain & seal the mortar deck before attaching the main deck. I originally intended to stain & seal the main deck before installation.
#2: Install the main deck.
#3: Patch 12 bulkhead tabs(notches) with deck planking. The wood grain will not match.
#4: Apply vertical planks to bulkhead that meets main deck at stern.
#5: Stain & seal main deck.
I'm not discouraged at all but I hate messing up. Thanks.........Al.

OK, I don't feel as bad... I did the same thing with the notches on the forecastle deck. LOL Granted, that was a little easier fix... just took the dremel with a sanding drum to the planks on the edges and re-planked the two outside ones on each side.
 
OK, I don't feel as bad... I did the same thing with the notches on the forecastle deck. LOL Granted, that was a little easier fix... just took the dremel with a sanding drum to the planks on the edges and re-planked the two outside ones on each side.
If I could find a way to remove the outer planks & re-plank that would be nice. I used Titebond & removing them would tear up the sub deck. Also, too much material for a Dremel.
I've been watching your build. What did you use for stain on your mortar deck?
 
If I could find a way to remove the outer planks & re-plank that would be nice. I used Titebond & removing them would tear up the sub deck. Also, too much material for a Dremel.
I've been watching your build. What did you use for stain on your mortar deck?

Funny you should mention the mortar deck, as I’m at the table right now redoing it. I did some test swatches and thought the Sepia dye looked pretty good, but in full size it came out much darker & redder than I liked. I slapped some 80 grit on the palm sander and ground it down to replank it… just got done with the nails. I did the oak dye on the main deck, and I think it looks much better.
 
The waterway and deck boarder planks should hide it. Not much, if any, surgery required.
Some of the other guys can advise you on this.

Pete
 
The wood material for the planking seems to be relatively soft. In this soft wood you press a toothstick, so the original hole is dispressed by the toothpick and the treennail is bigger than wanted.

One way could be the treatment of the peak of the toothpick by a drawplate, so that the peak has a consistant diamater

Take a look into my actual building log (scale 1:48 with 0,5mm treenails)


another possibility would be also not to use toothpicks, but drill the hole, maybe with 0,4 or 0,5mm and fill the holes with a wood putty.
I did this on my Bonhomme Richard section model with relatively good results
I've got some 0.5 carbon fibre to use as treenails.
 
Good tip which I didn't think of but will take note of it.
Supports are in & the main deck fits nicely in place.
I experimented simulating chalking with some scrap lumber & decided that using sewing thread looked the most realistic as you can see on the mortar deck. It needs to be trimmed, tree nails added & stained. Chalking the main deck in this manner will be tedious. Any thoughts on this technique?

View attachment 396515

View attachment 396516
Liking the thread to simulate caulking. Will follow your build with interest.
 
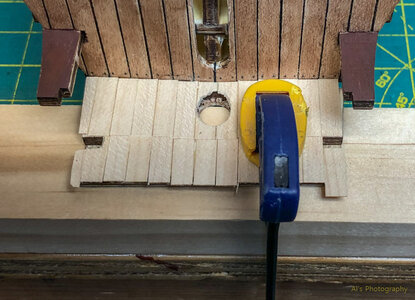
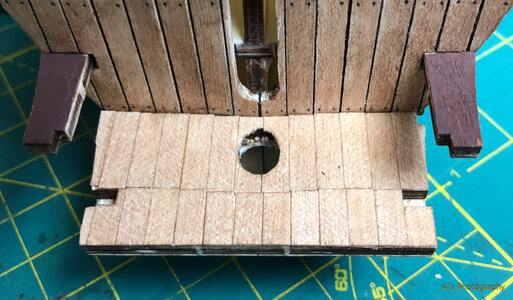
Back in post #20 I showed how I blundered & cut out the notches for the bulk heads. I was able to patch in those notches with tiny pieces of planking. The majority of these patches will be concealed by a walnut plank that runs along the perimeter of the deck.
I also finished adding treenails via the pencil method using a punch & straight edge.
Now I'm experimenting with various finishes for the decking. I'm pretty much sold on using shellac with a little tint instead of wood stain & a top coat.IMG_5905.jpg
 
Last edited:
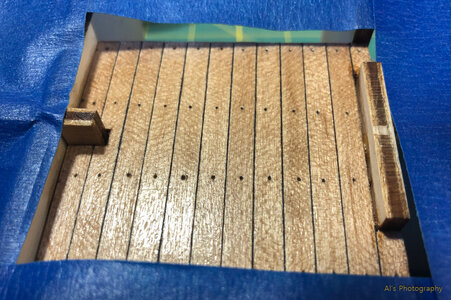
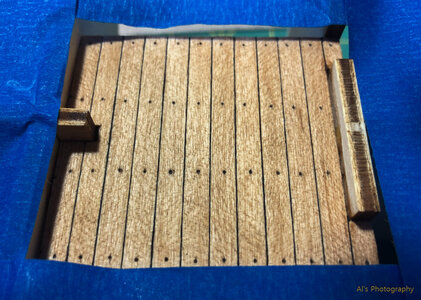
I've been experimenting with a variety of finishes for the decks including a few different stains but decided I did not like the color plus I would have to seal it with a top coat. Instead I went with two coats of Zinsser dewaxed seal coat shellac that I tinted to give it a brownish tone. I like the overall look but a little to glossy so I applied a coat of AK Interactive ultra matte varnish using my airbrush. This matte varnish totally removes the gloss as seen in these comparison photos.
I also,finally, have the deck glued to the false keel & will proceed with gluing the other decks before moving on to hull planking.IMG_5909.jpgIMG_5911.jpgIMG_5945.jpg
 
I've been experimenting with a variety of finishes for the decks including a few different stains but decided I did not like the color plus I would have to seal it with a top coat. Instead I went with two coats of Zinsser dewaxed seal coat shellac that I tinted to give it a brownish tone. I like the overall look but a little to glossy so I applied a coat of AK Interactive ultra matte varnish using my airbrush. This matte varnish totally removes the gloss as seen in these comparison photos.
I also,finally, have the deck glued to the false keel & will proceed with gluing the other decks before moving on to hull planking.View attachment 399336View attachment 399337View attachment 399338
Good evening Alan. Looking good!! Cheers Grant
 
On step #8 it says to "line the front top part of frame #2 but does not tell you to line the back of the frame (bulkhead). When you install the forecastle deck the backside will be visible so I decided to plank it also. I guess it could just be painted but I think it looks better planked. I also painted the top portion of bulkhead #3 the same walnut color as the trim as that also will be shown, somewhat, underneath the forecastle.IMG_5954.jpgIMG_5951.jpgIMG_5953.jpg
 
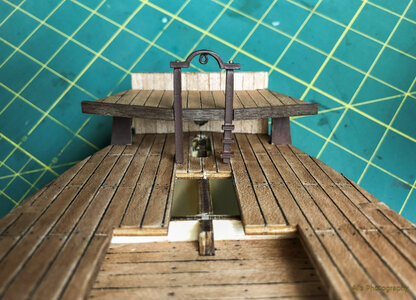
Here's two more views of the forecastle deck showing the planking underneath & above the deck. The belfry & deck are dry fitted for now. After looking at these photos I noticed that the right leg on the belfry is shorter then the left so work needs to be done on that.
Also ignore the color tone in the 1st. photo which is way off.
IMG_5957.jpgIMG_5964.jpg
 
Very nice. I wound up doing nearly the same on the vertical face forward of the forecastle. I didn’t do anything yet with the front face of that bulkhead that protrudes up to support the FC, but did notice you can really see the plywood even from a shallow viewing angle, so I’m going to do something with it.
Glad to see your belfry fit. If you recall, mine doesn’t, but I have some square basswood strips that fit those notches perfectly, so I plan on cutting the legs off of mine and gluing the top onto new legs.
Question for little later down the road… I noticed that the instructions don’t call for planking the inside of the bulwarks, but OcCre’s pictures of the model show it done, and it looks like they provide enough spare material… you going to try it? I’m heavily considering it.
 
Hi Frank, the notches for the belfry on mine did not fit also. I patched in the notches & the belfry will sit against the FC with the trim butting up to the belfry.
I like the idea of planking the bulwarks horizontaly as shown in the photos & will do that. Thanks for pointing that out:).
I also ordered the wheel & bell plus 12 canon from Modelers Central. The canans are the same length (36mm) & look much fancier in the brown color.
 
Did you get the decorated cannon?? Those look really nice!

And if your bell & wheel were half as crappy as mine, you will be very happy with the new ones.
 
Very nice. I wound up doing nearly the same on the vertical face forward of the forecastle. I didn’t do anything yet with the front face of that bulkhead that protrudes up to support the FC, but did notice you can really see the plywood even from a shallow viewing angle, so I’m going to do something with it.
Glad to see your belfry fit. If you recall, mine doesn’t, but I have some square basswood strips that fit those notches perfectly, so I plan on cutting the legs off of mine and gluing the top onto new legs.
Question for little later down the road… I noticed that the instructions don’t call for planking the inside of the bulwarks, but OcCre’s pictures of the model show it done, and it looks like they provide enough spare material… you going to try it? I’m heavily considering it.
Frank, I've been trying to see if I can plank the inside of the bulwarks & I came up with one method that may do the job but I'm not sure how realistic it will look.
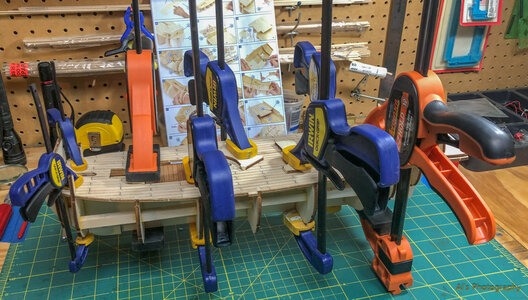
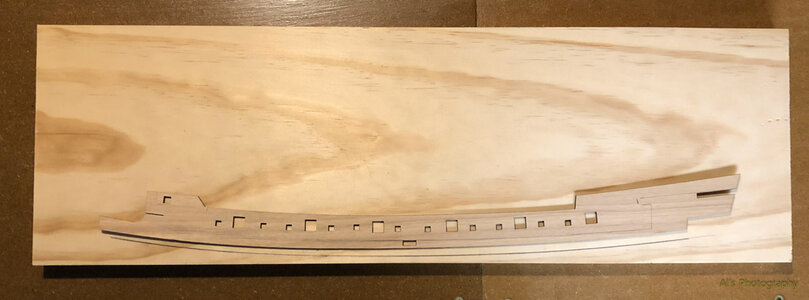
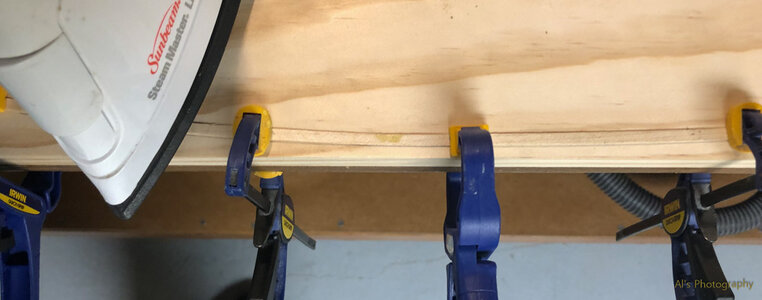
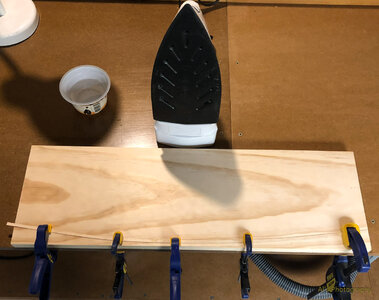
It involves bending the plank to the arc of the bulwark/main deck. I found this method of bending planks, as seen below, by Chuck Passaro where he clamps a plank, wets it with water & uses a cloths iron heating the plank to conform to the desired shape. I found it works quite well.
In the 1st photo I traced a line using the bottom of the bulwark.
Photos 2&3 show the iron heating the plank. I use my finger dipped in water to wet the plank first.
Photo #4 the plank is dry fitted to the bulwark. I clamped the bulwark in place on the ship & traced a line along the main deck, forecastle & quarter deck.
I suppose I could put the planks on straight but that would involve a lot of cutting, trimming & splicing.IMG_5977.jpgIMG_5971.jpgIMG_5973.jpgIMG_5974.jpg
 
Back
Top