• SUBSCRIBE TO SHIPS IN SCALE TODAY!

    The beloved Ships in Scale Magazine is back and charting a new course for 2026!
    Discover new skills, new techniques, and new inspirations in every issue.

    NOTE THAT OUR NEXT ISSUE WILL BE MARCH/APRIL 2026
  • Win a Free Custom Engraved Brass Coin!!!
    As a way to introduce our brass coins to the community, we will raffle off a free coin during the month of August. Follow link ABOVE for instructions for entering.

La Renommee 1/48th Scale

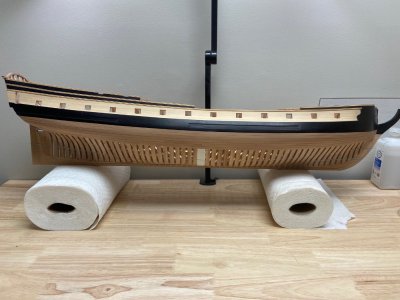
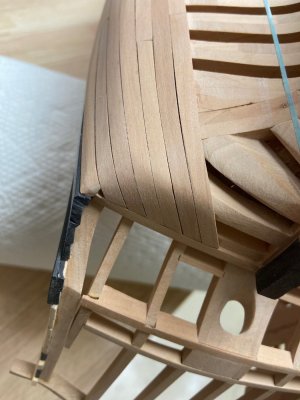
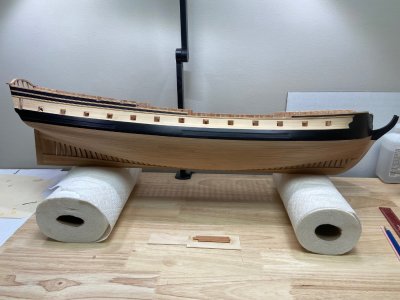
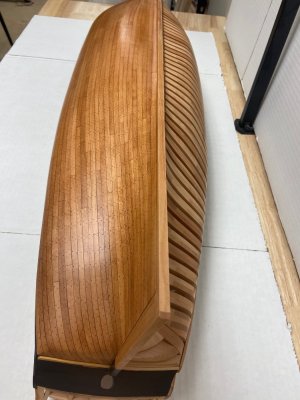
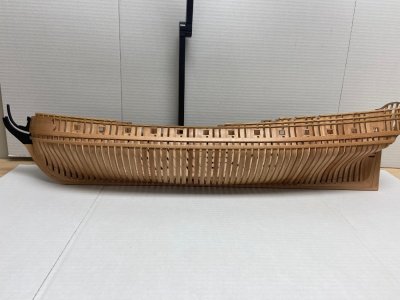
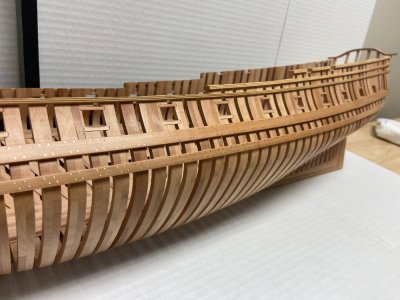
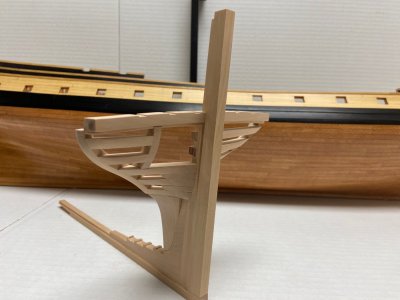
Good morning group, the first belt of four of hull planking is installed and not sanded yet. This was not easy as the French Method of planking uses thick planks which reduce as you approach the keel. So these planks range in thickness from 3mm thick to 2.5mm and reducing as I go. Notice the hull tuck which as a real pain - only after using a modified tea kettle to steam the planks and a hair dryer was I successful.

As I continue to plank I am considering the use or non use of treenails on the hull planking. As always appreciate your comments and yes the paper towel rolls are a great way to support the hull while inverted to install planks.

Planking First Belt.jpg

Stern Tuck.jpg
 
Beautiful clean and fair lines! The color contrast is awesome.

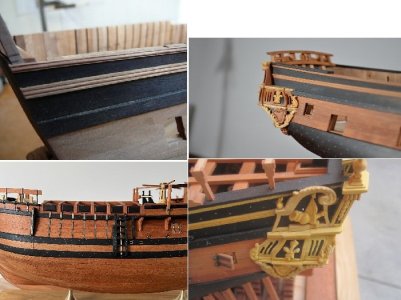
Look forward to your decision on treenails. I'm looking at a bunch of different Salamanadre color and trenails schemes...some are probably technically correct but seem to be too busy. Here a four, from few to lots.

side planking montage.jpg

I'm sure it will look great which ever path you choose. Thanks for sharing!

I'll post some pictures of the Salamandre stern, to which I added tiny 1" scale bolts to the thin stern timbers, later today.
 
Thanks gentleman - I am happy only a 4 more planks or so will need to be bent on the tuck.

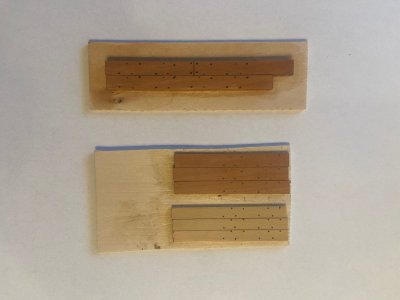
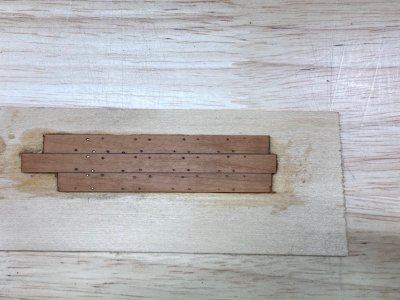
Brad - here's how I would approach treenails if I choose to apply them. Cover the wood with matt scotch tape to mark locations and protect the underlying wood.
Then drill appropriate size holes and fill with wood filler - top example is ebony filler, bottom one is walnut. Peal tape and and sand with 400 grit paper and you have subtle treenails.

Treenails.jpg
 
Many classic museum models do not feature treenails or bolts so I want to consider that option. Most example of La Renommee look identical with the same approach - I want to offer my unique take on this subject. Currently I really like the thought of less is more and highlight the beauty of the lines and the sculptures.

We'll see
 
Good day to you,. The quality of your model and the precision of its execution are truly admirable. I am also working on this ship model in the dockyard style, though I am still at the stage of cutting out and assembling the frames. Have you, by any chance, encountered inaccuracies in the plans? Upon careful scrutiny and comparison of the drawings, I have noted numerous discrepancies and distortions. To verify the lines, I found it necessary to reconstruct the structure in 3D and make substantial corrections to the frame contours. I am curious to know whether this is merely a printing defect in my particular copy of the monograph or a more general issue with the source.
I'll be watching your progress with great interest and will certainly aim to reach the standard of quality you have set.
 
Hi Alexey,
Thanks for your compliments. I have not notice any major discrepancies in the build so far. The only area I would make sure to check is the juncture of the fashion pieces, transom frames and the last frames 57 and 58 on the underside. I am currently planking my hull and have noticed a slight depression there. It could be my error otherwise no major problems.
Best
Chris
 
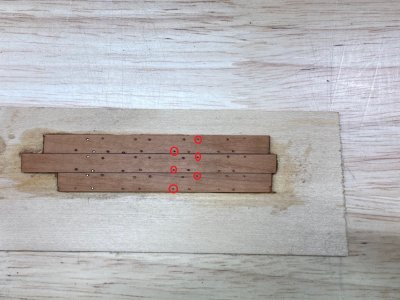
Planking continues - 6 strakes left. No stealers or drop planks will be needed. I am going to simulate nailing after and have attached the sample I have chosen. On the left I did try alternating the historically accurate pattern with one nail and trenail alternated. Instead I am going with the pattern on the right - which is simply holes filled in by wet sanding the Liberon Finishing Oil. Its a bit more subtle and to my liking.

I need to drill all the holes next to use the frames as a reference for the necessary lines before completing the planking.

Planking continues.jpg

Treenails.jpg
 
Chris,

The planking is looking great!

I like you decision on the right side.

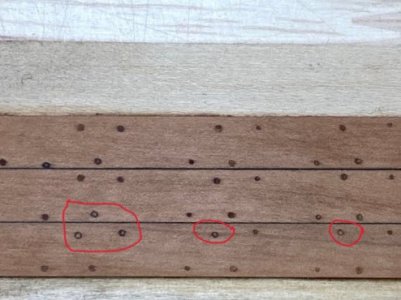
Did you use different size drills to simulate the wood/metal pattern or is it just an optical illusion? The red circles appear slightly smaller diameter?

If purposedly done, I like it!

treenails.jpg
 
I did use two different size bits - 0.4mm which is the nail size and 0.6mm which is the treenail size at 1/48. The larger bit does give that effect - the trick is shallow holes. I believe I twisted the pin vise 3 times on both holes. The oil saw dust mix does the rest.
 
Good Morning !

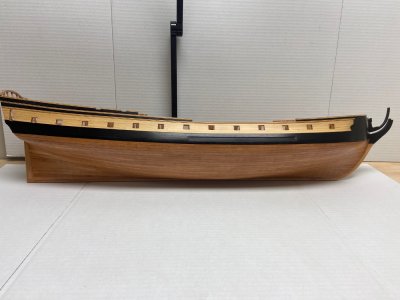
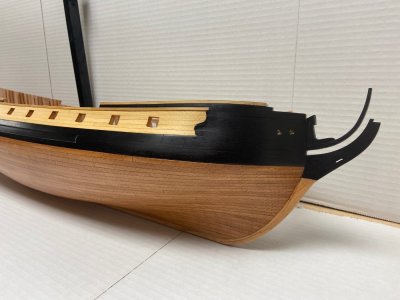
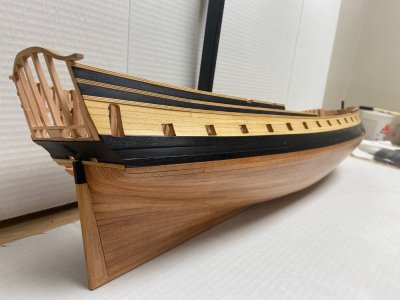
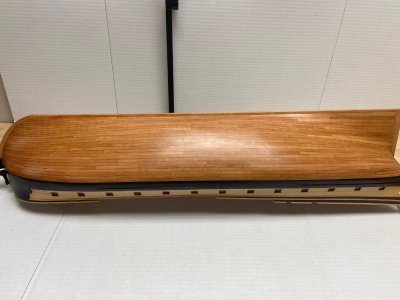
Here are some dated photos of my build as of this AM. The hull is planked and finish applied, shellac on the port side, and Liberon Finishing Oil on the Starboard side. The advantage of the oil is I am able to drill the proper size of the treenails and nails and then simply fill the holes with the slurry created during the application of the oil. Its much more subtle at this scale.

I did bolt the wales on the port side but not the black ones on the starboard side as an aesthetic choice.

While my intention was to begin construction on LInvention, I did look at some of the assemblies I made a few years back on Le Gros Ventre in 1/36th. All of the frames, keel parts and construction site are completed. I stopped because I had trouble with the hawse pieces. I may give them another go - as I could have another fully framed hull completed by the end of the year.

As always thanks for your encouragement,

Chris

Fame Starboard Full.jpg

Fame Bow Planked.jpg

Fame Stern Planked.jpg

Fame Hull Planking.jpg

Fame Stern Underside Planking.jpg

Fame Port Side.jpg

Fame Port Side Wales.jpg

IMG_2226.jpg
 
Good Morning !

Here are some dated photos of my build as of this AM. The hull is planked and finish applied, shellac on the port side, and Liberon Finishing Oil on the Starboard side. The advantage of the oil is I am able to drill the proper size of the treenails and nails and then simply fill the holes with the slurry created during the application of the oil. Its much more subtle at this scale.

I did bolt the wales on the port side but not the black ones on the starboard side as an aesthetic choice.

While my intention was to begin construction on LInvention, I did look at some of the assemblies I made a few years back on Le Gros Ventre in 1/36th. All of the frames, keel parts and construction site are completed. I stopped because I had trouble with the hawse pieces. I may give them another go - as I could have another fully framed hull completed by the end of the year.

As always thanks for your encouragement,

Chris

View attachment 603588

View attachment 603589

View attachment 603590

View attachment 603591

View attachment 603592

View attachment 603593

View attachment 603594

View attachment 603595
Outstanding !
 
Both sides look awesome! The finishes really bring out the beauty of the wood.

I like the black wales, with no treenails!

You're working at a rapid pace while maintaining exceptional quality in every aspect. Impressive!!

Thanks for the update and sharing the wonderful photos!
 
Thanks for the compliments - I am very pleased with the results after experimenting with various finishes. I am going to let her gas off for awhile while I attempt the Hawse timbers on the LGV yet again.
 
Back
Top