-

Win a Free Custom Engraved Brass Coin!!!
As a way to introduce our brass coins to the community, we will raffle off a free coin during the month of August. Follow link ABOVE for instructions for entering.
-

PRE-ORDER SHIPS IN SCALE TODAY!
The beloved Ships in Scale Magazine is back and charting a new course for 2026!
Discover new skills, new techniques, and new inspirations in every issue.
NOTE THAT OUR FIRST ISSUE WILL BE JAN/FEB 2026
You are using an out of date browser. It may not display this or other websites correctly.
You should upgrade or use an alternative browser.
You should upgrade or use an alternative browser.
Wow, you have overtaken me on my Enterprise build. Great work.
You have been quiet lately mate. How's the move coming along.Wow, you have overtaken me on my Enterprise build. Great work.
I pity you for I know what you are going through now.
I told my wife the next time when I leave this house for good, it will be in a pine box!
She tells me to shut up!
Happymoving mate
Greg
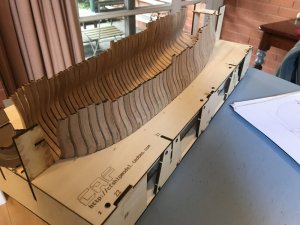
Not much progress lately. Just more sanding. Lots of work remains to finish the notches of the rib bases to fit keel. Ribs fit snuggly and not tight but there is some friction. I have to consider this because when ribs are assembled there will be a little friction multiplied by about 30 and that may make it difficult to remove hull from cradle.
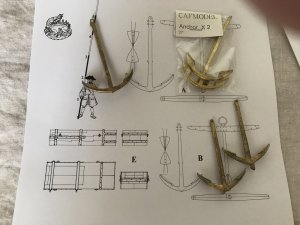
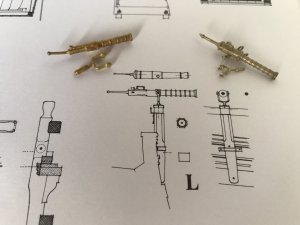
Below also are the rough cast unfinished anchors to be used as the positioning anchors as well as the falconets I bought from Alexey Baranov and compared to their CAF versions. Perhaps an unneccesay expense but I had some extra cash to burn and eager to sample some of the masters work.
Both sets of anchors are excellent with a little more detail in Alexeys version. His falconets shown on the right are highly detailed and there will be less work to finish them to a high standard. They have the hand holds molded on so no need for finicky soldering of wire which would have tested me. The mounts are very finely finished with pre cast holes and superior to the CAF version. Both the CAF kit and Alexeys versions compare very well to the ANCRE drawings. The CAF more accurate in size but much better detail in Alexeys. Though I ordered only eight falconets Alexey was kind enough to throw in two spares. Alexey makes these in various sizes also. These are 33mm length versions. Notice the plans also show an alternate version for the falconets.
Alexey accepts payment with Western Union and his communication is very good and helpful in English.


Last edited:
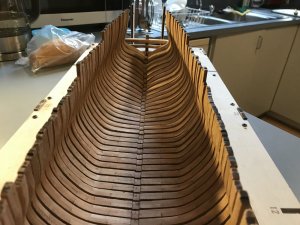
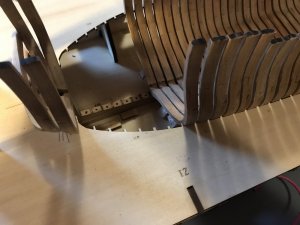
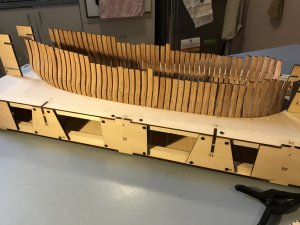
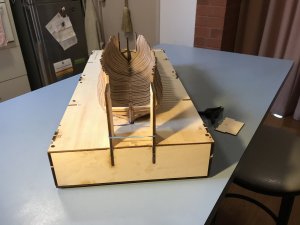
Work has been slow lately but now ready for glueing ribs to keel. I have had a lot of trouble with the stern transom area. This has been the most difficult part of the build so far. Delicate work and everything has to be exact or else the entire transom and stern castle structure will be off. I had to scratch remake the top fashion piece as I made some errors and it was out of alignment. Now fixed. I will attach the last 8 and first 8 ribs with toothpicks drilled into the keel. These are not shown in the instructions but necessary as the rear ribs are not notched and would have a tenuous weak hold otherwise.


Last edited:
Great progress my friend......ja ja, the stern with the frame 45 and the fashion pieces......I just started this work.....your frames are looking realy good.
I have glued all the ribs to the keel. I ended up pegging all the ribs with bamboo toothpicks to ensure they are all rigid and strongly attached. I have dry fitted the 6 keelson parts. They all fit very well with only little adjustments required. It is odd working with organic material like wood in our climate which is usually dry. It is mainly only humid when it rains and the humidity goes away quickly. Measurements seem to change overnight. What was perfect one day is slightly off the next then back correct again the following day. As Uwek has said the laser cutting and accuracy of the components is excellent. I am debating which way to proceed as there are no instructions for guidance. I may sand the floor of the ship and complete the keelson next, then straightening the ribs, followed by the stern castle. I will then attach the hawser pieces when ship is removed from cradle then final sanding.
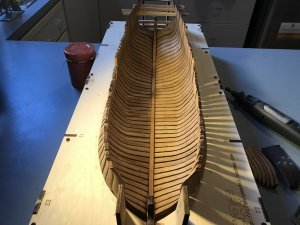
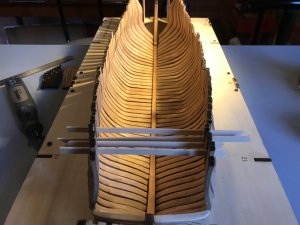


Last edited:
I love those frames how they look ,nice job!
Zoltan
Zoltan
WOW..... I am jeallous...... It is looking very good my friend.......realy good, very clean and accurate work.......WOW
I guess two per frame, or? Pre-drilled I guess? Did you drill from the top through the frame into the keel?

I guess you mean the additional wood elements in the upper part and in the gap between two frames?
Like on this photo?
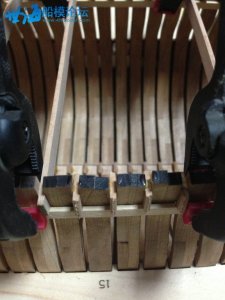
BTW: We all, especially myself would be happy to see more working steps in between......it is hard to wait for your next progress photos and your work is so good, that we would like to see much more often your work......Hope you can manage it somehow.....
Question: Why you decided to use wooden nails? After the installation of the keelson they will be not visible any more......I have glued all the ribs to the keel. I ended up pegging all the ribs with bamboo toothpicks to ensure they are all rigid and strongly attached.
I guess two per frame, or? Pre-drilled I guess? Did you drill from the top through the frame into the keel?
This experience I have also made. Mainly the joints between the different keelson parts needed some.....I have dry fitted the 6 keelson parts. They all fit very well with only little adjustments required.
I did not know, that this could be problematic.....but living in such a beautiful part of the world has to have some contras....It is odd working with organic material like wood in our climate which is usually dry. It is mainly only humid when it rains and the humidity goes away quickly. Measurements seem to change overnight. What was perfect one day is slightly off the next then back correct again the following day.
CAF made realy a very good job, I agree 100%As Uwek has said the laser cutting and accuracy of the components is excellent.
I think the strengthening would be necessary before sanding activities inside the hull, although it is only the lower part of the floor.I am debating which way to proceed as there are no instructions for guidance. I may sand the floor of the ship and complete the keelson next, then straightening the ribs, followed by the stern castle. I will then attach the hawser pieces when ship is removed from cradle then final sanding.
I guess you mean the additional wood elements in the upper part and in the gap between two frames?
Like on this photo?

BTW: We all, especially myself would be happy to see more working steps in between......it is hard to wait for your next progress photos and your work is so good, that we would like to see much more often your work......Hope you can manage it somehow.....
Hi Uwek, thank you for your kind comments and sorry for the late reply. Somehow I have missed your recent post. Don’t know how I missed it.WOW..... I am jeallous...... It is looking very good my friend.......realy good, very clean and accurate work.......WOW
Question: Why you decided to use wooden nails? After the installation of the keelson they will be not visible any more......
I guess two per frame, or? Pre-drilled I guess? Did you drill from the top through the frame into the keel?
This experience I have also made. Mainly the joints between the different keelson parts needed some.....
I did not know, that this could be problematic.....but living in such a beautiful part of the world has to have some contras....
CAF made realy a very good job, I agree 100%
I think the strengthening would be necessary before sanding activities inside the hull, although it is only the lower part of the floor.
I guess you mean the additional wood elements in the upper part and in the gap between two frames?
Like on this photo?
View attachment 41270
BTW: We all, especially myself would be happy to see more working steps in between......it is hard to wait for your next progress photos and your work is so good, that we would like to see much more often your work......Hope you can manage it somehow.....
In answer to your questions;
I used wooden pegs for all the ribs. The last 7-8 ribs I felt needed the extra strength as they have long feet with no notched base. I drilled these through the rib bottom and inserted a 1cm peg. I also added pegs to all the other ribs as it was easy and quick to drill thought the base of the middle and front ribs into the keel. The ribs now fit very firmly. I tend to over compensate for strength after having a model ruined by lack of structural rigidity in the past. I only sanded the floor of the ribs around the keelson area so I do not have to do too much later when fitted keelson might get in the way. There is plenty more sanding to do on the inside.
I have now added the keelson, put in some faux tree nails and straightened out all the ribs with clamps. I used rubber bands to fully stretch out the ribs so that they do not move. I inserted scrap wood separation tabs between ribs ranging from 1.5mm to 2.5mm in thickness. Most are about 2mm. I sanded the tops of the ribs and added lightly glued temporary support stringers. Below are photos of my latest progress. Next step is the stern castle which makes me nervous. And over here it is possible to have all four seasons of weather in one day. Hot, cold, wet, dry, calm or windy.
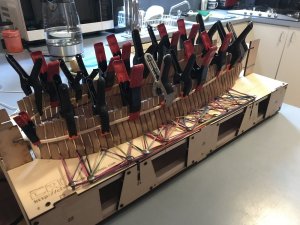
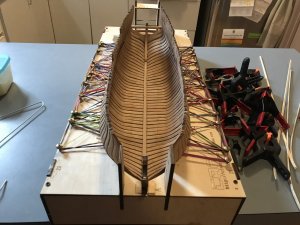
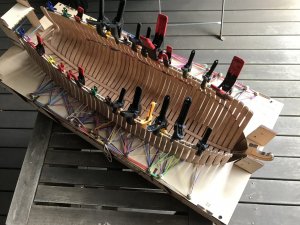
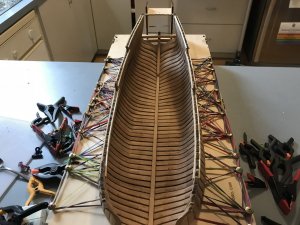
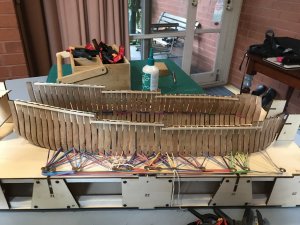
Last edited:
WoW Wow wOw woW .......
so you went far ahead in comparison to my built
My friend...it is realy looking good !
Are you still plan to fill the gaps between the frames with some spacers, like I showed on the photo in my last post #69 in your log?
so you went far ahead in comparison to my built
My friend...it is realy looking good !
Are you still plan to fill the gaps between the frames with some spacers, like I showed on the photo in my last post #69 in your log?
Sorry, I did not recognize them in the first view.......you made them out of a different, lighter by color, wood. So depends on the way you will plank her, they will be partly maybe visible. Are they only temporary glued and you will remove them where needed or will you cut them partly where ever they would be visible?Yes I have already filled the gaps. I used some scrap strips. I made them a littler longer than seen in other build logs.
Sorry for my penetrating questions...... I have the advantage, due to the fact, that you are building faster than myself
Thanks Uwek.The upper elements of the hull sides will be covered. They will stay there. So no problem with the length.Sorry, I did not recognize them in the first view.......you made them out of a different, lighter by color, wood. So depends on the way you will plank her, they will be partly maybe visible. Are they only temporary glued and you will remove them where needed or will you cut them partly where ever they would be visible?
Sorry for my penetrating questions...... I have the advantage, due to the fact, that you are building faster than myself
Looking at some scratch builds of the La Salamandre based on Boudriot, we can see some filling timbers at the bottom area, sometimes one, and often two
Look at this example:
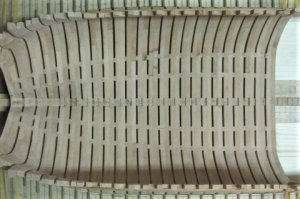
It is looking great and will also bring stability in the hull......Now my question to you, due to the fact, that you mentioned, that you have also the ancre darwings from Jean Boudriot in 1:48.
I can not find or see these timbers in the drawings, maybe I am blind ...... Do you know on which basis these modelers are working at this detail?
Look at this example:

It is looking great and will also bring stability in the hull......Now my question to you, due to the fact, that you mentioned, that you have also the ancre darwings from Jean Boudriot in 1:48.
I can not find or see these timbers in the drawings, maybe I am blind ...... Do you know on which basis these modelers are working at this detail?
That I don’t know either. Seems some improvisation goes on. Aesthetically not pure but practical especially for a first POF effort. For me they will keep the hull solid and stable whilst working and completely covered over in the end. So many new challenges here. Vastly different from a POB build.Looking at some scratch builds of the La Salamandre based on Boudriot, we can see some filling timbers at the bottom area, sometimes one, and often two
Look at this example:
View attachment 41987
It is looking great and will also bring stability in the hull......Now my question to you, due to the fact, that you mentioned, that you have also the ancre darwings from Jean Boudriot in 1:48.
I can not find or see these timbers in the drawings, maybe I am blind ...... Do you know on which basis these modelers are working at this detail?
I am speechless. This is truly inspirational to follow.
Hi all, I have now assembled the stern castle structure. I thought this might have been difficult but turned out relatively easy. The structure is quite fragile and will require consideration and protection from now on when working on other aspects of the build. It is now time to remove the hull from the cradle. But first I have to make the building base. It is now just under five months since I started the project. It is great to have such an advanced kit like this that can be made with basic hand tools and limited space.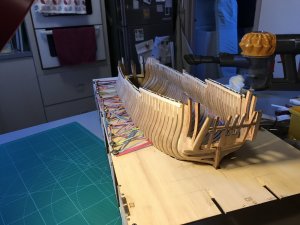
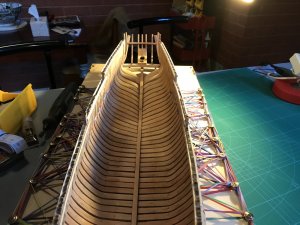


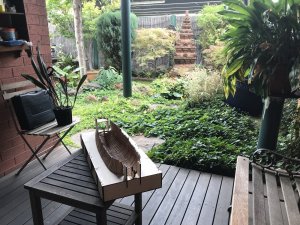
I made a simple building board for the boat. The boat came out of its cradle very easily. The lines are generally clean and straight with a few minor wobbles with a couple of ribs that I will correct during sanding. The model is well balanced. Can stand by itself on a level surface on its 6mm wide keel. Overall I am satisfied with the build so far. My joinery skills could be better though. That is a skill that has declined in the long gap between builds. I hope to get better on the next stage of the build. Next step is the hawser pieces then lots of sanding to smooth out the hull.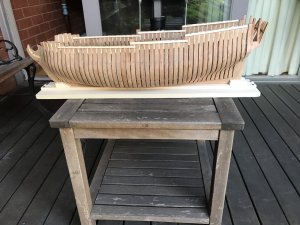

Last edited:
That is a lot of work but with such a great kit, it must be really enjoyable to build.


