-

Win a Free Custom Engraved Brass Coin!!!
As a way to introduce our brass coins to the community, we will raffle off a free coin during the month of August. Follow link ABOVE for instructions for entering.
-

PRE-ORDER SHIPS IN SCALE TODAY!
The beloved Ships in Scale Magazine is back and charting a new course for 2026!
Discover new skills, new techniques, and new inspirations in every issue.
NOTE THAT OUR FIRST ISSUE WILL BE JAN/FEB 2026
You are using an out of date browser. It may not display this or other websites correctly.
You should upgrade or use an alternative browser.
You should upgrade or use an alternative browser.
Lady Nelson - Amati 1:64 by Tangopapa - First time PoB Project [COMPLETED BUILD]
What’s the TP stand for? Looking good.
Just my initials -- Timothy Paul. Sometimes Teepee.What’s the TP stand for? Looking good.
I am hoping someone who scratch builds comes alongside here, but if you mean sheets of veneer that you intend to rip into planks, no, personally I would not take that on. You can buy the exact planks listed in the instruction sheets online at a number of locations. The kit comes with metric, but in a pinch you could use the next nearest Imperial size, I guess, for example, 1/8" x 1/32" (0.125" x 0.031") in place of 3mm x 1mm (which, doing the math in my head [YMMV] is 0.120" x 0.040"). My kit came with the wrong deck plank thickness, and the supplier, Cornwall Model Boats, sent me 24 sticks of 3 x 1mm beechwood in a cardboard tube from the UK. I got them in about 10 days IIRC. Great Hobbies in Mississauga sells plonk materials, we bought some there for our scratch build, but my brother is in Toronto. [Edit: meant to say "plank materials". You can get plonk at the Cornwall LCBO. LOL.]I got some today I am going to try it. Is veneer alright for planking? It’s the only 1 mm I could find?
I didn't think it was for toilet paper, but didn't know for sure.Just my initials -- Timothy Paul. Sometimes Teepee.
No, I dont think people here use that acronym. I think its American slang, anyway, I dont run into it that much here in the Great White North.;-)I didn't think it was for toilet paper, but didn't know for sure.
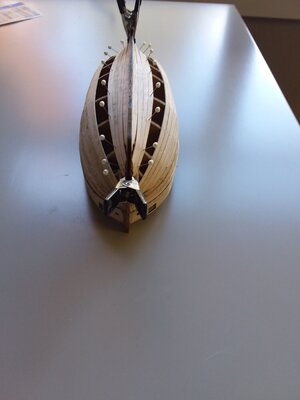
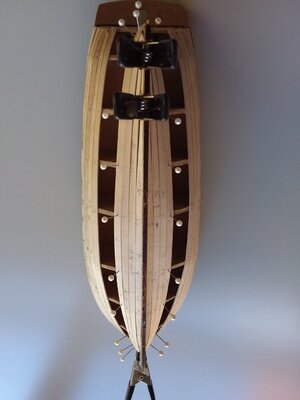
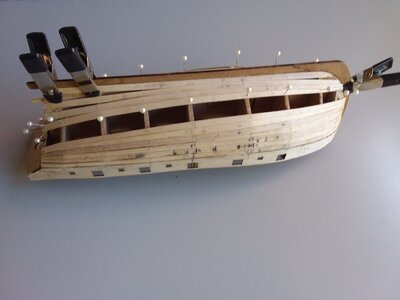
She's buttoned up with the first layer of planking. Nothing sanded yet, but adequate stealers are in place, just need trimming and some to be reduced to a feather edge at the stern post. The last planks on each side were not that hard, basically measure out the necessary width at each station and carved it accordingly, making fractional adjustments to the space they went into as I went. On general, the largest gaps are where I soaked for several hours before bending and installing. Lime wood seems to really swell. I wonder if the harder walnut top layer will swell as much? For a first hull, and considering where I was after three planks, I am not unhappy. That third link clinkering was a real "gumption trap" (See Zen ATAOMM).
There was increasing clinker effect formthe last two planks each side, but since they were the last 2 I was able to tolerate it. I have to find a way to do better on the final layer if I can.
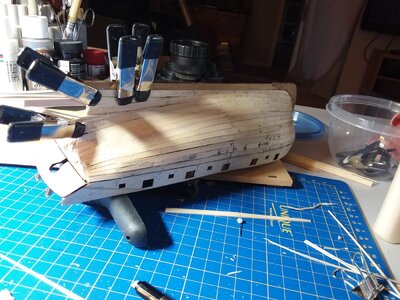
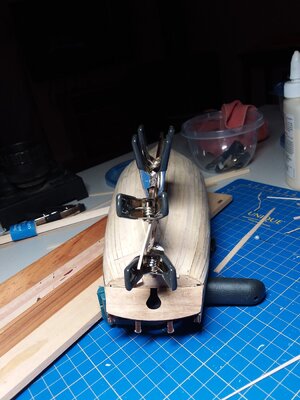
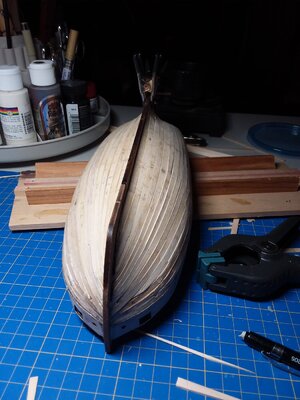
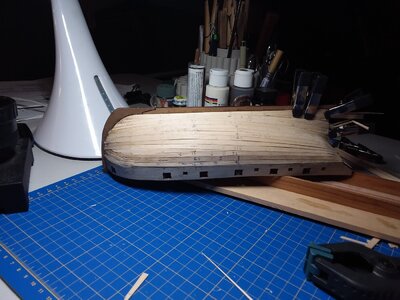
There was increasing clinker effect formthe last two planks each side, but since they were the last 2 I was able to tolerate it. I have to find a way to do better on the final layer if I can.


Last edited:
Now, when I ordered my model from Cornwall Model Boats, I ordered a tin of Mantua Article 1022 Light Wood Filler. I had no experience with it but knew I'd need something. Now I look at it, it is indeed light, it is almost fluffy and has a consistency something like mashed potatoes but falls apart easily before being pressed into a gap or edge.
Do many people use this on their first layer? It seems like it might be easier to spread on with a palette knife than wood putty, but is it substantial enough to be a good, glue-able base?
Do many people use this on their first layer? It seems like it might be easier to spread on with a palette knife than wood putty, but is it substantial enough to be a good, glue-able base?
Last edited:
Elmers wood filler seems to be the most popular, but in any event be sure to seal it before gluing on your next layer.
Both layers are 1mm thick. Inner is limewood and outer is I believe walnut, in two different shades. Others have found this too. I will use the lighter shade above where it will be natural and the greyish colour below the waterline, which will be painted white. The wales are pretty wide and will be black, so not all that much natural wood will show, but enough to look nice if I do my part.
Is sealing with water based varnish ok? Is the purpose so that the second layer adhesive doesn't soak into the wood?Elmers wood filler seems to be the most popular, but in any event be sure to seal it before gluing on your next layer.
The varnish will work fine. Glue does not adhere to filler very good so it should be sealed. When double planking I always seal the first layer whether I have used filler or not, followed by a light sanding. Many may say it is not necessary but it is something I do just to be safe, however, filler should always be sealed before adding the second layer. IMHO
OK Don, that helps me to understand. Thanks.
Just sanding now. And sanding. The Admiral has me installing new decks (flooring) in the house, so progress will slow slightly, but the room we are redoing is the hobby room, so I will have the shipyard back where it belongs shortly, better than ever.
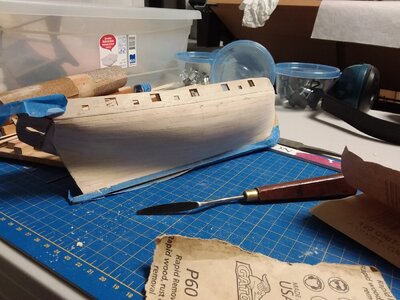
The first layer of planking is sanded now, I believe to a sufficient degree. Most visible lines now are from glue lines or pen marks and it is smooth to the touch and symmetrical. I double taped the stem and keel to protect them from the sandpaper and occasional file stroke. It looks like there is a divot on one side of the bow and a lump on the other, but they are just shades and shadows.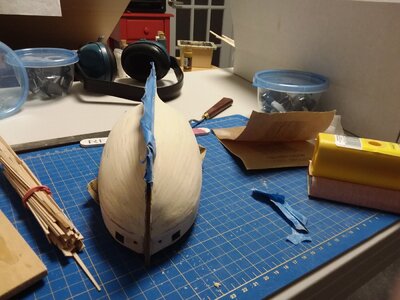


Last edited:
This is a very good basis for the second planking 

Lower transom is planked and shaped, which is quite a small area. Three out of four bulwark planks on each side are in place. I tried a few different ways in trials to curve these laterally before I attached them. The best seemed to be to soak them in quite hot water for an hour, then clamp them to a board with a bend in excess of what I'd need. After drying overnight, they sprang back somewhat, but fitted in place fairly easily. I bent them in the other plane using th Amati Form-a-Strip, with the blunt side of the blade showing. That worked fine.
I tried to use the Chuck Passaro (sp?) method where he clamps the plank, bent laterally, and heated with a hair dryer. When he does it, the plank is now bent. When I did it, and I gave the plank lots of time, it sprang back totally straight. This is 1x4 mm walnut. No idea why.
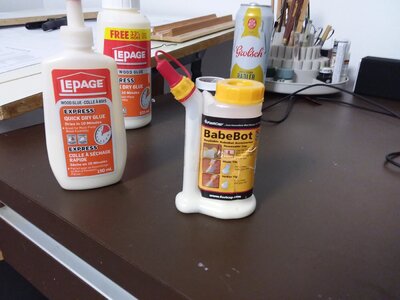
Finally, for glue, I did not use the contact cement as I was concerned about the need for exact initial placement, so I used the dot/dash method where you start with a dot of CA 10 second gel, then a line of 10 minute LePage's Express Quick Dry Glue. It let me get everything in position and 10 seconds at each CA "tack", clamp the PVA glue area, next dot, next dash, etc.
I happened to be in a Lee Valley store a week ago and picked up a BabeBot for applying glue. I was impressed, it gave me great control in how much and where to apply the LePages. The bottles it comes in have huge slots and you can easily dump WAY too much, so you have to use an applicator of some kind otherwise. The more handling of glue, the better odds of getting some where you don't want it, I figure. So I like the applicator.
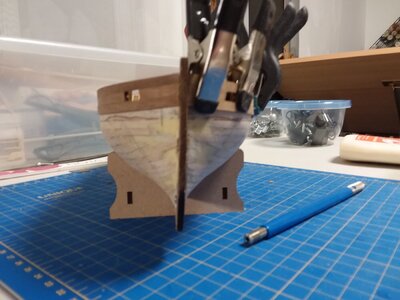
It seems to me that the outboard stern counter frames should maybe have been installed a bit further aft and the surface that supports the stern fascia faired like a bulkhead, but once everything is installed there will be just a small triangu gap on the inboard face against the fascia, which I can just fill with filler before painting. I will show how this works when I get to it, probably the next step, although I am debating whether to put the stern fascia on now or when all the planking is on. It could get damaged. The instructions required that it be in place already, but that would have meant teiming the bulwark planks to their exact length before attaching. I can't see any benefit to that!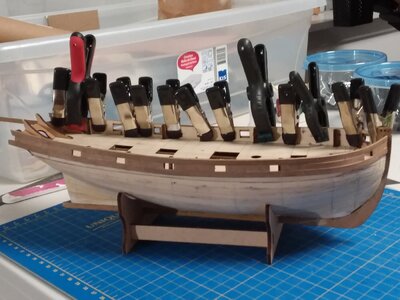


