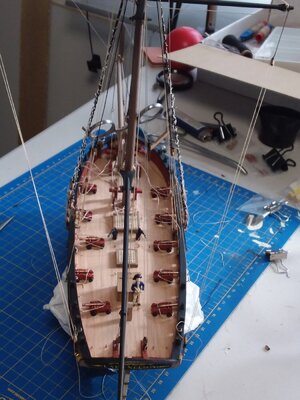
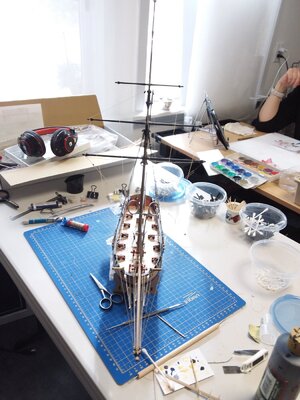
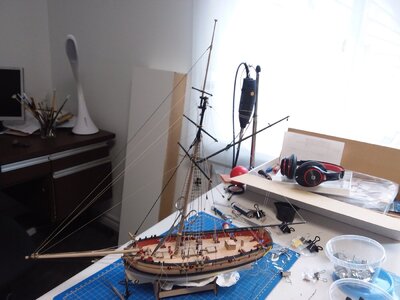
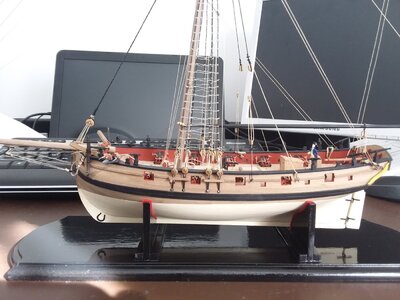
I have no idea. That puzzles me as well. Nothing in the parts list or instructions. I think it was in the pouch with the flags -- nothing about those in the instructions either. They seem huge, but in period paintings the ships' flags do seem very large.In the lady Nelson kit there is a piece of black material 4x6 in a plastic sleeve. There is nothing in the instructions or plans that show what it is used for. Any idea?
-

Win a Free Custom Engraved Brass Coin!!!
As a way to introduce our brass coins to the community, we will raffle off a free coin during the month of August. Follow link ABOVE for instructions for entering.
-

PRE-ORDER SHIPS IN SCALE TODAY!
The beloved Ships in Scale Magazine is back and charting a new course for 2026!
Discover new skills, new techniques, and new inspirations in every issue.
NOTE THAT OUR FIRST ISSUE WILL BE JAN/FEB 2026
You are using an out of date browser. It may not display this or other websites correctly.
You should upgrade or use an alternative browser.
You should upgrade or use an alternative browser.
Lady Nelson - Amati 1:64 by Tangopapa - First time PoB Project [COMPLETED BUILD]
- Joined
- Dec 29, 2020
- Messages
- 61
- Points
- 58

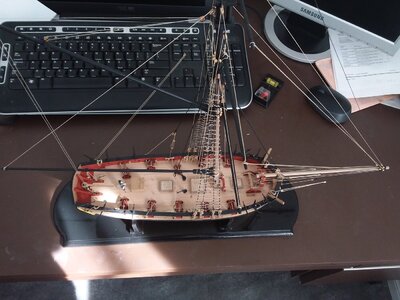
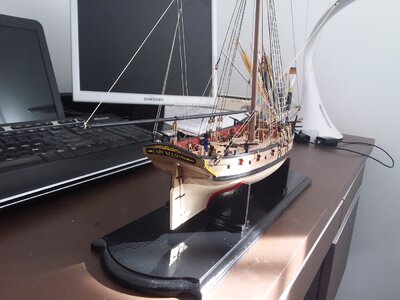
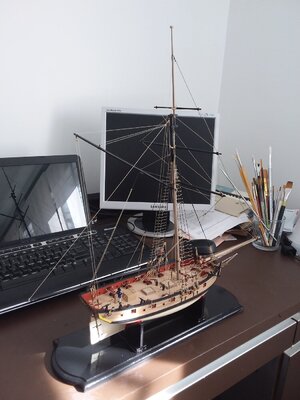
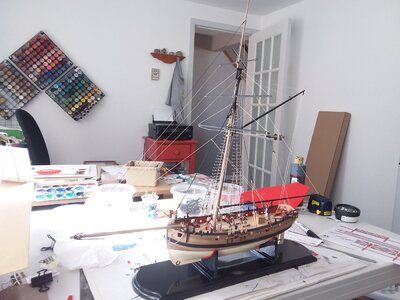
Finally finished. Tying the ratlines were a challenge for me. Not sure whether to put a flag on or not.
You work fast!
- Joined
- Dec 29, 2020
- Messages
- 61
- Points
- 58

Started mid December. It was all consuming. Everyday 6+ hours
After a slow 2-3 weeks I am back at it. Ratlines are complete and the yardarms are attached with pins only, except the main yard which has its haliard installed. I also, after much thought, painted the side decorations and nameplate and attached them. I painted the background of the nameplate matte black, then picked out the lettering with the finest liner brush I have, in yellow paint, while wearing a magnifying goggle thingy. It worked ok. Next to secure the upper yards to the masts via thread around the mast, then run the haliards to the belaying pins, then the rest of the running rigging, working from onboard to outboard.
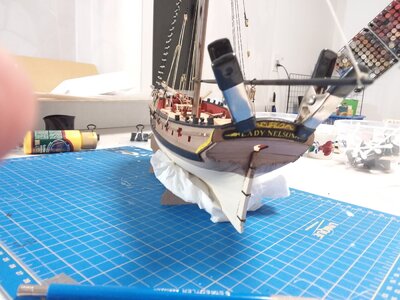
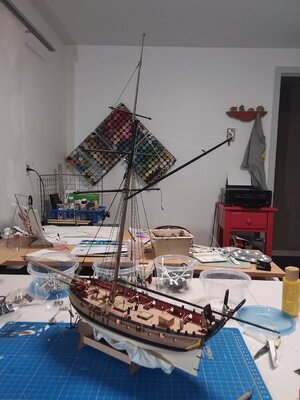


A fine looking build, Congratulations!! 


Congrats on your accomplishment!  She deserved to be photographed on the plain background and admitted to our showcase gallery! May we ask you to make for here a photo session with close-up photos, please...
 She deserved to be photographed on the plain background and admitted to our showcase gallery! May we ask you to make for here a photo session with close-up photos, please...
Sure. I will set up some kind of a neutral background. Not too many close ups, though -- they are too unforgiving! LOL.Congrats on your accomplishment!She deserved to be photographed on the plain background and admitted to our showcase gallery! May we ask you to make for here a photo session with close-up photos, please...
Ok. She is re-photographed and submitted to the completed project photo submission forum. If there are any issues with the photos, please let me know.
And thank you to all who participated in my build. It has been a wonderful experience. I am now researching a circa 1880 wooden hulled Welland Canal (this is the canal that allows ships to bypass Niagara Falls between Lakes Erie and Ontario) steamship. In collaboration with my much more experienced, but less handsome, brother, we hope this will be our next project.
And thank you to all who participated in my build. It has been a wonderful experience. I am now researching a circa 1880 wooden hulled Welland Canal (this is the canal that allows ships to bypass Niagara Falls between Lakes Erie and Ontario) steamship. In collaboration with my much more experienced, but less handsome, brother, we hope this will be our next project.
Bon chance!Ok. She is re-photographed and submitted to the completed project photo submission forum. If there are any issues with the photos, please let me know.
And thank you to all who participated in my build. It has been a wonderful experience. I am now researching a circa 1880 wooden hulled Welland Canal (this is the canal that allows ships to bypass Niagara Falls between Lakes Erie and Ontario) steamship. In collaboration with my much more experienced, but less handsome, brother, we hope this will be our next project.
Hallo @TangopapaIt was suggested that I do a build log since I am just starting out, so despite a deep dislike of making public mistakes, I will do so in the spirit suggested. It will make me a better person (more humble anyway).
I started this week on the model after studying the video tutorials recommended by Amati, and which are done by Leon Griffiths (I think I have his last name right) from Modeler's Shipyard in Australia. There are so many different thoughts about the best way to approach a build that I thought I would just accept him as my guru and follow his methods.
The only things I am not doing as he shows so far are: 1. I am not attaching the rudder post until at least after the first planking. I think this will let me taper the stern area of the false keel and the planks, as well as trimming them more easily and without damaging the rudder post and I can't see a down side. Another build log recommended this. The false keel and the rudder post are both 3mm thick and there are two layers of planks, each 1mm thick. So, if I dont make an effort at the stern it will end up poorly faired onto the rudder post to say the least. 2. Also, another build logger here (Glen?) added two extra blocks to the bow either side of the 3mm thick "bow plank terminal patterns" to make a thicker attachment area for the planks to start at. Again, if they turn out to be in the way, I can carve them away easily enough, but they may be helpful.
I assembled the bulkheads onto the false keel, and in dry fitting them I found a few were sitting very slightly low, so I put a square or two of paper under them to elevate them a bit. I was happier with that result. The no. 10 bulkhead, the aftermost one at the transom, sits at quite an angle, so the top of it needs to be faired so that it matches the sheer line of the deck at the stern. In doing this as shown by Leon, I found the mdf material came apart from the filing. This has been covered in a separate post. I will try different methods when I fair the rest of the bulkheads shortly. For one thing, I have little experience using a file versus sanding blocks and dowels, so if I am not happy with the file right away, as demonstrated on the video log, I will try plan B. Someone suggested that I might have been filing in the wrong direction, encouraging the "top skin" of the mdf to tear away. You have no choice since the curve of the deck only lets you approach with a file from the stern going forward. For the remainder of the fairing, I think I can choose my direction. Leon uses a file extensively.
Tonight I glued the false deck on. It was a bit of a wrestling match to get all the pins in place to hold everything down within the time permitted by the glue. I think it worked OK. I will leave it overnight to cure. But I can see no issues other than maybe I should be more generous with the PVA. I want to fill the joint, but avoid overflow, but maybe it is better to err on the other side.
The kit instructions suggest to sand and bevel the remaining bulkheads before gluing them in place, but Leon's method is to do it after they are in place and the false deck on. That makes more sense to me.
Oh, and the kit came with the wrong thickness of beechwood deck planking, variously described as 0.6 and 0.5mm thick. The material provided was a bit over 1mm. I notified Amati and also Cornwall Model Boats of the issue. I heard back from CMB that they will be sending me planking of the correct size. Once again, very happy that I chose to buy from them. They were great to deal with during our Great Lakes Schooner build project, even as Covid made things difficult.
I've been offered 0.5mm thick walnut second layer planks to replace the 1.0m that the kit came with. I don't know... I might later wish that I had the extra thickness to sand, especially on a first attempt. Anyway, that choice is fairly far in the future.
View attachment 182678
View attachment 182679
View attachment 182680
we wish you all the BEST and a HAPPY BIRTHDAY

Hope to see soon the next model in a building log - we are all looking forward
Happy Birthday, Tangopapa!! 

Hallo @TangopapaIt was suggested that I do a build log since I am just starting out, so despite a deep dislike of making public mistakes, I will do so in the spirit suggested. It will make me a better person (more humble anyway).
I started this week on the model after studying the video tutorials recommended by Amati, and which are done by Leon Griffiths (I think I have his last name right) from Modeler's Shipyard in Australia. There are so many different thoughts about the best way to approach a build that I thought I would just accept him as my guru and follow his methods.
The only things I am not doing as he shows so far are: 1. I am not attaching the rudder post until at least after the first planking. I think this will let me taper the stern area of the false keel and the planks, as well as trimming them more easily and without damaging the rudder post and I can't see a down side. Another build log recommended this. The false keel and the rudder post are both 3mm thick and there are two layers of planks, each 1mm thick. So, if I dont make an effort at the stern it will end up poorly faired onto the rudder post to say the least. 2. Also, another build logger here (Glen?) added two extra blocks to the bow either side of the 3mm thick "bow plank terminal patterns" to make a thicker attachment area for the planks to start at. Again, if they turn out to be in the way, I can carve them away easily enough, but they may be helpful.
I assembled the bulkheads onto the false keel, and in dry fitting them I found a few were sitting very slightly low, so I put a square or two of paper under them to elevate them a bit. I was happier with that result. The no. 10 bulkhead, the aftermost one at the transom, sits at quite an angle, so the top of it needs to be faired so that it matches the sheer line of the deck at the stern. In doing this as shown by Leon, I found the mdf material came apart from the filing. This has been covered in a separate post. I will try different methods when I fair the rest of the bulkheads shortly. For one thing, I have little experience using a file versus sanding blocks and dowels, so if I am not happy with the file right away, as demonstrated on the video log, I will try plan B. Someone suggested that I might have been filing in the wrong direction, encouraging the "top skin" of the mdf to tear away. You have no choice since the curve of the deck only lets you approach with a file from the stern going forward. For the remainder of the fairing, I think I can choose my direction. Leon uses a file extensively.
Tonight I glued the false deck on. It was a bit of a wrestling match to get all the pins in place to hold everything down within the time permitted by the glue. I think it worked OK. I will leave it overnight to cure. But I can see no issues other than maybe I should be more generous with the PVA. I want to fill the joint, but avoid overflow, but maybe it is better to err on the other side.
The kit instructions suggest to sand and bevel the remaining bulkheads before gluing them in place, but Leon's method is to do it after they are in place and the false deck on. That makes more sense to me.
Oh, and the kit came with the wrong thickness of beechwood deck planking, variously described as 0.6 and 0.5mm thick. The material provided was a bit over 1mm. I notified Amati and also Cornwall Model Boats of the issue. I heard back from CMB that they will be sending me planking of the correct size. Once again, very happy that I chose to buy from them. They were great to deal with during our Great Lakes Schooner build project, even as Covid made things difficult.
I've been offered 0.5mm thick walnut second layer planks to replace the 1.0m that the kit came with. I don't know... I might later wish that I had the extra thickness to sand, especially on a first attempt. Anyway, that choice is fairly far in the future.
View attachment 182678
View attachment 182679
View attachment 182680
we wish you all the BEST and a HAPPY Birthday


 s and swivel guns will go on last. The lieutenant in command has arrived and is on the deck in one picture. That bowsprit is a busy place!