Lady Nelson - Amati 1:64 by Tangopapa - First time PoB Project [COMPLETED BUILD]

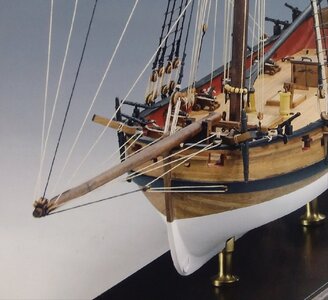
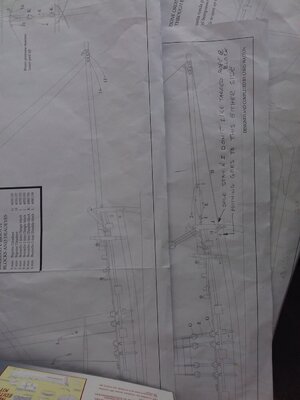
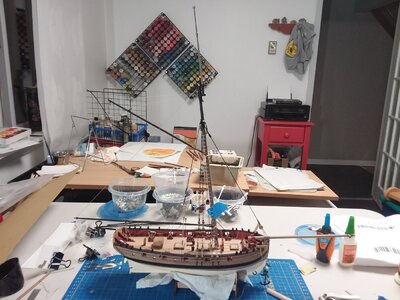
I've been working away at the rigging. Ratlines done on one side. I've just mounted the bowsprit and am rigging the forestay but after that the rigging of the standing rigging on the bowsprit seems confusing. Actually, the drawing is clear but leaves 2 eyelets either side of the bow unused. Also, it gives support from the lifting forces of sails, but no lateral. I notice that none of the completed models in the photo gallery have not done the rigging like the drawings show. They seemed to follow the model featured on the box lid. Maybe I will go with that.20210217_204537.jpg
 
Last edited:
I feel your pain, TP. My Black Pearl came with 4 rigging plans. Nowhere does it show where the triangular sails are tied off. Some things just don't make sense. It has 2 different plans on which blocks to use where. We'll have to go with what makes sense.
 
Thanks a lot for sharing your experience with us. I still like cutters an bought the HMS FLY plan by M. O. last week in addition to Capelle's and MacGregor's books about fast sailers. But at the moment I am in a moratorium to new projects - staying with my baroque ships - so I do follow your buildhighly interested.
 
I am also in the process of final rigging the Nelson. I agree plans are a little confusing but I did not end up with any unused eyelets. Take photo of your specific issue and I can show you what I did
 
I am also in the process of final rigging the Nelson. I agree plans are a little confusing but I did not end up with any unused eyelets. Take photo of your specific issue and I can show you what I did
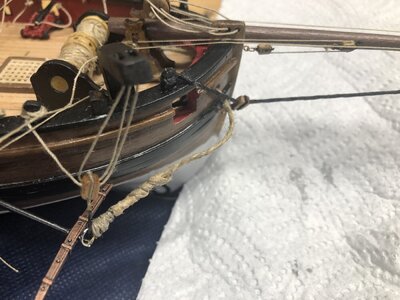
This is the only issue I had. What is shown is easy to understand. It just doesn't seem right. On the attached photo you can see the eyelets that have no purpose. No standing or running rigging goes there. Also shown is the box art, which clearly does show stays going there. As an aside, the sole stay that goes under the bowsprit, to a block attached to the stem doesnt seem right because it is a black (tarred) rope going through a block, but I can remedy that. I will make it into a long pendant and put a pair of single blocks at the shipboard end and secure to the same place.20210218_083231.jpg20210218_082334.jpg
 
Did you finish the rigging to the belaying pins before you did the shrouds
No, I can reach with my rigging tool I find the more rigging in place near where you are working, the greater the chance of catching it with your hand. You are focused on one piece and you strike another. I def don't want the main yardarm in place yet. I could consider the upper two and do the lifts but not the braces. Once a yard is up, I also like to put on all the rigging on it though, so it is well secured.
 
I feel your pain, TP. My Black Pearl came with 4 rigging plans. Nowhere does it show where the triangular sails are tied off. Some things just don't make sense. It has 2 different plans on which blocks to use where. We'll have to go with what makes sense.
The nice thing about an imaginary ship ( as is Lady Nelson) is that nobody can say I'm wrong, as long as I have a story to back up my choice. LOL.
 
Thanks a lot for sharing your experience with us. I still like cutters an bought the HMS FLY plan by M. O. last week in addition to Capelle's and MacGregor's books about fast sailers. But at the moment I am in a moratorium to new projects - staying with my baroque ships - so I do follow your buildhighly interested.
The HMS Fly and her sisters are beautiful ships, lovely lines. It was on my short list of candidates for next models. I went for the HMS Terror, although it is a brute in comparison. But I love the Victorian technology they introduced, the mystery and the Canadian connection. It is good to like the story of the ship for when you have challenges. It encourages you. Thanks for looking in on my build! Always nice to know people are watching.
 
Also rigging plan shows a number 6 line going to base of mast. This makes no sense to me. Is there any line that would go the the base of the mast
 
Also rigging plan shows a number 6 line going to base of mast. This makes no sense to me. Is there any line that would go the the base of the mast
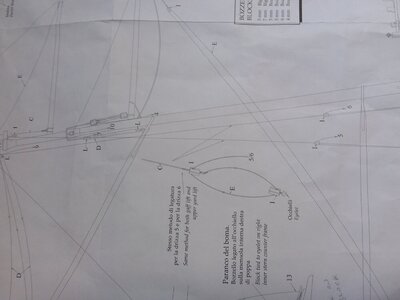
Yes, the lift for the boom goes though an arrangement of a couple of blocks and the free end gets tied off at a clear on the lower mast. This is detailed for the lines that go to 5 and 6. Five goes toa belaying on and 6 to the mast.20210218_095519.jpg You have two cleats on the lower mast one on each side, right? On many ships lots of lines went to the lower mast(s) to be secured, sometimes at belaying pins, sometimes at cleats.

So, does your LN rigging plan look different from mine at the bow? Can you post a photo of what you did and what your drawing shows?
 
This is the only issue I had. What is shown is easy to understand. It just doesn't seem right. On the attached photo you can see the eyelets that have no purpose. No standing or running rigging goes there. Also shown is the box art, which clearly does show stays going there. As an aside, the sole stay that goes under the bowsprit, to a block attached to the stem doesnt seem right because it is a black (tarred) rope going through a block, but I can remedy that. I will make it into a long pendant and put a pair of single blocks at the shipboard end and secure to the same place.View attachment 214384View attachment 214385
Yes, the lift for the boom goes though an arrangement of a couple of blocks and the free end gets tied off at a clear on the lower mast. This is detailed for the lines that go to 5 and 6. Five goes toa belaying on and 6 to the mast.View attachment 214396 You have two cleats on the lower mast one on each side, right? On many ships lots of lines went to the lower mast(s) to be secured, sometimes at belaying pins, sometimes at cleats.

So, does your LN rigging plan look different from mine at the bow? Can you post a photo of what you did and what your drawing shows?
You are correct. I messed up and attached a J block on both sides of the bow where you identify the extra eyelets. I did not use the eyelet on the bow. So I need to correct that. Also I would have assumed that since the rigging for 5 and 6 look identical that they would have both been tied off the the belaying pins. Diagram on sheet 5 shows tie point 6 behind the mast
 
I changed the arrangement based on your comments. I now also have 2 useless eyelets. I think this matches the plans. I agree that I’m not a fan of the tarred line but I am going to leave it.

7D22BA8C-7717-479D-BD0B-27C0BB9014E7.jpeg
 
Last edited by a moderator:
You are correct. I messed up and attached a J block on both sides of the bow where you identify the extra eyelets. I did not use the eyelet on the bow. So I need to correct that. Also I would have assumed that since the rigging for 5 and 6 look identical that they would have both been tied off the the belaying pins. Diagram on sheet 5 shows tie point 6 behind the mast
Yes. Line 6 is tied off on the mast cleat. They both have a block attached at deck level to an unidentified ring -- we can take our choice. I selected two just aft of the mast because if too far aft, the halyard would restrict the swing of the boom when running before the wind. I am going to put in two stays on the bowsprit, a slight mod. Otherwise it will irk me. I will see how that looks and add the third, central one if I think it needs more "down" strength. That bowsprit is quite chunky but it holds a lot of canvas in place.
 
I am not putting the PE nameplate and scroll work on the stern. Although it is attractive, it seems too showy for a humble cutter. I will paint the two small scrolls either side of the stern yellow and put them on. Also, there is a piece of trim that is supposed to go around the transom on the "enhanced" parts that now come with the kit. But the piece is SO brittle that it is impossible to put it on in one piece. I will try to at least put the top piece on since it creates a taffrail, or wider edge anyway, but will have to use either contact cement or CA. Tricky because it has already broken into 4 pieces so establishing the centre will not be easy.
 
Last edited:
I am not putting the PE nameplate and scroll work on the stern. Although it is attractive, it seems too showy for a humble cutter. I will paint the two small scrolls either side of the stern yellow and put them on. Also, there is a piece of trim that is supposed to go around the transom on the "enhanced" parts thst now come with the kit. But the piece is SO brittle that it is impossible to pu on in one piece. I will try to at least put the top piece on since it creates a taffrail, or wider edge anyway, but will have to use either contact cement or CA. Tricky because it has already broken I to 4 pieces to establishing the centre will not be easy.
Yikes!
 
In the lady Nelson kit there is a piece of black material 4x6 in a plastic sleeve. There is nothing in the instructions or plans that show what it is used for. Any idea?
 
Back
Top