An awesome explanation of how to approach the toughest part of this build. Thanks, Mike!
-

Win a Free Custom Engraved Brass Coin!!!
As a way to introduce our brass coins to the community, we will raffle off a free coin during the month of August. Follow link ABOVE for instructions for entering.
-

PRE-ORDER SHIPS IN SCALE TODAY!
The beloved Ships in Scale Magazine is back and charting a new course for 2026!
Discover new skills, new techniques, and new inspirations in every issue.
NOTE THAT OUR FIRST ISSUE WILL BE JAN/FEB 2026
You are using an out of date browser. It may not display this or other websites correctly.
You should upgrade or use an alternative browser.
You should upgrade or use an alternative browser.
Thanks Dave!!
CONTINUING FROM 2015
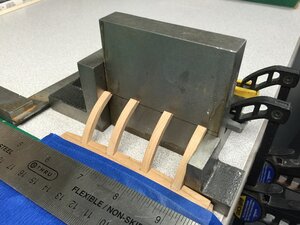
When gluing complex assemblies I like to create jigs out of a variety of machine squares as is the case here with the wing transom and transom supports. Don't ask me how I came up with this... I just sorta start squaring things up. Note that the center two support frames are about 1/32" higher than the outer ones. That's due to the very slight curve I sanded into the top of the wing transom per the practicum.
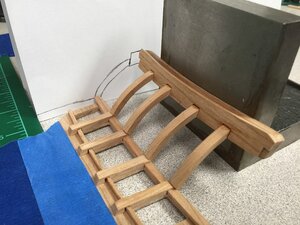
In addition to using machine squares to jig up my gluing, I traced the profile of the transom, frames, and wing transom from the plans. I then used the drawing to ensure I got the angle correct prior to gluing the assembly together. Hopefully this will give me a very square build at the aft end of the ship.
CONTINUING FROM 2015
When gluing complex assemblies I like to create jigs out of a variety of machine squares as is the case here with the wing transom and transom supports. Don't ask me how I came up with this... I just sorta start squaring things up. Note that the center two support frames are about 1/32" higher than the outer ones. That's due to the very slight curve I sanded into the top of the wing transom per the practicum.

In addition to using machine squares to jig up my gluing, I traced the profile of the transom, frames, and wing transom from the plans. I then used the drawing to ensure I got the angle correct prior to gluing the assembly together. Hopefully this will give me a very square build at the aft end of the ship.

Kurt Konrath
Kurt Konrath
Good technique on the work
Watching this is fun and teaching new info to me.
Watching this is fun and teaching new info to me.
BUILD LOG FROM 2015
Making great progress with no issues. I've completed the partial hull planking as called for in the practicum and am currently working on shaping the transom and planking the counter. Here are some photos with a few comments along the way:
Total build time so far: 164 hours
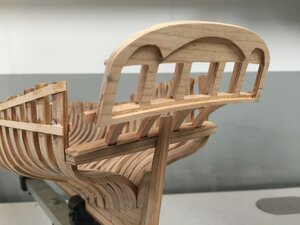
Transom is glued up to the stern. You will notice a very small piece of wood I had to add to extend the upper portion of the last frame on the left side. This was needed to ensure the transom was level. I do not believe this was a CAD or design error. More likely a very small builder's error that added up from bow to stern as I framed the ship. Wood variations, sanding variations, who knows... it is what wood modeling is all about. Not like a plastic kit.
Careful test fitting of the first hull plank in the stern area to ensure all the important relationships are checked out prior to gluing
A nice fit
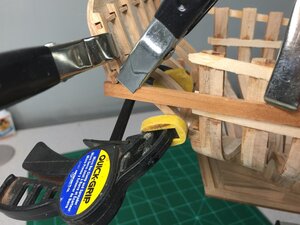
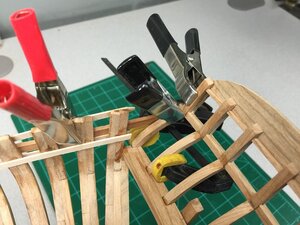
Lots of clamps
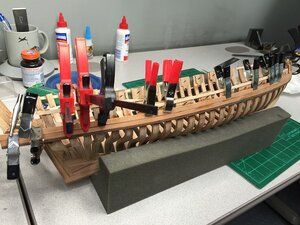
Soaking in water was key to getting smooth bends out of the cherry planks
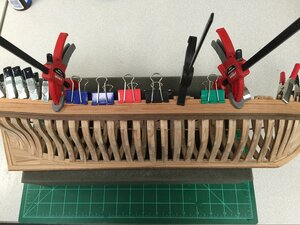
This is all of the outer hull planking. The other side only gets a few ribbands.
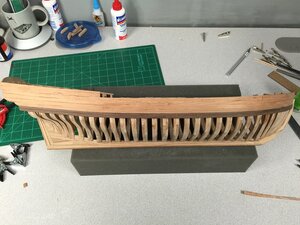
I ended up doing the top plank twice at the bow as I cut too much taper into it. It came out better the second time as seen here
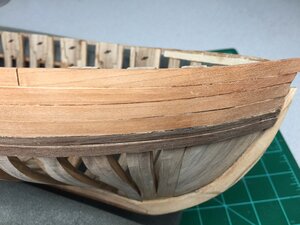
Some more pics here as I worked on the stern area. PLEASE NOTE: This is where I made my first mistake in that I cut the lower transom timbers too short. I ended up making new ones and fixing this a bit later in the build.
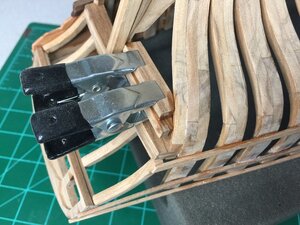
Gluing in the stern transom pieces that then have to be sanded into shape.
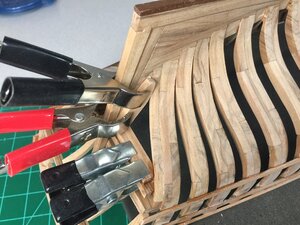
Using a plastic zip tie to test the lie of the ribband plank as I shape the transom. I also have the first counter plank glued and clamped.
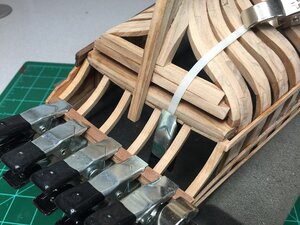
Making great progress with no issues. I've completed the partial hull planking as called for in the practicum and am currently working on shaping the transom and planking the counter. Here are some photos with a few comments along the way:
Total build time so far: 164 hours
Transom is glued up to the stern. You will notice a very small piece of wood I had to add to extend the upper portion of the last frame on the left side. This was needed to ensure the transom was level. I do not believe this was a CAD or design error. More likely a very small builder's error that added up from bow to stern as I framed the ship. Wood variations, sanding variations, who knows... it is what wood modeling is all about. Not like a plastic kit.

Careful test fitting of the first hull plank in the stern area to ensure all the important relationships are checked out prior to gluing

A nice fit

Lots of clamps

Soaking in water was key to getting smooth bends out of the cherry planks

This is all of the outer hull planking. The other side only gets a few ribbands.

I ended up doing the top plank twice at the bow as I cut too much taper into it. It came out better the second time as seen here

Some more pics here as I worked on the stern area. PLEASE NOTE: This is where I made my first mistake in that I cut the lower transom timbers too short. I ended up making new ones and fixing this a bit later in the build.

Gluing in the stern transom pieces that then have to be sanded into shape.

Using a plastic zip tie to test the lie of the ribband plank as I shape the transom. I also have the first counter plank glued and clamped.

BUILD LOG CONTINUES FROM 2015
I got the counter planked, gun ports framed and opened, oar sweeps and scuppers opened. My oar sweeps did not come out perfect but they look good enough for me. Followed the practicum to the letter except that I used a 90 degree Dremel attachment to help drill out the gun ports, sweeps and scuppers from the inside. I also corrected the lower transom timbers by making new ones. Just a few more details to go and I'll be ready for 3 coats of poly and the end of Chapter 5.
Total build duration so far: 173 hours
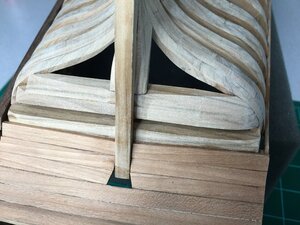
Notice I still have the lower transom timbers too short in this picture.
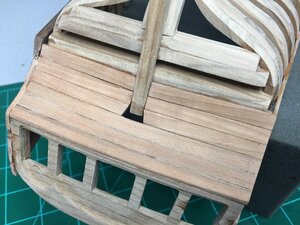
Here you can see where I have the properly shaped transom timbers on the right as compared to the ones that are too short on the left.
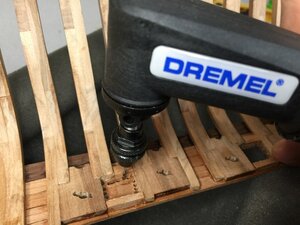
My least favorite of all Dremel accessories, but it got the job done
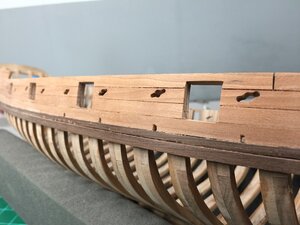
Gun ports and oar sweeps look pretty good. Notice the scuppers just above the ebony wale.
I got the counter planked, gun ports framed and opened, oar sweeps and scuppers opened. My oar sweeps did not come out perfect but they look good enough for me. Followed the practicum to the letter except that I used a 90 degree Dremel attachment to help drill out the gun ports, sweeps and scuppers from the inside. I also corrected the lower transom timbers by making new ones. Just a few more details to go and I'll be ready for 3 coats of poly and the end of Chapter 5.
Total build duration so far: 173 hours
Notice I still have the lower transom timbers too short in this picture.

Here you can see where I have the properly shaped transom timbers on the right as compared to the ones that are too short on the left.

My least favorite of all Dremel accessories, but it got the job done

Gun ports and oar sweeps look pretty good. Notice the scuppers just above the ebony wale.

Kurt Konrath
Kurt Konrath
More great history to enjoy!
Come on Clair. I know you have been following my posts. I have given several hints regarding this. Take a guess. How would you do it?how did you do it really?
Crap. ... It's not alcohole but something that eats the glue, and I forget what it was called for pva....
Kurt Konrath
Kurt Konrath
Fingernail Polish Remover, AKA Acetone!
LOL.... close enough. I use Weldbond to assemble the model. This is a type of PVA that dissolves with isopropyl (rubbing) alcohol. All I had to do was soak the glue joints with some alcohol on a cotton swap for a few minutes until the glue softened. Then I popped the part right out. No damage!!. It is a life saver!!Crap.
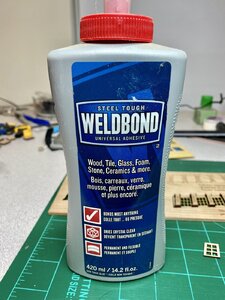
You would have been correct Kurt had I been using CA glue.Fingernail Polish Remover, AKA Acetone!
Well done Mike, I remembered you mentioning something that kills off pva but I wasnt sure exactly what. I was kinda close.
I really did figure you'd get a good laugh out of that meme too
I really did figure you'd get a good laugh out of that meme too
One of the great advantages of Weldbond. Also, you can scrape it off of wood easily if you plan to use stain. Dried Titebond will NOT allow stain to penetrate. And you can’t get it out of the wood pores once dry.
Kurt Konrath
Kurt Konrath
That is good to know!
Thanks again Doc!
Thanks again Doc!
Kurt Konrath
Kurt Konrath
Full log!
If we see it twice it might sink in better and not come loose with soaking of rubbing alcohol!
If we see it twice it might sink in better and not come loose with soaking of rubbing alcohol!
BUILD LOG CONTINUES FROM 2015
With the transom repaired and 2 coats of poly applied Chapter 5 is now complete. I've cleaned off the benches and am now ready to begin construction of the interior decks. As she sits right now, this is an amazing model. It will only get better from here....
Total build duration so far: 180.5 hours
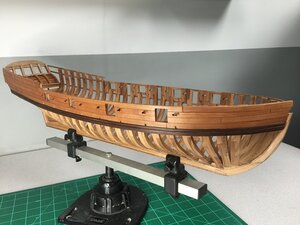
With the transom repaired and 2 coats of poly applied Chapter 5 is now complete. I've cleaned off the benches and am now ready to begin construction of the interior decks. As she sits right now, this is an amazing model. It will only get better from here....
Total build duration so far: 180.5 hours

BUILD LOG CONTINUES FROM 2015
Chapter 6 of this practicum deals with the planking of the lower deck. Here are some pictures with captions for your viewing pleasure.
Total Build Duration so far: 190.5 hours
Zip ties were used to hold down the keelson cap
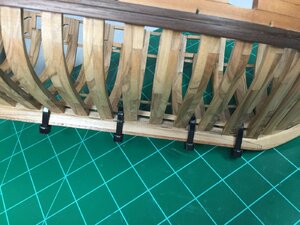
Take care when fitting the lower deck beams as they all need to be level so that the planking will lie flush. Minor variations may require sanding and/or shimming
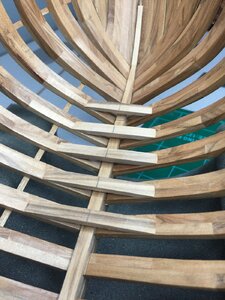
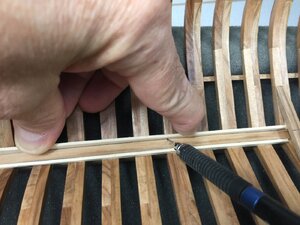
Mark the first plank that fits against the side of the keel. Make sure you push the plank tight down against the frames
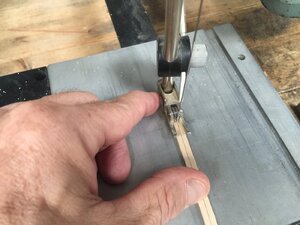
Cut the plank using my trusty mini-scroll saw
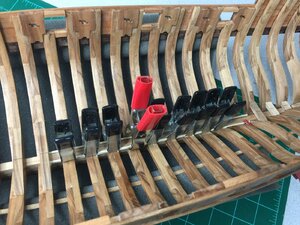
I love clamps!!!
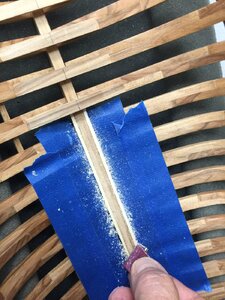
Sand the edge of the plank down flush with the keel. Protect the finished frames with some masking tape
Very nice contrast in color against the hardwood frames
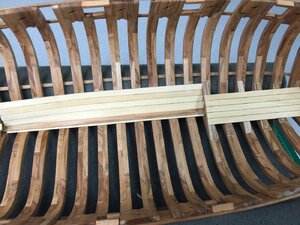
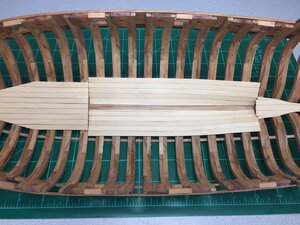
Chapter 6 of this practicum deals with the planking of the lower deck. Here are some pictures with captions for your viewing pleasure.
Total Build Duration so far: 190.5 hours
Zip ties were used to hold down the keelson cap

Take care when fitting the lower deck beams as they all need to be level so that the planking will lie flush. Minor variations may require sanding and/or shimming

Mark the first plank that fits against the side of the keel. Make sure you push the plank tight down against the frames

Cut the plank using my trusty mini-scroll saw

I love clamps!!!

Sand the edge of the plank down flush with the keel. Protect the finished frames with some masking tape

Very nice contrast in color against the hardwood frames


Hi Mike,
just catching up on your build log. Looking good my friend.
just catching up on your build log. Looking good my friend.


