• LUCZORAMA SHIPWRECK SCAVENGER HUNT GIVEAWAY. 4 Weeks of Fun • 1 Legendary Prize ((OcCre’s Fram Ship)) • Global Crew Welcome!
    **VIEW THREAD HERE**

Layout for copper plates

Ted sorry for the slow response, but I bought a two ounce bottle and had very little left, so bought another, I finished the copper then for what ever reason I shelfed the Pegasus and built a Duchess of the Kingston, and still have half a bottle.
Don't know anything about Caldercraft.
Bobby K ‼️
Thank you. This glue is holding the plates quite well
 
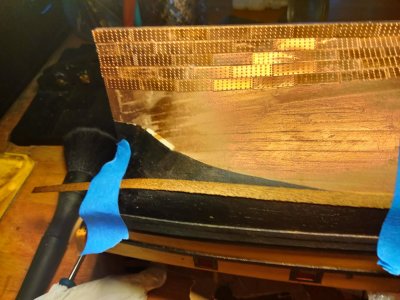
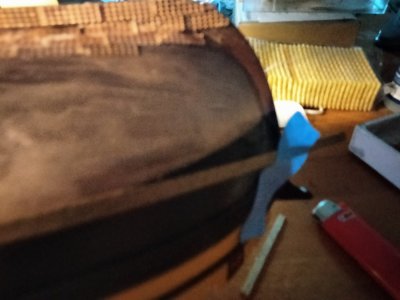
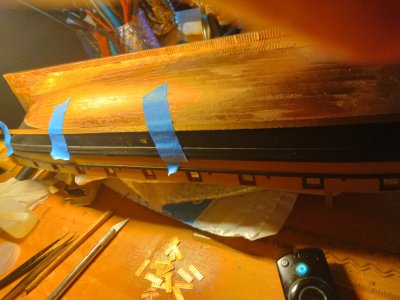
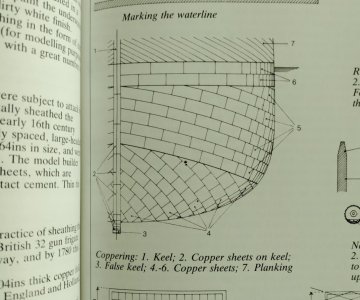
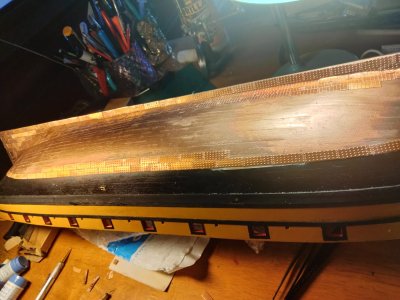
I'm a little confused. All the photos I see if Nelson era ships the copper plates make a belt at the top. When I put a strip of planking showing how the belt would fit it is above the waterline both fore and aft. Should I just taper the copper plates to fit the waterline
 
I'm confused. All the photos I see of Nelson era ships the copper plates make a belt at the top. When I put up a plank to show how the belt would fit it doesn't follow the waterline both fore and aft.
Should I just tapered the copper plates to fit the waterlineIMG20250622100246.jpg17506122406758296076363509932724.jpgIMG20250622100304.jpg
 
The word “waterline”has several meanings each will affect your model.

First there is the Design Waterline. This is the point on the ship’s hull where the Naval Architect intends for the ship to float.

Next there is the Load Waterline. This is the waterline where the ship floats fully loaded with stores, fuel, cargo, etc. it may or may not be the same as the Design Waterline.

There is also the Light Ship Waterline equal to the load waterline minus cargo.

Which of these are labeled as “Waterline” on your kit drawing is anybody’s guess.

These old sailing ships would leave port heavily loaded with stores, water, ammunition, etc. As these were consumed and in the case of water possibly replenished the waterline would vary hopefully between the load waterline and light ship waterline. There is no reason why the shipwrights would spend time and money trimming copper to exactly match a single waterline.

Roger
 
Your photos arrived while I was posting and show a different situation than I imagined.

Assuming that your waterline is correctly plotted, the waterline does not follow the straight line of the batten that you have taped to the hull. It curves in and ends up at the ship’s sternpost. The triangular area would not be coppered.

I would make one change. I would eliminate the “hook” in the waterline aft and would run the copper in a nice fair curve to meet the sternpost.

Roger
 
I'm confused. All the photos I see of Nelson era ships the copper plates make a belt at the top. When I put up a plank to show how the belt would fit it doesn't follow the waterline both fore and aft.
Should I just tapered the copper plates to fit the waterlineView attachment 527509View attachment 527511View attachment 527510
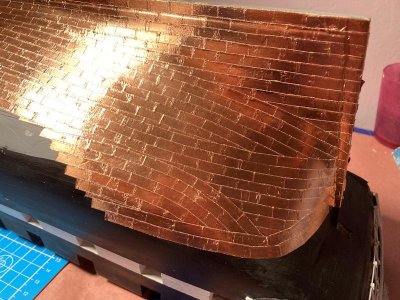
Ted! You're making great progress! That last row of copper plates at the waterline should not be tapered based on my sources. The plates will have to overlap to some degree to follow the curve of the waterline.
 
Ted! Although we use different plate material, the blue arrows show the overlap I mentioned above. Given the thickness of your plates you may need to shorten some of them as well as overlapping. You'll need to experiment a bit. Perhaps some construction paper cut to the dimensions of your plates? You could pin these to the hull and see how the dressing belt will lay.

Blessings. Peace. Gratitude.
Chuck
Plate overlap.jpg
 
Your photos arrived while I was posting and show a different situation than I imagined.

Assuming that your waterline is correctly plotted, the waterline does not follow the straight line of the batten that you have taped to the hull. It curves in and ends up at the ship’s sternpost. The triangular area would not be coppered.

I would make one change. I would eliminate the “hook” in the waterline aft and would run the copper in a nice fair curve to meet the sternpost.

Roger
Thanks. I'm back in track
 
Boys,
You can get the thin, adhesive backed copper tape at Hobby Lobby where the glass etching supplies are, reasonable price. They also carry that glue brand in the hobby kits area...
 
In addition, if I'm not mistaken... the plates would not stop at the waterline. They would copper to a point somewhere 'above' the waterline to help prevent water from the waves from seeping in and getting trapped between the plates and the hull thus causing the wooden planks to rot.
 
I'm not sure what the actual height would be for the copper plates on 'your' model, but for an example... the USS Constitution was plated up to her 'light' water line, if that helps any.
 
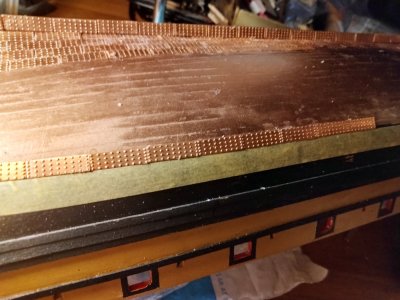
The first belt row is complete along with about a third of the second. This has been much easier.View attachment 527753
Ted, Just my opinion if you are going to have 3 rows on your "belt"I would not do the 3rd row until the rest of the hull has its plates in place. This would make it easier to trim and overlap the belt rows with the other rows and perhaps make things easier and neater.

Rob
 
Back
Top