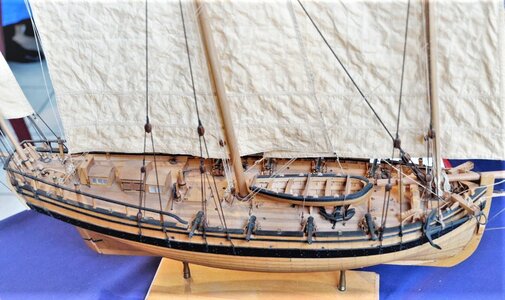
Le Coureur 1776 CAF Model by OT1138

Hallo my friend,
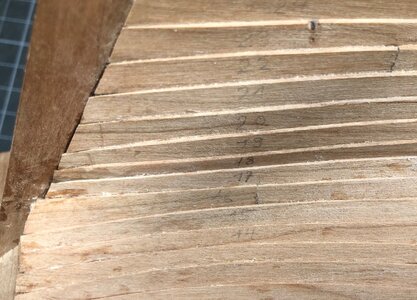
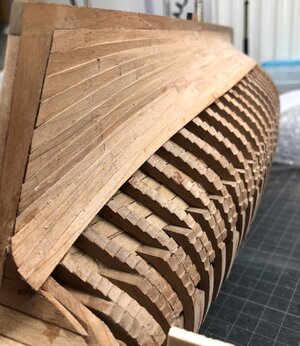
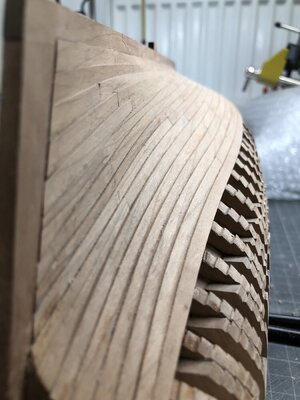
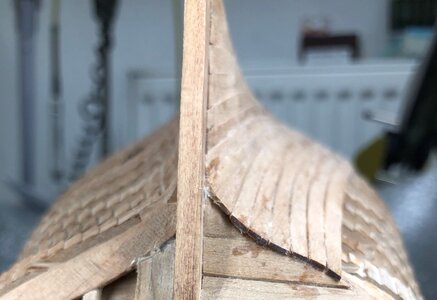
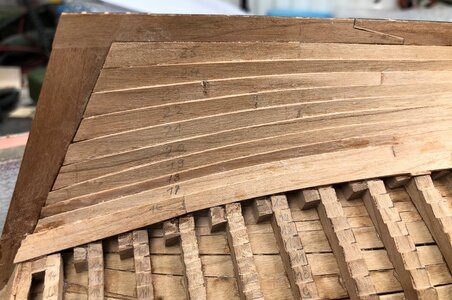
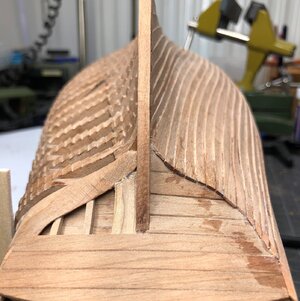
I had a similar situation like you on the plank row 16.
I did not make a stealer, due to the fact, that usually at clinker planking no stealers were used and I think technically it is not possible to get it water tight (on the real ship).
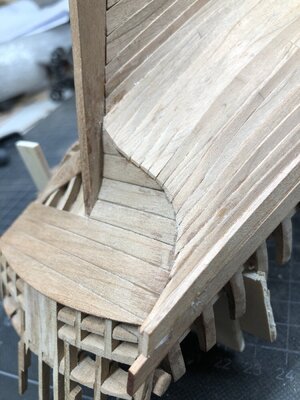
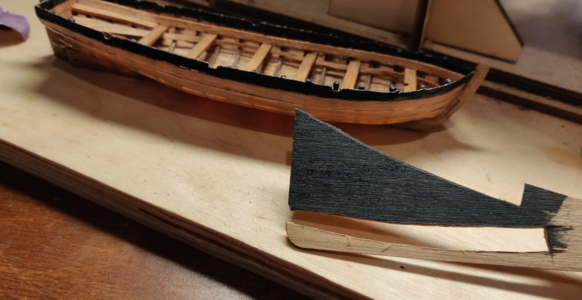
I made in row 16 at the stern a short plank with bigger width from scratch

Here are some photos showing the situation
IMG-5368.jpg IMG-5389a.jpg

IMG-5371.jpg IMG-5395.jpg IMG-5396a.jpg

Just yesterday I made the scratch plank 16 on the the other side of the hull.

One small comment to your planking of row 12 to 15
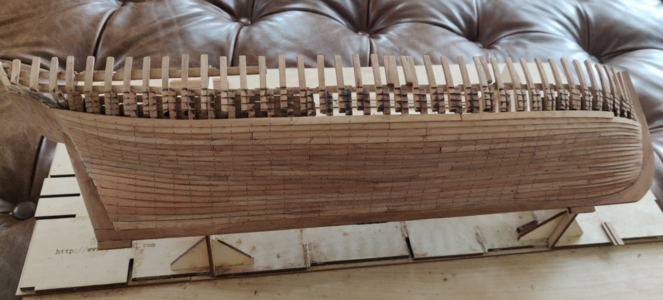
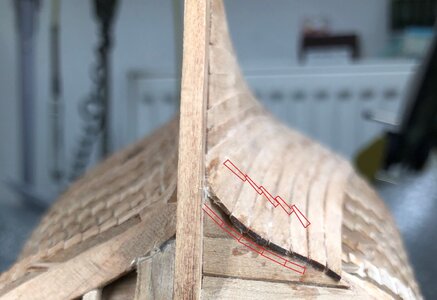
Seems, that you had at the end at the stern still the planks clinkered and not straight in one line
IMG-5396a1.jpg
I tried to show it with my red painting.
At the stern all planks are laying carvel and in the first 2 or 3cm the planks are changing into clinker - just the same like you did with the planks before (row 17 to 25)
IMG-5485.jpg IMG-5516.jpg
 
Last edited:
I haven't been able to get them as flat as yours due to the changing curves at the stem, but they aren't sanded yet either. So they will be (mostly) flat, but just not yet.
 
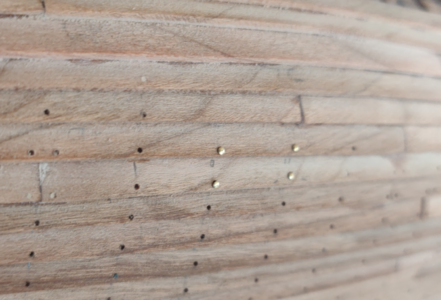
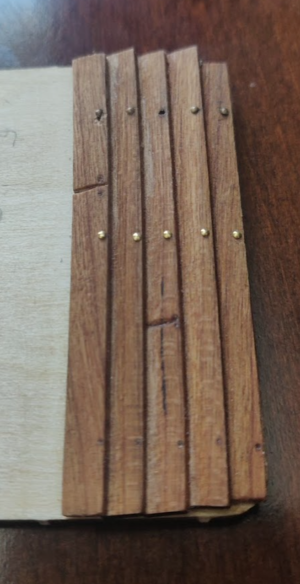
Slowly but surely... at a rate of a few planks per week, I am steadily making my way up the hull. I've also been drilling holes as I go. Made a few mistakes along the way but this is my first time and overall I'm pleased with how it's coming along.

Note that I did not opt for the single vertical line of nails as depicted in the Boudriot plans. It simply made no sense to me that the planks would not be nailed to the frames.

1613432289284.png

1613432364622.png
 
Very good progress - and your planking is looking very good.
You made a good decision with drilling the holes during the planking work, and also correct (also in my opinion) to change the nailing pattern....... Thumbsup
 
Thank you! I still find it very hard to overlook my mistakes but accept the fact that they aren't as obvious to most others. Good practice and a lot of fun in any case.
 
I'm coming up to the wales now. Planks 3 and 4 still need to be installed. I'd like to ask a few things of more knowledgeable members:

1. Should I install the wales before plank 3? Seems like this would be the best chance of avoiding an unfortunate gap.
2. Should the wales be colored prior to installation?
3. Should I use paint, stain or India ink to stain them (black)?
 
Hi Ot, I’m about to install the Wales and I will do it after having installed plank #4 and 3. It makes the alignment with the stern planking much better and as @Uwek did, I will create a slight overlap with the first wale and plank #3 to avoid any gaps and to create an even flow across the whole length. I am not using black to colour the Wales as it seems to harsh contrasting with the oiled hull planks. I have ordered some wood stain (antique mahogany) as this seems warmer and shows the wood grain and depth.
I will colour and oil the Wales prior to installing them.

0BAA776F-9630-4045-8D25-109829ACCB6A.jpeg
 
I'm coming up to the wales now. Planks 3 and 4 still need to be installed. I'd like to ask a few things of more knowledgeable members:

1. Should I install the wales before plank 3? Seems like this would be the best chance of avoiding an unfortunate gap.
2. Should the wales be colored prior to installation?
3. Should I use paint, stain or India ink to stain them (black)?
to 1)
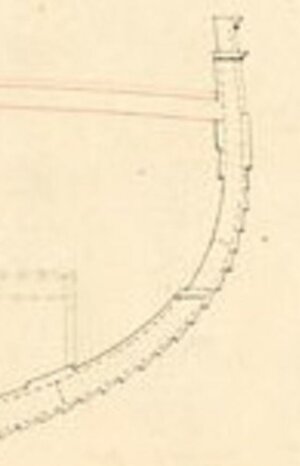
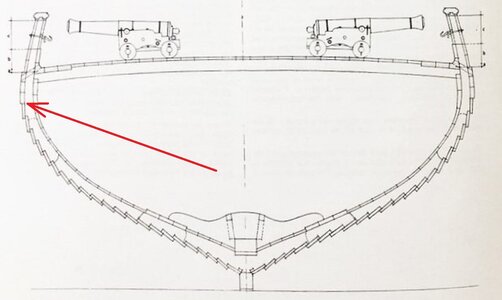
Technically correct (how the original ship was build) would be, that you first install the wales and the plank 3 would contact the wales along the length - so not overlapped
The principle of this detail is clearly shown in the contemporary drawing of the Le Coureur and also in the cross section of Jean Boudriot monograph
detail frame.JPG cerf9a1.jpg

If you are able to adjust the plank 3 and / or the first row of the wales in such a way, that there will be no gap - very good.

I was think about it and decided by myself, that due to the fact, that the strip for the wales is not very flexibel, I made them slightly overlapping, so also clinkered.
With this you have definitely no joint or gap between the 3 and the wales.
So like Chello mentioned in his post.
If you do it also in this way, do not forget to sand down the wales, because the original wooden strip of the wales would be too thick.

to 2)
Maarten was colouring the wales on his HMS Alert black before the installation. - if you want to have black wales it is also in my opinion much easier to make it before the installation, only some repair of the colour would be necessary.
Some models, also contemporary models have black wales (to be honest I do not know, why the wales were black) and some not - I decided for myself to leave them natural, because according my opinion, that such original ships like this lugger were definitely not painted -> to much work and additional costs with no technical reason

the model of Etienne Piette in scale 1:24
CEP_116.jpg

and Joel Lancelle
Coureur1 - Joel Lancelle.jpg

It is at the end a question of taste
 
Another question... the nails are a bit loose in the holes. Can I use a dab of weld bond to hold them in place or will this require a (slow set) epoxy?
 
I am wondering to use any nails at all. . Because with the scale of the model so many pins may look distracting. I am considering the more subtle graphite dot such as your showing.
For the loose nails consider smaller drill hole. Be a real drag gluing every pin.
 
Going to be a drag then... most of my holes were drilled with a hole just a bit oversized for these nails. But boy, do they look good.
 
where did you buy your extra nails? I have been looking and found some to be 6 bucks per hundred pak.
in Cdn. coin that would be over 100 dollers to do Courier.
 
I am using the copper nails from producer aeropiccola / aeronaut with diameter 0,6mm

415-03527-detail.jpg


Here you get a bag (appr. 12 Euro) with 50 gramm weight, which are appr. 1.800 nails, so much much cheaper.

Available also with 0,7 and 0,8mm

Unfortunately I bought the last bags from Modelllbau Planet, but as I know, they are ordered from Italy. But maybe you get them somewhere else
 
The Micromark nails are expensive but I have to admit that I was pleasantly surprised at the high quality. They are also the right length so I won't be cutting a thousand of them in half and don't have to worry about them penetrating the planking.
 
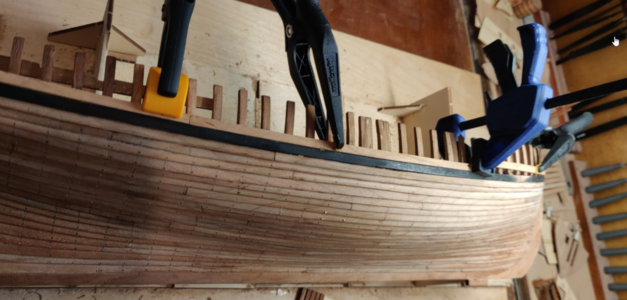
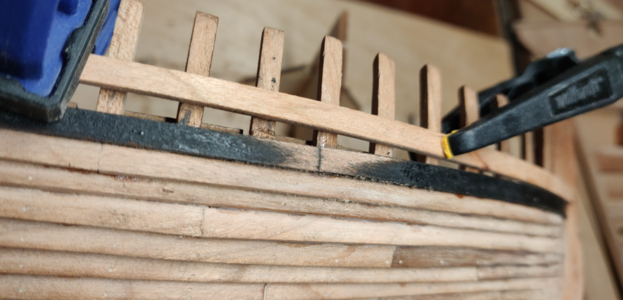
Lower wales have been installed and I'm now in the process of bending the upper wales to fit the outline of the hull. I chose not to overlap them but rather to butt them against plank row 3 just underneath. It was overall quite a good fit but there are a few small hairline gaps. I plan on filling these in from the back with a bit of wood glue, but even if I don't I doubt they will be visible once the inner deck planking has been completed.

1614108232564.png

I used Varathane ebony stain. It results in an excellent, matte black color but I found that it never seems to fully dry as advertised (or perhaps it will in a few weeks). The stain was constantly rubbing off on my fingers and making a mess. A simple solution was to spray each piece with a thin layer of lacquer, which effectively sealed the surface. Note that I did try thin coats (wiping the stain off after a few minutes) but for whatever reason, this stain does not want to evenly penetrate the wood.

The process I followed to get a good fit was to start at the stern and alternate between plank 3 and the lower wales. I used just one point of CA glue to anchor the end and used weldbond for the rest of the plank. This gave me plenty of time to make adjustments. I then clamped each plank down for a couple of hours to let the glue set.

Irregularities in the frames meant that the wales did not have a uniform distance from the surface of plank 3. In some spots, the wales and plank 3 were practically flush! I corrected this by forming shims from thin strips of walnut plank leftover from an old kit. It wasn't perfect but the wales hang nicely over plank 3 for the entire run now.

I was also concerned about the nailing pattern and how this would interact with the wales. Luckily, I found that the stain makes for an excellent filler. After the wales dried, I sanded them flush and applied more stain with a tiny brush. This seams are no longer visible and the wales appears to be formed from a single plank.

1614108795602.png

Like @Uwek, I also made some errors while drilling holes for the nails. Sometimes I missed a seam (as he showed in his build log) and in two other cases, my planks joined off center from the underlying frame. I am afraid I will not be able to attain perfection with my second build!
 
Back
Top