Le Coureur 1776 - French Lugger 1:48 - CAF by Alex

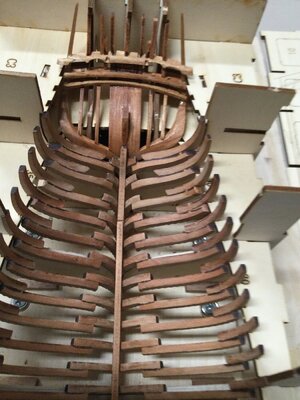
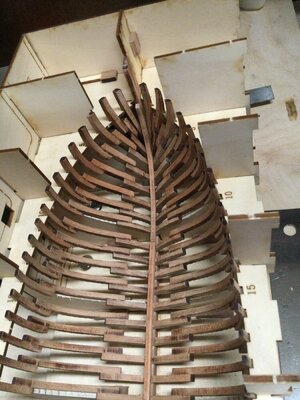
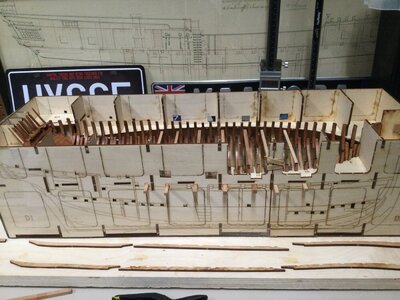
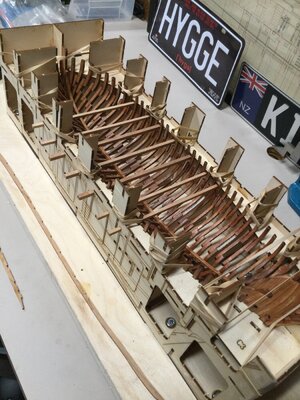
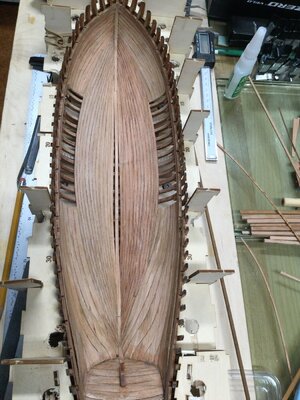
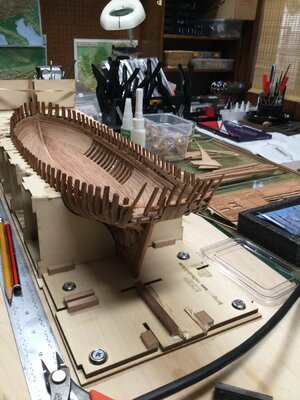
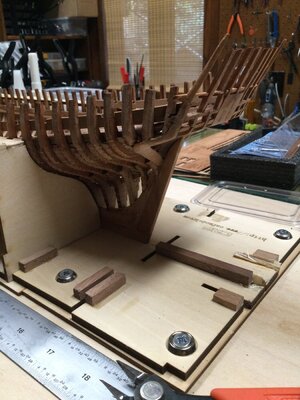
Some progress:
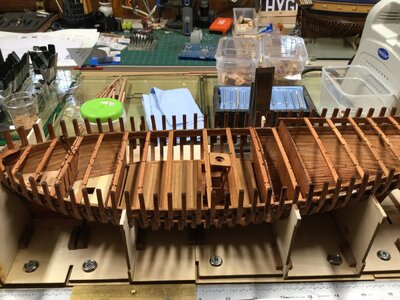
Satisfying how she is taking form as a ship.
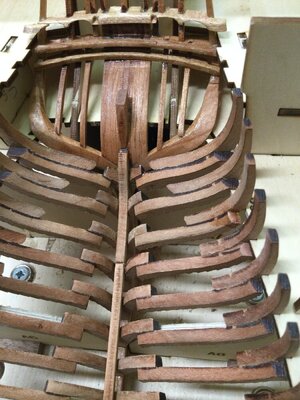
1) Frames are beveled inside and out, and glued to keel.
2) Keelson is glued over frames
3) Frame # 1 will be installed after ship comes out of building cradle
4) Frames # 38, 39, 40 will be installed shortly.
Next:
1) install exterior walls of building berth
2) Install deck clamps
3) Install interior planking.

Thanks to all of you, and especially to Uwe, in the group build for your time and work. Poul caught an obvious mistake in the stern that would have been very difficult to fix at a later stage. Thanks. Without the group's guidance a project like this would be full of mistakes and difficulties for me.

Alex R
B6A8645D-FB24-47C9-8F12-9E192B38D9B7.jpeg

B4D1DC4E-D455-463D-A548-AD77DFDC9892.jpeg

C3DC9B99-C3F0-48F5-A8ED-190D425E128B.jpeg

8D1C3788-EF68-424B-8993-8A43D488E36D.jpeg

29FD485B-7773-4913-9CB4-FD9E881FF74B.jpeg
 
Last edited by a moderator:
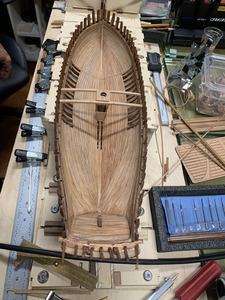
I finished the stern inner planking and getting ready to place the deck clamps.
I couldn't understand the difference between the green and red sticks, but finally figured out that the green (for the middle section clamp) fit into notches on the clamp to position the clamps exactly where it needs to be in a fore-aft direction.
Next:
1) I will temporarily remove some windows from the building berth to better be able to place clamps on the deck clamps..
2) Soak the deck clamps in water for 2 hours (not longer per Uwe's discussion to avoid shrinkage), and bend them into shape using heat from a hair dryer.49897715-50E5-4ED5-92AF-46D94D443212.jpeg65733CFB-F237-44BB-9D32-DD6FA6C92BD0.jpeg74689BE7-4CCC-4956-8AAE-6F761402D3BD.jpeg
3) Start with the center then the stern and finally the bow section.
 
I finished the stern inner planking and getting ready to place the deck clamps.
I couldn't understand the difference between the green and red sticks, but finally figured out that the green (for the middle section clamp) fit into notches on the clamp to position the clamps exactly where it needs to be in a fore-aft direction.
Next:
1) I will temporarily remove some windows from the building berth to better be able to place clamps on the deck clamps..
2) Soak the deck clamps in water for 2 hours (not longer per Uwe's discussion to avoid shrinkage), and bend them into shape using heat from a hair dryer.View attachment 224326View attachment 224327View attachment 224328
3) Start with the center then the stern and finally the bow section.
THis working step was partly described in my log starting with this post

Maybe it is helping to understand
 
THis working step was partly described in my log starting with this post

Maybe it is helping to understand
Hi Uwe
I'm following your build log closely,( a few months behind). The only thing I did different from you is I put rubber bands to solidify the building jig because it is not glued together. With the rubber bands, the ship is completely solid and unmovable. I should have the deck clamps installed soon. I am going away to visit grandchildren from tomorrow until next Monday, so there will be a pause.
It is nice to be vaccinated and be able to travel by plane again....

B75B093C-51AE-4D8D-924F-C5AF3AD5C4D0.jpeg
 
Very well done - I am happy for you, that you finished this interims working step - now some more enjoyable phase will start
 
Thank you for the kind remarks. There is no way Le Coureur would be at this stage without my SOS guides !
I dismantled most of the building berth, but I can still insert the "A1-6" parts to stabilize if needed later. I plan to build a few more of the interior furniture and partitions, but not install them until after the outside planking is done. I applied a light coat of Tung oil, after sandings, to protect the wood. Interesting that the wood took on different colorations although it is all cherry. I wonder if this phenomenon is due to how long/hot the wood wain the water while prepping it to bend.??
I tested glueing (wood glue) two pieces of Tung-oiled wood, after it had dried, and the glue held well, so I didn't see a problem with using the Tung oil at this stage. Any comments ?

tempImageHWvXaX.jpg

E7A465AA-4E1A-409A-9383-39AF025692C5.jpeg
 
Last edited by a moderator:
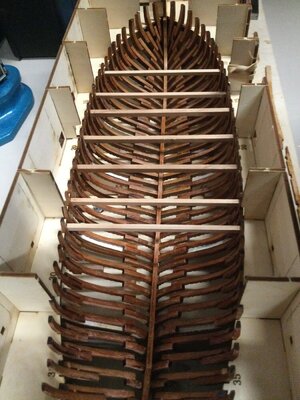
Interesting that the wood took on different colorations although it is all cherry. I wonder if this phenomenon is due to how long/hot the wood wain the water while prepping it to bend.??
I tested glueing (wood glue) two pieces of Tung-oiled wood, after it had dried, and the glue held well, so I didn't see a problem with using the Tung oil at this stage. Any comments ?
Hallo Alex - your inner planking works is realy looking very good .
I think, that the slight differences of the color after treating with oil is caused not by the time of watering.
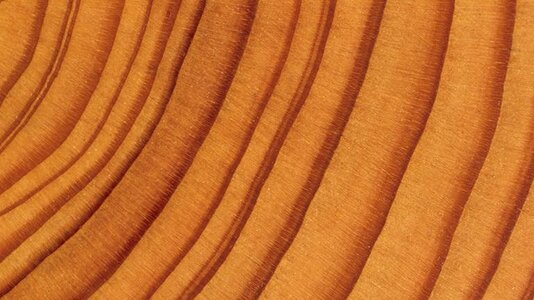
The different sheets of timber in the kit were cut out from different trees and / or different areas of the tree, Often you have also differences in the size of grain, caused by the differences over the years a tree is growing. In some better years is growing more and sometimes, f.e. dry years a tree is not growing very fast -> with this you have already different thicknesses of the annual growth rings.
1567797568951,image-swr-227722__v-16x9@2dM_-ad6791ade5eb8b5c935dd377130b903c4b5781d8.jpg

For me these slight difference in color and appearance is making the work with the natural product very attractive.
 
This is really good looking work
In my opnion you are doing it correctly with first dry fitting, and aftwards, when most of the material is prepared to start later the permanent fitting
 
Thank you. I'm following (mostly) Uwe's build sequence. The detailed explanations, pictures and discussions posted by Uwe and the build group have been so helpful that I use them as my primary instructions, with the plans and CAF booklets as a reference only.
The advantages to this build sequence are that with the interior pieces removed, the hull will be a lot easier to manipulate to do exterior planking without having to worry about damaging the interior. However, I can always dry-fit interior pieces to help me decide where to leave exterior planking off in order to better show the interior. I still have more sub-decks and partitions to make. When I finish these I will start on the exterior planking.....
 
Today I finished (well, almost) my Caldercraft HMS Snake 1:64 that was on the building dock for years...This allowed my ongoing build of HMS Enterprise to move to a different location in my shop. It still needs a lot of work, but all structural work is done. The shop is now re-configured to start Le Coureur. Keel first, then frames, then build-jig. View attachment 207578View attachment 207582
Hallo @Alex R
we wish you all the Best and a HAPPY BIRTHDAY
Birthday-Cake
 
Back
Top