OK FROM AN EXPERT ME AN EXPERT IN TAKING OBJECTS APART, PVA, CA ETC HAVE TAKEN MORE APART THEN THIS ENTIRE GROUP COMBINED LOL, LOL,, MY METHOD IS VERY SIMILAR TO MAARTENS IN THAT I USE NAIL POLISH REMOVER BUT I USE THGE ONE THAT HAS 100% ACOTON, THEN PROCEED LIKE MARATEEN SLOWLY AND CAREFULLY, IT COMES LOOSE WITH NO DAMAGE, JUST BE CAREFUL OF ACCES, JUST ME. GOD BLESS STAY SAFE ALL DON
-

Win a Free Custom Engraved Brass Coin!!!
As a way to introduce our brass coins to the community, we will raffle off a free coin during the month of August. Follow link ABOVE for instructions for entering.
-

PRE-ORDER SHIPS IN SCALE TODAY!
The beloved Ships in Scale Magazine is back and charting a new course for 2026!
Discover new skills, new techniques, and new inspirations in every issue.
NOTE THAT OUR FIRST ISSUE WILL BE JAN/FEB 2026
- Home
- Forums
- Ships of Scale Group Builds and Projects
- Le Coureur 1776 1:48 PoF Group Build
- Le Coureur 1776 1:48 Group Build Logs
You are using an out of date browser. It may not display this or other websites correctly.
You should upgrade or use an alternative browser.
You should upgrade or use an alternative browser.
Le Coureur 1776, model 1:48 by Adi
- Thread starter pianoforte
- Start date
- Watchers 52
Outstanding job on one of the most difficult pieces to properly install, Adi! Thanks for sharing.Thanks to te good preparatory work of all Coureur blog friends, especially Uwe, the next steps were a little easier for me.
I decided to do the stern ceiling planks first.
View attachment 214521
Than I noticed that the deck clamp part 3A-2 has aforced guide due to the 4mm square rods. So I had to start with this part, since the other two, 3A-1 and 3A-3 depend on it.
Now the parts had tobe shaped. Since they are not really thin, this job was quite lengthy.
A lot of water and the steam generating soldering iron helped the bending process.
View attachment 214528
View attachment 214529
Now put part 3A-2 in position, press it against the square rods from below and fasten it with many clamps.
View attachment 214537
Now fit parts 3A-1 and 3A-3 into to bow and stern. Water, bend, fit.
Part 3A-3 requires special attention because it must be fitted to the curvature of the stern planking.
View attachment 214540
View attachment 214541
View attachment 214542
To install part 2A-4, the sqare rods had to be repositioned. No major problem thanks to Uwe's instructions.
But then I noticed that his green drawn rod, which is responsible for the exact position, had to smaller than 4mm. I used a 3mm piece from the grabble box.
That worked.
Part 2A-4 then had to be reworked in the rear to fit the window opening.
View attachment 214543
View attachment 214544
View attachment 214545
- Joined
- Mar 19, 2020
- Messages
- 206
- Points
- 213

It’s great to follow real life examples and to learn from other people’s mistakes (I make many!) but take pride in your work as it is your work and your work alone. I will learn from your measured and patient approach.Dear friends, thank you so much for you kind words, but without your groundwork this would not have worked. You have really motivated ne.
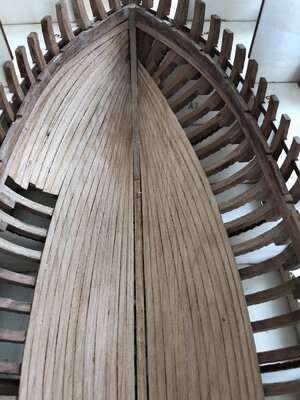
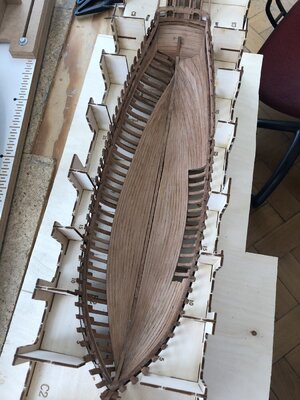
I have now dealt with the interior planking. After some consideration, I decided to work upwards from the keel, as I expect the pre-lasered planks to be perfect fit.
Have also immediately registered the famous limberboard gap an noted during installation.
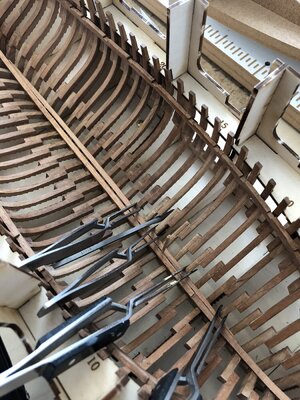
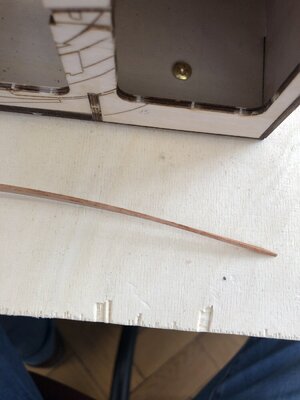
The planks were again watered, steam ironed and shaped accordingly. whereby I realized that the planks must not only be bent, but partially twisted at the ends.
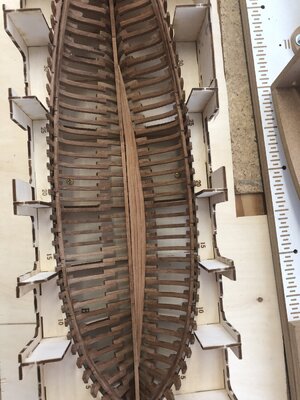
So I worked my way up wih the parts from 1O and assembled all 12.
At the moment I am installing parts 2A-1 to 2A-3.
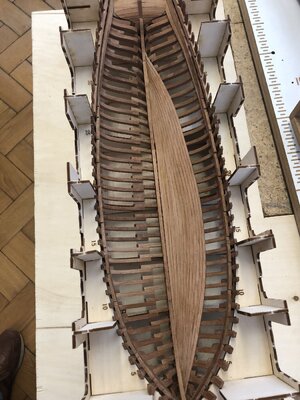
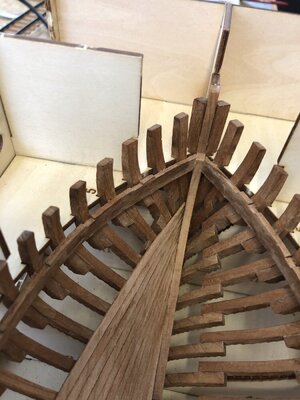
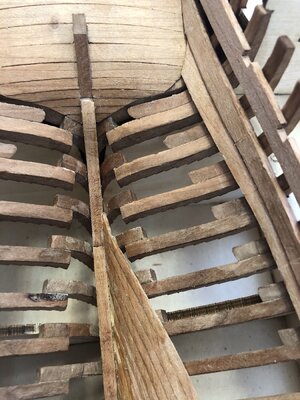
Have also immediately registered the famous limberboard gap

The planks were again watered, steam ironed and shaped accordingly. whereby I realized that the planks must not only be bent, but partially twisted at the ends.


So I worked my way up wih the parts from 1O and assembled all 12.
At the moment I am installing parts 2A-1 to 2A-3.


Looking very good my friend - and without any bigger gaps between the planks - very good done.
BTW: The idea with the tweezers using like clamps is very good !!!! Have to remember this
BTW: The idea with the tweezers using like clamps is very good !!!! Have to remember this

And now for the interior planking 1Q and 1S. If I hadn't seen the work of my predecessors, I would have puzzled for a long time what the strange planks of 1Q were about. Poul started from the top and achieved quite a good result. Since I already used 1O from the bottom, I had to continue from the bottom like Uwe and Chello also. it won't work without stealers, and if it has to be that way, I'll start right at the bottom. Maybe with an additional plank the numbers of stealers can be kept low.
To narrow down the problem, I started planking the bottom and top at the same time. It worked, a 7th plank was added. The white dot.
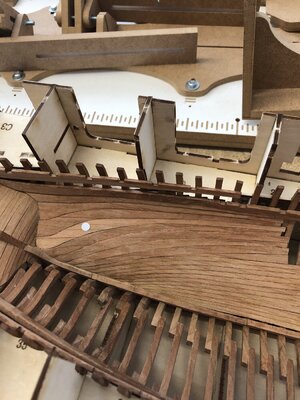
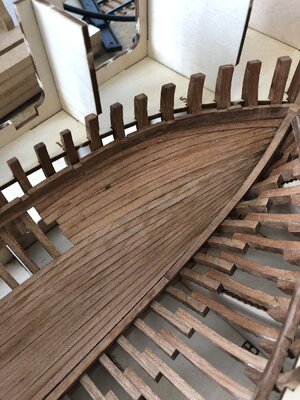
The installation of the parts 1S was than but a little easier.
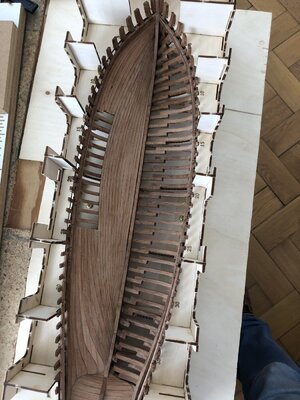
To narrow down the problem, I started planking the bottom and top at the same time. It worked, a 7th plank was added. The white dot.


The installation of the parts 1S was than but a little easier.

WOW - very good result my friend
- Joined
- Mar 19, 2020
- Messages
- 206
- Points
- 213

Fantastic work Adi!And now for the interior planking 1Q and 1S. If I hadn't seen the work of my predecessors, I would have puzzled for a long time what the strange planks of 1Q were about. Poul started from the top and achieved quite a good result. Since I already used 1O from the bottom, I had to continue from the bottom like Uwe and Chello also. it won't work without stealers, and if it has to be that way, I'll start right at the bottom. Maybe with an additional plank the numbers of stealers can be kept low.
To narrow down the problem, I started planking the bottom and top at the same time. It worked, a 7th plank was added. The white dot.
View attachment 217844View attachment 217845
The installation of the parts 1S was than but a little easier.
View attachment 217846
Very good progress, Adi!! 

You‘re right ot1138, we can live with that.
Very good result - seems, that you also plan one side of the hull open without complete outside planking ?
Absolutely correct .Very good result - seems, that you also plan one side of the hull open without complete outside planking ?
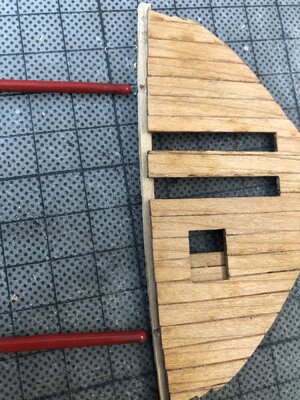
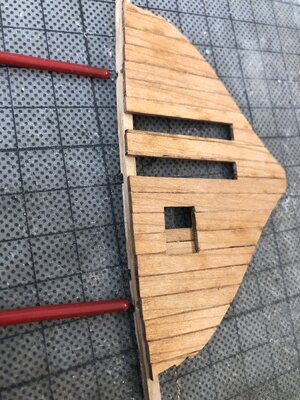
The last few days I have been working on the interior walls. With the 4 templates I tested the fit in the fuselage and found out that it will be quite tight.
That means rework. I still risked assembling the individual boards with beveling the edges.
Surprise, surprise, the finished walls were somehow smaller than the templates. I find that rather advantageous.
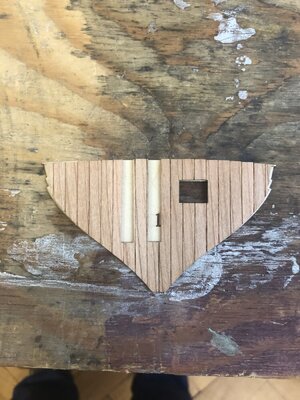
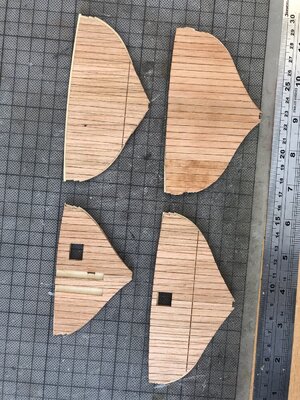
At the same time, I installed the shutter in the front wall. Movable, of course.
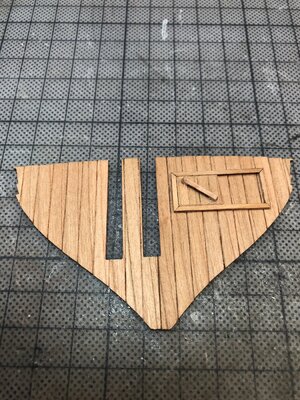
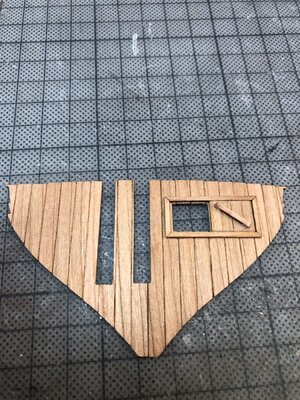
The first test use of the foremost wall looks quite promising.
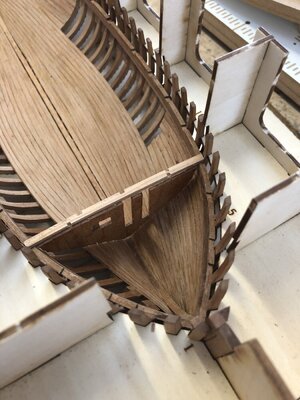
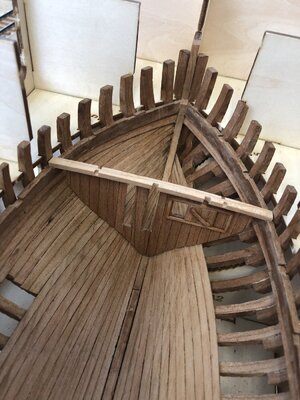
That means rework. I still risked assembling the individual boards with beveling the edges.
Surprise, surprise, the finished walls were somehow smaller than the templates. I find that rather advantageous.


At the same time, I installed the shutter in the front wall. Movable, of course.


The first test use of the foremost wall looks quite promising.


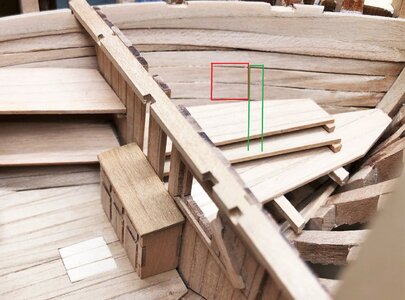
Thanks Uwe, I thought of that, as you can see in my second to last picture the wall is in front of the deck beam. But what about the stringers, they have run above the wall if there are no recesses in the wall, right? Then, as you correctly say, the wall would have to sit next to the beam, but a little lower, may be.
Can you show in a sketch or photo, what exactly you mean?Thanks Uwe, I thought of that, as you can see in my second to last picture the wall is in front of the deck beam. But what about the stringers, they have run above the wall if there are no recesses in the wall, right? Then, as you correctly say, the wall would have to sit next to the beam, but a little lower, may be.


