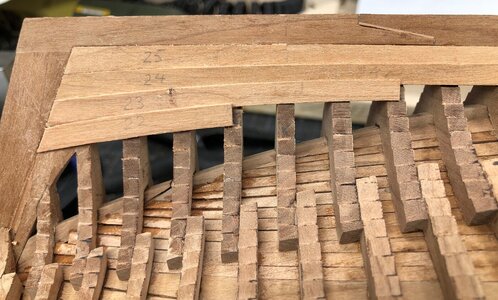
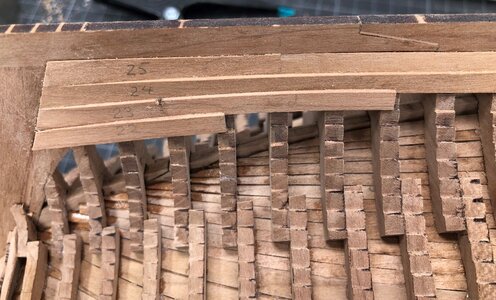
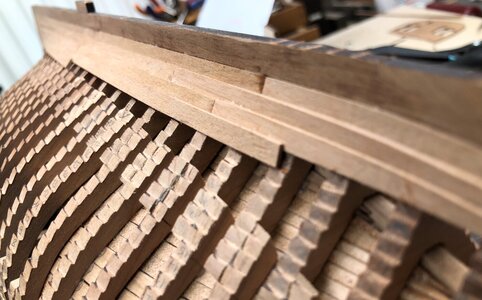
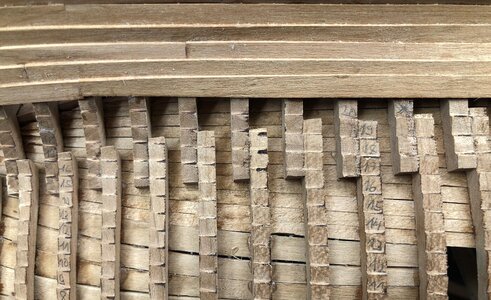
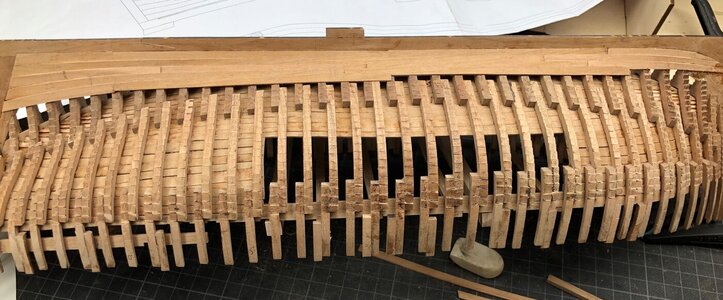
Hey Jim, how do they hold planks together if there is no underlying frame to support them? Am I missing something here?Those might be just treenails (not bolts) and used to hold planks together...
-

Win a Free Custom Engraved Brass Coin!!!
As a way to introduce our brass coins to the community, we will raffle off a free coin during the month of August. Follow link ABOVE for instructions for entering.
-

PRE-ORDER SHIPS IN SCALE TODAY!
The beloved Ships in Scale Magazine is back and charting a new course for 2026!
Discover new skills, new techniques, and new inspirations in every issue.
NOTE THAT OUR FIRST ISSUE WILL BE JAN/FEB 2026
- Home
- Forums
- Ships of Scale Group Builds and Projects
- Le Coureur 1776 1:48 PoF Group Build
- Le Coureur 1776 1:48 Group Build Logs
You are using an out of date browser. It may not display this or other websites correctly.
You should upgrade or use an alternative browser.
You should upgrade or use an alternative browser.
LE COUREUR - french Lugger 1776 - POF kit from CAF in 1:48 by Uwe
Hello Chris, This is clinker style planks. Both planks bolted to a frame's part (floor timber or first futtock) but between the frames, they 'clinched' using clinch or other fastenings by mean. However, this is not my statement, it is rather assumptions based on below images.Hey Jim, how do they hold planks together if there is no underlying frame to support them? Am I missing something here?
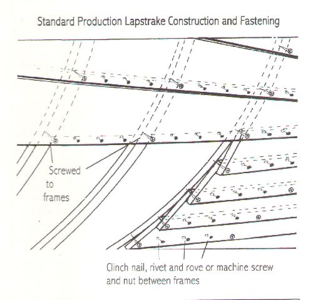
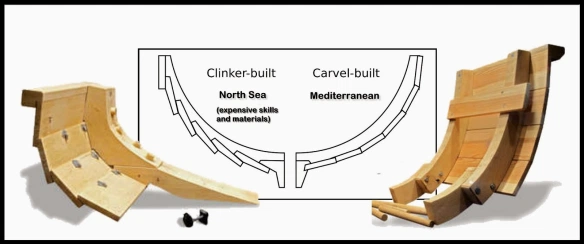
@Jimsky my friend the pictures you are showing seems to be a boat with loooong distance between frames  There are no fasteners between frames on the plans of Le Coureur. I have read in several places that French ships used a mix of Iron bolts/spikes and treenails below the waterline.
On all frames it is a straight line on the plan.
On all frames it is a straight line on the plan.
I can follow the arguments by @PoulD and agree here. I think also, that there is an error by the drawing of Boudriot, and seems, that all scratch models I know followed this small error.
It is looking a little bit strange, but the nailing pattern should be like this (red dotts)
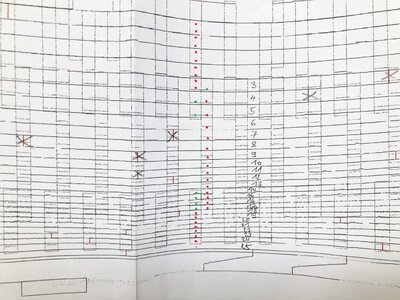
the "green nails" would be too much, due to the fact, that there would be stronger areas and weaker areas...... so I think only the red nails.....
It is looking a little bit strange, but the nailing pattern should be like this (red dotts)

the "green nails" would be too much, due to the fact, that there would be stronger areas and weaker areas...... so I think only the red nails.....
BTW: originally I think they used only bolts and no treenails for fixing the planks on such a clinker planked hull
BTW2: carvel planked french ships were really planked with using appr. 50% wooden treenails and 50% iron bolts
BTW2: carvel planked french ships were really planked with using appr. 50% wooden treenails and 50% iron bolts
Ahhh... now that makes sense. Thanks for explaining to the relatively new ship builder.Hello Chris, This is clinker style planks. Both planks bolted to a frame's part (floor timber or first futtock) but between the frames, they 'clinched' using clinch or other fastenings by mean. However, this is not my statement, it is rather assumptions based on below images.
View attachment 203463
View attachment 203464
Kurt Konrath
Kurt Konrath
They do bolt to the frames, but in overlap like household exterior siding.
Bottom bolt of one row also secures the top of the row below and underneath it.
Bottom bolt of one row also secures the top of the row below and underneath it.
Just an idea in case you or others are planning to use bolt in the planks: I think I would mark the centre of every frame on a few of the planks - or at least on the keel.
Or maybe there is an easier way to mark all the bolt locations once the hull is fully planked?
Or maybe there is an easier way to mark all the bolt locations once the hull is fully planked?
Just an idea in case you or others are planning to use bolt in the planks: I think I would mark the centre of every frame on a few of the planks - or at least on the keel.
Or maybe there is an easier way to mark all the bolt locations once the hull is fully planked?
Hallo my friends,Are you going to mark bolt locations on the planks Uwek ?
on the planks it will be not possible right now, due to the fact, that I will finally cleaning and sanding the single planks when I have one side completely finished with the planking jib.
I guess you can afterwards mark the locations of the nails, when you connect the frames on other side of the hull (which is not planked) and the visible top timbers.
Problematic will be only to define the plank, where we have to switch from the floor timber to the futtock and once more back to the top timber
So I think this will be possible also afterwards - I will see
and also: nobody can really check it at the end when the model is finished, if the location of single nails is 100% correct
I thought, that it is possible without - to be careful with the hull during the planking works - BUT
It happened, that I broke one of the vertical elements of the stern structure - because I / You can not be careful over hours
So I decided to make some simpel temporary support
-> My strong advise: Do something like this - it will help a lot
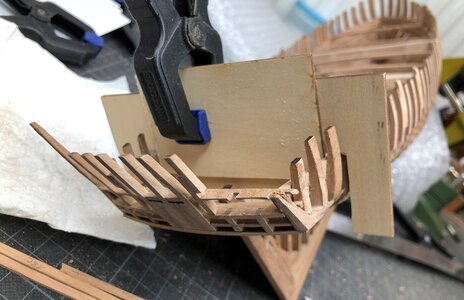
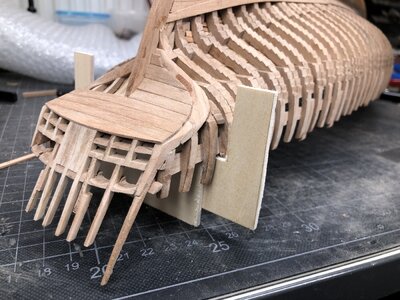
It happened, that I broke one of the vertical elements of the stern structure - because I / You can not be careful over hours
So I decided to make some simpel temporary support
-> My strong advise: Do something like this - it will help a lot


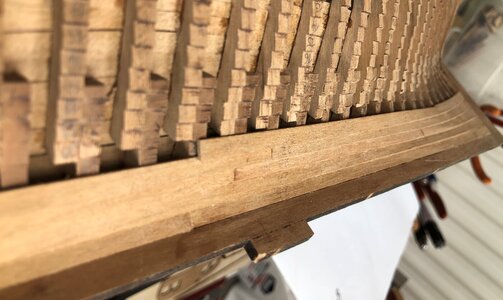
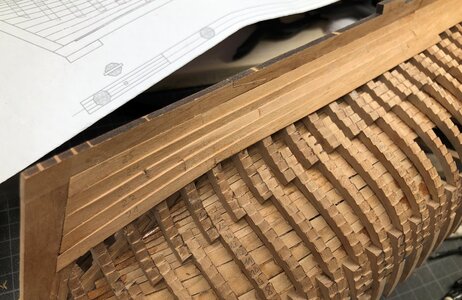
I have the same situation - only on some areas the clamps I have are working (partly), so most often I use also appr. 50% of the contact points with the frames with CA, and the other with wood glue..... this is now off course more problematic, due to the fact, that the interior planking is already installed.@Uwek How are you clamping planks 23 and higher to the hull? I am unable to figure out a good way, other than to use CA glue at several points and press it down by hand until it dries.
It is helping a little bit, to get the planks already in form of the curve necessary, f.e. with watering the planks .....
- Joined
- Mar 19, 2020
- Messages
- 206
- Points
- 213

I will master the technique of bending the planks as I won’t go through the CA torture againI have the same situation - only on some areas the clamps I have are working (partly), so most often I use also appr. 50% of the contact points with the frames with CA, and the other with wood glue..... this is now off course more problematic, due to the fact, that the interior planking is already installed.
It is helping a little bit, to get the planks already in form of the curve necessary, f.e. with watering the planks .....


