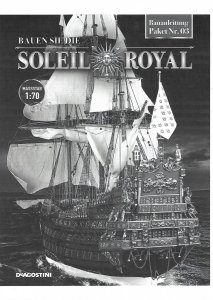
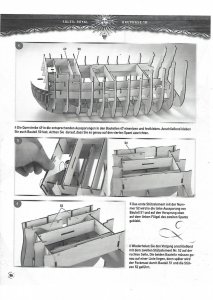
Le Soleil Royal, vaisseau de 104 - De Agostini - by Jack Aubrey

. . continuation. .

I continue here with the publication of additional images of the stern galleries from a closer viewpoint. In the first one you may notice that I have yet to find a way to close the bottom "bottle" (I've not yet found a proper english term) on the front side, "closing" that I intend to do as soon as possible.

01 P1080350.jpg
y4mc5kqVkbmA9aeyzykiz7S4t9-k-Z02f6czJnjNa1BcjRd89nRO5y3G1bwoaxhKHVNAfUjigMWvfG1YMxkojEIM_FvpvJ3Tl_5JNqH4Or_mmlgaRE8MdkNowzZDsGcAQsdABRhXWXUBWD7i-whgajfLH8KLlKR7hHHxLr_wY6XNl7t6wzUL2hRmJT5lSXsDoH06ZvluwsOodG0nd4HOnUrlA


Here, however, you might notice a couple of caryatids that connects the lower to the middle gallery above. At the time of bonding two other caryatids are missing. They will be installed in place shortly. The two missing caryatids are visible in the picture number 04 at the top.

02 P1080351.jpg
y4m793JD8hWiRsqeEKF0UBAL0ROWGIxsV7t0SCK4uJxKEsEXIsvbRi6rpR9yHb9yRR9YreTDl0IHgtoM0T8dYJpEVF3wW6FwKS79MmqjTx9lbpTztHsG53WgiaqdMsQkzwOLy4qGRxmeHc-j4xOlCKgV7UzxqIgrpQaPM4G1DWUoKKefBaIYiPma89zhfm8UrCNjhZQvKLtYX5wcyLJ6pJVDQ


03 P1080352.jpg
y4m_k4RvoOj-Y4aINa7TVzfL9M18esB5-4YzSW5FAW2zEZ512VqyrNV5GdOeTD3VwIy9wSVgLxd06UpmFP5ZoSot8Bi99lTTT9g9AWmt_jIqhyOGUr20HMYvLC_NFPupw8I6wzoPC8zM1Pb9Kgy5G7e3PJ4Py6089AeUk-KpBFy1DgjezheKjfAqRcIUBW_sM98ntc1YoyBekSbWfsPOVZB3g


In the next two images are shown all the last decorations, that remained to be gilded, in their last stage of processing. Now they have to be separated from the double-sided tape, smooth on the back side to remove the residuals of the tape glue and other filth in order to prepare a good support for bonding. Then it will be the turn of the "bottles" decorations . .

04 P1080354.jpg
y4mzBDzfAtB07UZnpeZ2fH7EurLxarGB1L7Sm-fypELPec45LNw25e1BiHAOQVFoekaBNejvl7NH5bfrizzKE1CmnWnJZtZj-QyPgiZvwfb68TsuptLT7xTWxv9maoucWtLN_T688hHV3gOCMp2lAX-cX6-VEPev01KZeJqaa4BcUKTt_EGNH7psfUS9KbQSDGLvmHC3RuUvGQLXAdvImct6A


05 P1080355.jpg
y4m99UHB8B38ORK4VLshfYnw-Dm_XbTerMCD6IDWA3bx1NOsqpLwPmBu_s3zAM0O7aUKJnm73Eqs0XdNCIW0-ez_id9aZV8RWetphygo8oKGKIP3Def1uyxC621leZvNlfnkZAaVWik3B5WegQp1mypOp5qwH1w-FpBkpuDgluIGEQjfF0S7aM8ce86F9cgZ6tkW732ThD1nGc2lDFDELvkQg


It remains to "gild" three statues, rather large: the figurehead and two human figures that are to be applied in the stern area. Having regard to the size I want to think not only to a process of browning but also to apply some color. To this end, I will try to find some photos on the internet "enlightening" of these details. Until now without great success but . .

See you soon, Jack.
 
August 25, 2012. . continuation. .

Some new details added on the decks: the pinrails of the mainmast. In the rush to fix these pieces I forgot to drill the pinrails before installation. Now I'll have to do it "freehand" on the pieces already fixed and will be more difficult to achieve the same spacing and alignment I would achieve before . .

01 P1080347.jpg
y4mH5AWPN-ZO0BozOm9HjH2anY1nZy6oHLb0hsy7l_Rgkgc681K6Y8GSROU8ia76vVpgznm5_i0pwNrhXax_AfU_fbr79RWg8amqCtRXMS-HTwXRtw3IOhyPIfex_tkNgjc4pJoMd_8NTwKyslGrwyllmjPPjSmfByEpE2lPds0btb-7rC5GshrkSJpUMh2xkzmrxXTgdl4mgnLwC2UB49Hug


02 P1080348.jpg
y4mAlr9qo7AsP945AYFnCyR8ERph2iibWZ6WwaaTs4EGYFKeqv9r0yTL3sNudrsmQv0S_FfHyvgb1FPngcmwBolWYpsui3CGw5V0P5pzru8JEVIyexJcKE8Nq228PhIm9eiwD9gNjOdd9q3eQTrYamHvPD7Tv13qglEWld-oC-4W-PVlhbVEjZLEboq0A5j423S6-1O9YxYZHZG0xEDEp-G8Q


Here are shown the WCs installed at prow . .

03 P1080349.jpg
y4mXKpa90Gq1DAfRHx5XPKFcLlmmhqyw6aLmT4cvgS_Pvpc8xKN2Ht2g2OVWcymYepNI0q25Vjz2YkY5_ZWDZhz8QRbTVxMenTT-JiFewBFnAe584VcedZWJQtO2bWaqN3KuqCcQY-jvEjojVxyJZ_oZ-YX8JlZi5NedfWiAzpolHE6Qtkq8khl9cFufX5a5VOWGh_61I50adzYM4IGquU15w


Finally an overview of the guns after I finally glued the barrels to the carriages, using epoxy glue. Initially these barrels were fixed with the cyan and had fallen off completely after few time. The seal of the epoxy is incredibly stronger than the cyan for this type of bonding.
To keep in mind for the future for when I will have to fix the remaining gun carriages to the decks. . with this glue it will no longer be necessary to use pins as reinforcements.

04 P1080353.jpg
y4mq3arYlNfajyKdvFkZHFWFMAeduHFdNTpoeszNlku7JFFPqpp576C-EWTCYGsa98jiSGr3TPr1ppPs_ft1binWqj99ISxcw0T1OTWjBq0uGscslyVMfpIewEIzWqGD3j_1Yvzhh5SeB8CzY6HFghussdJFPgDLQ7ao_EyDB59tbnkBq218nmv2qqQ66RTO9WlXtlK0Rdb5Fue442K9SrJfw


See you soon, Jack.
 
Monday, September 3, 2012

In the few hours that I devoted to the model in these last days I continued to apply some of the decorations that were ready for installation and, above all, I have finished the "missing wood pieces" of the lower "bottle". I also decided to change its color, applying the stained blue strips, as you can see from the first and second picture when compared to the previous already posted some time ago.

01 P1080357.jpg
y4mrPgHJuOkatTcvkW2NuDxvi1fTGr3ud1WrE8no2oF8xWg3U15EGF-P2r_EAeLYjaAUuxXPYdWIPkX3Kru3qYih9PBWlXq1JenDtwmLL90Cqg0tQcZQux4i18-YlPBFgkxuilCeIh272XGZJCOoJL51cKDYLbnknABjwRqnI6azoVF_kB3a6BV9yyUYj7XB4FAAksVE7pU5llUdDxUpI5oCg


02 P1080358.jpg
y4mX7i3QaK-kv7hFaoyPfJZTQ33Ztp3FmQ7SqAB2eD_XQM-0P1QW8QOWrZmKtB7Y0PSqt7fikt7doHEmbB50pnXiyOMkfZYJ5B-OxpEJeIqAylbVrVT6MeBWTXhax5ZM42STyIPF3N_8_MAVsV-iOIXZNfMv-mNNBiRgWIvcMkY-QLKALQXgL76qsqXd8cwVuQvax8eQ4mxsMc18rApjKYs1g


The remaining images show the other decorations applied to the gunports of the upper deck and bow. Nothing to add apart I used the epoxy glue to fix them.

03 P1080359.jpg
y4mR51MJGaOLPuNTsgxrQ6Hy9rpHxBloRet5yW9gniqh6BiXXesDuGVbjWHzBVK73_xwD7Y9Fd8YL_tNrisyLbyanjZR0F5YZ6B_7CT6qNJtlHIbdla-IPP-0Y_E2N8Bj2Fm9AxsjsouXd_4sQqFoVhoNL4LHXmKyEynuBDlR_zcnwgxo6tX4tz8U3E8ilNkBoYPK_QFDKKjtRMTVZWO1_UtA


04 P1080361.jpg
y4mWzkE4-PtlB3Fim6u40BJOY-oKkrWwjW1uca5FTJ4sFggzMnMeKiwj5VMvZQaLwfeg2kOy5zwGRNsY9l3_6ftzXimvpcAfnrMtsLM6AAt3k00qaGdA73tvy4FQimJCVy_xY75nMvgjc3mac3GFkEZWQHPhzIXg9jD3q3ORLa9tg8bNaRM99EHcSggxmdNXrVUOAHmBwdqlBhPLbjgpNS5lQ


05 P1080360.jpg
y4m7L-qUb4anRB9TRxJLH-RP7WuWpxQFi3Xad0YQaThQkM1vGf8DyDgTLRFcr7V-l9i8lFEPYAupbQNnZEtKrAWPZvFFD3eMZktySsl8_KGhCdXcwSAlFlZvZH2fqZHOKR0UsDgAMMjnZ5-ZaKeokeniPyfviY65tMBNY8niUqMdcEAD3YCosnSX9dP4IV75FI-fO3zxDut7J4Yt_aBMApuiA


Kind regards, Jack.
 
Wednesday, September 19, 2012

The last evolution of the stern.

01 P1080367.jpg
y4msXoqTTRe_7MX-pZd3wgR3dVOV_0a--Oa2NseXs99Z5TIVkkbfBSWsnlAtkP5cvYGgiJcvZsME1tUmGe5--Ez8jrL7BQUs8iLSyg-_uNoOgzcDZO7KyJJaYX1tx6807GdrriJOkDSKv2RFtfn91KGKALUsZg_3em9qVn4OkYW8vpvnhJ4a_pPRkmvsDbU4bG3FqHqymMPvp4xGpbh2HUyZQ


02 P1080370.jpg
y4mP6nThdp8FUBI06VJMVgKYH6eU5FkJTcWSov0s9_GQcdKpUeaYYHVOUGsYtD5kNR3j3n8PGIZ0Vy4HScOo1TpFqwAZVcIFEKwVey3ZRn2UD1ut7c2wXXMcFaoNuvrojHWCGX77-j7F6NGV-qjJPZEj4htg7wssfUZhpJoYGkuSmfNSDN56y3wFFiDnJfahSh0hZXiP_8PXTga6S0qJQMkBQ


03 P1080368.jpg
y4m7j0lPqerZ9b5xvZ4n1AWOoMxvkv6We4NDOss08GwQa0GzHlqxp5o3rFuNPnge9q54rym-A1Xf-VEziFODuHofHmzS_56QW8BTh1gTKdfSCyBm2zorzVWaDyvWSsbFl0-3o3NydsUY2_6a8W4Br9M1F7jWHo9TY8BGs15y1_j_4uIBzIU8nhnvyZlCPagovr8IBMY99FCjuttPIVPG8dO3g


04 P1080371.jpg
y4mIku27xGCpFFXKkKQr8xHADAnemYPg7lsHpq37SBr3C6l2kZfZmMCBHEtvOOMPM1eIOy3nhD6Q9-fdumKl98bC6va_lAReKNug1X4mHgob-E3oUQDkw0vkDpY5FPb1D_iTXjwZnYzXrggh0bwDNxCRGipVTULPSpDaJ-xFvATnwnWEv2ORTYWrphhKqPeAS3gboR2CJSju24EDzT26MPmAQ


Then yesterday I took the hull and I fixed rigidly on the work table upside down to start thinking seriously about the decorations that are under the lower gallery and those to be placed on the two lower smaller bottles.

I must now say that the decorations of the lower bottles do not fit very well on their surface and, by a careful examination and after various positioning tests, this is a quite big problem . . I'm still far from a clear idea of how to proceed . . I'm considering to rebuild totally them with mouldings like FIMO or Milliput . .

Kind regards, Jack.Aubrey.
 
Tuesday, September 25, 2012 - Display Case

I temporarily abandoned the stern and his goddamn decorations and I got into the building of the display case basement. A kind of digression to the routine of the stern. .

In the picture 01 you can see the first part of the case, the pedestal, just finished, even if they miss the obvious finish (stain, velvet or cork on the surface of contact with the hull, etc.). This piece will be later mounted on the basis of the case, not yet ready.

01 P1080380R_zpsfb8ce24c.jpg
y4mCldrWDerPQc1Ti7dj-f8B8D_tk6n4SVBWh8D6KEgBNoMJFCHAStF2LVpdh1CCG13PvApLFC9WVQByGJa7JlRydEbotF_dLrLHH-dlKooogGnM_XwNjX3VLV3OnUP5U644G2_wo7qgYVM7fwJDYSKXIIiBj1Sd6-c40OiMdDyGKTQJ4-jw43CB16v1hE_a3vZZwWlmHVTPU5NvTJaRvrNSg


The next two images show this piece without the hull above, visible in all its details. If you look at the images in high resolution you will notice how the two supports, with a thickness of 1 cm. have been shaped with a camber to follow the lines of the hull in the area where it will rest. The material used is beechwood.

02 P1080377R_zps694ae4ec.jpg
y4m4KSzy1ibsS4Df_1osbnGhTh1AIzx5lI1JHJetBeBBqNTqPPjSRxGtE0UAhEE2w4nfw7Vw8AxJMA0PE1nLnUpNwkyxuH8GJTi36Ukqo4YYXECx8BjxyrEZ2xZkMTvYjY_tML5NwBWTD3Sl2WaIAZhgtRsGTGrJQArIrI35m78wW5_7GMaRFebbGATgZ4uWQwlZ1rIE4ZclyU0ifCkCB94jQ


03 P1080379R_zps5aa91f5e.jpg
y4mMvmOgc3AvnRHMFtGHu2YfWmzPz-OBlrxS4Sk_zIah8CcMG1gQgVcKyOGe2-P3kRF6dE1u-ykDWkbDKZ3pZOYkYy0Lis74ZerYKfJJLo-IDwrDoH3WBFYNghD0-7nLQoMvUoqWj4RV2HxPXMOyqyCf9a0Z6k8DofqGr5C9NwNw8wU7Y1hlbIeJI6FZFDlAhY4Jtw0sSqAZPSTjO6W8YeIYQ


To take the shape of the hull in the area where this would be resting on the pedestal I used a tool that is called "form tracer", illustrated below.

04 P1080373R_zps71fd0ceb.jpg
y4m9jJZ7i0zRr4gArQnBu1PR8MQE6KIYWsguXHJXiVf9S6V3ws_Zzp_iOIfDe2OMLg8Rbpr3WJt_OqPDQeIAwO96utBkSEVSw08HIQBPz5dPQJzNvSNN9m40NaoZ-HIBCmcoyaTD85VMB02nxDV4Irz8bUKqNJtdIuj-n89lsHu5AbagauT8WxuZMV-LZbJowIFk6Ct98rV_u3jYo8qptTvwA


And before to work on the final beechwood table I made the prototype with an more ordinary poplar plywood 5 mm thick, much easier to work.

05 P1080374_zps4e0561c5.jpg
y4mSSNKejiW8zS6Ko1DMw6ZWv6FKA0vTv9YQjoSYkc7obRmXhE8_PtNNIXMgTBk3q7xvwhWWc4lbmUcPGdZldJm4pG-1GWmZpzc3k5ugNRNgA2DAaCJNtueHRzwsk60WqwaGdalC5MSDUvTdUYr-YJnk7w3vcj3ViY4fk6gdYoL-aQ78YLmOCHp4YGvOhAmTm3SWeMyY3Xsg_gARjUFPudpUg


That's all for today, Jack.Aubrey
 
Monday, October 1, 2012 - Display Case

In these days since my last post I continued the work on the display case. For the base I bought at the nearest woodstore the three elements that characterize it, namely:

1) - a beech table (thickness 18mm) cut with dimensions of 99 x 27 cm; the customized cutting service was provided by the woodstore staff;

2) - strips of wood (unidentified), length 240 cm, 3 cm x 0.5; it will be used for the outer frame of the base;

3) - 5 knobs of lathed wood for the "legs" of the base.

The pictures 01 and 02 show the upper part of the base, with the outer frame applied. As can be observed the frame delimits the perimeter of the base and, being higher than 1.2 cm. will serve to hold the plexiglass of the transparent element of the case.

The wood was then treated with a coat of wood filler. Once the paint dried I sanded everything with very fine steel wool and then I applied a couple of coats of wood oil, the same I usually use for the model. Between one coat and the other I had to wait a couple of days to allow the oil to deeply penetrate and dry.

01 P1080388.jpg
y4mssMLFgqwIcYQq70D4NeCWldwBSj4697Jv-LG3_asoMS5EesbnhfLrdYjr_OHICncx5EM3gI0Cua2WZDVLkOXLBcTMBTa59n6vjX0_Dr5yn_0OoTamd1D_q_QrCEZ6b9hDxOTxB3CY3DGH2LsvAZhXZMckv-f0GaNqj6uuyat2hVXbVdsS1S6WsI3txxWxxJZG37IniVttMsUkSyxCsg4LQ


02 P1080389.jpg
y4mujViRzKvkPTTILPyXxWlzKgjdrKfNjR72grZuvaeV_PLc_PsTa4_Oj_oucrLJfFhBbt-EYW2aPL8uNjrjkIjENClcSZZPQ6JcXQqtCY7B9CWbaqmHw1IFelWwexCaKwZ8Rn1SeOWcYRMVr_1-Of8V7x_HR-NllW0qZW_v2f-V3-svAigjzUq6GDGHyIubit3cW0ZNL1AEObXxo-NFklQpQ


In the next two images (03 and 04) I show the bottom of the base, which is also treated with a coat of wood filler. Here are visible the five knobs that have the function of "legs". I decided it was necessary a fifth knob placed in the centre to avoid a possible failure in the central area of the base under the weight of the parts above. Unfortunately for this knob I had to use a different color because the light ones were finished, but it is well hidden under the base and should not be visible.

03 P1080383.jpg
y4mb_CSTylbIjEdzIRDYIKstryBxmicJRFFt8KVBNDGr3kMZ5XRW8PtBbgfXLuN7gkyWAJ1645coEC1jtgzdEO5k-qsJNuv2P0_fix50NU_jiWpGKMR9WuCkruaMJwiUneaIei_Pk5mBp1AF5eC1MA_wZmpWhJ5EyQGN4DW203_8sxQrWoZoHpBFLTZCCt6qJcajt_NDgoDEcvRI8INMEzjsw


04 P1080385.jpg
y4mhTcwbT5cjRKI338LElPHQ0-tzNjb67Yyk_n1sMpxfwLTrMShQDJETjloZQ82fDy_Gtuf4ccd2pIGgzBKASBlGGunMHFUa3RQrkdnrIC7JWcstuzvxAfXumaZ3SVnpgVA323qblgWnNI_ekvzEZ36RsVZ6NsI8kXprPyxsxnEZM5HuvVLDiQnWluxOau9PqG9FVoEwYsjxA8uHrn8dLaL5Q


Finally, the last image, even if these details are also visible in the first two (but in high resolution) where you see the threaded cylinders where I will fix the pedestal shown in the previous message; anchor points are in number of four.

05 P1080390.jpg
y4mq6OBaMNdTDO-l2LD2eoL_8w5dHteYz9adNv_ITfeNf-9SQny0zaSAAnIUe-68IP4oRaVpKhMLuumxKysCasCVdB4s6TNHAIaqxk2kEa49p8XWx7ARuNyO8TWlj9hIFfGROxW6GK0HBSsDFtQJ366ErZedqjLyRR7hoPBPwFxMr-UlpwwsAvUDZpnsumTABXMEWvEdNj8KyhenfaCOuybLw


That's all for now, even though I have more pictures to show, but in the next episode. .

Cheers, Jack.
 
Tuesday, October 2, 2012 - Display case . . continuation

The presentation of my work for the building of the display case base for my Soleil Royal continues here. In this new post I want to focus on a particular detail: the name of the model.

Usually a model is presented with somewhere a label that specifies the name and more. For my Soleil I used my computer and I tried a bit of presentations and I decided to adopt the label here below presented.

01 P1080382.jpg
y4m2AfFtEOxN5LKlDJODpzQwCGmlV2qY69ww0uKshSnXeeFMoPdMfO-tfUB5S6Qrl-EK2D46cKrmannb896SuA3HJ3h04l45hYHJjiYerS8laakAHDYIGMYVhAg0YGKS9owRwNZp0GdvuhC6WOxzlDRtGI3ChG5j9TK9tGvQwefDZKyD03JpytBF2GUS0rOJjUsrVgC_sLlhB7lbhyS_fx8VA


Having made my choice I passed to the practical realization and I designed the oval on an ordinary tablet of plywood, with a jig saw I proceeded to cut them and finishing with sandpaper and three coats of white acrylic paint as a primer.

A little trick that I have thought to work faster with acrylics: to have the paint drying in a couple of minutes, in order to avoid waiting for the complete "natural" drying, I use to heat the painted piece with the hair dryer . In this way I was able to apply three coats in less than 15 minutes against at least 6-8 hours of the normal procedure. In the picture 02 the resulting pieces, suitably sanded and ready for final processing.

02 P1080381.jpg
y4mNFtMmRK4nT7TEcmm_UD9twf-pmXrDHsQ-NoT8KOAaoqoP7nK1fVsPTQ207CYa2ErfnTS2XGKEOkk8SYCivlXoFxFChfC9WhhoOujNwA0f1_gkI_Nt7FeFDElzoc3d3-6ZSL1cGkO6NtXm1TWJzezdVOL-A8tUU4lRfCStWK7m3BOzZkdRJJNlNxBnpIYRnjju1Z0sNDPFX3olV5xL7mnrA


I left the final processing to my wife who loves painting with acrylics with the so called "country" style. And here below the result of her work.

03 P1080393.jpg
y4mZ_j0JjW2Zl25A8-D2emmkr9AOWunjgTFk6eJX588ndyCWJY20M3NdfEhAMiyGMXj_-0BWt8wdXhmtqNLLPxX9wDvi3AWts-F5OTM_a1ae_rM46ZDan0Ty91IooNmGqjSdS3WID-DllgT63N5jDC7Qk69aCv56_ZPNKjMH6mYWqlsUnGbWYlCwbNKV5cQMlxt-v2KlQNI7E21kEpEH4TgOQ


04 P1080391.jpg
y4maMvoQfN9P54xatUQeguhl4hE7v12nogOTUlI_MZrEdfiHBxPaAHIdLBMk7_6oGzOP2WWsQ3vEZ4DKsO21i3nlXI1m9Q5M68CjrjuLysOikarzYNcf7En76pRbqQtCIuFecHDLbP1vK4u5syG_OLPT5J4nOdPKrv06V0xxiw69aDvFym3_tr_n8XRBCNfLf6Lzyyrr-QmGFiFvIAmv_NSHQ


05 P1080392.jpg
y4mfqM_lFhQ0eV1knbMHdfbq0POd95evn1iVTbOrDZw1mWZDobrZZ3B-sqI6uEvRzVn4nHiX_ju-PGU-kxxHVr8ctdwGCM63glQAT77wkJA1RwP20qFqltVb94IXj_YK0fWXplZtkAILreCOv4aZM5cPzYF1tTv9K3DOyDE6_eckXbEYsBYbaDzUFL00mLj2a4_htDbfwXc__NvYm2Ee4YGOQ


The pedestal in the center of the base is only positioned because I have to finish the screws and washers that will be used to secure it to the base. But this is a trivial detail. Until next time, Jack.
 
Thursday, October 4, 2012

To complete the images of the above messages, here is the display case base with the model in place . .

Regarding possible display variants I decided to build a third boat, in place of the two proposed by the kit manufacturer, more precisely, I would like to build a longboat.

Then I decided to put only one of these three boats, perhaps the smallest, over the structure (this structure is a bit strange indeed, I've never seen a similar one on other models) that should host it amidships.

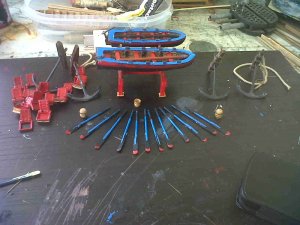
I'm going to show the other two boats not aboard but on the base of the case in a suitable position. This would allow a better overview of the details in place in the central area of the deck, certainly less crowded and to increase the visibility of these boats, presented separately. I spent a lot of time to build these boats and I would like to better appreciate them.

I did some simulations and the idea likes me very much . .

01 P1080394.jpg
y4mulKnkt7bjOxXHYACBVpKRcv4WOywfzUtNismQGXjuCE1KVyBDwldCRiXfklPMoBvnJBeVM6436e28YzCUI_hnnf7HUnazHhFdpjW2wMYtOjVbtqWajAN7J2CKnm0L1QMKY0QDGY6uYdAKJy-WP0-Izu-JhbKdAcvg6MDLZDt_77W9UZ1pI2SzSuyMuj06QCDo139SSRfYHMsq8hAKNAiXg


02 P1080395.jpg
y4mbtVQsO9BIHza6xqgfJR8YN-CsKVwNppPjv74Gz3vpGjramWzYPxVcSRU54_ioKtli0_Z8QaVAccCR3V6_QMI-AwG6YMx__5zUh3v98LCAi6410UEM-vAblEzPnCLqDWJvoM6ZuK48_zRCH3Hm0hzuLKObJgxTN7CxTtIvXxlxWWyjd_4Z_Kx1JjoQuEB_m-mEQ9ywWNuZgd8KIWPU_tl9A


03 P1080396.jpg
y4mhdrfzPU5xeTwKB3v87xXqp8XPSkRZ71sA4BJt0xIGQXeqXkVMOfIECVA6TTcfeCktFsEJGjYUJE7tD_h2ogn5OeJ7TBs-YdAXIUkQuq2EPgQG2PBHkQ0pSgtOLq_hpUMOKW7cQmrXV-AtUl_2VpRRGqKwuKGVllmlReW_0_eCVAB9QmoMsqIeRbmwXjD7nHmhqIX1TIwsipfOatRvuEBMw


Greetings, Jack.
 
Monday October 8, 2012

I've almost finished the building of the display case: now the only part missing is the plexiglass cover, but this can wait sometime. I have started and finished a couple of tasks that I left behind, such as the browning of all decorative elements.
In particular, I have devoted great attention to the figurehead and a couple of human figures that will be placed at the stern. In the photographs they seem worst as they appear in real life, but I'm not happy with the result: they seem to me a little vanishing, as if there were no reliefs enhancing the depth effect. Before installing them I'll wait to find some ideas to increase their realism.

01 P1080397.jpg
y4m0LB8hSh8y9SwZcD77ZJEzFppGtCAJ0WUVXiTGHXO59YCOvlhALyykYkEsOu2KlYkvVEvJnbRiU5zJ-Ys912Bl6bOY8rwxKO0DgEosBiu4sajDgHzQNlKXMvRVya2W-tCfypYYWNcrXRAw6qZKvLt-SVRZfC5IRWGXbbj4tKn3LDzMH5Bt7Cu1TBNav_AR_FLjFU1tw3-Dvbsoikqavp9Vw


02 P1080398.jpg
y4mcvTxmU8TW_TlwvksjEdJNDXJJpcIgfM_g4KMGAIvfsCVRmcfx8jZnSXHKqU2mTfNeJJtu1PjGF4xie-govvGiZzEp0LJtB-cT60JFWJbxr2wq4D7nj6Lin90P4ZKQ8ACACWXA8-1JIo8be81ZcK4H2xlCHkh3raJKXyYAQUySwoqZF8HziRlVPql1L9T3jiagsuQzwdDEgXHu4jd2EImYA


03 P1080400.jpg
y4mWi5z5iN0LU6ShQgtIxB1cefoQ7REqHgE0ACQb9RaRmr7dXV_dVR1XSEWDbPMU1ZjZDT6UQPN79HfRLH5OCu5cHDmfrx4sowlV7maK-qzBu08mfevFjlQI4Zoi4MKebfLQG1CaJQ3qm741W50EW_tWqD-icJxhvd_81jQdhdOlQC7YfJyewUuwh_-2xcyyha1m0hmcJJ_p9Kqa-WzFgZR7Q


Then I started the preliminaries for a new task: the installation of metal small columns that will be the basis of the gunwales all around the decks. As a logical consequence of having all the metal decorations properly gilded I can't leave the columns as they were originally delivered. . there would be an inconsistency so I took the decision to treat them too, although this would force me to spend much more time than usual.

I guess now you all understand why the model progresses so slowly. . and the remarkable qualities of patience I developed in this adventure, qualities that I didn't absolutely have before . .

After the application of two coats of primer I had two options: gold paint or another color. At the end, I opted to color them in red (but after having also evaluated the blue color). Maybe this choice will appear a little crazy to most of you but I think there's already enough gold on this model . .

04 P1080402.jpg
y4mk6VAGRJlzkoh2ye8nOSLoIn2utNBTcSqIzBb3Km_Z0Yk_XbfAV2UKcIteHKLB7NUNlYxyIWsEbBuOpvtmlSp4GQy9CkW2ftdn5VNuJbBAqL-BPJjtz6K-2Ch1qCoFHyJggcXSWHHzrwkWokjrdO9cBPsYpfE0ia5APhNFkx24-fqaU5rYi2pSceE1yRUAuHK04YCEFdhs3pm5e2Niyd1Zg


Cheers, Jack.Aubrey.
 
Below a possible idea of how to position and present the ship boats, externally to the model, on the display case basement. If we exclude the black base which of course is not needed, this presentation system would have two advantages: allow to display the boat with more viewpoints visible and the possibility of fixing the boat base to the basement with a simple double-sided tape. .

01 pinfin4_863.jpg
y4mAoaMB3fD-j9Sm3HYaPk2hSkC3tYiRhI2A3m6Get6Rh3ML2nu9pUfYD7ExODwERXki2IBx6HfR_pSXSNMLt7jgA495yrVMl_il2wVKUrogwdRGNgDoMFTnozfldfYwb6EiV5t9UQDpfUwstxQwRqs0n6bZXu7OHZq8wjkUVmKbyACWyaVrKWMZFmt8-afbS4su72hczTLE90dDy4pjiGCaQ


Cheers, Jack.Aubrey.

Wednesday, October 11, 2012 - Third ship boat

As I wrote a few messages ago, I decided to build a third boat for my Soleil Royal. This boat that will be exposed on the basement of the case, as I decided for the larger of the two I built before, whose material was included in the kit.

I used a project already in my hands for some time and some work done in the past.

Yesterday afternoon and Monday I prepared the gun port lids that will be installed of the lower and intermediate decks. For the solution that I had in mind the pre-cut material supplied by DeAgostini was not suitable, not so much for the pieces themselves as the lack of an adequate system of fixing to the hull. So I've built the lids from scratch using other material. For the moment I am still in the process, even though I already painted the inside in red. In the coming days I could show you how I imagine the necessary finishes that I have in mind: hinges, rings and ropes for their opening and closing . .

Sincerely, Jack.

Saturday, October 13, 2012 - Gun port lids

As I have previously written, I changed all the necessary material for the gun-port lids because I wanted to implement a method of securing themselves to the hull that was very strong. In fact the pieces proposed in the kit, although correct from a formal point of view, do not provide any appropriate method to fix them on the hull.

So, as I wrote, I re-did from scratch everything. For the larger square, originally plywood with 2mm thickness, I did it again using plywood (1.5 mm) on which I glued strips of chestnut veneer (0.5 mm), the same wood used for the second planking of the hull. I have prepared in this way bars of 15 x 10 cm and then I cut with the table saw piece to piece.

Regarding the second piece, the smaller square, I re-did it in a different form: instead of square I made it rectangular, so that it protrudes from a side of about 3mm from the larger square element. If you look at the picture below you will easily understand what it came out.

Then glueing the two pieces together using a template to ensure all result the same and, finally red acrylic paint of the inside.

01 P1080403.jpg
y4muc6iNpBh9rTnP2sXbXk5aYNjrjduus6iOL-hRYXlrttT1DVJ7y2pYu2dTBJu8sOeV4bCFd8IdstwW1qmE1qt7XJMEw2vB-p25A7n9NTkNR1XAIp1_q678rox0R3x33hBea3P9yVgvoCQxL-mndqDbJBhgNSbmyQ_x3oO3Idterg8_0DxzfpuZ2La5VyX7vXxvg9LFWbHPCDA7GLk1bIt6g


Then it was the turn of the eyebolts. Those proposed by the kit are out of scale for me.

I opted for building from brass wire/thread. The ring has an inner diameter of 0.75 mm. Must be burnished prior to assembly.

02 P1080409.jpg
y4mgPD4JmwVn4Zs9wBvi-QN8Qh_QaoG0AdN6MdYVStLi7bC8Oh6Ef7ZSA7qbQiXGETpxLxMOec-8ILBIoiHc-CISCQa_QH-EbTxpg0XdAl49xbTcrSiVdwW1NvC2A6uRulJgu8RIy7W7m-8XyB7uqmATaYl5sdi4Q2Si-lulifW8EP3gcsHsiBWMGSS2AVj7BPam1PLwGVuyIlPF8gPg4WszA


I developed a prototype that I brought up to the final assembly stage, to see if it satisfied me. It is visible in the three images that follow. The eyebolts used have an internal diameter of 1.5 mm as I have used material already available to accelerate the process. The final version will use the smaller ones. I also have in mind further improvements.

For gluing the lid to the hull, as well as the half-barrel, I used two-components epoxy glue. I've seen that this glue provides a very strong bonding. For the lid would be enough the vinyl glue, but since I had already prepared the epoxy I used the latter. But I think the epoxy is much more tenacious, then I'll probably use this one for the future.

03 P1080410.jpg
y4mgxupsQR5CON0-3-LGdOLasoJzdhlKtYV7KahfDug367lgaC9DDA5VMoilkBy47vUCBCu-C1t-IjSKUE0eRv5XGk-rkxnjBGvDtjasTLcpCllEjucFSzQD-LL7MoTviFG5MnuGGi9dsEd3BX4Z1Nn2HWDgqWlhIAGvYuVDPP8X7H8zhus-9HWQji3XXSX1Rth2ljscrDkxiwBljbddvvbzQ


04 P1080411.jpg
y4mpytBYiGNZP39H9MOVv8hODTncQUoYB-1sjyxEr4GT3jPPk-AwxurL26WpVBTP9kIhRpIi_mwX4o3ASGtlpSgDC8_Gmo1YwnUj1t9t3-q2vv95Bxf-Fd-Zh814lPOL9JKs1JHxxgOoiA_DaX18eYiXtyvcaZpIJngQtG5OyQIiVxDtR44Bc3rNkGBxJI_6N4rolpUi9AVaHG7ca4QIbu_bg


05 P1080413.jpg
y4moGv3pJQMZJK_IzB_yBa45wrOSE0QOGSvCYbVBBDXlfjMBYlV_NHASCBbtr97pYuajKodK8MV8-76mbeTKQQetiRg1U4vfb9NPU8D7eYrIiv7KAvU_2ZQZtaGDXUYIJEcFE6T5bJ7Qr80NB7FT93fQi2MmZXhbae3CP6K31kWl9NYN18hUq2pWmbLmBM6dUIjqolBcBuJAyNLeWurgV1QOw


Once finished the prototype now I have to move to mass production for all the rest. The work to be done is a lot: about 200 eyebolts, three holes for door, assembly, ropes, etc.. For the moment, what I wanted was the prototype while for the rest there is time, since before there are more important things to do.

See you next time, Jack.Aubrey.
 
Tuesday, October 2, 2012 - Display case . . continuation

The presentation of my work for the building of the display case base for my Soleil Royal continues here. In this new post I want to focus on a particular detail: the name of the model.

Usually a model is presented with somewhere a label that specifies the name and more. For my Soleil I used my computer and I tried a bit of presentations and I decided to adopt the label here below presented.

01 P1080382.jpg
y4m2AfFtEOxN5LKlDJODpzQwCGmlV2qY69ww0uKshSnXeeFMoPdMfO-tfUB5S6Qrl-EK2D46cKrmannb896SuA3HJ3h04l45hYHJjiYerS8laakAHDYIGMYVhAg0YGKS9owRwNZp0GdvuhC6WOxzlDRtGI3ChG5j9TK9tGvQwefDZKyD03JpytBF2GUS0rOJjUsrVgC_sLlhB7lbhyS_fx8VA


Having made my choice I passed to the practical realization and I designed the oval on an ordinary tablet of plywood, with a jig saw I proceeded to cut them and finishing with sandpaper and three coats of white acrylic paint as a primer.

A little trick that I have thought to work faster with acrylics: to have the paint drying in a couple of minutes, in order to avoid waiting for the complete "natural" drying, I use to heat the painted piece with the hair dryer . In this way I was able to apply three coats in less than 15 minutes against at least 6-8 hours of the normal procedure. In the picture 02 the resulting pieces, suitably sanded and ready for final processing.

02 P1080381.jpg
y4mNFtMmRK4nT7TEcmm_UD9twf-pmXrDHsQ-NoT8KOAaoqoP7nK1fVsPTQ207CYa2ErfnTS2XGKEOkk8SYCivlXoFxFChfC9WhhoOujNwA0f1_gkI_Nt7FeFDElzoc3d3-6ZSL1cGkO6NtXm1TWJzezdVOL-A8tUU4lRfCStWK7m3BOzZkdRJJNlNxBnpIYRnjju1Z0sNDPFX3olV5xL7mnrA


I left the final processing to my wife who loves painting with acrylics with the so called "country" style. And here below the result of her work.

03 P1080393.jpg
y4mZ_j0JjW2Zl25A8-D2emmkr9AOWunjgTFk6eJX588ndyCWJY20M3NdfEhAMiyGMXj_-0BWt8wdXhmtqNLLPxX9wDvi3AWts-F5OTM_a1ae_rM46ZDan0Ty91IooNmGqjSdS3WID-DllgT63N5jDC7Qk69aCv56_ZPNKjMH6mYWqlsUnGbWYlCwbNKV5cQMlxt-v2KlQNI7E21kEpEH4TgOQ


04 P1080391.jpg
y4maMvoQfN9P54xatUQeguhl4hE7v12nogOTUlI_MZrEdfiHBxPaAHIdLBMk7_6oGzOP2WWsQ3vEZ4DKsO21i3nlXI1m9Q5M68CjrjuLysOikarzYNcf7En76pRbqQtCIuFecHDLbP1vK4u5syG_OLPT5J4nOdPKrv06V0xxiw69aDvFym3_tr_n8XRBCNfLf6Lzyyrr-QmGFiFvIAmv_NSHQ


05 P1080392.jpg
y4mfqM_lFhQ0eV1knbMHdfbq0POd95evn1iVTbOrDZw1mWZDobrZZ3B-sqI6uEvRzVn4nHiX_ju-PGU-kxxHVr8ctdwGCM63glQAT77wkJA1RwP20qFqltVb94IXj_YK0fWXplZtkAILreCOv4aZM5cPzYF1tTv9K3DOyDE6_eckXbEYsBYbaDzUFL00mLj2a4_htDbfwXc__NvYm2Ee4YGOQ


The pedestal in the centre of the base is only positioned because I have to finish the screws and washers that will be used to secure it to the base. But this is a trivial detail. Until next time, Jack.
Hi, Is this Model the new Model de Agostini DE? If yes you may know, that you can download the build until packet 52 from the web. the build for the moment stop hear, when the ship in blanked -badly- and the second layer. the download is in PDF format. I have it, but as in PDF FORMART, THERE IS NO WAY TO MAKE COPY. I can print it out, but it is more than 100 pages, and then scan it. some of you may be more clever here than me There is a lot to be discussed with new KIT -quit different in many ways- some good and some bad, especially the first planking. happy building. p.s. as my model after 5 years went to the bin, I have recovered nearly all the metal pars-oxidised- and some more thing, so it there is a need, I have a lot
 
Hi, @El Capi I believe this model already built by Jack, as the date of the log, shows October 2. 2012. But this hint can be used of any of us who will decide to build this cross section. Many thanks (as always)!
 
I think it is only available in Germani through deAgostine.DE. It looks like it is delivered by a packet of 5 building face every quarter. It takes about a Year before you have the hole false Keel and bulkheads. It is very much different build of a Kit, that I have seen, only that it takes 3-4 years before you have all the pieces with a TOP price. I have been able to print some of the processes out, so now I will have to Scan them before I can send some Samples. For myselves I will try to print out all and Scan them, but I am not sure it there is any copyrights here. heer solly may be of helpScan_0001.jpgScan_0002.jpg
 
Monday, November 12, 2012

I decided to work on the gunwales above the third deck battery (waist), an activity that involves the use of the metal columns that I had previously colored red.

Obviously I was prepared myself teorically to manage this step and I came to the conclusion that:
  1. I would have used the bi-component epoxy glue to bond the metal columns to the deck, and that
  2. I would have bent the rails 2 x 7 to follow the curve of the waist and the forecastle using the trick to prepare two strips 2 x 3,5 glued together, so as to form a 2 x 7, on a template obtained from the same contour of the deck.

For the second point it seems obvious to point out that once the whole composite was dried completely would have had the exact shape of one side of the waist and forecastle.

Due to the long drying time of the bi-component glue, I spent a day bonding all the columns on the waist while I spent the next day to apply the strip prepared in step 2, the columns are glued in turn to the top strip always with bi-component glue.

It was not a difficult job, the only real problem was caused by the same columns that, perhaps because of the molding process not very accurate, were not all exactly with the same height and then in some cases were too short and other too long.
With a lot of patience I leveled all the columns with the mini-drill, which was mounted on a grinding wheel suitable for metal.
Some adjustments to the bulwarks profile which lacked a few tenths in certain points and then I could proceed with the final bonding.

The third day was dedicated to finishing the job done and to complete some of the remaining two ship boats accessories (rudders, eye bolts, coils of rope, etc.), to install accessories today in order to have the boats "really" finished .

Below are some pictures of the work done.

01 P1080427.jpg
y4mCYmUSohpyMK8UMHWQozawRW81g9fYPOh48-Zl-dPfsQL-J-DHpPW-ktC2_TTjI7_VI6iS8tHH29aN63erWaxx5VWc9Io6c5FJB80fvqbjpgHW5a9MPshH_x5SYMtq1QpIN72igPM6hYl-sdn6mLik-sRNLb1HnlY2ISDSeC8eBz2w2__IXA_w16c9gYnTODyt2pmAcpKcYGVLBuczYKlFw


02 P1080428R.jpg
y4mniN455Gw-pRmGM3QwzsMW30x8IJaBN_vmmOMwZTm3iVu4MrqilNABytsBEkz7dkLjnOJm-IgMj3O2wcSewOdaepP43oJdUx6jJzs2Wn7m3-8xS3qK2ea3Y5ybLFV0Qzs0w0qBP8AVSyjvCBQ_GKXDbVJBuXAW5Twhm2trKerxjtWGUEtzmvD7A6UywQXE6Q5jN4ioVY9-Gu0917oXCZ9CA


03 P1080429R.jpg
y4myYAgBIqZYiu0u3Q9GAI76Td7ZZhb6iNKmQwNh7AdHsilZeyXF7MgqblQFE9pbM4LU5PHDQZH5KpjmjTGmnpTVw2LJao_y3CPbdMQlkZGdGzbPnNb8F47tsW0loQDLSRM9-ja6JTe3431MwZrcFQPtkKnlHEBUg2uPhqG9mqv1sCAsLeDH76jUDIoLKMjdwLFIQATq83hWF3NutzZdJXBOA


04 P1080432R.jpg
y4mRAJE0lWOuzVxG-zH7V_1UnF5J0Bm4UCJ0eKfssV0ORqN_jj5owjiP2Li57tIspLGH0eIhHgKBFF2XrUsijViBXoq3hwDIj0noYHw63jeAWY1UUa6MowlECTbzjlCuBTS_mB7apt8AxlETR7TuQRFo2D3iYrguRCzCeqytBnXCIAvtzFdrkBFK5xI2OaTtSRa1MCFgXKF_l2lnFZErcdazw


05 P1080433R.jpg
y4merKjlTdW3T2SlCMN15W7YG_EvhI1bC8b_1M66VI6WkPdlKLdp2uzMgYutLNc128vV3FO33tlqx633aLM4DHR5xJSOVpw_No0Oko3Bt-4htC4i5bB7nhEjEWmOuVpUBzGjPRn-Z0i_U6uxOsF9Zj_xIK21ZyZNcTbfyM-677XqPEyZ20SMNYk2woFShVq_pd2ocfQ-4fjoUH_GvBCLj7fkw


Cheers, Jack.Aubrey.
 
Monday, November 12, 2012

I decided to work on the gunwales above the third deck battery (waist), an activity that involves the use of the metal columns that I had previously colored red.

Obviously I was prepared myself teorically to manage this step and I came to the conclusion that:
  1. I would have used the bi-component epoxy glue to bond the metal columns to the deck, and that

  2. I would have bent the rails 2 x 7 to follow the curve of the waist and the forecastle using the trick to prepare two strips 2 x 3,5 glued together, so as to form a 2 x 7, on a template obtained from the same contour of the deck.

For the second point it seems obvious to point out that once the whole composite was dried completely would have had the exact shape of one side of the waist and forecastle.

Due to the long drying time of the bi-component glue, I spent a day bonding all the columns on the waist while I spent the next day to apply the strip prepared in step 2, the columns are glued in turn to the top strip always with bi-component glue.

It was not a difficult job, the only real problem was caused by the same columns that, perhaps because of the molding process not very accurate, were not all exactly with the same height and then in some cases were too short and other too long.
With a lot of patience I leveled all the columns with the mini-drill, which was mounted on a grinding wheel suitable for metal.
Some adjustments to the bulwarks profile which lacked a few tenths in certain points and then I could proceed with the final bonding.

The third day was dedicated to finishing the job done and to complete some of the remaining two ship boats accessories (rudders, eye bolts, coils of rope, etc.), to install accessories today in order to have the boats "really" finished .

Below are some pictures of the work done.

01 P1080427.jpg
y4mCYmUSohpyMK8UMHWQozawRW81g9fYPOh48-Zl-dPfsQL-J-DHpPW-ktC2_TTjI7_VI6iS8tHH29aN63erWaxx5VWc9Io6c5FJB80fvqbjpgHW5a9MPshH_x5SYMtq1QpIN72igPM6hYl-sdn6mLik-sRNLb1HnlY2ISDSeC8eBz2w2__IXA_w16c9gYnTODyt2pmAcpKcYGVLBuczYKlFw


02 P1080428R.jpg
y4mniN455Gw-pRmGM3QwzsMW30x8IJaBN_vmmOMwZTm3iVu4MrqilNABytsBEkz7dkLjnOJm-IgMj3O2wcSewOdaepP43oJdUx6jJzs2Wn7m3-8xS3qK2ea3Y5ybLFV0Qzs0w0qBP8AVSyjvCBQ_GKXDbVJBuXAW5Twhm2trKerxjtWGUEtzmvD7A6UywQXE6Q5jN4ioVY9-Gu0917oXCZ9CA


03 P1080429R.jpg
y4myYAgBIqZYiu0u3Q9GAI76Td7ZZhb6iNKmQwNh7AdHsilZeyXF7MgqblQFE9pbM4LU5PHDQZH5KpjmjTGmnpTVw2LJao_y3CPbdMQlkZGdGzbPnNb8F47tsW0loQDLSRM9-ja6JTe3431MwZrcFQPtkKnlHEBUg2uPhqG9mqv1sCAsLeDH76jUDIoLKMjdwLFIQATq83hWF3NutzZdJXBOA


04 P1080432R.jpg
y4mRAJE0lWOuzVxG-zH7V_1UnF5J0Bm4UCJ0eKfssV0ORqN_jj5owjiP2Li57tIspLGH0eIhHgKBFF2XrUsijViBXoq3hwDIj0noYHw63jeAWY1UUa6MowlECTbzjlCuBTS_mB7apt8AxlETR7TuQRFo2D3iYrguRCzCeqytBnXCIAvtzFdrkBFK5xI2OaTtSRa1MCFgXKF_l2lnFZErcdazw


05 P1080433R.jpg
y4merKjlTdW3T2SlCMN15W7YG_EvhI1bC8b_1M66VI6WkPdlKLdp2uzMgYutLNc128vV3FO33tlqx633aLM4DHR5xJSOVpw_No0Oko3Bt-4htC4i5bB7nhEjEWmOuVpUBzGjPRn-Z0i_U6uxOsF9Zj_xIK21ZyZNcTbfyM-677XqPEyZ20SMNYk2woFShVq_pd2ocfQ-4fjoUH_GvBCLj7fkw


Cheers, Jack.Aubrey.
I¡¡
 
Back
Top