Le Soleil Royal ZHL Build Log [COMPLETED BUILD]

On the French (Continental) carriages, the breeching line goes inside the cartridge, while the British cannons are equipped with a breeching line around the Pommelion or Cascabel. In the latter 18th century, the breeching line on the English cannons goes thru the breeching ring instead of around cascabel. Not only the breeching line was different, but the 'Train tackle' also was differed from each other. Check out the image below.
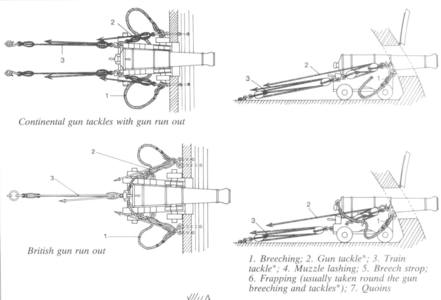
1627919644159.png

P.S. On the lower right side of the image, it shows the Blomfield patent barrel (with Britching ring).
 
On the French (Continental) carriages, the breeching line goes inside the cartridge, while the British cannons are equipped with a breeching line around the Pommelion or Cascabel. In the latter 18th century, the breeching line on the English cannons goes thru the breeching ring instead of around cascabel. Not only the breeching line was different, but the 'Train tackle' also was differed from each other. Check out the image below.

View attachment 247825

P.S. On the lower right side of the image, it shows the Blomfield patent barrel (with Britching ring).
That's what I thought. It looks like the gun tackle and train tackle are hooked to the same eyebolt.
 
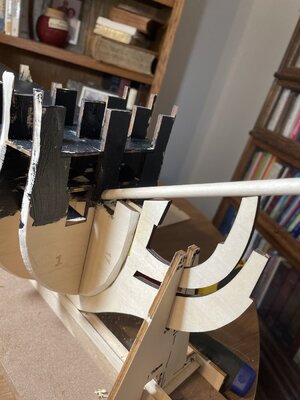
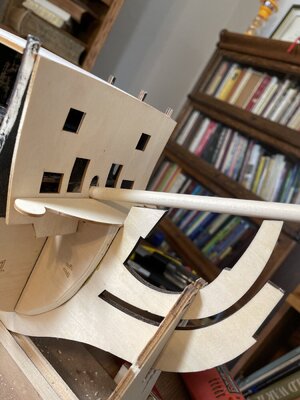
I figure this is the way the bowsprit should be angled.
View attachment 247880
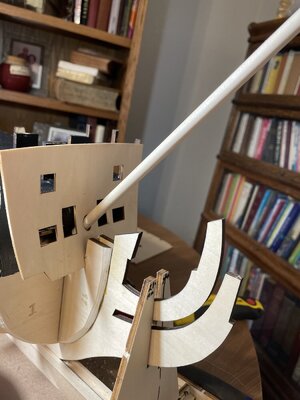
But this is the angle after I put the front piece on. View attachment 247881
something doesn’t look right. And that’s after I chiseled 4-5 mm off the piece it’s sitting on.
Hi Vic
Regarding this from piece that come on front of bulkhead #1 some ZHL SR models I have seen on ships of scale do put a strong bend on this piece (see the log from Paulb). I personally did not do that and laid it flat.
Note that I have not tried to see how does the bowsprit look like. I'll have to figure that out in the near future.
 

I figure this is the way the bowsprit should be angled.
View attachment 247880
But this is the angle after I put the front piece on. View attachment 247881
something doesn’t look right. And that’s after I chiseled 4-5 mm off the piece it’s sitting on.
Based on some ships that I have done in the past, I would say that second photo with the steep angle is wrong. Question if you were to make the groove deeper on that piece, will that misalign the openings relative to the decks? Hope I am making sense.
 
Based on some ships that I have done in the past, I would say that second photo with the steep angle is wrong. Question if you were to make the groove deeper on that piece, will that misalign the openings relative to the decks? Hope I am making sense.
I don’t know yet. I may cut off the piece on which it stands.
 
I figure this is the way the bowsprit should be angled.
View attachment 247880
But this is the angle after I put the front piece on. View attachment 247881
something doesn’t look right. And that’s after I chiseled 4-5 mm off the piece it’s sitting on.
The way you had it in the first photo is correct. Mine was the same. I took a dremel with a burr (handy device) and brought it down.
 
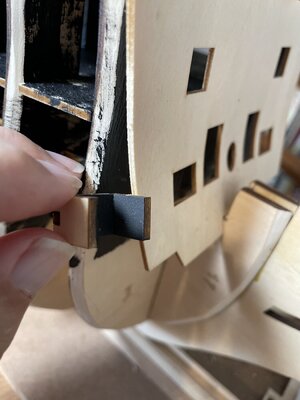
I see we've been posting back and forth between this build log and another. When you glue those gun boxes use alot.... I used a quik dry tacky glue. If you can, figure out something that will give you more retention.
 
Based on some ships that I have done in the past, I would say that second photo with the steep angle is wrong. Question if you were to make the groove deeper on that piece, will that misalign the openings relative to the decks? Hope I am making sense.
The openings already sit too low for the bottom two guns imho. I think they would blow a hole through the gold ornaments, rigging, and bow sails.
 
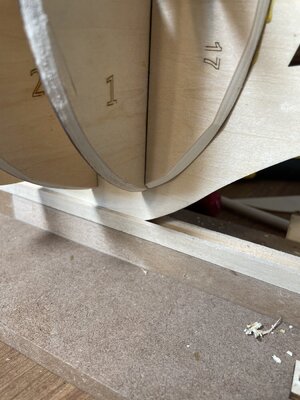
I wonder if I made a mistake by sanding the first few bulkheads and the support pieces on the bow beforehand. That might have caused the support piece to be too high by about 5mm. That might also have accounted for my bowsprit and mini deck problems. image.jpg
 
Also, there is not enough room for the lower forward gun boxes behind the front piece. I thought about trimming the boxes, but that would make the guns stick out too far. Seems like a couple of options present themselves: 1) close the ports off; 2) use something like styrofoam to stick the bottom two guns in. image.jpg
 
Back
Top