-

Win a Free Custom Engraved Brass Coin!!!
As a way to introduce our brass coins to the community, we will raffle off a free coin during the month of August. Follow link ABOVE for instructions for entering.
-

PRE-ORDER SHIPS IN SCALE TODAY!
The beloved Ships in Scale Magazine is back and charting a new course for 2026!
Discover new skills, new techniques, and new inspirations in every issue.
NOTE THAT OUR FIRST ISSUE WILL BE JAN/FEB 2026
You are using an out of date browser. It may not display this or other websites correctly.
You should upgrade or use an alternative browser.
You should upgrade or use an alternative browser.
Lempi, a steam powered half open launch built in 1877 in Warkaus, Finland
Thank you Janos! Well it is not always so easy. Some parts have been made twice or even the third one is good enough. But this is hobby, and you should enjoy it and not have stress of not perfectly made parts.
Concerning steam generation, from the beginning I made up my mind that I must have a small gas fired horizontal boiler for it. First I thought to build it by myself, but after having tried to silver solder a 3" copper tube, I found out that my equipment is too small for this work and doesn't generate enough heat. So the only way to go was to purchase a boiler from a well known company. After all it is a pressure vessel which must be made professionally to be sure that it is safe, and it must also have a test certificate. So this is why I bought it from an Australian company, and a few weeks ago I received a nice boiler from them with all nice fittings like safety valve, water glass, manometer, burner, gas tank etc.
So soon when I get the steam engine ready and the hull from fibreglas shop, I am ready to start fitting those two components into the hull.
The next update was to make the pistons, piston rods and crossheads. Nothing special here, just careful turning. Pistons and crossheads were made of brass, piston rods of 3 mm silver steel. Crosshead pins are tiny screws with M2 threads cut at the ends. The parts must move smoothly in cylinders and trunk guides, be concentric and not have too much play. Tightening of pistons in cylinders is made by winding graphited yarn into the grooves turned in pistons.
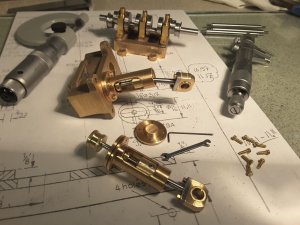
Installing the parts together:
Careful grinding was necessary here too to get the parts moving nicely:
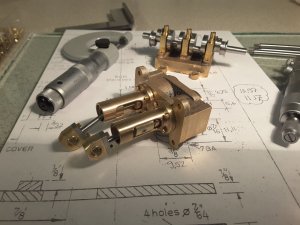
Installing the parts together:

Careful grinding was necessary here too to get the parts moving nicely:

- Joined
- Jun 19, 2013
- Messages
- 968
- Points
- 393

Well I have an older 10"gun tooling Atlas and a Grizzly Mill.Thank you Rob and all the likes as well! What kind of machining work have you done? Which lathe/milling machine have you?
Generally I make telescope parts for my custom refractor telescopes. And General custom machining.
But your miniature lathe/mill work is wonderful. And since it is manufacturing a steam engine...even better.
Rob
Thanks Rob, so it seems that you are making much bigger projects than me, and I am sure that it needs much more accuracy and skills to machine parts for telescopes, than just these small toys.
Anyway the next job was the one which I was most afraid of. That is to mill the slots for steam passages into the cylinder block ends. They are so tiny, and need very accurate machining not to break the cutter inside the block and ruin it completely. For this work I had to buy new 1 mm diameter cutters because I didn`t have so small ones before. The smallest slots are only 1,2 mm wide and 3 mm deep, so milling them needs a lot of patience. However I managed to make them and only one cutter was broken.
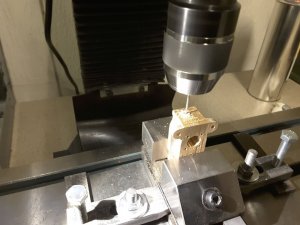
First 1,2 mm holes were drilled at both ends of the steam passages:
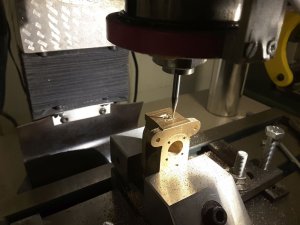
Followed by 1 mm milling cutter:
One end succesfully made:
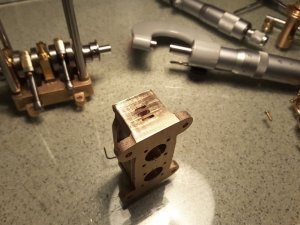
Next the angled steam passages had to be drilled from both ends of cylinders into the milled slots:
Anyway the next job was the one which I was most afraid of. That is to mill the slots for steam passages into the cylinder block ends. They are so tiny, and need very accurate machining not to break the cutter inside the block and ruin it completely. For this work I had to buy new 1 mm diameter cutters because I didn`t have so small ones before. The smallest slots are only 1,2 mm wide and 3 mm deep, so milling them needs a lot of patience. However I managed to make them and only one cutter was broken.
First 1,2 mm holes were drilled at both ends of the steam passages:

Followed by 1 mm milling cutter:

One end succesfully made:

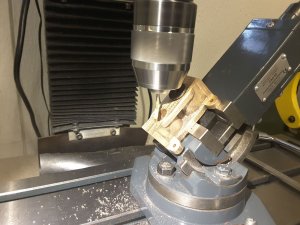
Next the angled steam passages had to be drilled from both ends of cylinders into the milled slots:

- Joined
- Jun 19, 2013
- Messages
- 968
- Points
- 393

Sweet...
Rob
Rob
Thanks Rob for watching, and all the "likes" as well!
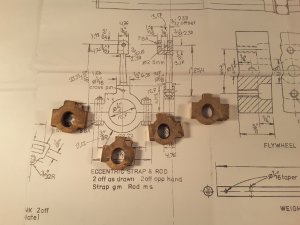
We are nearing completion of this engine, the last thing to do are the slide valves and their driving mechanisms. Next I was concentrating to make the eccentric straps. A casting containing all 4 of them is provided. First thing to do is to separate them from each other:
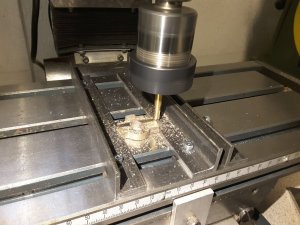
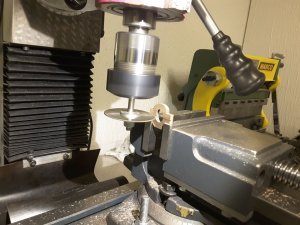
After that they were milled into final dimensions:
And cut into two halves:
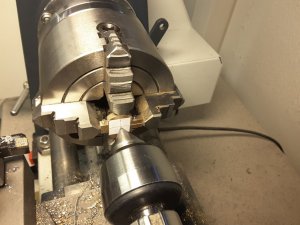
Next they were bored in the lathe. First it seemed to be impossible to find the center of the hole, but then I glued a piece of paper with a cross drawn on it into the middle, and with that it was easy to adjust the piece into correct position and boring could be made:
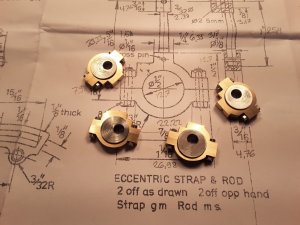
And soon all 4 straps were made:
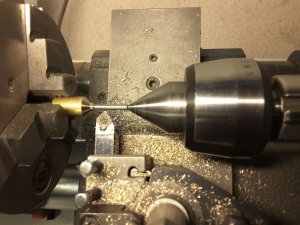
Next thing to do were the eccentric rods. They were turned in lathe using a mandrel and revolving centre:
Together with some small parts the eccentric rods were ready. Expansion links were cut of 3 mm mild steel with a jeweler`s saw and filed into final shape:
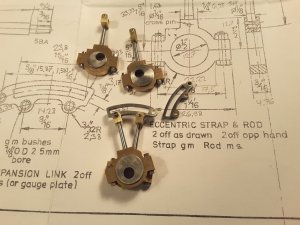
We are nearing completion of this engine, the last thing to do are the slide valves and their driving mechanisms. Next I was concentrating to make the eccentric straps. A casting containing all 4 of them is provided. First thing to do is to separate them from each other:

After that they were milled into final dimensions:

And cut into two halves:

Next they were bored in the lathe. First it seemed to be impossible to find the center of the hole, but then I glued a piece of paper with a cross drawn on it into the middle, and with that it was easy to adjust the piece into correct position and boring could be made:

And soon all 4 straps were made:

Next thing to do were the eccentric rods. They were turned in lathe using a mandrel and revolving centre:

Together with some small parts the eccentric rods were ready. Expansion links were cut of 3 mm mild steel with a jeweler`s saw and filed into final shape:

- Joined
- Jun 19, 2013
- Messages
- 968
- Points
- 393

Amazing work...….
Love to see it all coming together...and the day it runs.
Rob
Love to see it all coming together...and the day it runs.
Rob
This is fantastic!
G'day Moxis, I have just read through your build log and really enjoyed it, some great machining you are doing, I am also building the Borkum Steam Launch and have built the Stuart Turner Engine to go into it but I am just building a fake boiler to use with the Steam Engine as I don't want to run it on steam for various reasons, I am looking forward to the rest of your build,
best regards John,
best regards John,
Thank you very much Rob, Dave and John for your interest into my build. And all the likes as well. In the beginning I thought that nobody has any interest towards building of a steam engine, but luckily I was wrong ( as always according to my wife`s opinion).
Anyway we are nearing completion of our little engine. This time the small parts for slide valves were made and installed.
Again a common casting was provided for all slide valve chest frames. They were first separated from each other:
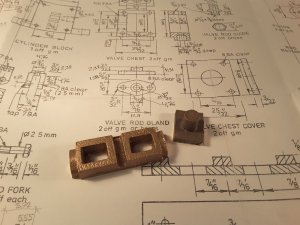
Small parts inside the valve chest were made:
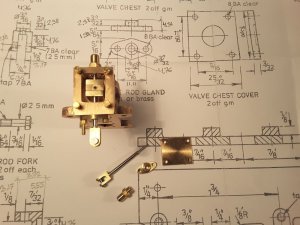
And installed into the engine:
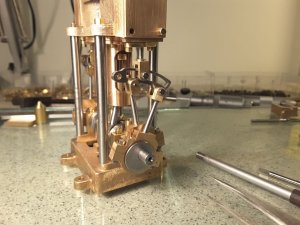
Small details like flywheel, reverse mechanism & plumbing were also made, and finally we could start planning the test run of the engine:
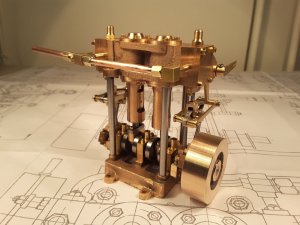
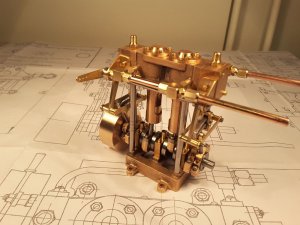
Anyway we are nearing completion of our little engine. This time the small parts for slide valves were made and installed.
Again a common casting was provided for all slide valve chest frames. They were first separated from each other:

Small parts inside the valve chest were made:

And installed into the engine:

Small details like flywheel, reverse mechanism & plumbing were also made, and finally we could start planning the test run of the engine:


Your "MARCHER" is really a beauty - Lucky you, that you can produce and work on such metal structure
Amazing work
Amazing work

WOW - Great looking - well running - WOW 
I guess the turns per minute the model is running on your test was much more, than a real contemporary steam engine would run.
How is this problem usually solved in the RC-community with working models - I guess the 1:1 scale turns of a screw would produce too less propulsion.
I guess the turns per minute the model is running on your test was much more, than a real contemporary steam engine would run.
How is this problem usually solved in the RC-community with working models - I guess the 1:1 scale turns of a screw would produce too less propulsion.
Hi John, I have followed also your log with great interest. In fact I have similar ideas for my next project: To build a boat with visible steam engine and boiler, but use a hidden electric motor as power source. Great idea, and I just love the way you have built yours.G'day Moxis, I have just read through your build log and really enjoyed it, some great machining you are doing, I am also building the Borkum Steam Launch and have built the Stuart Turner Engine to go into it but I am just building a fake boiler to use with the Steam Engine as I don't want to run it on steam for various reasons, I am looking forward to the rest of your build,
best regards John,
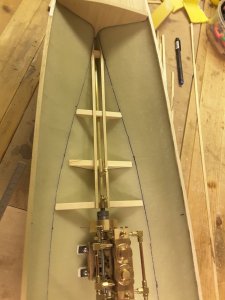
In the mean time I got a nice and solid hull from the fibreglas workshop, and immediately I had to start fitting the engine inside:
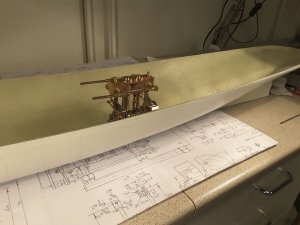
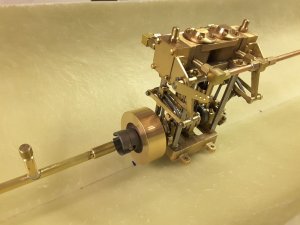
The coupling between engine and propshaft was made of an old rc car driveshaft:
Propshaft & floor supporting beams installed into the hull:
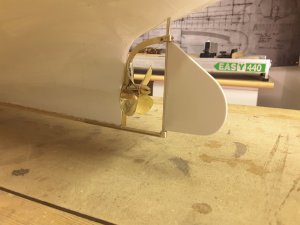
Rudder and propeller installed. Propeller is 4 blade, diameter 60 mm:

The coupling between engine and propshaft was made of an old rc car driveshaft:

Propshaft & floor supporting beams installed into the hull:

Rudder and propeller installed. Propeller is 4 blade, diameter 60 mm:

- Joined
- Jun 19, 2013
- Messages
- 968
- Points
- 393

Beautiful work....just beautiful.
Stuffing box looks very nice too.
Can't wait for the next installment.
Rob
Stuffing box looks very nice too.
Can't wait for the next installment.
Rob
Thank you Rob and all the nice people who have liked my build. I really appreciate this feedback, it gives me motivation to continue building.
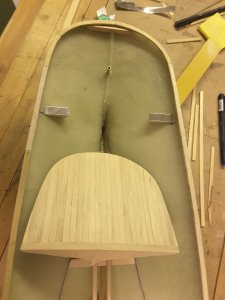
So this time a short update with decking. The stern decking was made of 2x6 mm abachi strips. Because rudder servo must have its place underneath, the deck must be removable. It is kept at its place with two neodyme magnets:
Front decking is fixed, no additional equipment will be situated here:
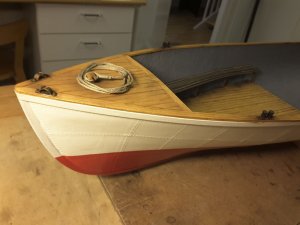
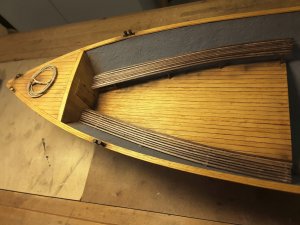
Floor panels are made of same material as decks. All strucktures were stained with oak color. Benches were made of 1x2 mm strips:
So this time a short update with decking. The stern decking was made of 2x6 mm abachi strips. Because rudder servo must have its place underneath, the deck must be removable. It is kept at its place with two neodyme magnets:

Front decking is fixed, no additional equipment will be situated here:

Floor panels are made of same material as decks. All strucktures were stained with oak color. Benches were made of 1x2 mm strips:

G'day Moxis, she is looking very nice, I really like the riveted hull, its looks like a nice solid hull,
best regards John,
best regards John,


