-

Win a Free Custom Engraved Brass Coin!!!
As a way to introduce our brass coins to the community, we will raffle off a free coin during the month of August. Follow link ABOVE for instructions for entering.
-

PRE-ORDER SHIPS IN SCALE TODAY!
The beloved Ships in Scale Magazine is back and charting a new course for 2026!
Discover new skills, new techniques, and new inspirations in every issue.
NOTE THAT OUR FIRST ISSUE WILL BE JAN/FEB 2026
You are using an out of date browser. It may not display this or other websites correctly.
You should upgrade or use an alternative browser.
You should upgrade or use an alternative browser.
Lempi, a steam powered half open launch built in 1877 in Warkaus, Finland
I guess the fiberglass shop knows how to do it right. However, without perfect mold you have made, the fiberglass hull would a challenge for them....Thanks John! Yes indeed, the fibreglas workshop did marvellous work.
Yes, you are right Jim, I am glad that my original hull proved to be successful.
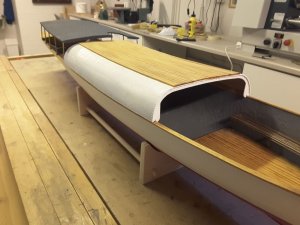
And now again a small update. This time the building of covered decks. The deck at the back was made of thin aircraft quality birch plywood. It was cut at shape, glued on curved "bulkheads", wiped with thinned PVA glue, scattered with fine sand, and when dry extra sand was blown away, and the deck was painted with matt grey paint. Supporting bars are 3 mm brass rod:
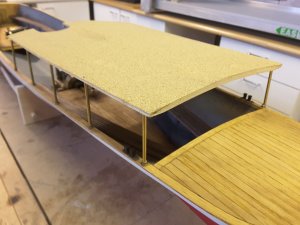
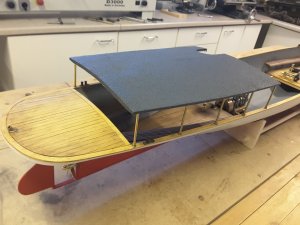
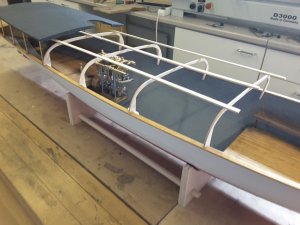
The front cover was made of 2x6 mm abachi strips glued again on the "bulkheads", because it is curved at both directions:
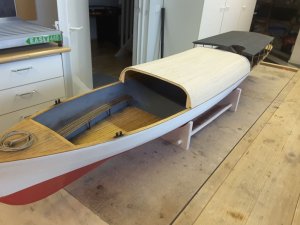
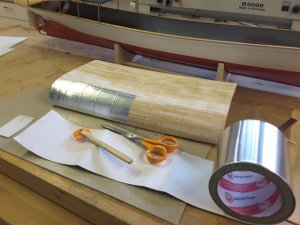
After sanding it was covered with the same aluminum foil as the hull, to show the riveting:
And now again a small update. This time the building of covered decks. The deck at the back was made of thin aircraft quality birch plywood. It was cut at shape, glued on curved "bulkheads", wiped with thinned PVA glue, scattered with fine sand, and when dry extra sand was blown away, and the deck was painted with matt grey paint. Supporting bars are 3 mm brass rod:


The front cover was made of 2x6 mm abachi strips glued again on the "bulkheads", because it is curved at both directions:


After sanding it was covered with the same aluminum foil as the hull, to show the riveting:

Thank you all kind people for the likes!
This time I was adding some details on the decks. Floor to the machine house cover was made using abachi strips:
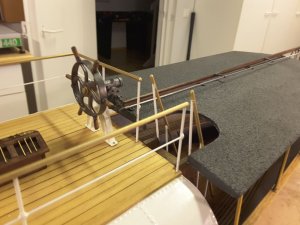
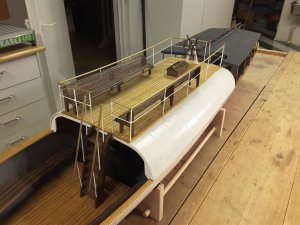
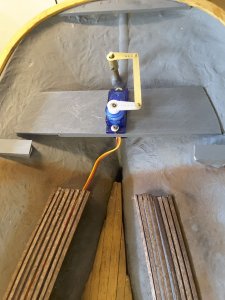
Steering wheel, rudder mechanism, railings, stairs, benches, and light chest added. The rudder mechanism is only a mock up, rudder is turned with a servo situated under the stern deck:
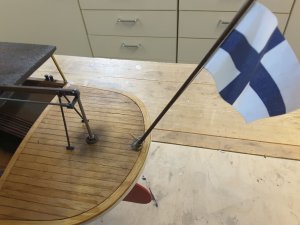
This time I was adding some details on the decks. Floor to the machine house cover was made using abachi strips:

Steering wheel, rudder mechanism, railings, stairs, benches, and light chest added. The rudder mechanism is only a mock up, rudder is turned with a servo situated under the stern deck:


This is really a big progress - some days not looking into this topic - and the model is close to be finished.....
Very good appearance - very good work
Sad to see, that the beautiful engine is covered and not visible during sailing on the lake.
Are your two collegues also fast like you in building a model?
Very good appearance - very good work
Sad to see, that the beautiful engine is covered and not visible during sailing on the lake.
Are your two collegues also fast like you in building a model?
Thank you Uwe for your nice words, and all the "likes" too. I am trying to build as fast as I can so that interest of the people watching my log wouldn`t vanish completely. And I kind of agree with you that it is sad to hide the engine & other mechanisms under the cover, but so it was with the original vessel too, and we have to obey that.
Considering the builds of my colleagues, they have so much to do with their previous projects that they have hardly started to build Lempi, so we have to wait for a long time before they have something to show.
As you wrote, we are nearing the completion of this project, and I think the most interesting part is yet to come: To install the engine, boiler, piping and RC equipment.
To start with the boiler, this is how it looked when arrived. Nicely packed and no damage:
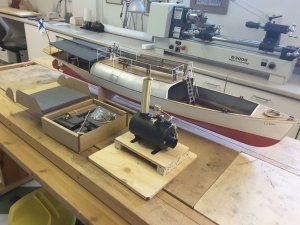
And immediately I started to fit the boiler, gas tank and engine into the boat`s hull. And it seemed that there is just enough room for all these components:
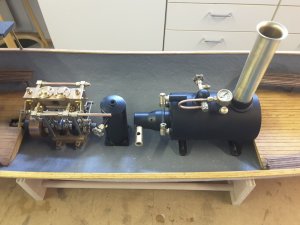
Place for additional components like steam control valve, pressure regulator valve, and oiler had to be found too:
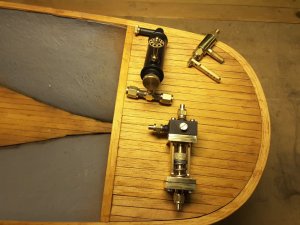
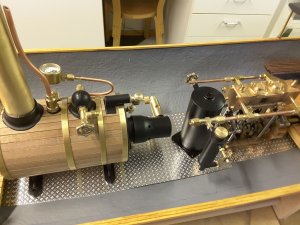
First thing to do was to install the wooden strips around the boiler using brass strips included in delivery. Panels cut out of aluminum tearplate were placed at the boat`s floor, and oiler installed into steam pipe before engine:
Considering the builds of my colleagues, they have so much to do with their previous projects that they have hardly started to build Lempi, so we have to wait for a long time before they have something to show.
As you wrote, we are nearing the completion of this project, and I think the most interesting part is yet to come: To install the engine, boiler, piping and RC equipment.
To start with the boiler, this is how it looked when arrived. Nicely packed and no damage:

And immediately I started to fit the boiler, gas tank and engine into the boat`s hull. And it seemed that there is just enough room for all these components:

Place for additional components like steam control valve, pressure regulator valve, and oiler had to be found too:

First thing to do was to install the wooden strips around the boiler using brass strips included in delivery. Panels cut out of aluminum tearplate were placed at the boat`s floor, and oiler installed into steam pipe before engine:

That's a very nice boiler and engine setup, looking forward to the maiden voyage,
Best regards John,
Best regards John,
Thank you Uwe for your nice words, and all the "likes" too. I am trying to build as fast as I can so that interest of the people watching my log wouldn`t vanish completely. And I kind of agree with you that it is sad to hide the engine & other mechanisms under the cover, but so it was with the original vessel too, and we have to obey that.
Considering the builds of my colleagues, they have so much to do with their previous projects that they have hardly started to build Lempi, so we have to wait for a long time before they have something to show.
As you wrote, we are nearing the completion of this project, and I think the most interesting part is yet to come: To install the engine, boiler, piping and RC equipment.
To start with the boiler, this is how it looked when arrived. Nicely packed and no damage:
View attachment 96050
And immediately I started to fit the boiler, gas tank and engine into the boat`s hull. And it seemed that there is just enough room for all these components:
View attachment 96051
Place for additional components like steam control valve, pressure regulator valve, and oiler had to be found too:
View attachment 96055
First thing to do was to install the wooden strips around the boiler using brass strips included in delivery. Panels cut out of aluminum tearplate were placed at the boat`s floor, and oiler installed into steam pipe before engine:
View attachment 96056
There is every time high interest in your building logs - independent of the speed - definitely
I was falling in love with this beautiful elements and components of the engine - really a beauty
- Joined
- Dec 3, 2018
- Messages
- 2,451
- Points
- 538

Good progress Moxis, the engine you have made and the boiler you have bought look really good together, nice collaboration.
All parts and equipment for this model are certainly very expensive, so I hope everything works as it should when you try
out your mechanical masterpiece.
Greeting-
All parts and equipment for this model are certainly very expensive, so I hope everything works as it should when you try
out your mechanical masterpiece.
Greeting-
This is just an incredible and amazing work all together! As size as it and it is actually functioning!!! WOW!
Thank you very much John, Uwe, Knut and Jim. I appreciate a lot that you have had interesse enough to follow my build.
But everything will end sooner or later. This will be my last update for Lempi, to show the installing of piping and RC equipment. After this we could consider this project as completed, and start waiting for good weather to perform her maiden voyage.
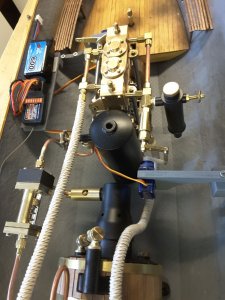
Steam pipes installed from boiler to speed control valve and from engine to funnel. I decided to connect the steam exhaust pipe directly to funnel and not into a condensate chamber or outside the hull. Exhaust steam includes some oil in it, which hopefully will burn in the hot funnel. Also a short pipe is connected from safety valve into the side of funnel.
There was a bit fiddling with threaded pipe connectors, because some of the threads were imperial 1/4"x40, and some metric M5x0,5 but luckily I have taps and dies for both of them, so necessary nipples could be made:
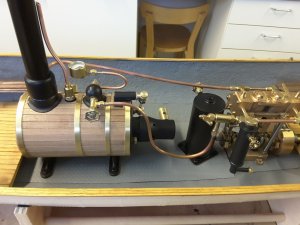
Boiler pressure controlling valve was installed between the gas tank and burner. It measures steam pressure in boiler and controls gas flow trying to maintain constant boiler pressure. With this device we could try to avoid blowing of the safety valve.
Gas tank is not attached into the hull, it must be removed for filling, for not to get leakage gas at the bilge:
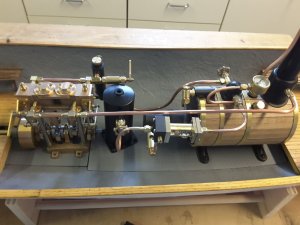
Heat isolation of steam pipes was made by winding cotton string around them:
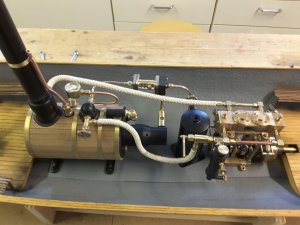
RC equipment like battery, receiver and servos for reverse and throttle installed:
Rudder servo:
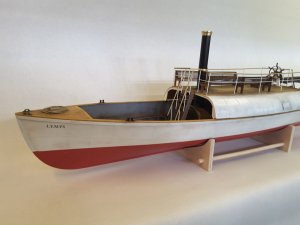
And finally a couple of pictures of the completed model:
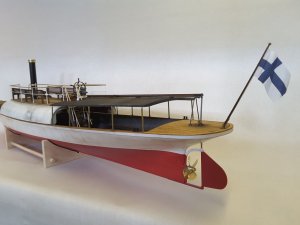
But everything will end sooner or later. This will be my last update for Lempi, to show the installing of piping and RC equipment. After this we could consider this project as completed, and start waiting for good weather to perform her maiden voyage.
Steam pipes installed from boiler to speed control valve and from engine to funnel. I decided to connect the steam exhaust pipe directly to funnel and not into a condensate chamber or outside the hull. Exhaust steam includes some oil in it, which hopefully will burn in the hot funnel. Also a short pipe is connected from safety valve into the side of funnel.
There was a bit fiddling with threaded pipe connectors, because some of the threads were imperial 1/4"x40, and some metric M5x0,5 but luckily I have taps and dies for both of them, so necessary nipples could be made:

Boiler pressure controlling valve was installed between the gas tank and burner. It measures steam pressure in boiler and controls gas flow trying to maintain constant boiler pressure. With this device we could try to avoid blowing of the safety valve.
Gas tank is not attached into the hull, it must be removed for filling, for not to get leakage gas at the bilge:

Heat isolation of steam pipes was made by winding cotton string around them:

RC equipment like battery, receiver and servos for reverse and throttle installed:

Rudder servo:

And finally a couple of pictures of the completed model:


Absolutely beautiful workmanship and a really lovely Steam Launch, looking forward to the maiden voyage,
Best regards John,
Best regards John,
Wonderful model - Congratulation
Did you test the engine already once - a "Dry-test" ?
I hope, that your building log is not completely finished - we all would like to see the engine running - so maybe it is would be possible to make a small video with sound - and off course in action - sailing -> Sorry for this request, but I guess you already expected something like this, or?
Wonderful model - Congratulation
Did you test the engine already once - a "Dry-test" ?
I hope, that your building log is not completely finished - we all would like to see the engine running - so maybe it is would be possible to make a small video with sound - and off course in action - sailing -> Sorry for this request, but I guess you already expected something like this, or?
Thanks Uwe! Yes, I was pretty sure that people would like to see a video of her maiden voyage. Let's see if I can arrange something in the near future. After all, we are living in a land of 10.000 lakes, so somewhere might be a nice place to test her.
And yes, I was making a dry test of the engine when it was finished, but only with compressed air. I have never tested it with steam, this will be very exciting to do.
Good Moxis, then we just wait for the video, hope the boiler does not explode because of a valve you forgot to open, joke, congratulations.
Good point Knut I have to remember to open the main steam valve. And luckily there is the safety valve which should remind me about that when blowing hot steam directly on my face
Just amazing workmanship from start to end! Bravo!
G'day Moxis, you have answered something I was wondering about, that was where to take the exhaust, so I will do the same as you and take it to the funnel, I'm hoping to get mine finished today, fingers crossed, thank you for posting your log,
best regards John,
best regards John,
You have some amazing skills, well done!


