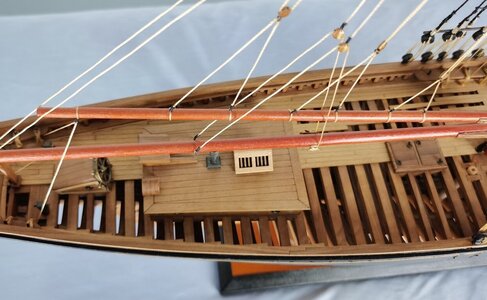
Let’s get started BLUENOSE #3

748BB1BC-FCF9-4634-8176-F7AA4F4AD3A1.jpeg
The two end pieces have me concerned.
Am I close?
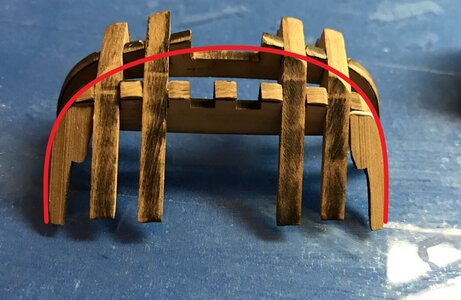
That's looking correct. The main thing here, I think, is getting the transom curves at the sides sanded/filed, so that they progress smoothly and appropriately. The bevel lines do a good job of this, and yours is looking good.

748BB1BC-FCF9-4634-8176-F7AA4F4AD3A1.jpg

I did have some trouble keeping that transom assembly attached to the backmost hullframe. Any movement would want to detach it, so I assembled the transom as you have it and only added it once I had the inside strakes in place. These gave just enough support from above to secure the transom more firmly. (Of course I had some other issues of broken parts at the centerline that also contributed to that instability, so you might be just fine in that regard.)
 
Again, just ordered the BN. Forum is still my only reference.
I see posts saying glue the first and last frame to the jig, then the keel to those two frames.
It then seems the subsequent frames need to be aligned to the keel, not the jig,
as the keel determines the deck curvature, not the jig? (being flat)
Am I missing something?
Unglue 2 frames to jig later?

Finn
 
Thanks. Slid in until they bottom out with the keel?
Thus with varying depth in the jig, giving the eventual deck a front to back curvature?

Later after receiving the kit, I realize that the curvature comes from the ribs getting cut down. Neat!

Finn
 
Last edited:
I have been moving forward and came across a problem.
I circled it in red. Don’t quite know where I went wrong, but I did.
Going to have to do a hack to fix it.

The deck is not glued yet just fitting it to see what need needs adjusting.23E57F80-1D08-43BA-A729-3B50E35A5250.jpegF3E21BFA-AC6A-4623-9D22-427351DF0305.jpegFB04127A-92AB-4E61-BB93-D40C7ADCFFB5.jpeg1C338CAD-CDB6-45AD-89F9-9370049A9825.jpeg
 
I have been moving forward and came across a problem.
I circled it in red. Don’t quite know where I went wrong, but I did.
Going to have to do a hack to fix it.

The deck is not glued yet just fitting it to see what need needs adjusting.View attachment 210312View attachment 210313View attachment 210314View attachment 210315
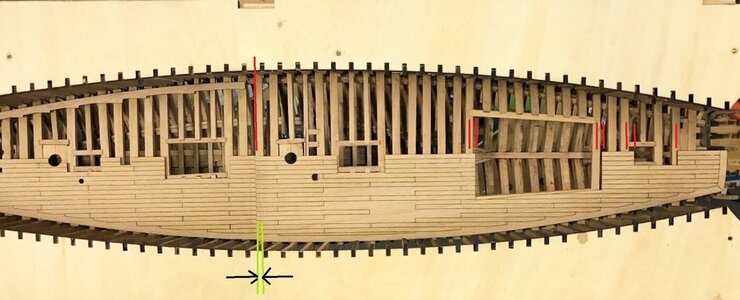
I think you have luck, and the problem is not only at the area where the red circle is.
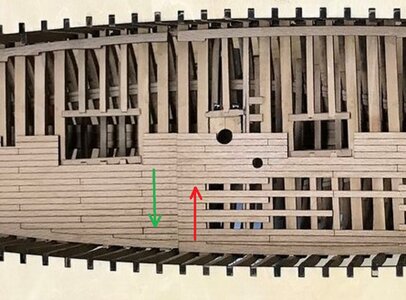
It is looking like, that the complete deck element is moved by several mm towards the stern. You see more or less at every deck opening the deck is some mm moved into direction to the stern (red lines)

FB04127A-92AB-4E61-BB93-D40C7ADCFFB5.jpeg

so I would think about maybe to shorten the right deck element by the green lines some mm.
It is the only area, where you will not recognize such a "cut" - every where else it will be visible
You will have only some new problem with the mast hole - but here is maybe the cover of the mast partners closing the gap - but please check.

Because of such situation - > I do not like these complete prepared decks - I prefer (my personal taste) single strips.

BTW: Do not forget the deck opening where the planks are not "nailed"....
 
Decided to pop up the deck frames and redo using the deck as a guide.
Might be something to think about when you get Figs 11, 12,& 13View attachment 210473
I would opt to plank with individual boards. But ensuring frames are properly located is always a good idea! As that locates everything on the deck.
 
There are pros and cons to both sides. The individual planks make individual adjustments easier, but at the risk of not having such a neat deck assembly. Terry, I believe what you are doing is the right way as anything else would be - as you call it - a hack.

@Uwek This is in many ways like the Russian kits. They are so precise - that there is very little room for error - if any.
 
Please check something before you glue and fix - these are friendly hints, but maybe you made these already - than sorry for bothering you

I was wondering on your last photo about still a disortion - so I want only summarize my thoughts and the order of my thoughts I made

First what I realized was that on one side is still some disortion
aa.jpeg

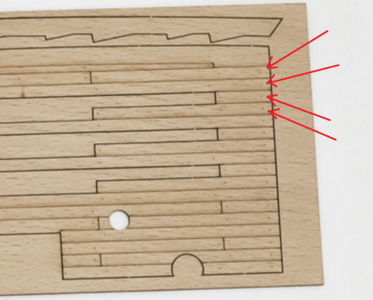
with looking at the area where the two planking sheets comes together - I think it will be very important, that these two sheets are really correctly connected - but
aa1.png.jpeg

I realized that there are nails on every single plank - My first thought was, that this is this an error in the laser printing, because there technically nails are making no sense.....
DSC_4284.png

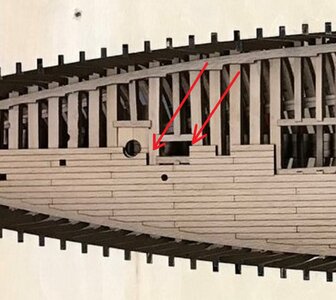
but than I realized on one photo, that there is a beam or something else, or a step (marked with the arrows) - did you take this also into account?
bbb.jpg

I do not have the kit so please check this, because it could have a big influence on your decking and the correct layout
In addition, if the joint of the two deck planking sheets will be covered, you can adjust here slightly some mistakes in moving

BTW:
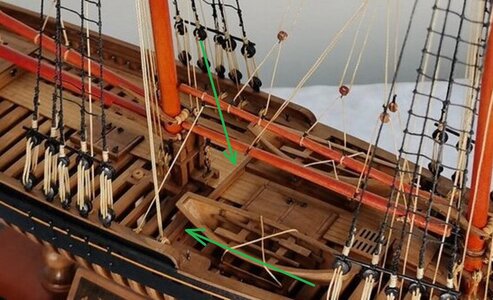
I would prepare partls also the deck houses, or check minimum their correct sizes before I fix the decks finally - not that you have later on here the next problems
bbc.jpg
 
Back
Top