Marmara Trade Boat, 1:48 , SC brand [COMPLETED BUILD]

Joined
May 13, 2020
Messages
2,006
Points
503

Hi all

Yes, I couldn't stop myself. Yes, the Red Dragon will be finished. Yes, it's almost done, but i decided to stretch the end of it and start SLOWLY another project that i have dreamed all my life since I started this hobby. Building a POF ship.

Wait !!!! NO NO I will not jump and start one of those complex and master models that you can see every day at SOS building logs. I am learning from them.

But I am in love with this Marmara boat that is a hybrid, like my Prius :). It is at the bow and stern POB and all the rest in between POF.

The ribs are 2x3 mm. Small. So i am scare with the sanding. Questions to come.

To start you can read a nice kit review here:


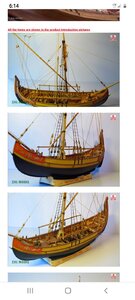
For history, I was not able to find, let be clear, anything, beside what came with the kit. The site, cited at the end, have stopped working this year. So I will post these pictures:
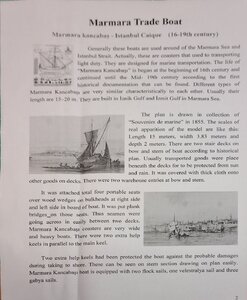
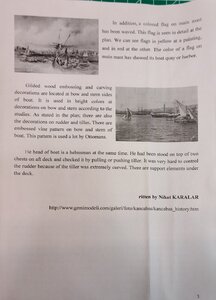
20200731_133202.jpg20200731_133311.jpg

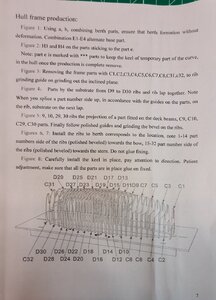
At the review kit link. You will find the instruction manual in English.

Well.... more to come.... but this is the start of another step on my hobby.....AND I WILL NEED YOUR EXPERT HELP !!!!

Daniel
 
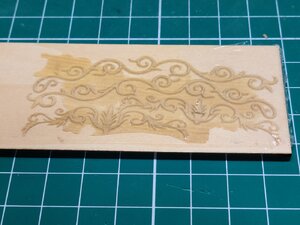
this is the Delux Version. Come with an upgraded berth, and also has the berth that comes in the standard version. Also, this version has barrels and crates. The standard do not. I also have the decoration carved in wood.

20200731_132705.jpg
 
Last edited:
The start

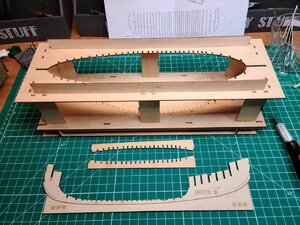
Building berth first

20200731_162026.jpg

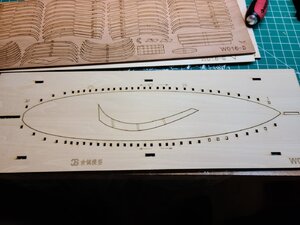
What you see between the keel and the berth are parts of the berth that goes at the top to provide extra support to the middle ribs that are higher. Will not put in place until those rib are placed at the berth.

The keel has extra wood (have 3 *) below it. That wood, for niw, stays there.

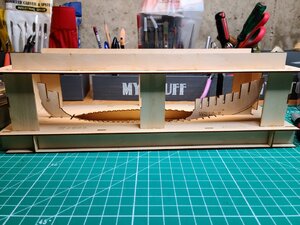
I placed the keel in the berth just to check how it fits. Perfect. But still I have to glue a few pieces at the stern and bow before placing it at the berth to install the ribs.

The berth took me almost 2 hours to build it carefully. First trying the fit and understanding how every piece go. Fit and cuts...Perfects. the columns only fit in 1 position. So you have to find that position by moving the pieces. Difficult to explain.

See keel in berth.
20200731_163817.jpg

The Deluxe version also have the most simple berth. It is the one pictured in the instruction manual.

20200731_133622.jpg

20200731_162943.jpg

I think i can used this one for the planking.

Do you agree ?
 
Last edited:
More questions.

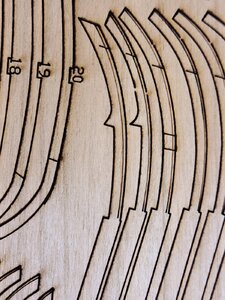
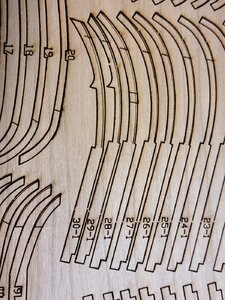
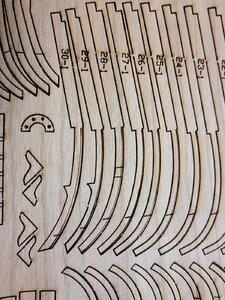
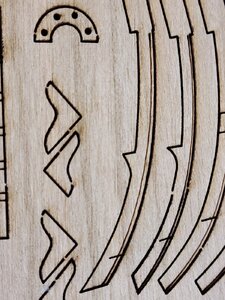
Here are pictures of some ribs. You can see the laser line for the sanding.

I plan to sand each piece, slowly, by hand. Then glue the Rib (3 pieces)

Do you agree ???

I will sand the rib sides up to the line by placing that rib piece against the bench. In that way i will avoid breaking it by accident in my hand. They are 2x3 mm.

Do you agree ???

Bottom line, sanding each piece first using the bench as the support (flat over the bench) and then gluing the 3 parts.

Pictures so you understand what I am talking about.

20200731_162734.jpg20200731_162743.jpg20200731_162804.jpg20200731_162838.jpg

Any suggestion on how you will be doing this job..... please !!

Thanks
Daniel
 
Very nice. Good luck with this little boat, it looks fun. If you don't mind I would like to make a couple technical observations on the kit itself:

1. The fillagree carving is nice. Same way I do it. It is done via CNC leaving a very thin sheet of wood behind at the end.
2. The laser cutting is a bit heavy. This is quite common in the industry. I think sometimes the kit makers are cutting through multiple sheets at once.
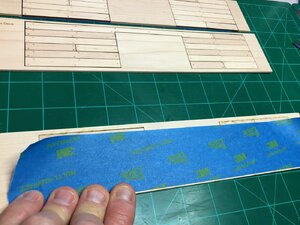
3. The laser cut parts have tabs on them. They are small tabs indeed but still there. They do this for shipping purposes but it is still a pain to clean them up. I back my laser cut parts with masking tape instead.
4. Not sure why they laser etched the part numbers directly on the part itself. This is a mistake in my opinion.
5. The building jig (berth) is nice. Interesting the standard one shown in the manual is of the traditional Hahn style.

Looking forward to seeing it finished!!!

Please !!! Feel free to do any comment that you want. Interesting the tape detail. If I understood, the laser cut is all around and to keep the piece in place you use a tape ?

For the carving Max told me to sand that left over wood. Not to cut it or I will break the carving. You do it in that way to ?

Daniel
 
Please !!! Feel free to do any comment that you want. Interesting the tape detail. If I understood, the laser cut is all around and to keep the piece in place you use a tape ?
Yes...because the frame is plywood (I guess), very thin and fragile, the tape should hold it against a flat surface when you will bevel and remove the laser char
 
Please !!! Feel free to do any comment that you want. Interesting the tape detail. If I understood, the laser cut is all around and to keep the piece in place you use a tape ?
For the carving Max told me to sand that left over wood. Not to cut it or I will break the carving. You do it in that way to ?

Yes... I laser cut all the way around the part, then back the billet with masking tape for shipping. Remove the tape and the parts fall right out.
Yes... follow Max's instructions. That part is VERY fragile. You can also put it on a cutting mat and carefully trim around it with an xacto knife if you feel skilled enough... Either way, go VERY slowly then carefully clean the edges with a "fine" sanding stick. Work it as if it were it's own model.
 
QUESTION ON THE FILAGREE CARVINGS
Hi Don. That picture of the fillagree CNC cut carving you are looking at is indeed already in 3D. Actually, technically it is what we call 2D+ because the backside is a flat surface. This is ok since the part will be glued to another flat surface. If you were to take that same carving and make a second one, glue the two parts together as halves, then you would have a full 3D part. What I do in those situations is a 2-sided carving on my CNC machine by flipping the board over to carve the second side synched up in harmony with the front side (such as on my cannons).

When we are dealing with a very finely detailed 3D carved part such as decorations they are always going to be fragile when produced in wood. The only real way around this would be to either 1) cast them in resin or metal, or 2) print them in plastic on a 3D printer.

I hope this makes sense.
 
I WAS THINKING OF THE PLASTIC ON A 3-D PRINTER
I will tell you my thoughts on this.... this is just me talking...

1. Many people do not like plastic parts on wooden models. I understand and appreciate that. But I think this attitude is changing as time moves forward.
2. If the part is in plastic it must then be painted. Many modelers prefer not to paint or may not have the skills to paint. So this must be considered.
3. Yes, the plastic part is more durable and easier to handle when it is small and detailed. Also, being plastic it is flexible.
4. In years past, the cost of good 3D printers was much, much too expensive because the technology was so new. That price point is now coming down.
5. Most 3D printers that can be purchased by a "consumer" cannot meet the needs of a serious model builder. The resolution quality is not good enough and the size of the part that can be printed is very small. Just like with CNC machines, if the 3D printer comes as an "assembly kit" it is just for learning - not model building.
6. High-end commercial 3D printers are VERY expensive, just like commercial lasers.
7. 3D printers are very slow, even slower than a CNC machine. To print just one small part can take many hours - it is best to go to bed and let it finish.
8. The very good thing about a 3D printer is we can get down to very small detail that even the best CNC machine cannot achieve.

It is for all those reasons above that we have not yet added a 3D printer to our fabrication shop. But time is changing very fast and our plan is to purchase a commercial 3D printer next year. We will get whatever is state-of-the-art for our price point at that time. Just have to wait and see.

That was a very good question. I think we took over Daniel's build log. Sorry.
 
SORRY DANIEL,. GOD BLESS STAY SAFE YOU AND YOURS DON

No problem at all. I like these discussions that they teach a lot to all the readers. And it was all related with the log..... the wood carved decoration. I didn’t have any idea of all those details about 3D printers and CNC technology. I was totally out of all these new technologies. Now you guys pushed me to read more and educate myself. And I like that.

So.... no problem at all !!!!

Best
Daniel
 
Back
Top