
Francois - looks like you will need to do some sort of finish prep as the photo seems to show a bit of dust. Wet sanding may remove too much paint around raised areas like the 'bolts' and edges. As an alternate to wet sanding try some 1500 liquid polish compound. I've always used Presta but it has gotten way beyond expensive. 3m or Meguire's and others have similar products

-

SUBSCRIBE TO SHIPS IN SCALE TODAY!
The beloved Ships in Scale Magazine is back and charting a new course for 2026!
Discover new skills, new techniques, and new inspirations in every issue.
NOTE THAT OUR NEXT ISSUE WILL BE MARCH/APRIL 2026 -

Win a Free Custom Engraved Brass Coin!!!
As a way to introduce our brass coins to the community, we will raffle off a free coin during the month of August. Follow link ABOVE for instructions for entering.
- Home
- Forums
- Ships of Scale Build Logs
- Super Detailing Static Models / Other Genres
- Historical Trailways, Guns, Aircraft, and Cars
You are using an out of date browser. It may not display this or other websites correctly.
You should upgrade or use an alternative browser.
You should upgrade or use an alternative browser.

Dave, I'm a much better designer/modeler than a painter. I new this part of the project was going to be very challenging for me, I'll do my best but I don't expect a perfect finish. I did a test this morning using 3M polishing compound followed by a 3M hand glace on my test piece. It got rid of some dust but not all. One theory is that I didn't give it enough curing time.... but probably that I'm just a bad painted is more likely.


- Joined
- Jul 18, 2024
- Messages
- 496
- Points
- 323

A thin coat of floor polish will make it shine. Is often used in plastic kit models as a final layer.
Top of my head: Pledge Clear.
But test on a part and let dry until hardened.
Top of my head: Pledge Clear.
But test on a part and let dry until hardened.
Francois - that looks pretty darn good and exactly the kinds of finish products I would have used.
As to being a not so great painter - I reread the original post and it appears that you used rattle cans to do your painting. These will get paint on but sometimes they just cannot always do a great job. Consider what they have for a mass produced spray nozzle (that often gets partially clogged) then the propellant which is at an inconsistent pressure. I have used IWATA LPH-80 for small areas as well as their full size guns. They are low pressure and for my amateur needs, perfect - but you do need at least a compressor. As far as dust - that happens without a spray booth of some sort - sighhhh
A good carnuba based auto wax will work best for final shine but wait a couple more days to let the dry surface trapped solvents (water or?) escape.
That lid really looks nice now though
Thanks Dave. Althought the color is from a spray can, the clear is airbrushed on. And I do have a spray booth.
I'm on a fairly steep learning curve with the paint and clear process.
I cleared all parts except the fenders, the rear trunk lid and the body. The result is ok, no more. I need to better control the dust (I got a tack cloth for this) and to better degrease the parts. After testing on a spare part, I decided to sand the cleared parts with a 3000 grit tamiya sponge pad first and then with a 5000 grit polishing pad (dry and wet). I will then re-apply a wet coat of clear. Once this coat has cured 48 hrs, I will see if another 5000 wet polish is needed or if I can just wax it as is. It's a very slow process.
Tamiya 3000 pad

5000 polishing pad

Second clear test on spare part

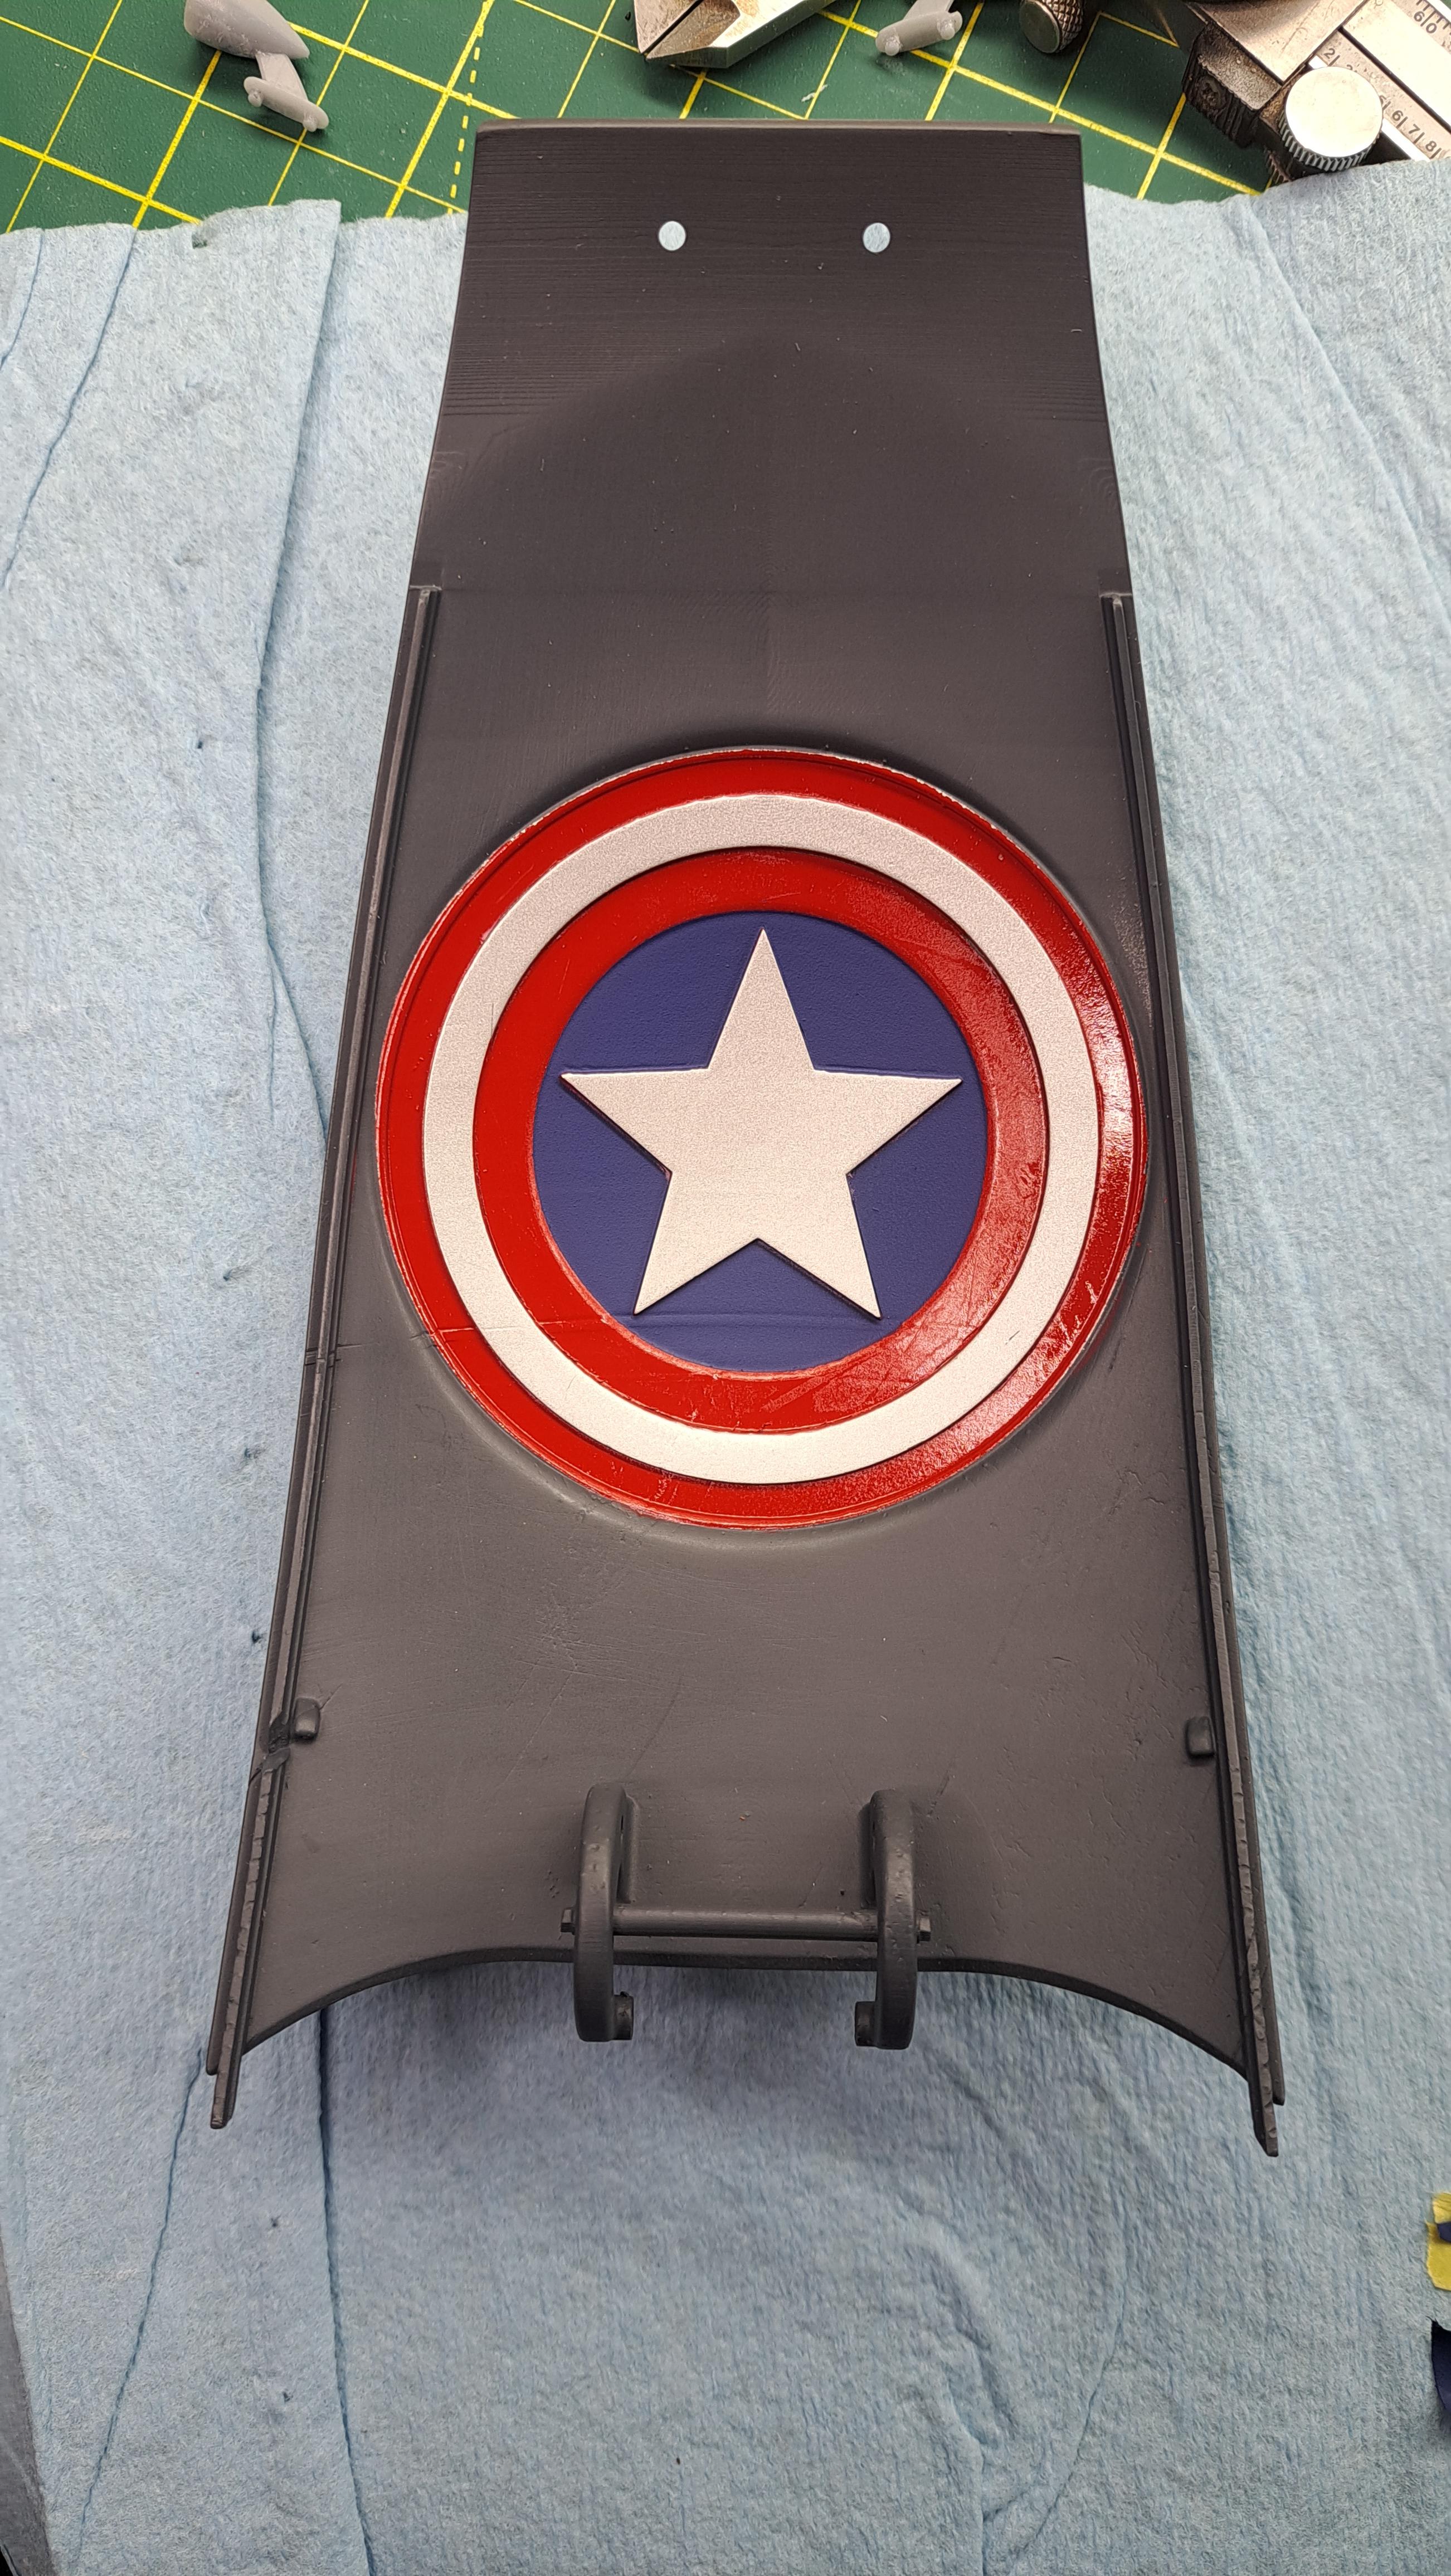
I finished the of day by painting the shield on the inside of the trunk lid. Still need to do a few touch-up and to apply the clear but I'm happy with the result.


I cleared all parts except the fenders, the rear trunk lid and the body. The result is ok, no more. I need to better control the dust (I got a tack cloth for this) and to better degrease the parts. After testing on a spare part, I decided to sand the cleared parts with a 3000 grit tamiya sponge pad first and then with a 5000 grit polishing pad (dry and wet). I will then re-apply a wet coat of clear. Once this coat has cured 48 hrs, I will see if another 5000 wet polish is needed or if I can just wax it as is. It's a very slow process.
Tamiya 3000 pad
5000 polishing pad
Second clear test on spare part
I finished the of day by painting the shield on the inside of the trunk lid. Still need to do a few touch-up and to apply the clear but I'm happy with the result.
G'morning Francois,
Looking at that spare part again with those many raised nubs and would be concerned with using sandpaper. Sandpaper, even those very fine grits will remove the paint faster on those raised surfaces. Got to thinking that if I was to build a similarly painted model, I would drag out my old bench mounted buffer and a tube of something like jeweler's rouge and buff those stuck on dust motes out after each coat of paint. Unfortunately you can't paint over them on succeeding coats so it adds lots of prep time. Eastwood (and others) have a decent charts for choices if you want to consider this method.
Looking at that spare part again with those many raised nubs and would be concerned with using sandpaper. Sandpaper, even those very fine grits will remove the paint faster on those raised surfaces. Got to thinking that if I was to build a similarly painted model, I would drag out my old bench mounted buffer and a tube of something like jeweler's rouge and buff those stuck on dust motes out after each coat of paint. Unfortunately you can't paint over them on succeeding coats so it adds lots of prep time. Eastwood (and others) have a decent charts for choices if you want to consider this method.
Dave, the 5000 grit buffing pad doesn't affect the tiny nuts at all and leaves a surprisingly smooth surface when looked with the naked eye. Like I said, it won't be perfect but I think it should be pretty good. What concerne me most will be the large body. It has many curves and large surfaces and getting a good finish will be challenging.
That's good information. If it works, that's the best wayDave, the 5000 grit buffing pad doesn't affect the tiny nuts at all and leaves a surprisingly smooth surface when looked with the naked eye. Like I said, it won't be perfect but I think it should be pretty good. What concerne me most will be the large body. It has many curves and large surfaces and getting a good finish will be challenging.
")
This is the latest test, and hopefully the last, before I resume clear coating the parts. Here's what I did. Starting with my test piece that had a coat of finish paint and 3 coats of clear, the clear was wet sanded and received another coat of clear. This last coat was sanded it with the 3000 pad and wet sanded with the 5000 pad. I then buffed the left side using my 3M buffing compound, my 3M hand glace and finished with a polymere wax. These 3 last steps were done using a cotton wheel on my dremel at the lowest speed. The right side is as it was after sanding.
The result is quite nice and the waxed surface is slippery as should be.

So here's how I will proceed for the rest.
All parts that had received 3 coats of clear have been sanded with the 3000 and 5000 pads. They will receive a new wet coat of clear and once cured, will be lightly sanded, buffed, glazed and waxed.
As for the parts not yet cleared, they will get 3 coats of clear followed by the steps described above.
I will pay more attention to the cleaning and dust control.
The result is quite nice and the waxed surface is slippery as should be.
So here's how I will proceed for the rest.
All parts that had received 3 coats of clear have been sanded with the 3000 and 5000 pads. They will receive a new wet coat of clear and once cured, will be lightly sanded, buffed, glazed and waxed.
As for the parts not yet cleared, they will get 3 coats of clear followed by the steps described above.
I will pay more attention to the cleaning and dust control.
I printed the seats, they will be covered with the same leather I used for the rear seat and door panels. If you look closely at the print, you will see a hole on the lower portion of the seat plus some striations (lines) on certain surfaces. They should not be there. After some research, it appears my LCD screen is shot and needs to be replaced. Apparently, an LCD screen on a printer is a consumable with a life span anywhere from a few months to a few years depending on use. I was wondering with my prints where not as nice as before. Thankfully, I only need to reprint the tool box covers since I now understand why they look like they do. Live and learn...

So, all body parts have been clear coated except for the 2 tool box lids, I have to repair the printer firts in order to reprint these. They really look crappy.
The main body after clear coating

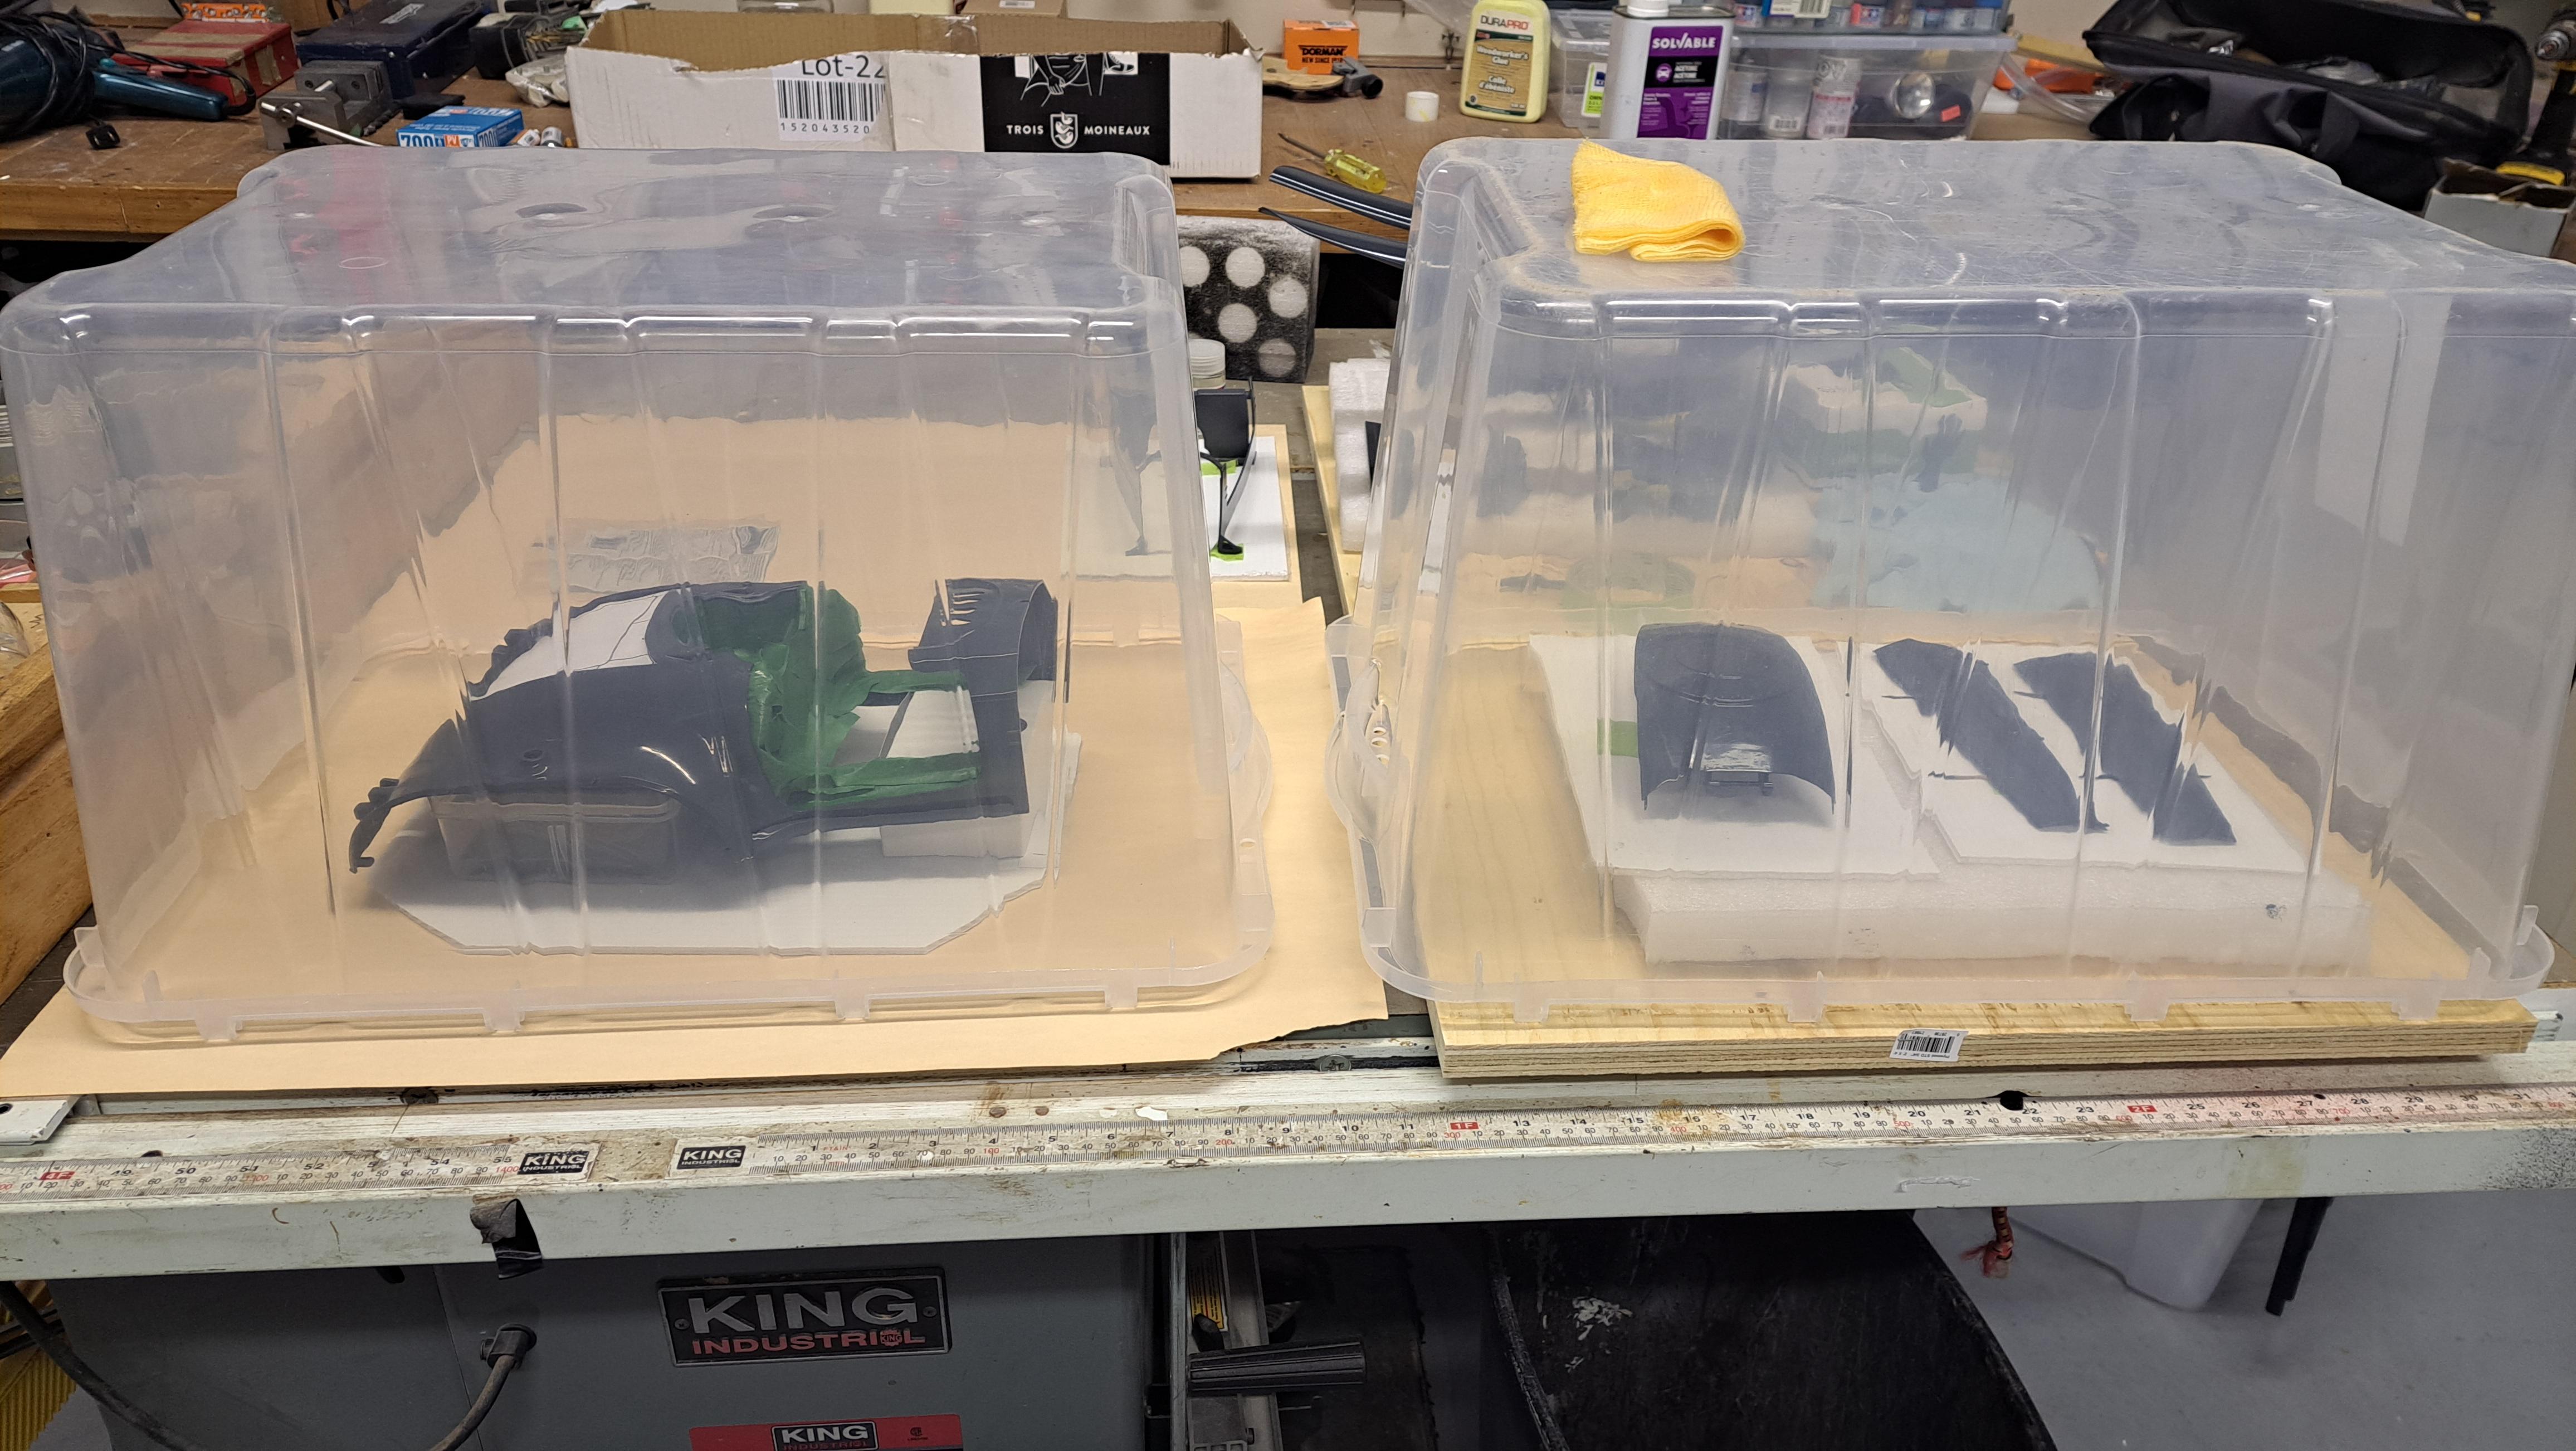
Curing under dome. It was suggested that I cover the still wet parts with a box to protect from dust, quite ingenous
Cured parts awaiting final buffing and wax

Test fit of both seat on floorpan

next up, leather covering of said seats
The main body after clear coating
Curing under dome. It was suggested that I cover the still wet parts with a box to protect from dust, quite ingenous
Cured parts awaiting final buffing and wax
Test fit of both seat on floorpan
next up, leather covering of said seats
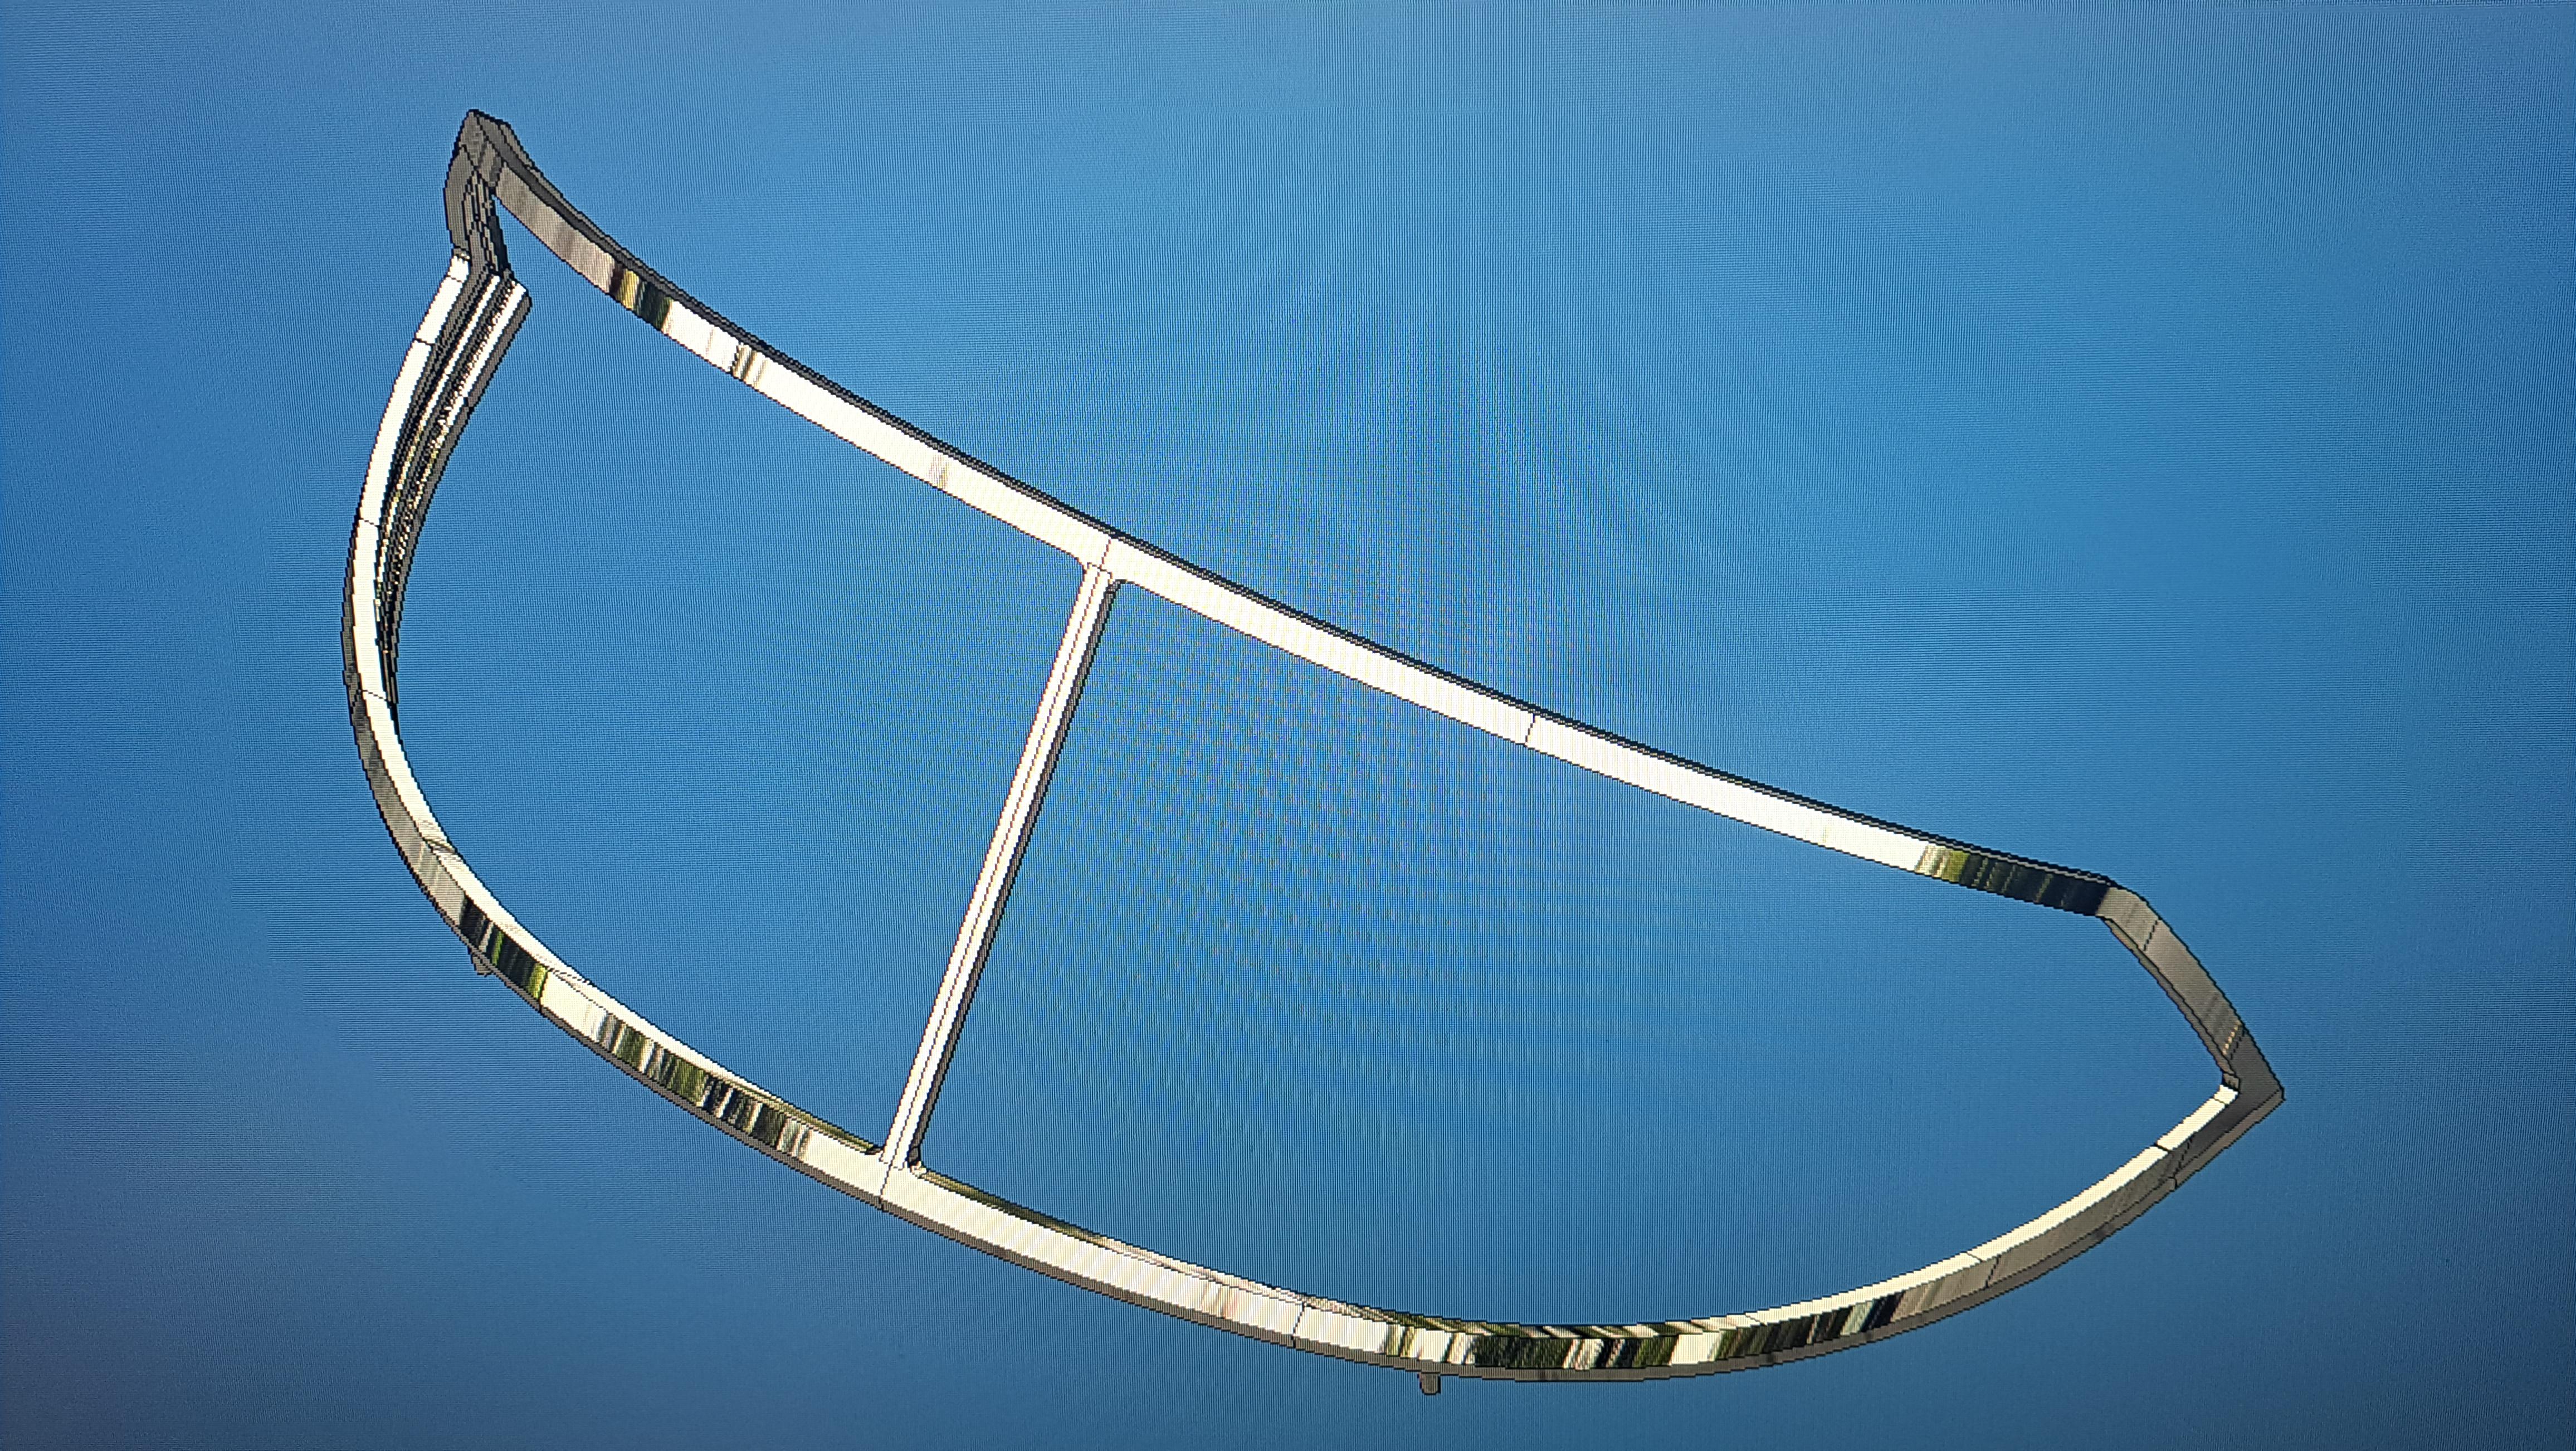
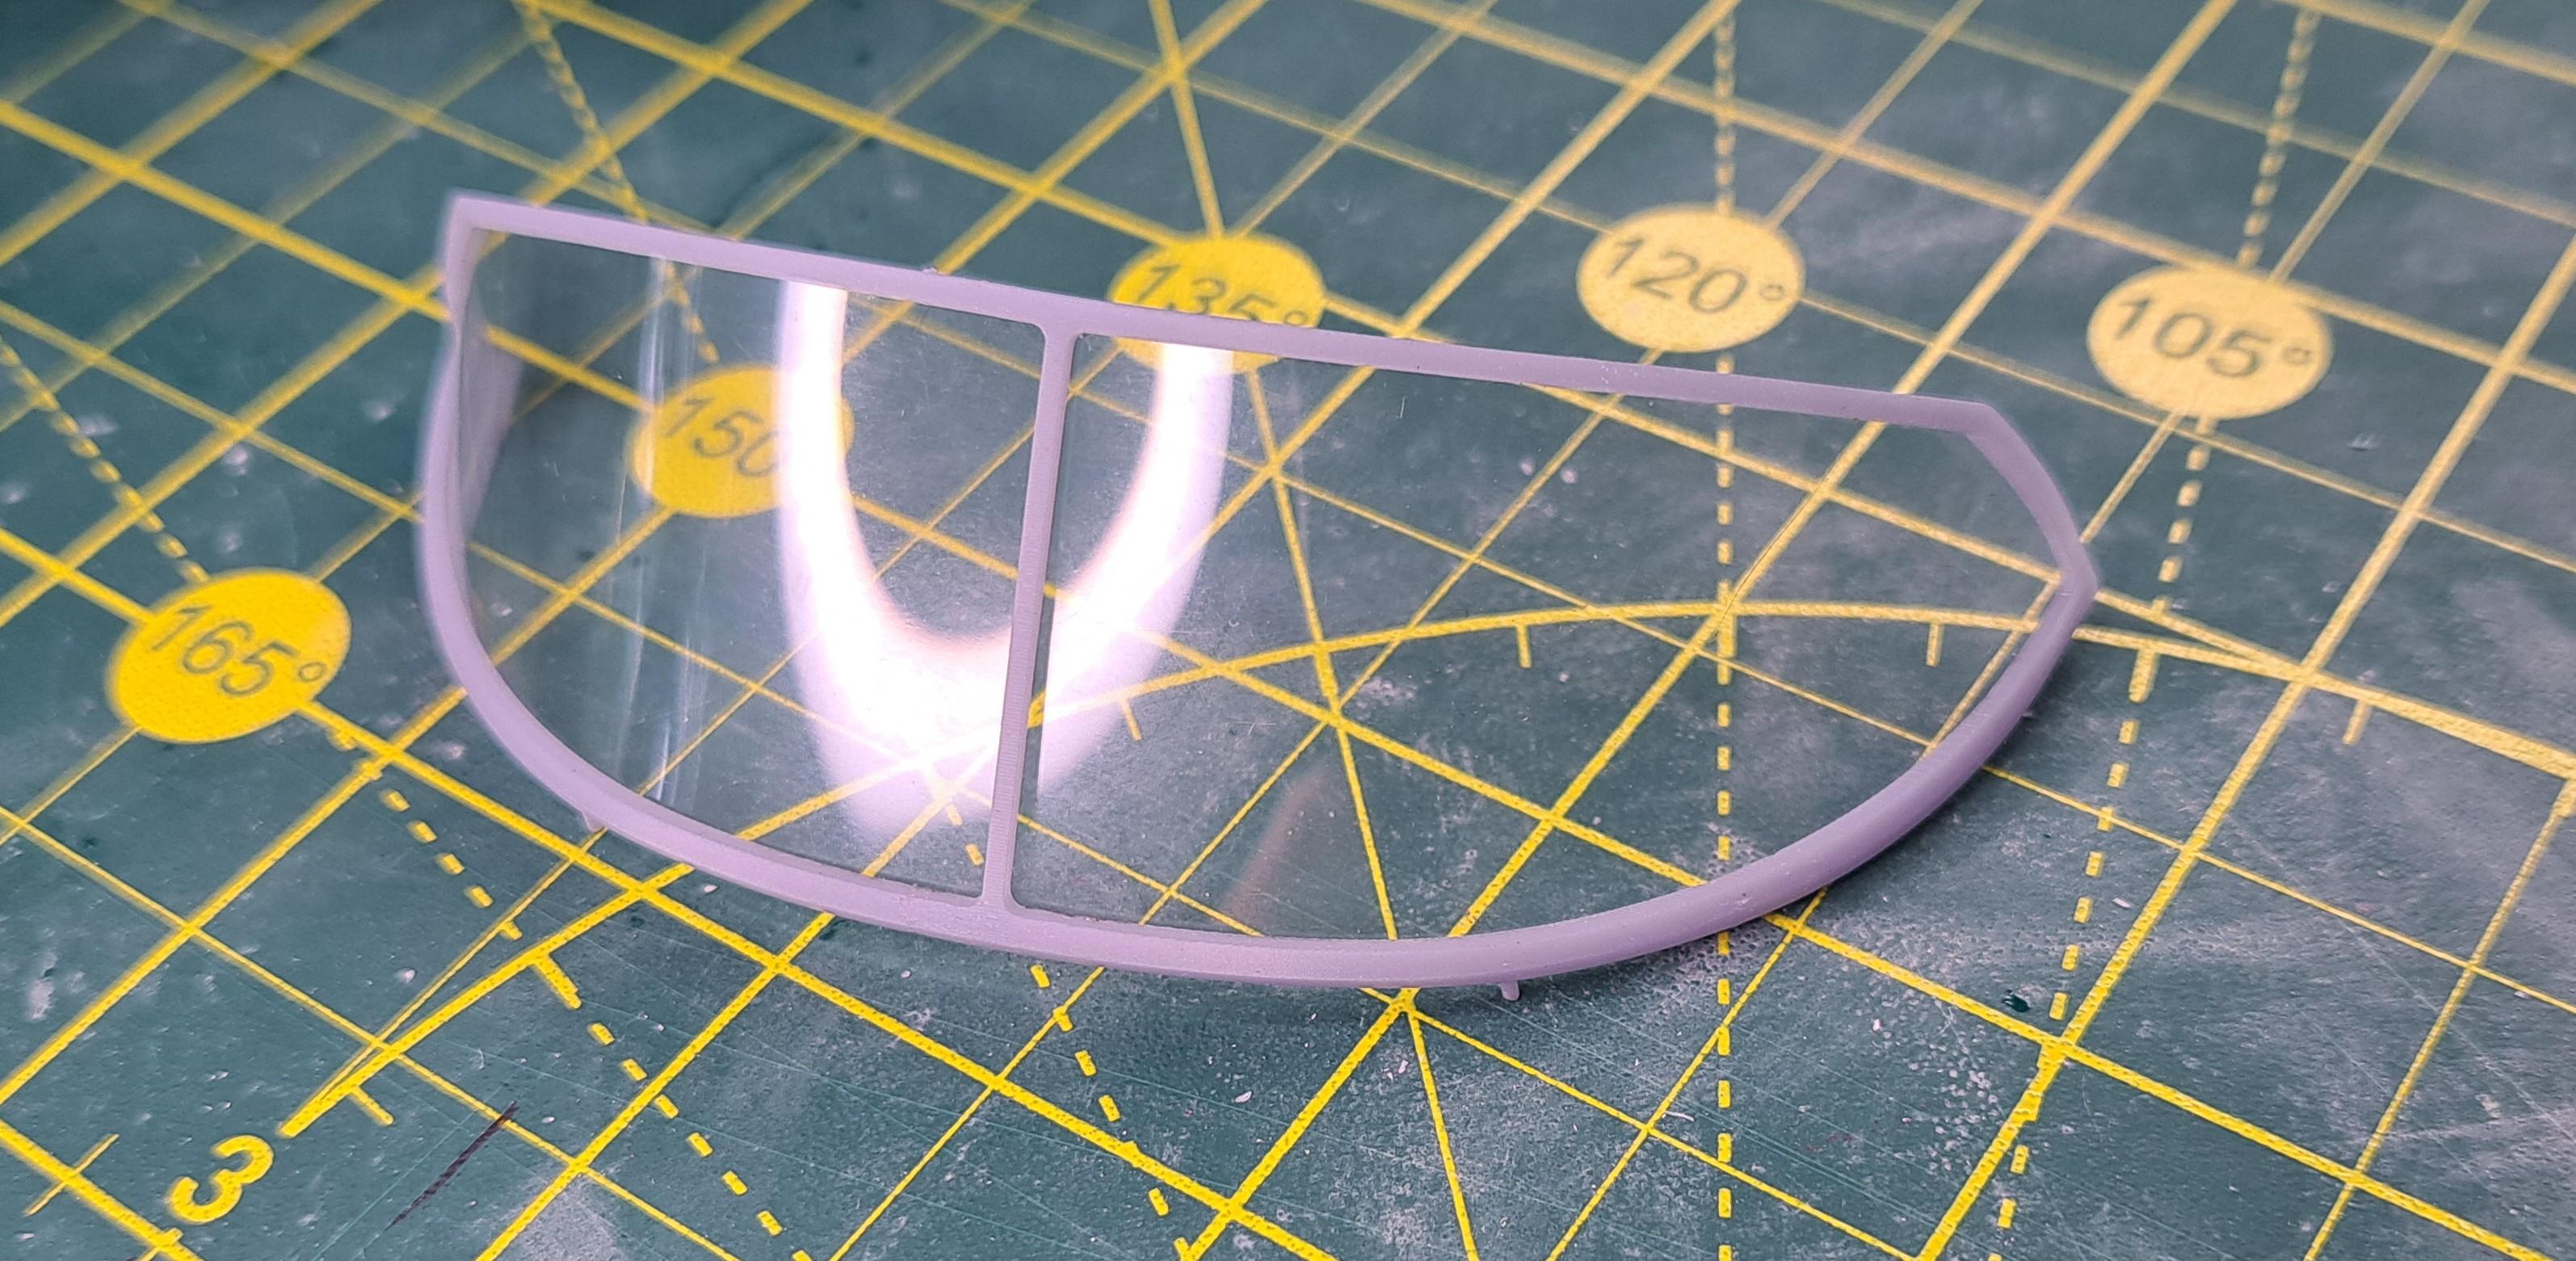
I did the windshield today. It's quite an odd shape to cut so I printed a template. To design the template, I used the 'derived component' command on my 3d modeling program. I apologize in advance to all you non-3d modeling savy readers out there, this will get a bit technical. Hopefully someone will know what I'm talking about, if not, well it will have been another good english writing exercice.
What this command does is that it can sudstract one or more form (the cutter) from another(the raw material). The resulting 'derived' part is the difference of this substraction. In this particular case, I needed the curved shape of the windshield so I could use it to cut a clear plastic sheet to the correct shape. Now, I already have the windscreen frame modeled. So by substracting this frame (the cutter) from a larger form ( the raw material that the cutter cuts), I ended up with a derived part that has the exact shape of the windshield. There's one other maneuver that had do be done but I won't explain it because, well quite frankly, I don't know how to.
Here are a few pictures to better explain
The windshield frame
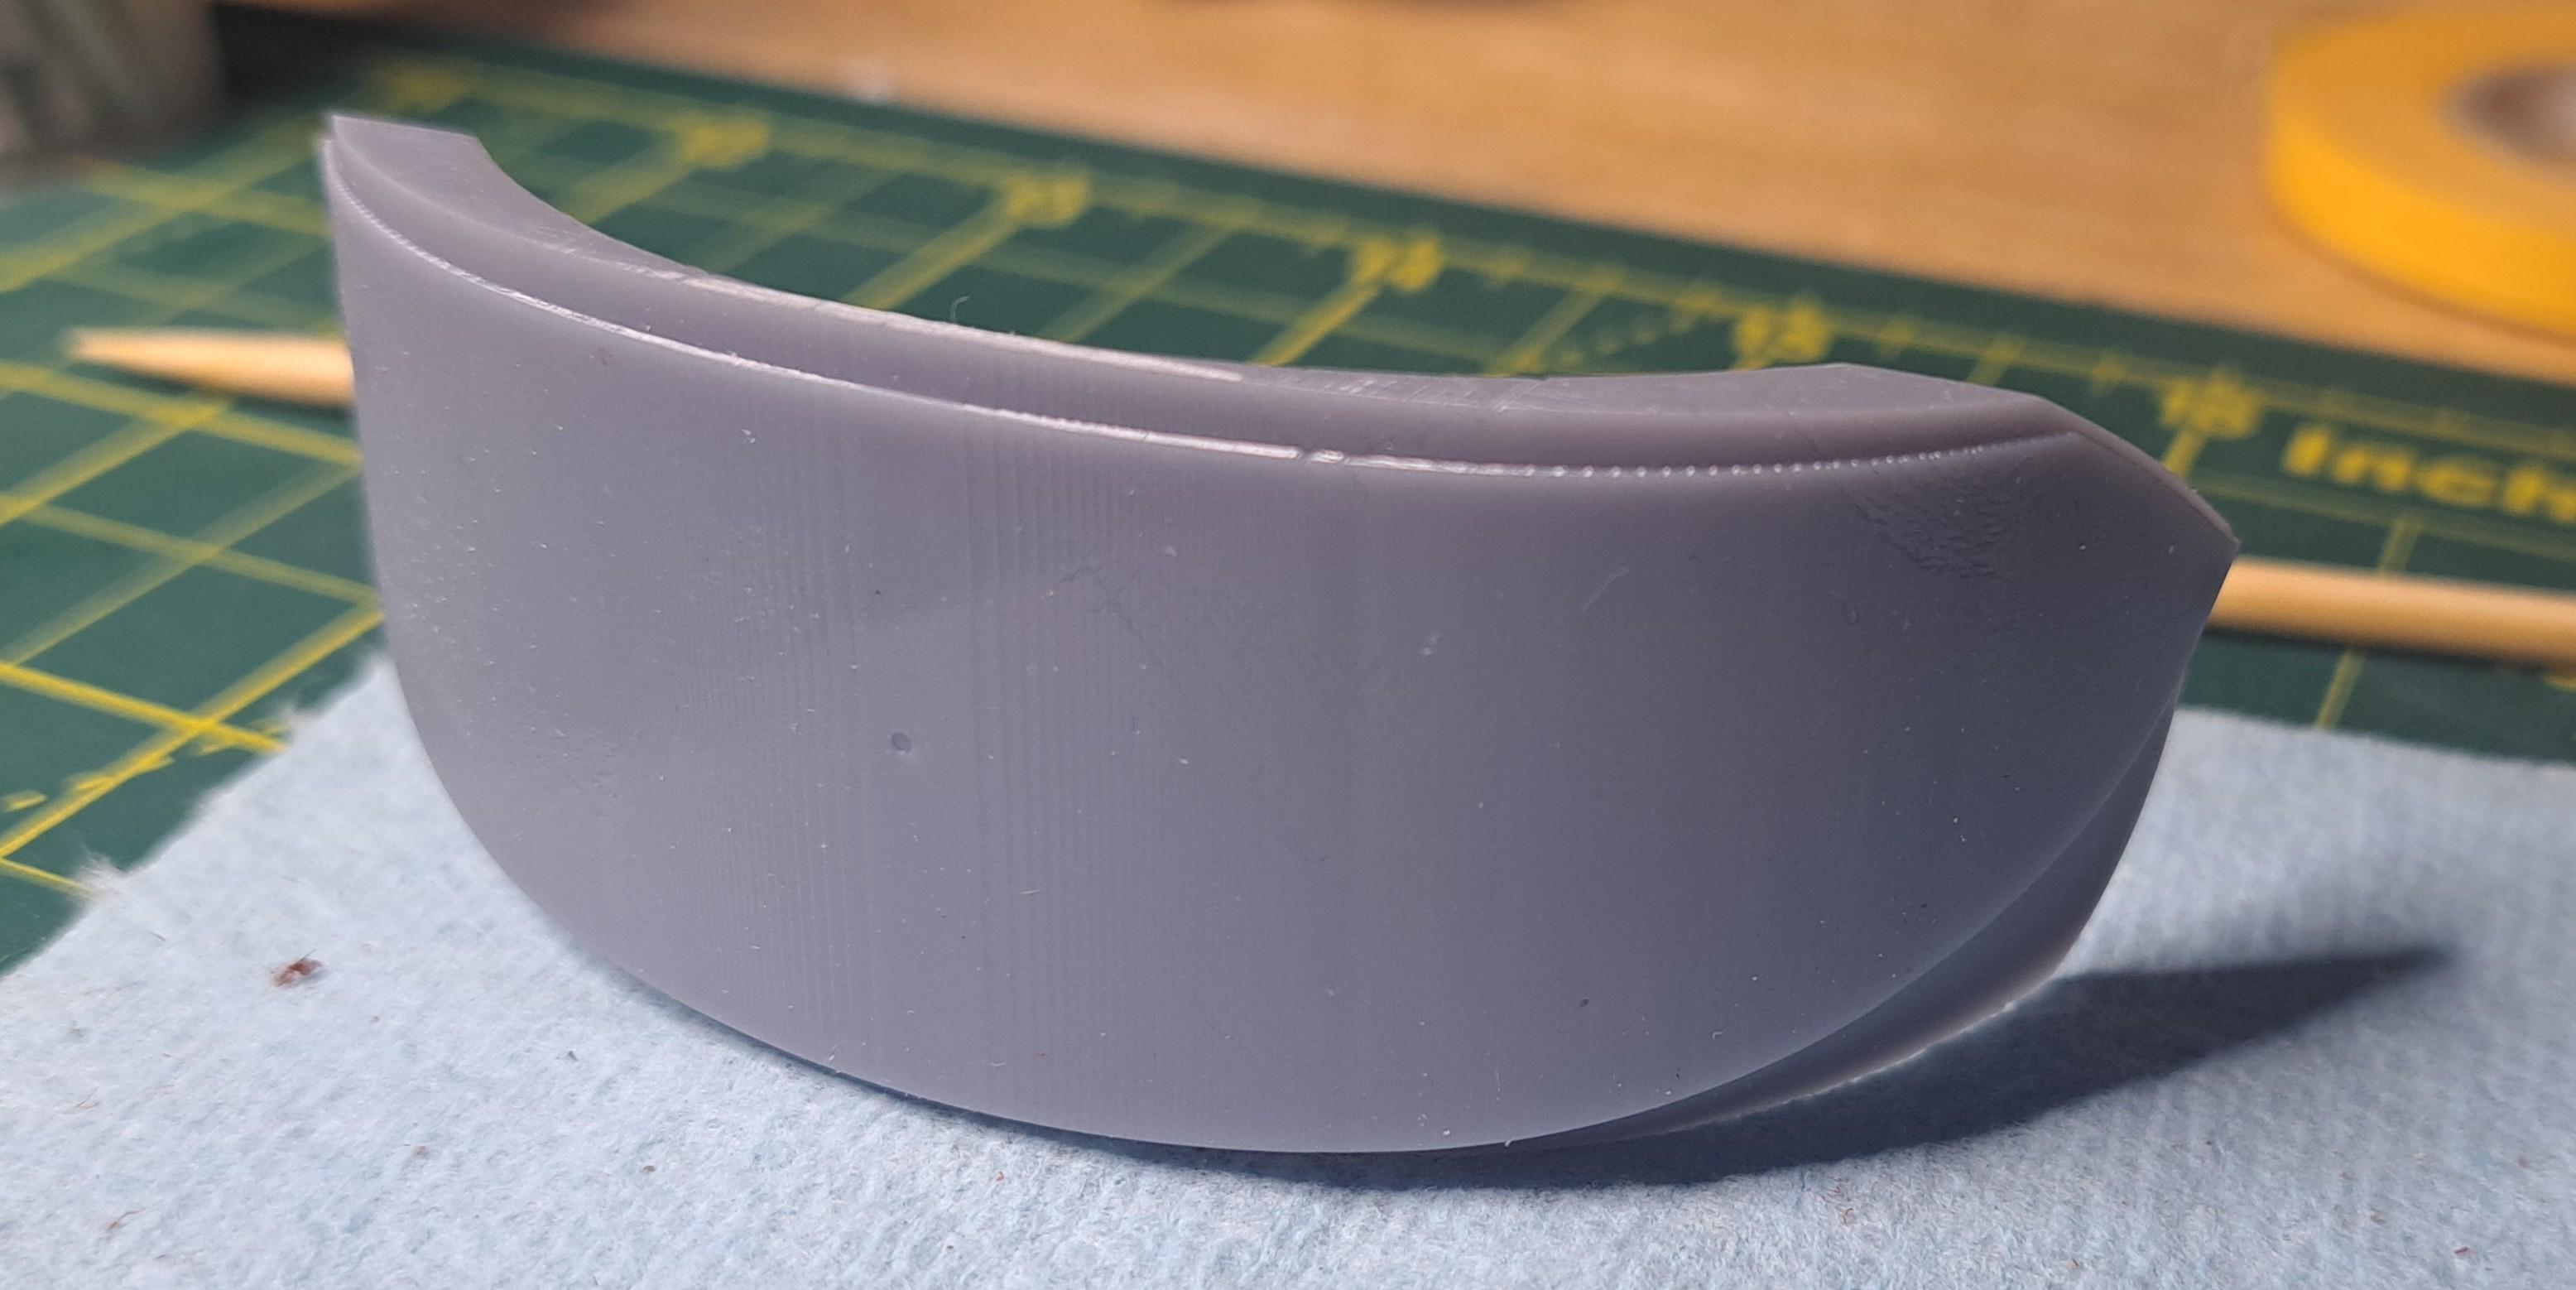
The 'derived' part which is the difference between the frame and the raw form hence called the template

The printed template
Clear plastic sheet on template

Windshield cut to size
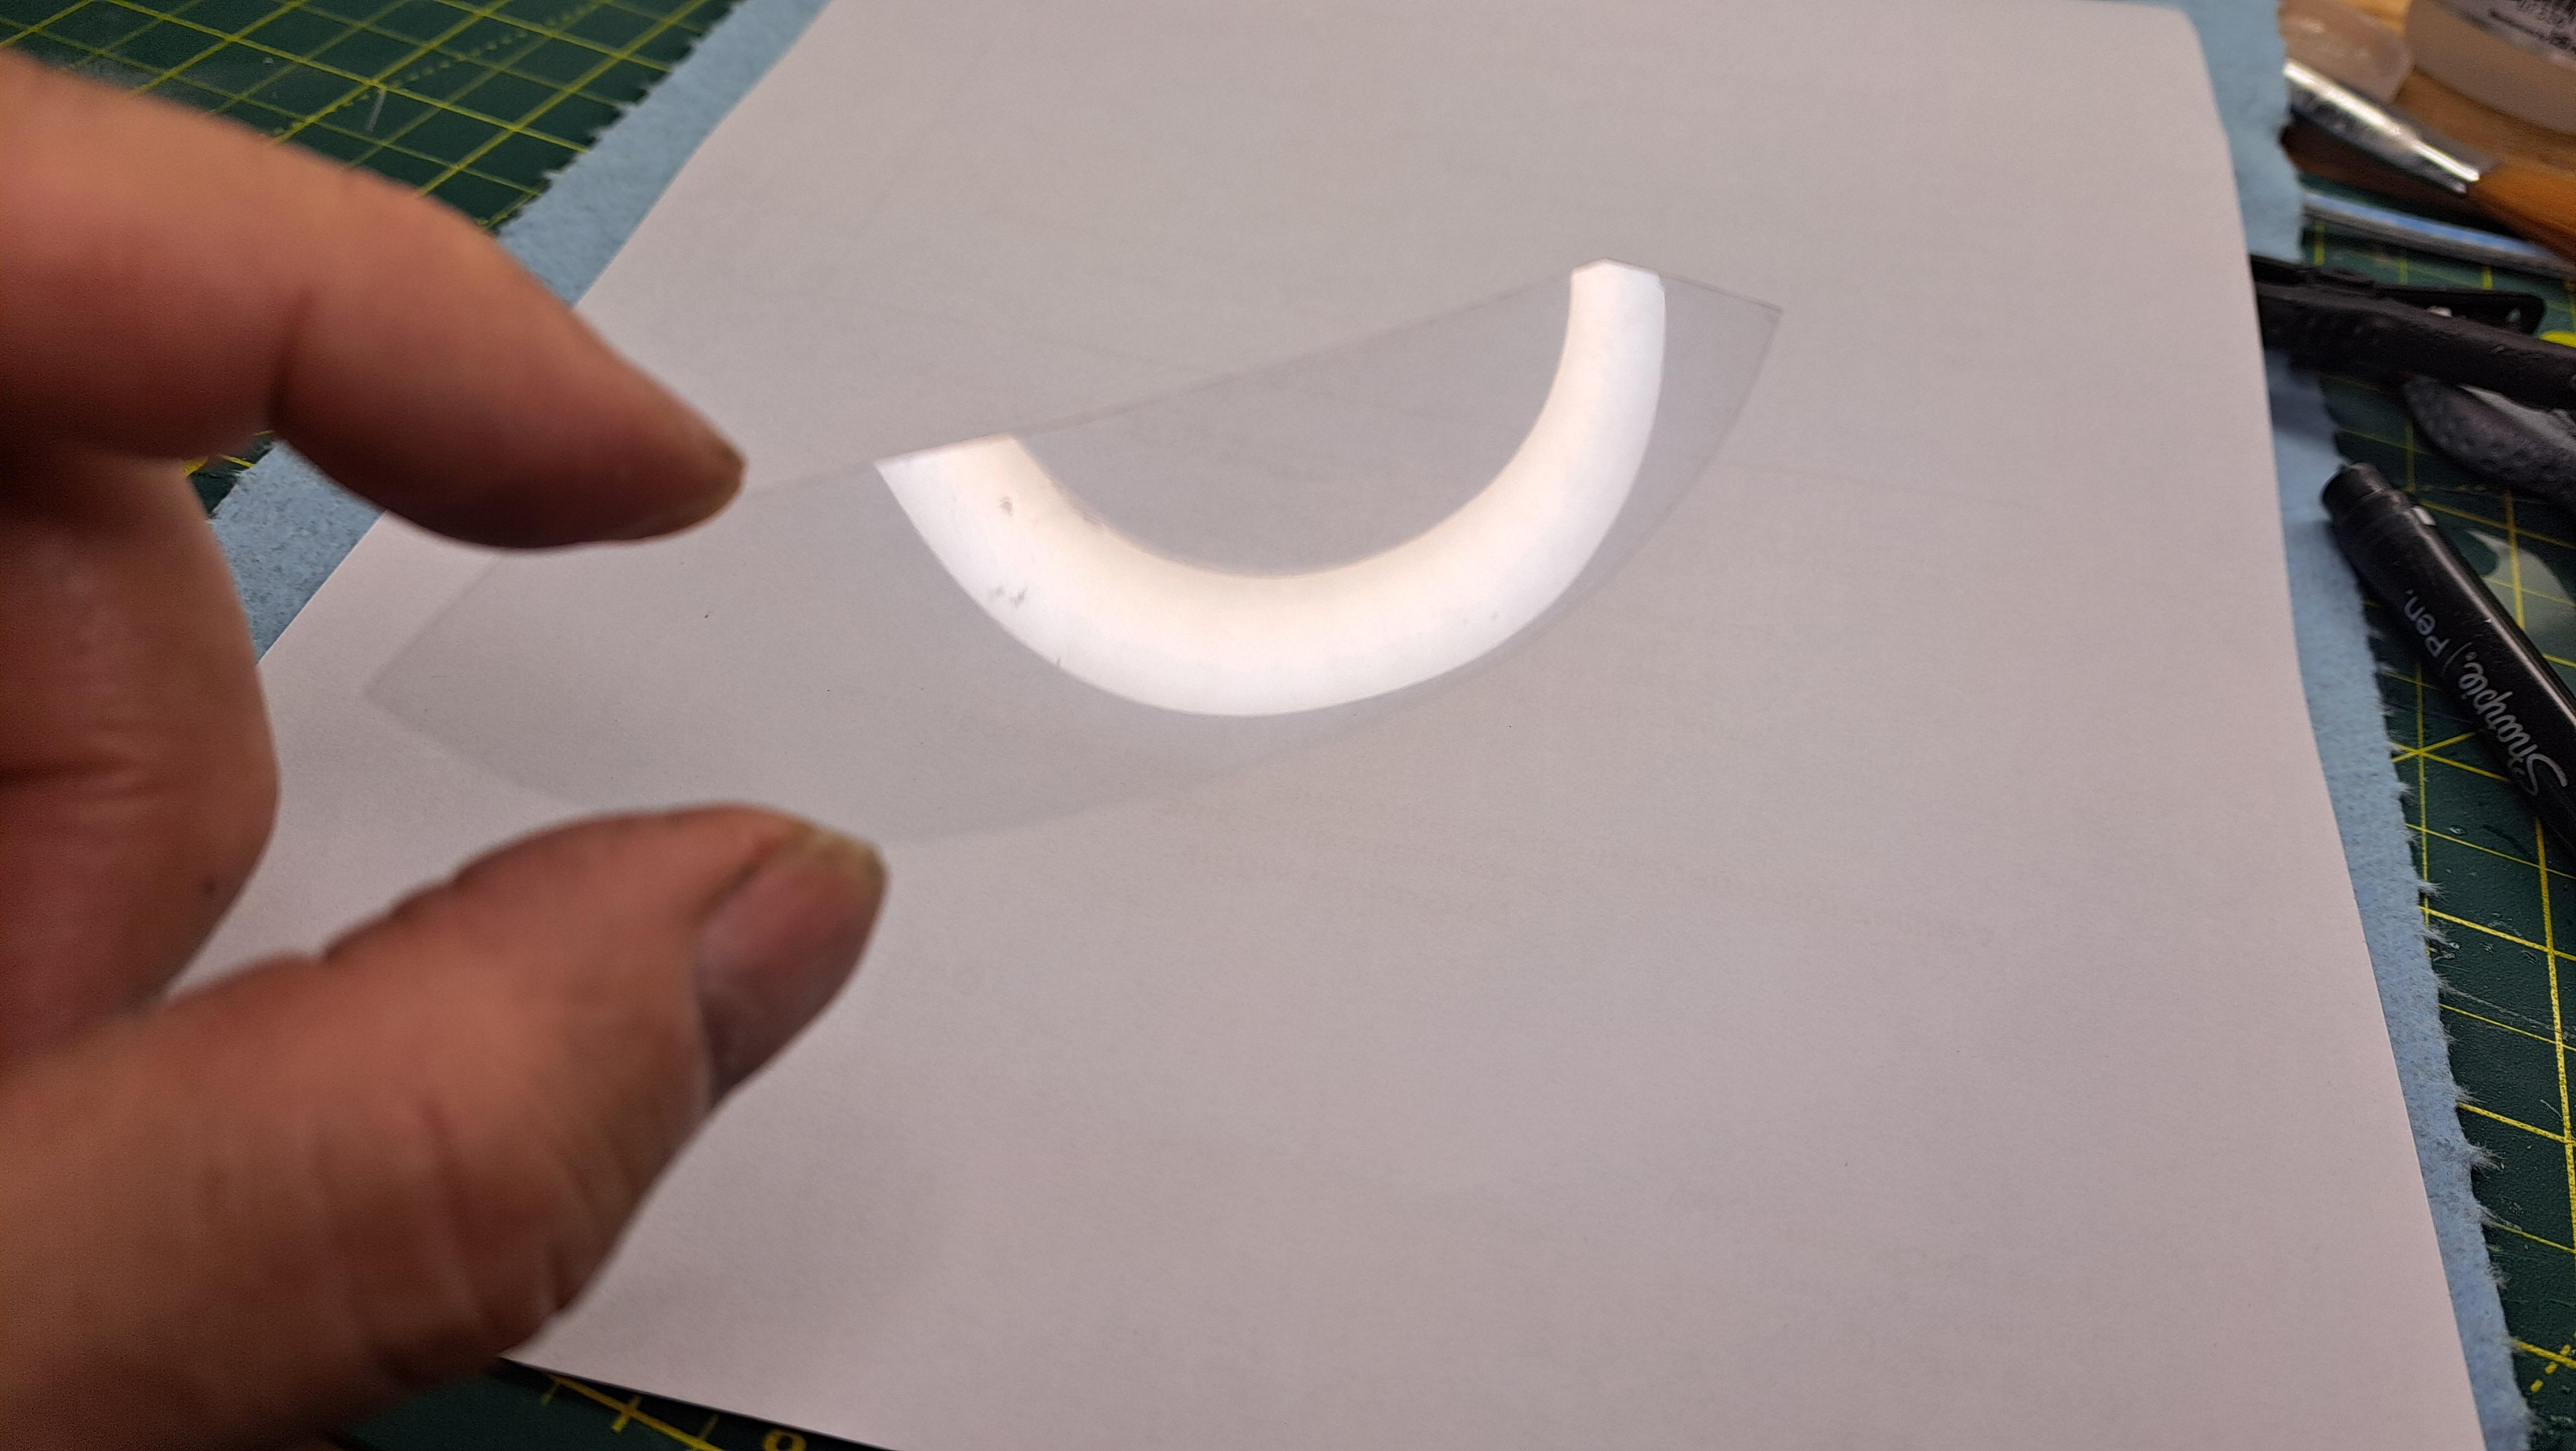
Windshield in windshield frame
I also started to upholster the seats. The leather is nice and soft but a little thicker then the leather I used on the Bentley. It's a little harder to handle but the result is still nice.


What this command does is that it can sudstract one or more form (the cutter) from another(the raw material). The resulting 'derived' part is the difference of this substraction. In this particular case, I needed the curved shape of the windshield so I could use it to cut a clear plastic sheet to the correct shape. Now, I already have the windscreen frame modeled. So by substracting this frame (the cutter) from a larger form ( the raw material that the cutter cuts), I ended up with a derived part that has the exact shape of the windshield. There's one other maneuver that had do be done but I won't explain it because, well quite frankly, I don't know how to.
Here are a few pictures to better explain
The windshield frame
The 'derived' part which is the difference between the frame and the raw form hence called the template
The printed template
Clear plastic sheet on template
Windshield cut to size
Windshield in windshield frame
I also started to upholster the seats. The leather is nice and soft but a little thicker then the leather I used on the Bentley. It's a little harder to handle but the result is still nice.
I might have missed it in a previous post, but what are you using to adhere the leather to the seats?
- Joined
- Dec 5, 2022
- Messages
- 1,135
- Points
- 443

Hello Francois,
you are really doing a fantastic job! It's hard to believe how much love and time you're putting into this project. I covered the seat covers of a Ferrari Testarossa with white liver. That was a very demanding job. That's why I know how difficult it is to make sure that the glue doesn't get on the leather. I used the textile adhesive from Beckmann. It dried quite quickly, but was easy to work with, especially in the seat grooves. I look forward to continuing to follow your project.
Cheers
Günther
Thank you everyone !
Namabiiru, I'm using a spray on contact ciment from 3M and a textile glue on the underseams. I designed the seat in multiple parts, each wrapped individualy and then assembled together. The joints will probably receive a chrome moulding of some sort or a color coordinated piping.
Namabiiru, I'm using a spray on contact ciment from 3M and a textile glue on the underseams. I designed the seat in multiple parts, each wrapped individualy and then assembled together. The joints will probably receive a chrome moulding of some sort or a color coordinated piping.
Wow Francois. Your build thread and your skills are inspirational and sensational. I am enjoying every post, and it’s not even a ship.
Can i ask how you made the leather adhere to the grooves of the printed seat, did you press the leather in with a forming tool or some other process?
Merci beaucoup.
Michael
Can i ask how you made the leather adhere to the grooves of the printed seat, did you press the leather in with a forming tool or some other process?
Merci beaucoup.
Michael
Thanks chestcutter, I simply used a very thin steel ruler with a radiused end and gently pressed the leather in the groove. Seems to work.