If you are interested here is the link to the website of the historical society in Oberursel. It is mainly in German and some of the info is in English.:Oberursel has a long, very interesting history.
-

Win a Free Custom Engraved Brass Coin!!!
As a way to introduce our brass coins to the community, we will raffle off a free coin during the month of August. Follow link ABOVE for instructions for entering.
-

PRE-ORDER SHIPS IN SCALE TODAY!
The beloved Ships in Scale Magazine is back and charting a new course for 2026!
Discover new skills, new techniques, and new inspirations in every issue.
NOTE THAT OUR FIRST ISSUE WILL BE JAN/FEB 2026
- Home
- Forums
- Ships of Scale Build Logs
- Super Detailing Static Models / Other Genres
- Historical Trailways, Guns, Aircraft, and Cars
You are using an out of date browser. It may not display this or other websites correctly.
You should upgrade or use an alternative browser.
You should upgrade or use an alternative browser.
Model Airways Sopwith Camel 1/16 scale [COMPLETED BUILD]
Kurt Konrath
Kurt Konrath
Britannia metal casting are old school and cheap, they don't have to pay to have someone design new resin molds or get new equipment to process them.Thank you Adi!
The Britannia metal castings leave a lot to be desired! They need a lot of clean up, and the detail is less than plastic or resin. And finally they are heavy! It’s amazing how heavy this fuselage is getting and the motor is not on yet!
In conclusion, I would have preferred they use plastic or resin because I am painting most of it anyway.
Thank you, I will look into that!If you are interested here is the link to the website of the historical society in Oberursel. It is mainly in German and some of the info is in English.:
True, but I would be willing to pay more to get better quality!Britannia metal casting are old school and cheap, they don't have to pay to have someone design new resin molds or get new equipment to process them.
- Joined
- Sep 3, 2021
- Messages
- 5,190
- Points
- 738

Very interesting read, thanks for sharing.If you are interested here is the link to the website of the historical society in Oberursel. It is mainly in German and some of the info is in English.:
I thought Rolls-Royce is nowadays owned by BMW. At least the aero-engine division is.
No, the car division is owned by BMW. The aero-engine division is a separate company, owned wholly by Rolls-Royce Plc with the mother company in Derby, England. RR has a subsidary company in Germany, consisting of two sites, one being in Oberursel.Very interesting read, thanks for sharing.
I thought Rolls-Royce is nowadays owned by BMW. At least the aero-engine division is.
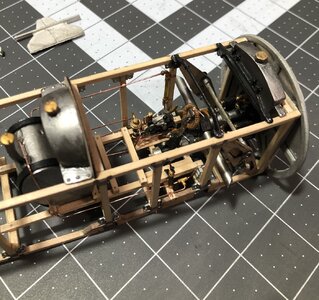
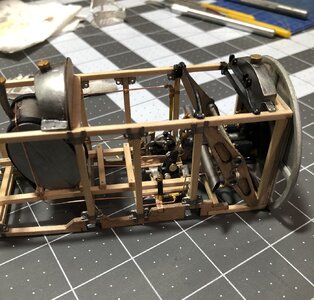
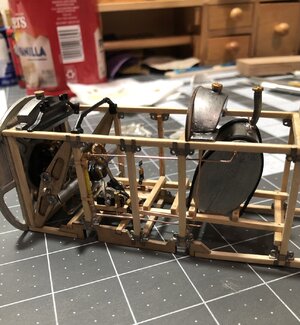
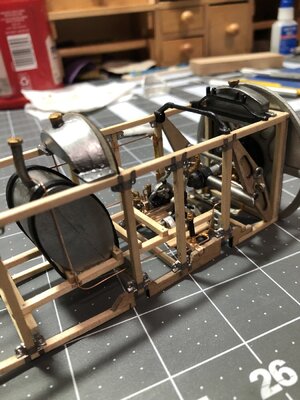
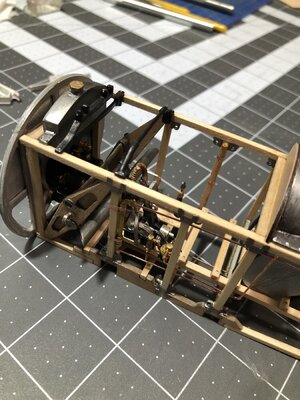
Today was assembly and tubing…
I installed the main tank, the straps that hold it in place, then the tubing for the fuel lines.
Then I installed the fuel level sight glass, and then the tubing to the fuel tank for it (2 lines).
Then I installed the fuel pressure system and lines. I added a straight fitting at the end of the line that goes to the pump on the cabane strut. That will be added later in the build, so I just needed to have a connection point.
Then I installed the oil tank and the oil line.
Next is the ammo canisters that I have to start assembly on and paint after making adjustments.
Pics of today’s progress…


I think, precise attention to details you made, and great job in general building this model, the best advertisement for this kit, mi Amigo!!! Model Airways should pay you!! 
Thank you Jimsky! Much appreciated!I think, precise attention to details you made, and great job in general building this model, the best advertisement for this kit, mi Amigo!!! Model Airways should pay you!!
They should pay me for dealing with their crummy Britannia metal castings!
- Joined
- Sep 3, 2021
- Messages
- 5,190
- Points
- 738

I've seen wonderful CAD-models from your hand, resulting in rather nicely printed 3D-parts. Why not toss out the crappy castings and go for the more successful approach?Thank you Jimsky! Much appreciated!
They should pay me for dealing with their crummy Britannia metal castings!
- Joined
- Sep 3, 2021
- Messages
- 5,190
- Points
- 738

You're correct, originally BMW had a majority share, later BMW stepped away, leaving Rolls-Royce as the owner.No, the car division is owned by BMW. The aero-engine division is a separate company, owned wholly by Rolls-Royce Plc with the mother company in Derby, England. RR has a subsidary company in Germany, consisting of two sites, one being in Oberursel.
Since I don’t actually own a printer at the moment, I try to keep the amount of parts printed to a minimum, as a courtesy to my friend.I've seen wonderful CAD-models from your hand, resulting in rather nicely printed 3D-parts. Why not toss out the crappy castings and go for the more successful approach?
Should I decide to invest in a printer, then that would change! In fact I fear if I buy a printer, then I will end up modeling and printing my own models, piece by piece! I wouldn’t need a kit!
Today I added the ammo canister and the instrument panel. Afterwards I added the machine guns and the sight.
I drilled holes in the end of the machine gun barrels to add realism, I also extended the gun discharge chute and made it hollow inside for realism. I added bolts heads to all mounting straps and the sight bar on the guns.
Also I added pipe clamps wherever it was possible. I have added so much detail, I honestly don’t remember everything and won’t bore you any further with a list…ha ha! But if you look closely you will notice these things!
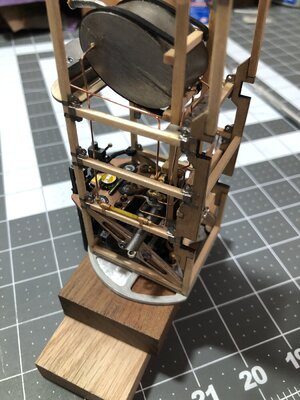
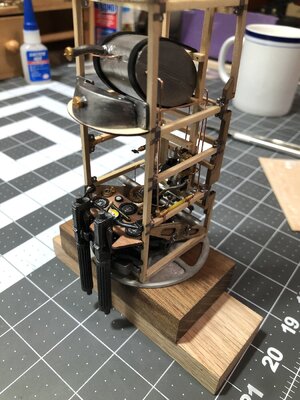
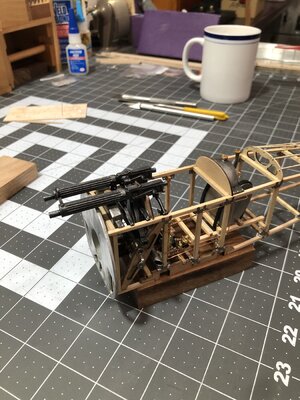
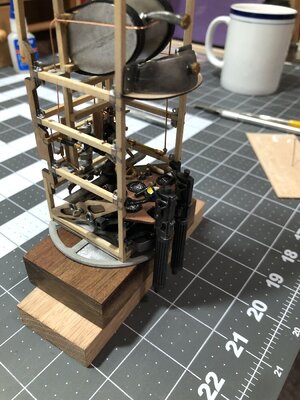
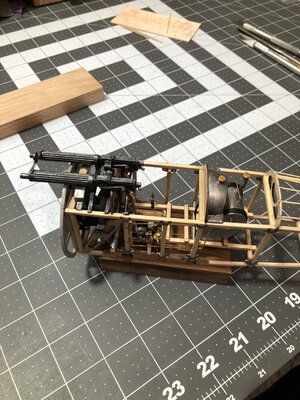
Then I test fitted the cowling to check clearance with the guns, etc.
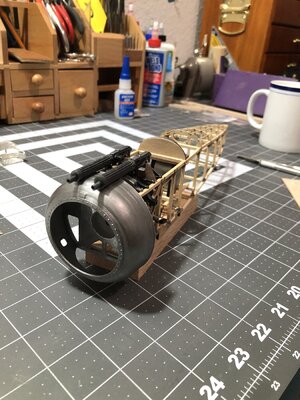
Then I test fitted the cockpit cover…it is just sitting in place loosely, but once glued down will fit tight. This exercise is just to verify clearance with the guns, and to check fuel tank filler access hole locations. So far it looks good…
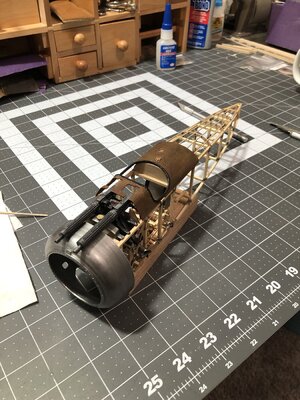
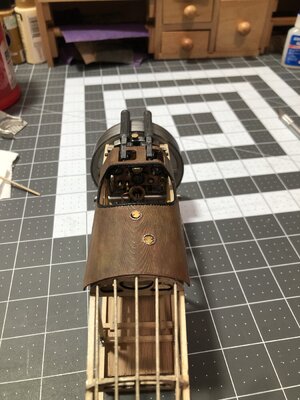
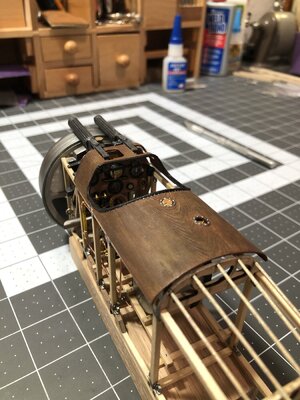
Next will be the seat and the tail skid…the list goes on! After that it will be time for all of the turnbuckles and tension wires!
I will leave the bottom ones off until I have run all of the control wires to the empannage assembly.
I drilled holes in the end of the machine gun barrels to add realism, I also extended the gun discharge chute and made it hollow inside for realism. I added bolts heads to all mounting straps and the sight bar on the guns.
Also I added pipe clamps wherever it was possible. I have added so much detail, I honestly don’t remember everything and won’t bore you any further with a list…ha ha! But if you look closely you will notice these things!


Then I test fitted the cowling to check clearance with the guns, etc.

Then I test fitted the cockpit cover…it is just sitting in place loosely, but once glued down will fit tight. This exercise is just to verify clearance with the guns, and to check fuel tank filler access hole locations. So far it looks good…


Next will be the seat and the tail skid…the list goes on! After that it will be time for all of the turnbuckles and tension wires!
I will leave the bottom ones off until I have run all of the control wires to the empannage assembly.
Excellent, excellent. Adding all those small details must be a chore, but the results are worth the effort.
I added the tail skid…it has rigging! 
They used a bungee cord which acted like a shock absorber.
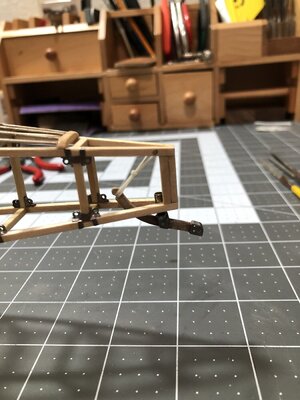
Then I decided to try to make something decent out of the provided seat. First I cleaned it up and glued it to the seat bottom and painted the bottom.
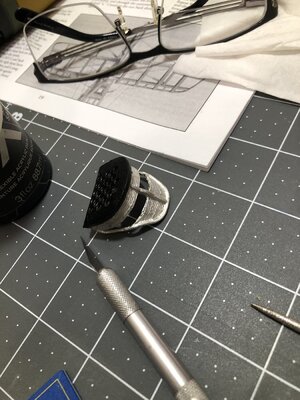
There was a big gap and no supports…sigh! So I added the vertical supports that cross …
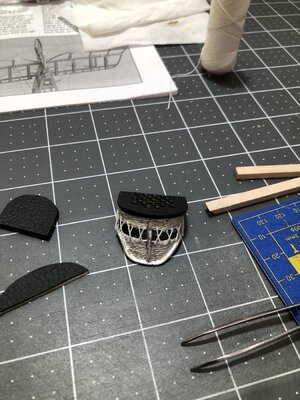
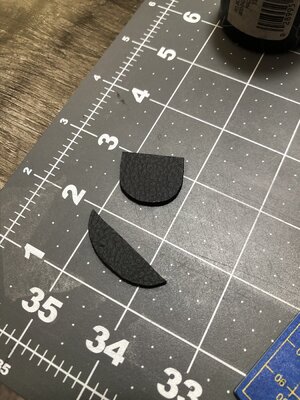
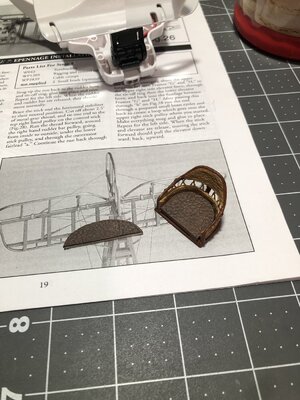
As you can see I also decided to make a seat cushion, which was standard. But I also decided to make a upper cushion that goes on the bulkhead behind the seat. I have seen this added on the real airplane.
Then I painted the seat and cushions…
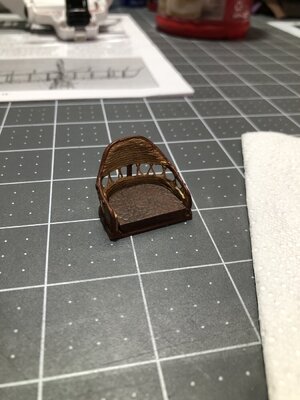
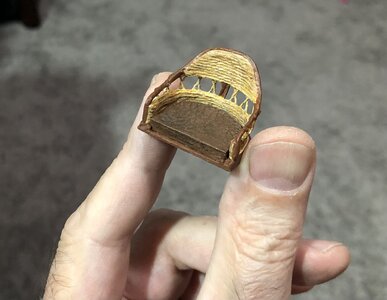
Then they were installed in the fuselage…
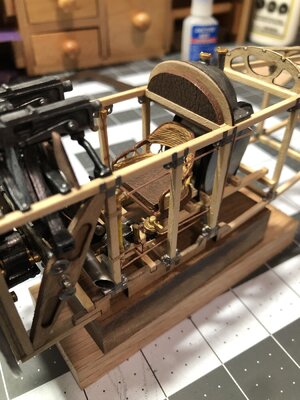
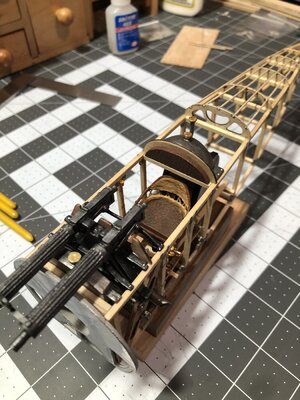
As she sits now with current progress…
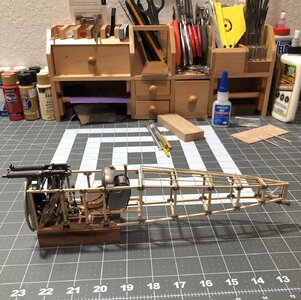
They used a bungee cord which acted like a shock absorber.

Then I decided to try to make something decent out of the provided seat. First I cleaned it up and glued it to the seat bottom and painted the bottom.

There was a big gap and no supports…sigh! So I added the vertical supports that cross …

As you can see I also decided to make a seat cushion, which was standard. But I also decided to make a upper cushion that goes on the bulkhead behind the seat. I have seen this added on the real airplane.

Then I painted the seat and cushions…


Then they were installed in the fuselage…


As she sits now with current progress…

Last edited:
Wow, the seat is absolutely perfect . Wonderful Dean.
Now it is a real Rattan woven chair. A comfortable seat, Dean. The pilot will appreciate that!I added the tail skid…it has rigging!
They used a bungee cord which acted like a shock absorber.
View attachment 298947
Then I decided to try to make something decent out of the provided seat. First I cleaned it up and glued it to the seat bottom and painted the bottom.
View attachment 298948
There was a big gap and no supports…sigh! So I added the vertical supports that cross …
View attachment 298949
As you can see I also decided to make a seat cushion, which was standard. But I also decided to make a upper cushion that goes on the bulkhead behind the seat. I have seen this added on the real airplane.
View attachment 298950
Then I painted the seat and cushions…
View attachment 298951View attachment 298952View attachment 298953
Then they were installed in the fuselage…
View attachment 298954View attachment 298955
As she sits now with current progress…
View attachment 298957
Thank you very much Adi!Wow, the seat is absolutely perfect . Wonderful Dean.
Thank you Peter!Now it is a real Rattan woven chair. A comfortable seat, Dean. The pilot will appreciate that!


