- Joined
- Jan 9, 2020
- Messages
- 10,566
- Points
- 938

Uwe there is no second planking. It is single-layered.For second planking of lower wooden quality such a nipper like shown by Brian could really help
 |
As a way to introduce our brass coins to the community, we will raffle off a free coin during the month of August. Follow link ABOVE for instructions for entering. |
 |
 |
The beloved Ships in Scale Magazine is back and charting a new course for 2026! Discover new skills, new techniques, and new inspirations in every issue. NOTE THAT OUR FIRST ISSUE WILL BE JAN/FEB 2026 |
 |

Uwe there is no second planking. It is single-layered.For second planking of lower wooden quality such a nipper like shown by Brian could really help
OK - I used it in the past for my second plankingUwe there is no second planking. It is single-layered.
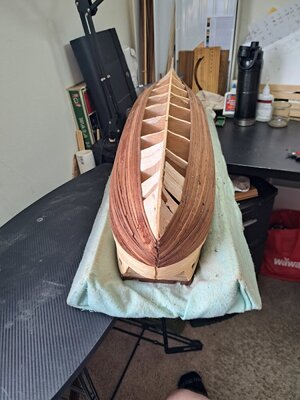
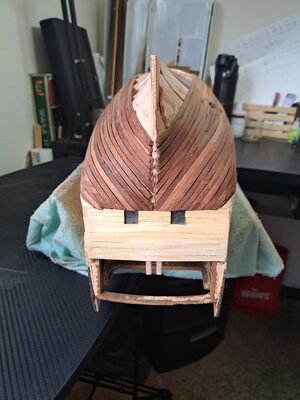
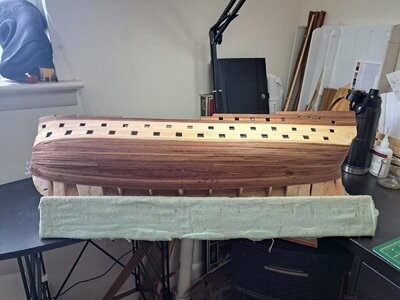
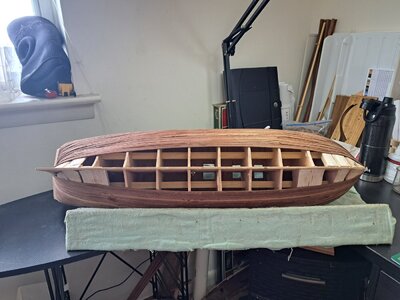
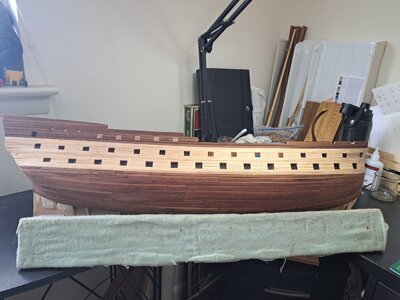

Hi, you appear to be well advanced so my suggestion will probably not be necessary, but for that type of wood, walnut is it, you probably need a couple of hours of soaking. That's what I did. It's painfully slow, but if you do a bunch at the same time you can have them ready for use.So I figure it's time for another update. Nothing too exciting as planking continues. 2/3 of her done but this will be where I stop for a little as I work on refining and drilling gunports and making sure my cannons fit and don't fall. I feel keeping the bottom of the hull open for this process might help me with possibilities of losing my pieces high if I finish the planking first lol. View attachment 322501View attachment 322502View attachment 322503View attachment 322504View attachment 322505
Also new phone so nicer pictures. Yay!! Also you don't really just how heavy this ship is till the planking starts getting almost completeshe is a hefty girl but I'm enjoying it none the less.
I have a power sander on order and will be this weekend so I can start sanding and getting my sawdust for my very needed patches that will need help. This wood did not make this planking easy I tell you what. It just would not bend even with heat and soaking or the planking hand tool or anything. It just kept snapping even with gentleness and re soaking the planks and all so I think it was just the wood and not my skill maybe.....
Slow and steady I know it's very easy to make a big mistake and it's for the initial shape not the finer details. So there will be a lot of hand sanding to get the exact shape I want but the starting shaping and getting everything level will be the sander.Go slow with the power sander Rob...
I appreciate the idea because it's quite annoying to dry and deal with... also I'm humbled by your assumption but this is only my second ship, so I am still learning for sure but again thank you!Hi, you appear to be well advanced so my suggestion will probably not be necessary, but for that type of wood, walnut is it, you probably need a couple of hours of soaking. That's what I did. It's painfully slow, but if you do a bunch at the same time you can have them ready for use.
If I can make a guess your talking about the front side of the ship. Those are actually extra pieces on top of the planking to so I can make the curve. Because of the planks not twisting with the bends without breaking this is my solution to make sure there is enough material. Not the prettiest now but I wanted to make sure I didn't have to add once I was sanding.You will have issue with those broken planks. To get the planks level you might sand right through the bends. Remember to get a smooth shape you have to remove material down to the lowest point so if you have several planks that are much lower than others that’s the level you need to get to but without sanding right through the higher ones. Not an easy task. It’s like cutting wood, “you can always cut another piece off but you can’t cut a piece on.”
True storyGo slow with the power sander Rob...
Good morning Rob. Well done. I know you have heard it 100 times but take your time sanding. It is a make or break aspect of your hull. - especially those fixes on your bow. Going to be fun tho. Cheers GrantSo I figure it's time for another update. Nothing too exciting as planking continues. 2/3 of her done but this will be where I stop for a little as I work on refining and drilling gunports and making sure my cannons fit and don't fall. I feel keeping the bottom of the hull open for this process might help me with possibilities of losing my pieces high if I finish the planking first lol. View attachment 322501View attachment 322502View attachment 322503View attachment 322504View attachment 322505
Also new phone so nicer pictures. Yay!! Also you don't really just how heavy this ship is till the planking starts getting almost completeshe is a hefty girl but I'm enjoying it none the less.
I have a power sander on order and will be this weekend so I can start sanding and getting my sawdust for my very needed patches that will need help. This wood did not make this planking easy I tell you what. It just would not bend even with heat and soaking or the planking hand tool or anything. It just kept snapping even with gentleness and re soaking the planks and all so I think it was just the wood and not my skill maybe.....

This is so true! Excellent advice.No I mean the stern but now I see it the bow too.
Each plank one by one needs to be shaped and spiled and yes it takes forever maybe 2 planks per day but then you won’t be trying to bend them into shapes they will not bend to. They’ll only bend to a point and just as critical they should be tapered to fit their space sometimes in different directions. No planks are ever really equal in width or shape.
This is so very true lol and wrists are already hurting just thinking about itWell Rob, she's taking shape nicely, you do have your work cut out for you though in the sanding department.
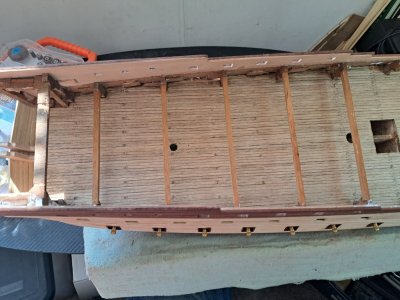
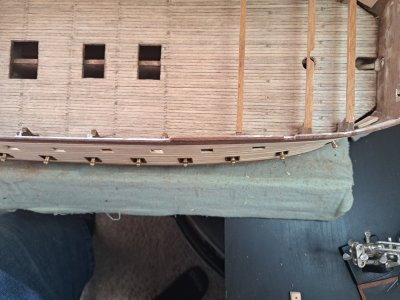
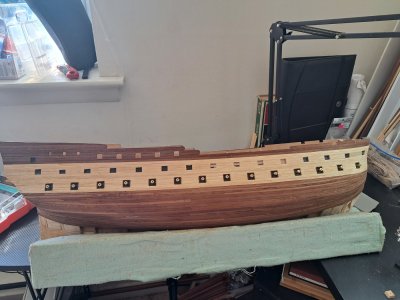
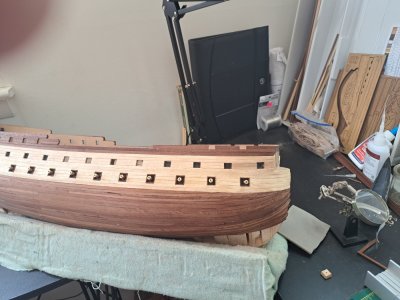
Hey Bryan and thx for coming to check out my build. I have not completed the planking yet and have the bottom. 3rd completely open still, but those are next on my list after completing the port side cannons. I wanted access to the back of the false cannons incase I have an accident.Hello Rob,
I would be dry fitting the stem and keel to ensure a snug fit with the planks. Great progress.
