MY BLUENOSE- YUANQING SCALE 1:72 SCALE [COMPLETED BUILD]

Hello Johan, I do not understand just why you say that. I would suggest that you just go slow, think of what you are doing, do one thing at a time and do think ahead. The YQ-Bluenose is a very fine kit, things are a bit small so go lightly. There is no rush, building a model ship is not a job, but a very enjoyable hobby that will wedel away the hours.
Regards Lawr

Hello Ted, I do thank you very much for all of your likes , they are very much appreciated. I am pleased that you find my YQ Bluenose build helpful in your build, This is just my way of doing things, giving you a few ideas on just how you want your YQ Bluenose to look. This little fishing schooner gave me many, many enjoyable hours. And I believe yours will do the same for you if you give it a chance, ENJOY.
Regards Lawrence
The love you have for this ship is obvious. I'm in the process of reading your entire build log. The work you have done is incredible.
Ted
 
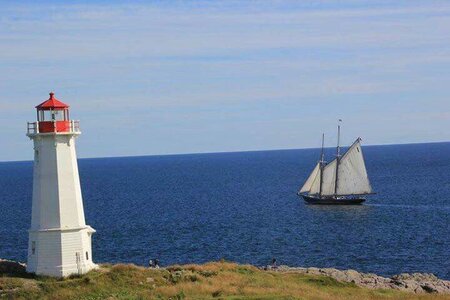
Hello Ship Mates, My sister in law sent me this picture of Peggy's Cove with the Bluenose 11 in the back ground and I just wanted to share it with all of you.
Regards Lawrence


View attachment 446424
What a nice picture, Lawrence. I think Dean @Dean62 likes it also very much. Like his model of it.
Regards, Peter
 
Last edited:
What a nice picture, Lawrence. I think Dean @Dean62 likes it also very much. Like his model of it.
Regards, Peter
Hello Peter, Yes I like it very much. Yes Dean did a great job of this Historic Light House in Peggie's Cove. my Admiral also has an 7 1/2" replica of this light house , it sits over my desk and dose have a lot of deal. This was given to her many years ago by her sister.
Regards Lawrence
 
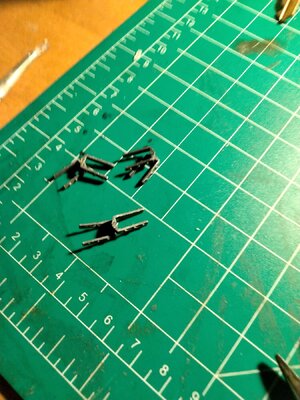
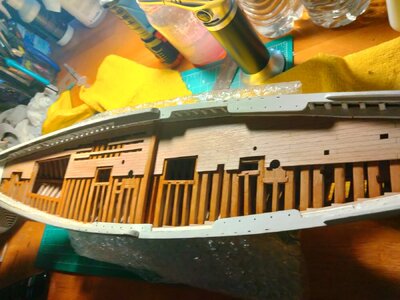
Hello Ship Mates, After our little setback and our return from the rebuild ship yard the little fellows and I have have completed the ships Clamps # 102 & 103 so that we can move on to the load bearing beams # 135. Another set of challenges for us.

Regards LawrenceView attachment 297201View attachment 297202
Are the parts in these photos stained or is it just the lights you used to take the pictures?

This is the color I'm trying to match.
I have already spent over $50 on stains but can't match it
Would you mind sharing the finish you used.
Thank you
Ted
 
Are the parts in these photos stained or is it just the lights you used to take the pictures?

This is the color I'm trying to match.
I have already spent over $50 on stains but can't match it
Would you mind sharing the finish you used.
Thank you
Ted
Hello Ted, I did not apply any stains paint or oils at this stage for fear that my glue would not hold. Yes is just the light giving that nice glow on the pear wood. Later on when all of the Bluenose building was done I applied a couple of coats of Tung Oil giving me a nice soft glow, but be careful as glue will not stick very well to any applied surface, hope this helps, Enjoy Your Build.
Regards Lawrence
How do you finish the interior parts once covered.
Ted
 
How do you finish the interior parts once covered.
Ted
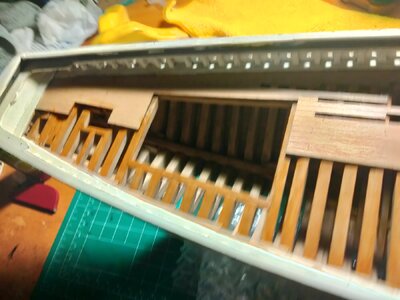
Hello Ted, On my Bluenose I had 12 cutout that left me a lot of room to give the wood a couple of coats of Tung Oil. I can see your problem, I would suggest that you finish our wood up just below your glue points and later on use a small paint brush to touch up the unfinished wood, a bit of a pain but this will insure that your glue will hold.
Regards Lawrence
That seems to be a good plan.
Best regards,
Ted
 
I'm working on the rudder.
Does the forward part of the rudder round off where it butts up against the keel. I can't te from the photos or instructions.
Best regards,
Ted
 
Does the forward part of the rudder round off where it butts up against the keel.
Hi Ted, this rudder is a static nonfunctioning rudder that does not butt up against the keel. It is separated from the keel/sternpost by the width that is created from the hinge assemblies. So, I would say no, you do not need to do any rounding on the forward part.
 
Hi Ted, this rudder is a static nonfunctioning rudder that does not butt up against the keel. It is separated from the keel/sternpost by the width that is created from the hinge assemblies. So, I would say no, you do not need to do any rounding on the forward part.
Thank you,
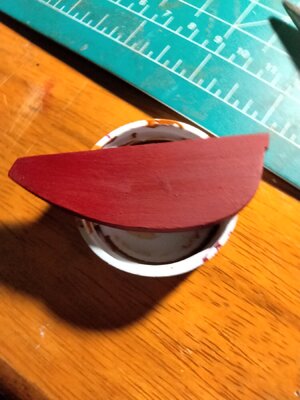
Based on that I have started painting the rudder and have assembled the hinges.IMG20240814074649.jpg

IMG20240814074645.jpg
 
Hello Ship Mates, The little fellows and I got a bit of a surprise when we went looking for the lower mast hoops, thought we had them but they were no where to be found . So we got out a piece of 2mm pear wood along with our tiny plane and made a bunch of shavings. We then got out a 25/64, 10mm drill bit and then wound these shavings around the drill bit an glued them up.
Sanded the ends and applied a little Tung Oil.
We also completed the fore mast along with all of it's fittings, there are quite a few of them.
Regards Lawrence

View attachment 394753

View attachment 394754

View attachment 394755

View attachment 394756
What size drill bit did you use for the topmasts?
Best regards
Ted
 
Hello Ted, Just take your time and these hoops will also tern out ok and do have fun making thim.
Regards Lawrence
I can't find the mast hoops in the Instruction book. How many do I make for each top mast?
I'm making extras and selecting those that come out the best. I had 12 extras on the lowers.
This has turned out to be one of the more enjoyable parts of my build.
Happy modeling
Ted
 
Back
Top