Good morning Dean. Quality work as always. As for the hair I thought it suited the “rocker” with all those guitars and music passionLast night I put the trim boards on the back gallery wall…
View attachment 479915
Then I painted it gold…
you may notice I also painted the upper and lower edges of the lower trim black in preparation to paint the face gold.
View attachment 479916
Looks like I need to do some final sanding on one of the upper boards.
Anyway…this is how she sits now…
View attachment 479917
I realized that I can go ahead and sand the corner piece flush with trim boards, as a flat will average across that area for the figure in the future. And the scroll will be under the feet of the figure, not the column the figure is attached to.
So I will paint the lower trim gold, and probably start on the carvings for the lower areas of the galleries on this starboard side.
Some people switch from side to side and do the same amount of work to each side concurrently. I do not work that way. I like to get enough done on one side to find any potential pitfalls during the process of getting to the final details of the woodworking. That way I learn from the first side and don’t repeat any mistakes.
And finally, I have decided to go with red windows on gold gallery walls. I think it is a visually pleasing combination and fits the overall color scheme. However I am going to experiment on ways to get the window boards thinner.
-

Win a Free Custom Engraved Brass Coin!!!
As a way to introduce our brass coins to the community, we will raffle off a free coin during the month of August. Follow link ABOVE for instructions for entering.
-

PRE-ORDER SHIPS IN SCALE TODAY!
The beloved Ships in Scale Magazine is back and charting a new course for 2026!
Discover new skills, new techniques, and new inspirations in every issue.
NOTE THAT OUR FIRST ISSUE WILL BE JAN/FEB 2026
You are using an out of date browser. It may not display this or other websites correctly.
You should upgrade or use an alternative browser.
You should upgrade or use an alternative browser.
NORSKE LOVE - Billing Boats 1:75 scale
- Thread starter Dean62
- Start date
- Watchers 74
-
- Tags
- billing boats norske lowe
Rocker, artist, puzzle maker, engineer - a true Renaissance Man  .
.
... and a Pink Floyd fan, for that matter!
He’s just jealous because he’s going bald!Only Paul

The lower carving is done…I am happy with certain aspects and unhappy with others. I guess I will take the good with the bad. 
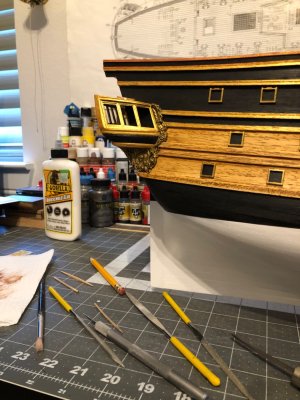
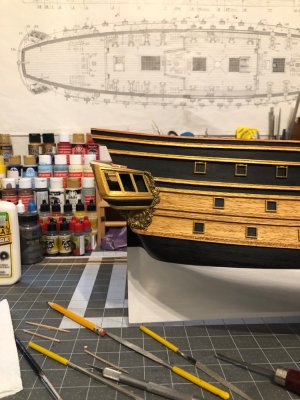
And at an angle… there is a little overhang because I have to join it with the carving on the transom…
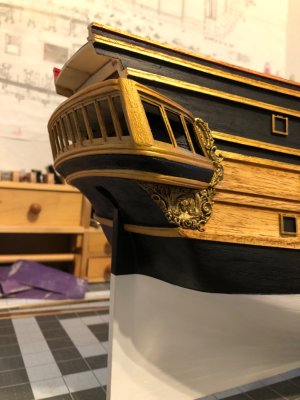
This is the carving that will join it at the edge…

This will be challenging as I have to make a template, carve it and then soak and bend it without ruining my hard work! Also you can see the figure that sits on the corner piece of the galleries. That’s why the corner piece has a flat beveled on it.


And at an angle… there is a little overhang because I have to join it with the carving on the transom…

This is the carving that will join it at the edge…

This will be challenging as I have to make a template, carve it and then soak and bend it without ruining my hard work! Also you can see the figure that sits on the corner piece of the galleries. That’s why the corner piece has a flat beveled on it.
After looking at the carvings, I thought they would look better if they flowed together more. There was more separation than I cared for.
So I was going for a more organic outline.
I ended up adding some leaf like pieces (triangular) around the perimeter of the upper piece where it meets the lower piece, to tie them together.
For reference, this is what I had previously…

And this is after modifying it…
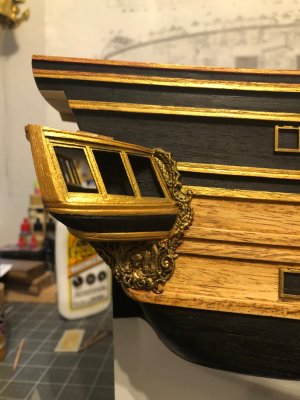
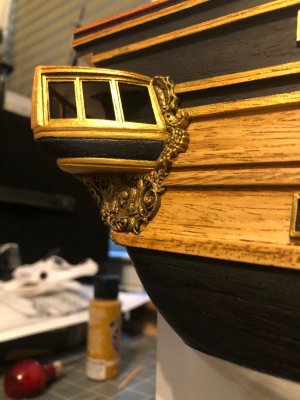

I think this is an improvement. I have to repeat this on the other side eventually.
So I was going for a more organic outline.
I ended up adding some leaf like pieces (triangular) around the perimeter of the upper piece where it meets the lower piece, to tie them together.
For reference, this is what I had previously…

And this is after modifying it…


I think this is an improvement. I have to repeat this on the other side eventually.
On another note, painting them allows me to scab on additional pieces easier. But after painting a base coat and dry brushing two coats of different shades, you start to lose some of the detail. It’s not too bad, almost looks like castings…lol But I like the gold. 
In the future, I would like to build a large scale admiralty ship and do all natural wood color carvings!
In the future, I would like to build a large scale admiralty ship and do all natural wood color carvings!
Thank you!Dear Dean
Very impressive and beautiful work , I like very much the way you have created the back gallery

The carvings are looking very nice do now fit very well on all sides and on the hull, Dean. You are informing your skills day by day.After looking at the carvings, I thought they would look better if they flowed together more. There was more separation than I cared for.
So I was going for a more organic outline.
I ended up adding some leaf like pieces (triangular) around the perimeter of the upper piece where it meets the lower piece, to tie them together.
For reference, this is what I had previously…
View attachment 480153
And this is after modifying it…
View attachment 480154
View attachment 480155
View attachment 480156
I think this is an improvement. I have to repeat this on the other side eventually.
Regards, Peter
Thank you Peter!The carvings are looking very nice do now fit very well on all sides and on the hull, Dean. You are informing your skills day by day.
Regards, Peter
As you may very well know, carving such small scale pieces and painting them looks good at normal viewing distances, but macro pics make me cringe!
 .
.Thank goodness I have the rotary tool with tiny dental tools to use, I am improving my skills at drawing and carving with them. It’s like painting, a steady hand and patience is required. I still see areas I would like to improve, but fear I will never finish if I scrutinize my work too much.
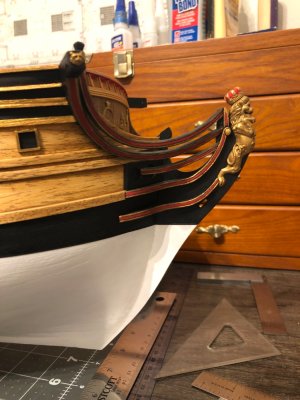
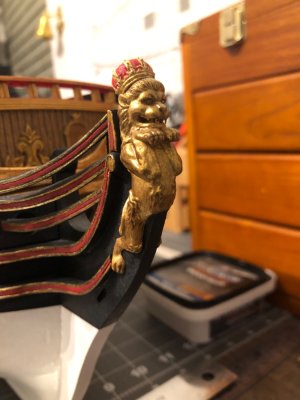
Here are some current progress pics. There is still a lot to do! I have to get back to the beaks head rails on the bow, and put in a floor and vertical supports there.
And of course the galleries are going to be the most work to finish!
Then it’s cannons and deck furnishings with more ladders, railings, cannon doors, etc.
It will be a long time before I even start the masts and rigging.
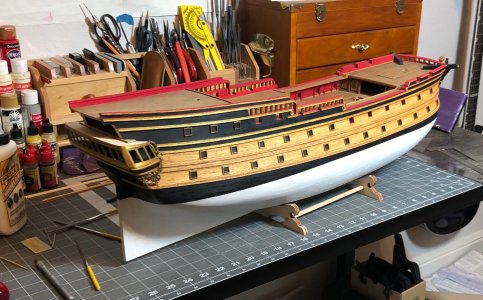
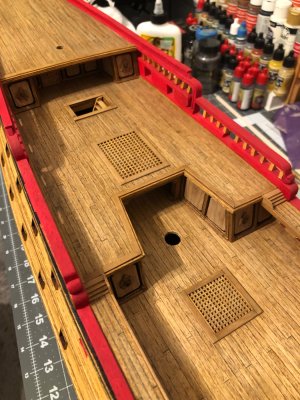

And of course the galleries are going to be the most work to finish!
Then it’s cannons and deck furnishings with more ladders, railings, cannon doors, etc.
It will be a long time before I even start the masts and rigging.


On to the carving on the starboard side of the transom.
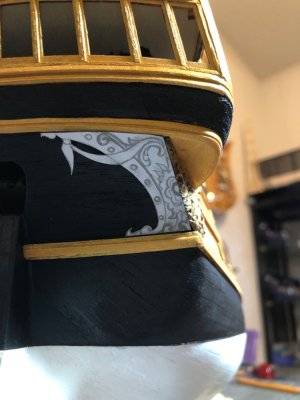
First, let’s look at the kit offering, not sure if it’s the wrong scale or what, but I feel bad for anyone attempting to use this, or almost any of what the kit provides! As we know, making the best of this kit means you better be good at scratch building and problem solving!
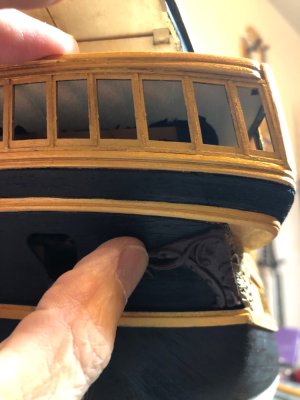
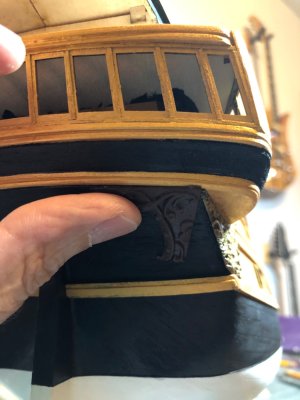
As you can see, it can’t be lined up with the top edge or the side edge (angle is wrong direction), and it’s too short. A complete failure at being something usable!
So I started by making a paper template…
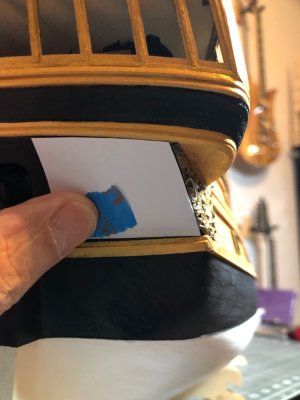
Once I have the top, side and bottom framed, it was time to sketch the carving on the template.
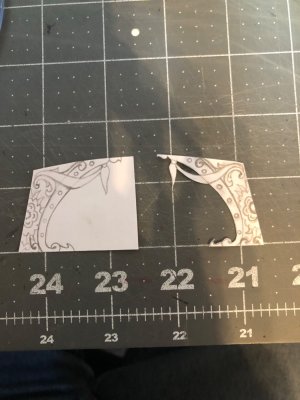
And I made the port side as well and verified it has the appropriate borders to fit the ship.
Then I cut out the starboard side in preparation to make a carving.
Next, this was glued to the piece of wood I am going to carve. After which I carefully cutout and filed to the edges.
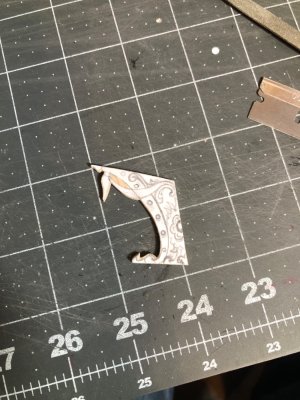
Now to start carving…
Note - the large flower in the center has to line up with the flower on the carving on the side of the ship. This will be a continuation that wraps around the corner. I put the paper template on the ship to locate that.
First, let’s look at the kit offering, not sure if it’s the wrong scale or what, but I feel bad for anyone attempting to use this, or almost any of what the kit provides! As we know, making the best of this kit means you better be good at scratch building and problem solving!


As you can see, it can’t be lined up with the top edge or the side edge (angle is wrong direction), and it’s too short. A complete failure at being something usable!
So I started by making a paper template…

Once I have the top, side and bottom framed, it was time to sketch the carving on the template.

And I made the port side as well and verified it has the appropriate borders to fit the ship.
Then I cut out the starboard side in preparation to make a carving.
Next, this was glued to the piece of wood I am going to carve. After which I carefully cutout and filed to the edges.

Now to start carving…
Note - the large flower in the center has to line up with the flower on the carving on the side of the ship. This will be a continuation that wraps around the corner. I put the paper template on the ship to locate that.
Ok I think I can live with this one. I used a little artist license because the reference drawings are so crude.
The sketched pattern…
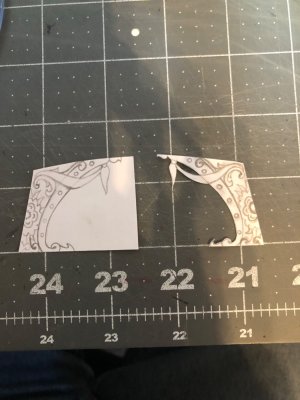
And the carving…
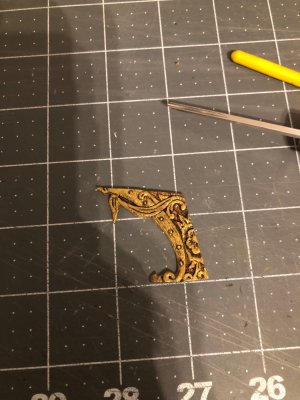
Next I have to thin the piece of wood some in preparation for bending. I’m a little nervous about bending it! I will brush the back with water and let soak for about 15 minutes and see where that gets me. Also, at the top I need to taper it to a point gradually to sit flush. That makes me nervous too because I can break it if I’m not very careful. So if it survives sanding and bending, I can then blend it into the side piece at the corner where they meet. Nothing like a challenge!
The sketched pattern…

And the carving…

Next I have to thin the piece of wood some in preparation for bending. I’m a little nervous about bending it! I will brush the back with water and let soak for about 15 minutes and see where that gets me. Also, at the top I need to taper it to a point gradually to sit flush. That makes me nervous too because I can break it if I’m not very careful. So if it survives sanding and bending, I can then blend it into the side piece at the corner where they meet. Nothing like a challenge!

I survived…big sigh of relief! This has been a full weeks worth of work, long hours and late nights.
But I wanted to get the carvings on this side done, from the lower galleries around to the transom.
I have been waiting a long time to do this.
I tapered the top edge of the transom carving to be thinner, as there is no board over it.
Then I brushed water on the backside and waited 15 minutes. Then I put it on the ship and bent it, glued on and then blended with the lower side piece.
I’m happy with how it came out. The flowers blend into the back very well. Now to put on the gallery wall on the port side and do all of this again!
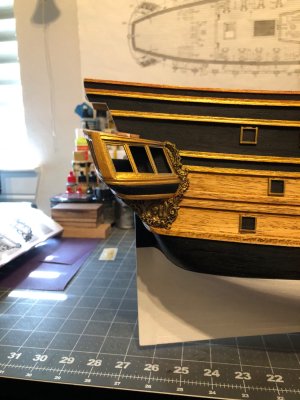
Side view above…
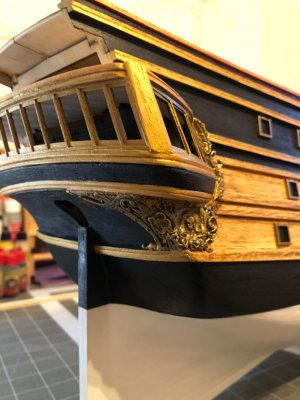
3/4 view above…
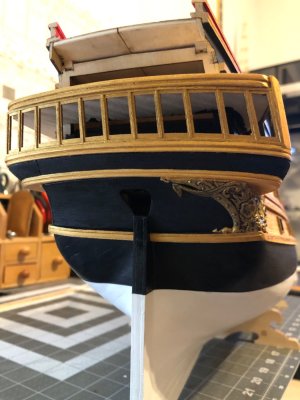
Rear view above…
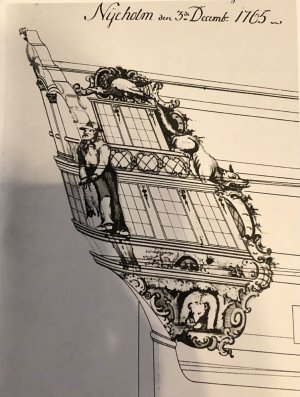
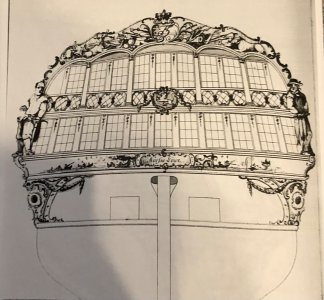
And for reference again… the go by drawings
Happy modeling!
But I wanted to get the carvings on this side done, from the lower galleries around to the transom.
I have been waiting a long time to do this.
I tapered the top edge of the transom carving to be thinner, as there is no board over it.
Then I brushed water on the backside and waited 15 minutes. Then I put it on the ship and bent it, glued on and then blended with the lower side piece.
I’m happy with how it came out. The flowers blend into the back very well. Now to put on the gallery wall on the port side and do all of this again!

Side view above…

3/4 view above…

Rear view above…
And for reference again… the go by drawings


Happy modeling!
That is some very nice carving, Dean. You don't see the transition between the two parts. And the ornament parts flow nicely into each other.I survived…big sigh of relief! This has been a full weeks worth of work, long hours and late nights.
But I wanted to get the carvings on this side done, from the lower galleries around to the transom.
I have been waiting a long time to do this.
I tapered the top edge of the transom carving to be thinner, as there is no board over it.
Then I brushed water on the backside and waited 15 minutes. Then I put it on the ship and bent it, glued on and then blended with the lower side piece.
I’m happy with how it came out. The flowers blend into the back very well. Now to put on the gallery wall on the port side and do all of this again!
View attachment 480508
Side view above…
View attachment 480509
3/4 view above…
View attachment 480510
Rear view above…
And for reference again… the go by drawings
View attachment 480511
View attachment 480512
Happy modeling!
Regards, Peter.
Brilliant! A very nice outcome my friend!
Thank you Peter! It is a very busy carving, a lot of different elements that tie together, and making it all flow around the corner without an obvious interruption was the real challenge.That is some very nice carving, Dean. You don't see the transition between the two parts. And the ornament parts flow nicely into each other.
Regards, Peter.
Last edited:
Thanks Paul! I was a little nervous prior to getting it on the ship. Buts all is well that ends well.Brilliant! A very nice outcome my friend!


