-

Win a Free Custom Engraved Brass Coin!!!
As a way to introduce our brass coins to the community, we will raffle off a free coin during the month of August. Follow link ABOVE for instructions for entering.
-

PRE-ORDER SHIPS IN SCALE TODAY!
The beloved Ships in Scale Magazine is back and charting a new course for 2026!
Discover new skills, new techniques, and new inspirations in every issue.
NOTE THAT OUR FIRST ISSUE WILL BE JAN/FEB 2026
You are using an out of date browser. It may not display this or other websites correctly.
You should upgrade or use an alternative browser.
You should upgrade or use an alternative browser.
NORSKE LOVE - Billing Boats 1:75 scale
- Thread starter Dean62
- Start date
- Watchers 74
-
- Tags
- billing boats norske lowe
Hi Dean. Nice to see the steps how you made the coat of arms. With the constant quality!
And now realizing the new crown on the Lion. The example looks challenging. I wonder what creation you show us.
Regards, Peter
And now realizing the new crown on the Lion. The example looks challenging. I wonder what creation you show us.
Regards, Peter
Thanks Peter. I’m looking forward to the crown, and the hatchet, I have to add to the Lion. A nice diversion from fairing the hull and planking!Hi Dean. Nice to see the steps how you made the coat of arms. With the constant quality!
And now realizing the new crown on the Lion. The example looks challenging. I wonder what creation you show us.
Regards, Peter
Thank you Heinrich! You never know…I am enjoying carving…lolDean you are just moving onto another planet. But ... I am so glad to have a friend who is so good at carving and painting ....nudge ... nudge... wink ... wink ...
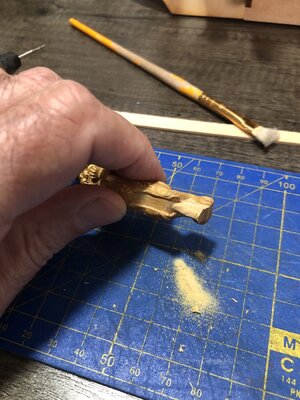
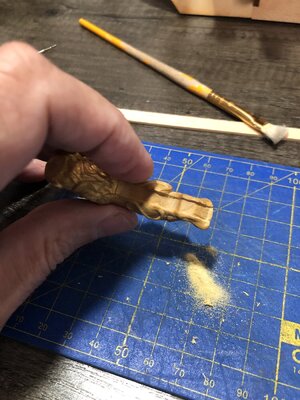
I removed the material for the slot…a lot to remove. For now I will stop, as the final adjustments for depth and width will come after the bowsprit is in place and the crown is on the Lion.
Plus there are additional pieces that go on each side of the keel, prior to planking. They are used in place of a rabbet, to terminate the hull planks.
What I have for now…
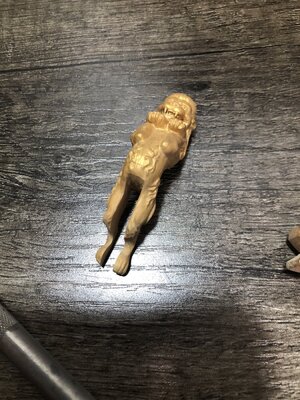
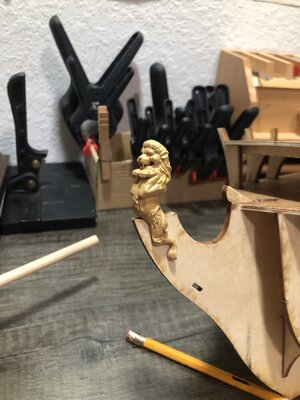
Plus there are additional pieces that go on each side of the keel, prior to planking. They are used in place of a rabbet, to terminate the hull planks.
What I have for now…


That's a Lion on a King's Throne. That will become a eyecatcher on your NL!I removed the material for the slot…a lot to remove. For now I will stop, as the final adjustments for depth and width will come after the bowsprit is in place and the crown is on the Lion.
Plus there are additional pieces that go on each side of the keel, prior to planking. They are used in place of a rabbet, to terminate the hull planks.
What I have for now…
View attachment 270568View attachment 270569View attachment 270570View attachment 270571
Thank you Peter!That's a Lion on a King's Throne. That will become a eyecatcher on your NL!
In my opinion, the figurehead is one of the most important pieces on a ship. Which why I am putting so much effort into it! That and the rails that go behind it.
After that, the galley can make or break a ship! I have a lot of embellishments in mind for the stern as well!
So many little things add up to make the big picture…
Well that’s what I call craftsmanship , a masterpiece coming along, my compliments Dean !I removed the material for the slot…a lot to remove. For now I will stop, as the final adjustments for depth and width will come after the bowsprit is in place and the crown is on the Lion.
Plus there are additional pieces that go on each side of the keel, prior to planking. They are used in place of a rabbet, to terminate the hull planks.
What I have for now…
View attachment 270568View attachment 270569View attachment 270570View attachment 270571
Thank you Robert! So much work ahead! I often don’t know what to work on next…lol.Well that’s what I call craftsmanship , a masterpiece coming along, my compliments Dean !
Excellent!Preparing for the crown.
It was time to remove the crown from the top of the Lion. Then blend the hair to replace the carved out area around it.
View attachment 270366
First I filed and sanded the crown down, close to the top of the head. Then I marked the diameter of the new crown ( I have to carve) at the base. Then started carving the extra material off.
View attachment 270367View attachment 270368
Then I blended the hair into the carved surfaces, to continue up to where the new crown will sit.
View attachment 270369View attachment 270370View attachment 270371
Then I painted the changed areas gold.
Thank you!Excellent!
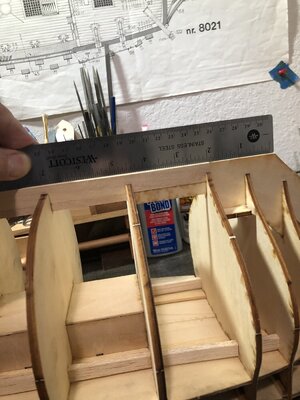
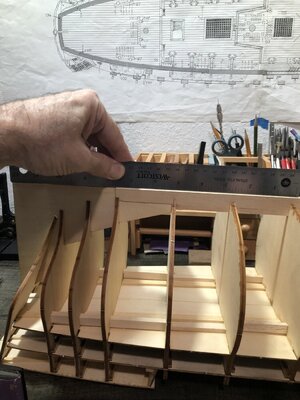
I’ve spent the last couple of days fairing the hull. I’m not even done with one side of the ship! I added some filler wood at the bow. I’ve been carving, filing, sanding, filing, and sanding!!! You get the idea! Still not done with the filler material on the bow. I’m starting to think the provided frame is too short…would not surprise me! If so, I have to add some wood to it. I will know once I sand enough to get the final shape.
Pic…
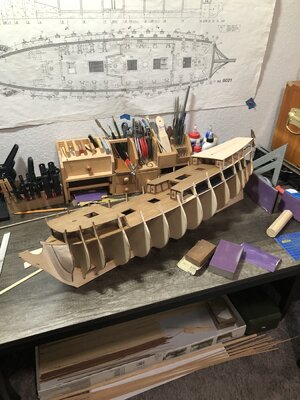
Pic…

Now, that is a fair amount of work to create sawdust by hand, steady and true. RichI’ve spent the last couple of days fairing the hull. I’m not even done with one side of the ship! I added some filler wood at the bow. I’ve been carving, filing, sanding, filing, and sanding!!! You get the idea! Still not done with the filler material on the bow. I’m starting to think the provided frame is too short…would not surprise me! If so, I have to add some wood to it. I will know once I sand enough to get the final shape.
Pic…
View attachment 271142
Greetings from Brooklyn, Mia Amigo.I’ve spent the last couple of days fairing the hull. I’m not even done with one side of the ship! I added some filler wood at the bow. I’ve been carving, filing, sanding, filing, and sanding!!! You get the idea! Still not done with the filler material on the bow. I’m starting to think the provided frame is too short…would not surprise me! If so, I have to add some wood to it. I will know once I sand enough to get the final shape.
If I may, one of my recommendations while fairing the hull, is to use a long sanding block. Depending on the given bulkhead layout, it should cover at least 3 neighboring bulkheads. This will ensure an even fairing and avoid gaps. Also, use flat\even wooden block (1 ~ 1.5 inches wide) made out of plywood for example. Move this block only in one direction (not back & forth). Do NOT use any soft sanding blocks.
Ahh and I thought your shipyard was idle. That is a cool workstation for your tools Dean. Did you make it?I’ve spent the last couple of days fairing the hull. I’m not even done with one side of the ship! I added some filler wood at the bow. I’ve been carving, filing, sanding, filing, and sanding!!! You get the idea! Still not done with the filler material on the bow. I’m starting to think the provided frame is too short…would not surprise me! If so, I have to add some wood to it. I will know once I sand enough to get the final shape.
Pic…
View attachment 271142
Thanks, I bought the workstation from MicroMark. I drilled extra holes in the storage area to the right for my files and bits.Ahh and I thought your shipyard was idle. That is a cool workstation for your tools Dean. Did you make it?
Thanks Jimsky. Those are good tips!Greetings from Brooklyn, Mia Amigo.
If I may, one of my recommendations while fairing the hull, is to use a long sanding block. Depending on the given bulkhead layout, it should cover at least 3 neighboring bulkheads. This will ensure an even fairing and avoid gaps. Also, use flat\even wooden block (1 ~ 1.5 inches wide) made out of plywood for example. Move this block only in one direction (not back & forth). Do NOT use any soft sanding blocks.
I mainly use my long metal file, seen on the upper left. And my large sanding block, on the upper right. For the bottom of the frames and at the upper frames where there are smaller inside curves, I use a large wooden dowel with sandpaper wrapped around it, seen on the right. I never use soft sanding blocks except maybe on the bow filler, and only to do final sanding, since it’s a spherical or domed surface. But even that is very limited.
Last edited:
- Joined
- Sep 3, 2021
- Messages
- 5,196
- Points
- 738

Nerve wrecking job. This is where the difference is made between failure and succes.I’ve spent the last couple of days fairing the hull. I’m not even done with one side of the ship! I added some filler wood at the bow. I’ve been carving, filing, sanding, filing, and sanding!!! You get the idea! Still not done with the filler material on the bow. I’m starting to think the provided frame is too short…would not surprise me! If so, I have to add some wood to it. I will know once I sand enough to get the final shape.
Pic…
View attachment 271142
Good luck Dean!

PS No doubt in my mind whatsoever that this will turn out to be more than successful ...

