Thank you Peter! Problem is I have to follow it on the other side.Lovely details on the vertical supports. I think you are the first to go this extra mile on this. Now see who will follow your example...

-

Win a Free Custom Engraved Brass Coin!!!
As a way to introduce our brass coins to the community, we will raffle off a free coin during the month of August. Follow link ABOVE for instructions for entering.
-

PRE-ORDER SHIPS IN SCALE TODAY!
The beloved Ships in Scale Magazine is back and charting a new course for 2026!
Discover new skills, new techniques, and new inspirations in every issue.
NOTE THAT OUR FIRST ISSUE WILL BE JAN/FEB 2026
You are using an out of date browser. It may not display this or other websites correctly.
You should upgrade or use an alternative browser.
You should upgrade or use an alternative browser.
NORSKE LOVE - Billing Boats 1:75 scale
- Thread starter Dean62
- Start date
- Watchers 74
-
- Tags
- billing boats norske lowe
great work - your small "covers" are looking very good
Thank you Uwek!great work - your small "covers" are looking very good
- Joined
- Sep 3, 2021
- Messages
- 5,191
- Points
- 738

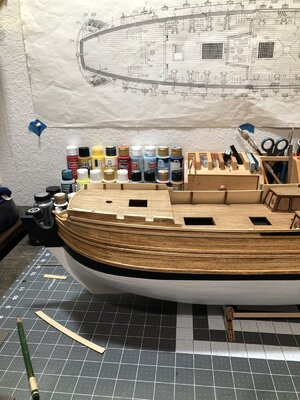
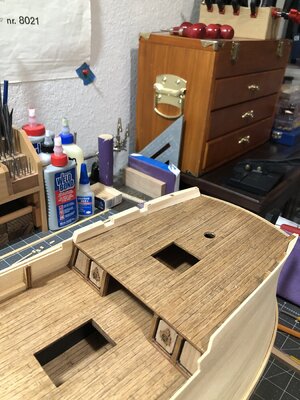
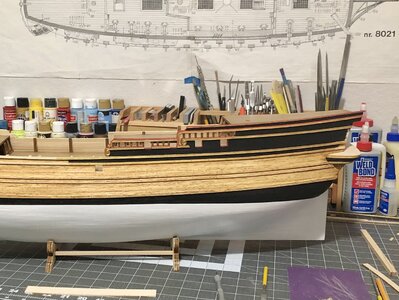
It's becoming a burly Lion...Quick update, I started the bulwarks on the bow deck and cut out the cannon openings. They have to be capped with railings and the end will be cut for the cat davits.
View attachment 361227View attachment 361228View attachment 361229
I decided to finish the cannon ports for all of the cannons on open decks. Then once I install the cat davit along with all railings and the final scroll, this side will be done and I will repeat everything on the other side.
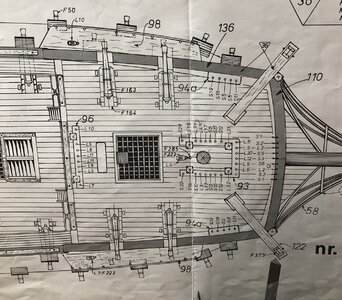
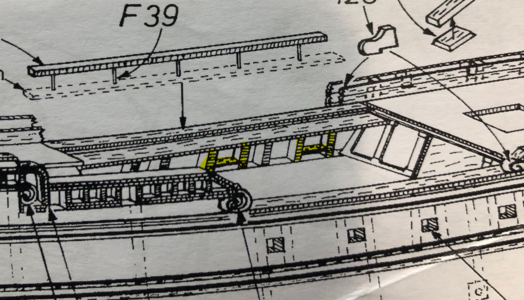
So at mid ship, here are the instructions... which show you to cut the cannon port into the planking and put a horizontal board underneath to frame it....
And here is a reference pic from the kit pictures...
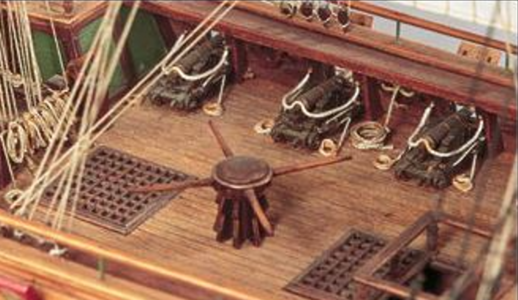
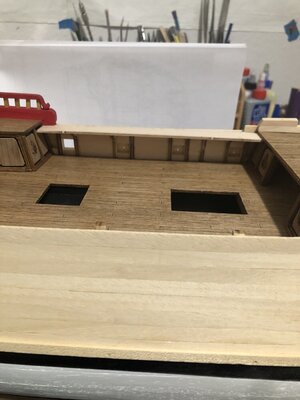
Obviously that isn't correct, so I decided to thicken the walls and plank them like the rest of the ship...
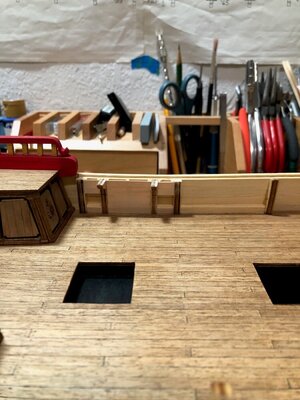
and I had to create beams to add the planks...
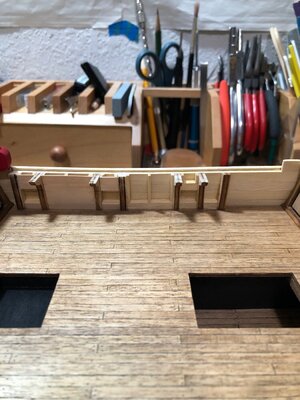
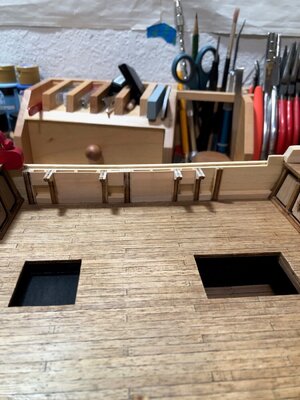
then I checked with the walkway that will go above it on the knees...
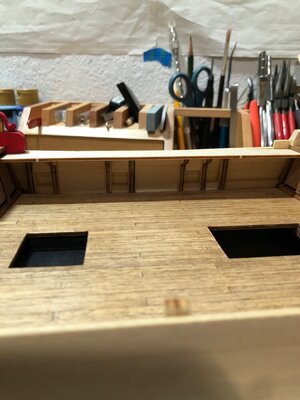
I have to finish framing the ports and this bulwark and then I can cut and file the cannon openings. The most important part is making sure the ports are equally spaced. Then it will be painted red and I can add the waterway boards, I will make the holes for the eyes to attach the cannon rigging for later prior to adding the walkway above. The walkway has to be planked like the deck and stained, then the side boards added. Then I can do the scroll and add the final rails and boards, along with the cat davit, at the bow. Then this side will be done! A lot of work to get this far!
Some people say my work area is always clean...not when I am working...
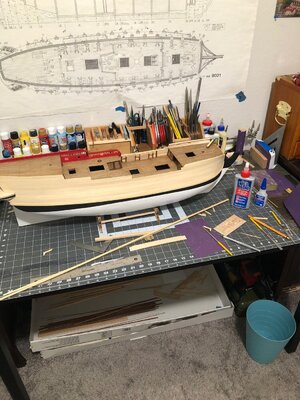
Happy modeling!
So at mid ship, here are the instructions... which show you to cut the cannon port into the planking and put a horizontal board underneath to frame it....

And here is a reference pic from the kit pictures...

Obviously that isn't correct, so I decided to thicken the walls and plank them like the rest of the ship...

and I had to create beams to add the planks...


then I checked with the walkway that will go above it on the knees...

I have to finish framing the ports and this bulwark and then I can cut and file the cannon openings. The most important part is making sure the ports are equally spaced.
Some people say my work area is always clean...not when I am working...

Happy modeling!
Looks very good and accurate! Keep yem (images) coming!
Thank you Jimsky! I have one more cannon port to frame and then finish planking. Then I will cut out the ports.Looks very good and accurate! Keep yem (images) coming!
Good morning Dean. So good. I love it when you change the kit to get things looking like they should be. Ha….that work bench is so tidy during construction. I often wonder if a persons shipyard reflects the quality of their shipI decided to finish the cannon ports for all of the cannons on open decks. Then once I install the cat davit along with all railings and the final scroll, this side will be done and I will repeat everything on the other side.
So at mid ship, here are the instructions... which show you to cut the cannon port into the planking and put a horizontal board underneath to frame it....
View attachment 361579
And here is a reference pic from the kit pictures...
View attachment 361580
Obviously that isn't correct, so I decided to thicken the walls and plank them like the rest of the ship...
View attachment 361581
and I had to create beams to add the planks...
View attachment 361582View attachment 361583
then I checked with the walkway that will go above it on the knees...
View attachment 361584
I have to finish framing the ports and this bulwark and then I can cut and file the cannon openings. The most important part is making sure the ports are equally spaced.Then it will be painted red and I can add the waterway boards, I will make the holes for the eyes to attach the cannon rigging for later prior to adding the walkway above. The walkway has to be planked like the deck and stained, then the side boards added. Then I can do the scroll and add the final rails and boards, along with the cat davit, at the bow. Then this side will be done! A lot of work to get this far!
Some people say my work area is always clean...not when I am working...
View attachment 361585
Happy modeling!
 . Cheers Grant
Thank you Johan! I measured before putting on the wales to ensure the cannon port was going to be at the bottom of it! Guess it worked!Wow, will you look at that! Awesome!
Thanks Grant! I dreaded doing that, but just couldn’t bring myself to make a cannon port that is a single plank wall!Good morning Dean. So good. I love it when you change the kit to get things looking like they should be. Ha….that work bench is so tidy during construction. I often wonder if a persons shipyard reflects the quality of their ship. Time to give mine a clean then
. Cheers Grant
A well-thought-out adjustment, Dean. It looks decent.
Regards, Peter
Regards, Peter
Thank you Pter!Excellent work Dean and I love a tidy workplace. Tee Like Grant said, it's reflecting on your work.
Thank you Peter! It’s still in the ugly stage.A well-thought-out adjustment, Dean. It looks decent.
Regards, Peter
Nothing ugly at all! I find the walkway on the bulwark very interesting. And how you buildup and strengthened that bulwark with also the ‘inner’ knees.Thank you Peter! It’s still in the ugly stage.
Regards, Peter

