NORSKE LOVE - Billing Boats 1:75 scale

Yes! And I am also for no painting the outside. For lower details it made the accents.
Your Lion can now breathe. And the hair is also better than the 'grandmother's water wave'.
I love those tiny details.
Regards, Peter
Thank you! Glad you can notice the extra detail in the hair. :)
 
Last edited:
This is a massive improvement Dean. Its not just the more ferocious look that makes a difference - there is now also a lot more depth to the carving. I find the dark abyss of the mouth particularly good as that is what most creates the 3D-effect for me. Well done!
 
This is a massive improvement Dean. Its not just the more ferocious look that makes a difference - there is now also a lot more depth to the carving. I find the dark abyss of the mouth particularly good as that is what most creates the 3D-effect for me. Well done!
Thank you Heinrich! It has been fun... and I still have a crown and hatchet to add in the future. But I couldn't resist getting started on it. But now it's back to putting down boards on the deck. ;)
 
I did a little more work on the figurehead. Added lower teeth and fangs in front, added some detail to the hair. Started adding some gold paint to see how it’s going to look.
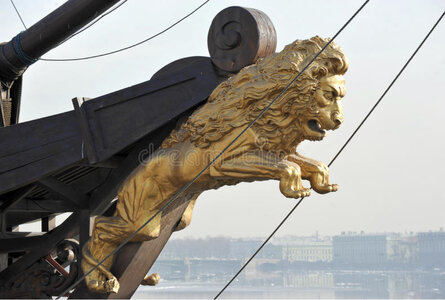
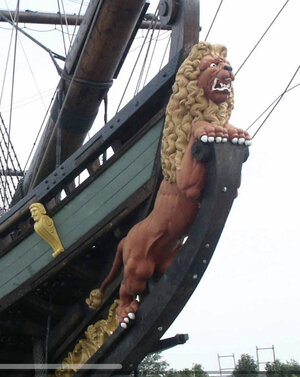
Found some figurehead pictures, one from an unknown ship, but closely resembling your carving, and one from the Batavia in the Netherlands.
Personally, I find the unknown one, and thus in extension your figurehead, more convincing.
Nice job by the way!

Johan

50D27C7A-15FB-4C4A-BB38-287C06DB44B5.jpeg

F8B0BC1D-D433-4B5E-A7CB-2844A76C3FEB.jpeg
 
Found some figurehead pictures, one from an unknown ship, but closely resembling your carving, and one from the Batavia in the Netherlands.
Personally, I find the unknown one, and thus in extension your figurehead, more convincing.
Nice job by the way!

Johan

View attachment 262127

View attachment 262128
Thank you Johan! And thanks for sharing the photos!
I am always looking at references from actual ship photos, and of course real photos of lions! I would prefer the lions mane to be fuller from the front view on my figurehead, but it looks nice from the side and a 3/4 view (iso).
The picture at top has a nice head and mane, however the wrinkles on the legs are not anatomically correct. The lower has a better muscular look to the body, but needs the head from the pic above...lol. So each has it's pros and cons.
On my figurehead, I think the nose is too round, and I am going to flatten it out some. I will probably do a little more work on the claws as well. I tend to over analyze things sometimes, but it's all in the details. In any form of art, the more correct the details are, the more lifelike the subject becomes. So to me carving is like drawing in 3d. But I can't use a pencil, or paint brush. Now I have to learn to create with tools, through material removal. ;)
 
I would like to see the bottom lion all in gold paint. Then we'd be closer to comparing apples to apples. I think the coloration is throwing it off.
 
Last edited:
Thank you Johan! And thanks for sharing the photos!
I am always looking at references from actual ship photos, and of course real photos of lions! I would prefer the lions mane to be fuller from the front view on my figurehead, but it looks nice from the side and a 3/4 view (iso).
The picture at top has a nice head and mane, however the wrinkles on the legs are not anatomically correct. The lower has a better muscular look to the body, but needs the head from the pic above...lol. So each has it's pros and cons.
On my figurehead, I think the nose is too round, and I am going to flatten it out some. I will probably do a little more work on the claws as well. I tend to over analyze things sometimes, but it's all in the details. In any form of art, the more correct the details are, the more lifelike the subject becomes. So to me carving is like drawing in 3d. But I can't use a pencil, or paint brush. Now I have to learn to create with tools, through material removal. ;)
On the 3D definitions, I find it easier to model complex designs, rather than "chipping" away with knifes and chisels. I have more control over the algorithms than I have over a piece of wood...
So I find myself impressed with your carving
 
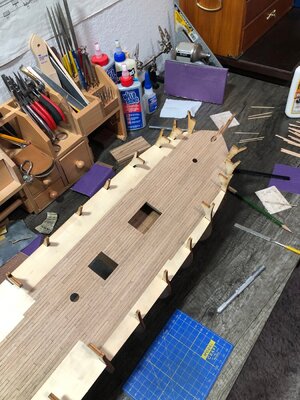
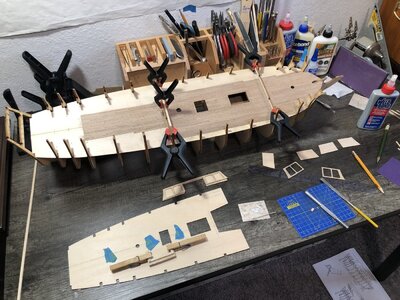
Back to deck planking! I really like the look with the edges blackened with a charcoal pencil. Kind of messy to work with, but I think with stain or clear coat, it’s going to show up very well.
Also, I am almost planking the entire length of the ship, because over some areas are deck grates, stairs, etc. I decided if there is a chance you can see it, then I must plank it. Plus at the bow, there will be an oven. The kit only provides the oven pipe, but I plan to build an oven. ;)

DA270610-5753-4533-BAAC-E5B0096850C0.jpeg5520A1C5-60DD-4D31-B8A2-5AEFC129B603.jpeg
 
Moving along, a board at a time! ;)
norske-14.jpg

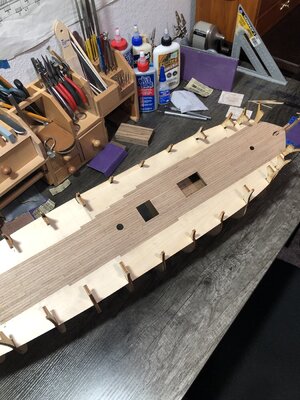
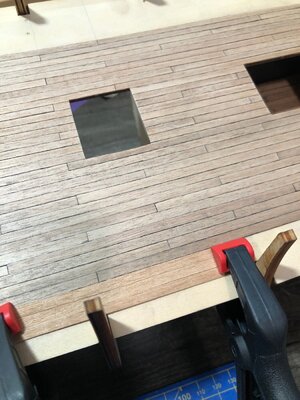
Here is a picture showing the color of the deck boards, a beechwood veneer. They are at the bottom, (3) in place for visual reference, not glued down.
The black charcoal pencil edges, results in the charcoal being transferred to the boards during sanding. This look gives the boards more of a weathered look, which I really like! ;)

norske-13.jpg
 
Morning Dean,

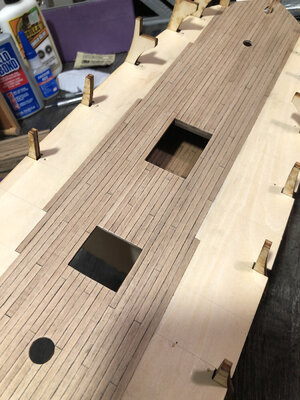
While thoroughly enjoying your progress on the Norske Lowe and the pictures you share, I am curious on how you manage to have the deck protrusions square, or circular, and the edges of the individual deck planks perfectly aligned? You also displayed this perfectionism on your Bluenose build, with the partially cut away deck.
It almost looks like it's an NC-operation...

Johan
 
Sharp blades and sandpaper? Slow and methodical mad shipbuilding skills? Or a combination thereof? :)
Exactly…square cuts, sharp blades, sandpaper the edges, reference lines on the deck…and slow and methodical…lol. ;)
On the deck openings I let the boards go past, then carefully trim with xacto close, and file flush. Flat file on square openings, rat tail file on holes.
 
Last edited:
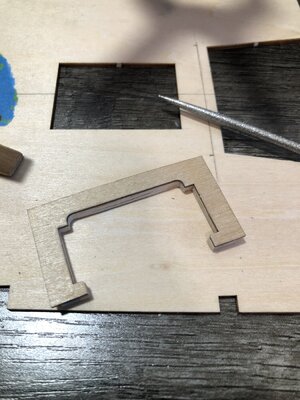
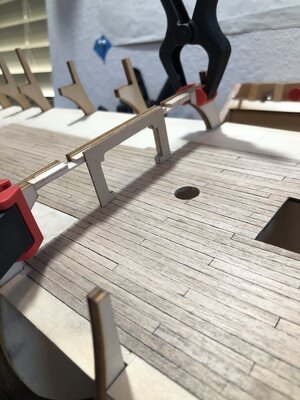
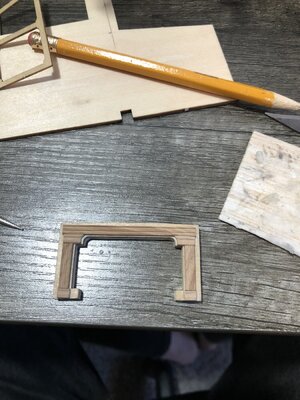
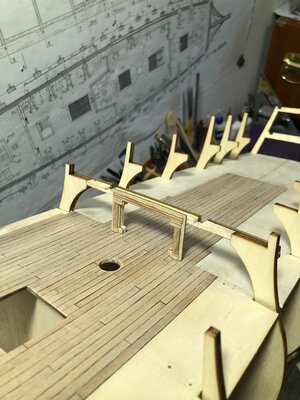
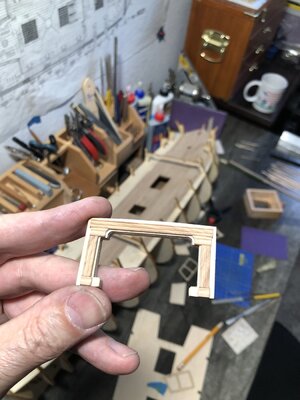
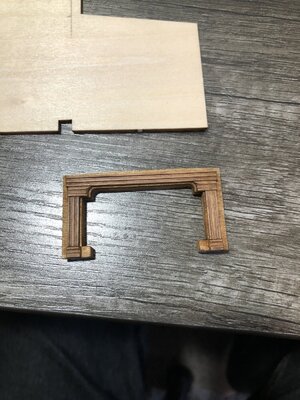
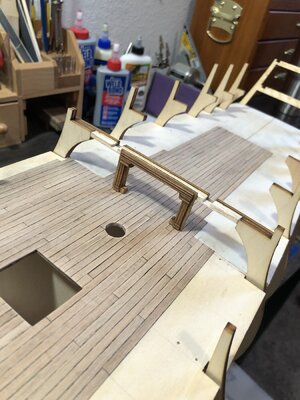
Starting to look at locating the walls…the entry way is provided as a flat sheet. I added some boards around the entry to thicken it, and then added some columns and trim work. Hopefully not too ornate…lol. I have many other walls to add and will put columns on them as well.
I also added the additional piece to locate the wall, as the cross beam is too far back to use.
Problem is I’m not sure what scheme to use? All stain? White? Stain with gold accents? White with gold accents? Decisions! :(
Pics…
6EE53804-4491-4B84-A43C-7565E1E31E96.jpegF056DE52-8A29-4A51-9E2A-CFBDB3F3FAA2.jpeg311B1BDE-7C7E-4C8D-A23A-F8172050BEA5.jpegDCC62389-A88A-4635-9715-8E5F657D7647.jpegEEFE595E-5D00-47D5-9504-0CBDA206C25D.jpegB701EA4A-3143-41F0-A058-90B36A311BB1.jpeg
 
Last edited:
My rule is, when deciding to paint or not, is to stain first. If you don’t like the way it looks, then consider painting. There will be no paint! ;)
368A415C-5554-401C-A6C1-25084E6459C4.jpegCDD37F7F-1F04-4900-88D0-8CEB7A1B13E8.jpeg

The deck will become darker after stain and finishing. But I do want a contrast between the deck and walls. ;)
Now I have to start on the other walls, which are at angles. This will help me determine where to stop the deck boards, as it’s looking like I could run out with three more decks to go. But I can always buy more wood!
So the goal now is to build the walls, and that will allow me to finish planking and add nails. Then the walls will go in permanently so the upper decks can go on top of them.
 
Last edited:
I like the stain a lot. Dean! I am absolute cannot paint, and if use it, will definitely spoil all work (I know this for a fact). To me, it is the use of different wood species and their color.
 
I like the stain a lot. Dean! I am absolute cannot paint, and if use it, will definitely spoil all work (I know this for a fact). To me, it is the use of different wood species and their color.
Thanks Jimsky, I used different wood for the trim, so I thought it may give me the contrast I was looking for. ;)
 
I like EVERYTHING about this build a lot! I am very familiar with the graphite between the deck planks as bearding lines, but have now realized once again that it does add a great weathering effect to the deck when sanded. The Dutch builders like to use the steel wool soaked in vinegar method, but I will have to work up a lot of courage to try that. :) I am so glad that you stained your partitioning decorations and did not paint them. They look the real deal this way!
 
I like EVERYTHING about this build a lot! I am very familiar with the graphite between the deck planks as bearding lines, but have now realized once again that it does add a great weathering effect to the deck when sanded. The Dutch builders like to use the steel wool soaked in vinegar method, but I will have to work up a lot of courage to try that. :) I am so glad that you stained your partitioning decorations and did not paint them. They look the real deal this way!
Thank you Heinrich! The instructions actually tell you to paint the inset panels on the walls green! Yikes! I considered black, but now I’m just going to use stain. I haven’t built those yet. But they will be next. ;)
 
Last edited:
On the Haarlem they are black, but if I were to build the ship again, I would do it in plain walnut with a coat of Danish Oil over it.
 
Back
Top