NORSKE LOVE - Billing Boats 1:75 scale

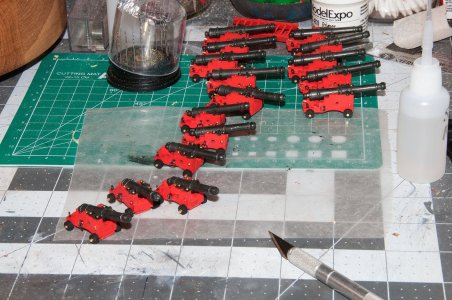
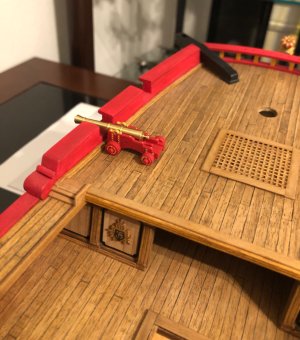
Trial painting on the one I am not using…ROTF
Testing adding a wash to see how it looks and selecting the paints.
IMG_7779.jpegIMG_7780.jpegIMG_7781.jpeg
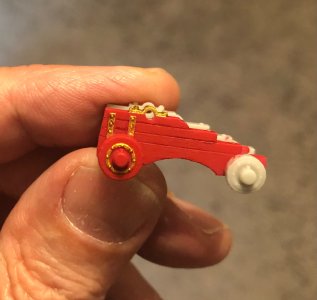
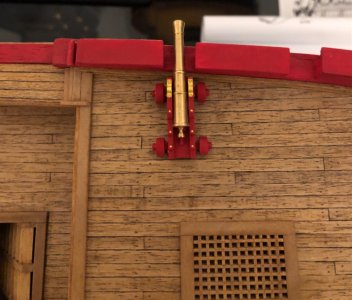
Not sure about the cannon, may have to primer it and paint black. I could always dry brush it some for more realism. I have gun barrel metallic paint that might be just right. Will see. I am tempted to leave them as is. I really hate cannons and carriages, too much work and a lot of tiny rigging and blocks…yikes! But she must have guns captain! Aye!
And the new carriage does not have the facets on the wheels, I reduced the chord height on the STL file for a better resolution file. ;)
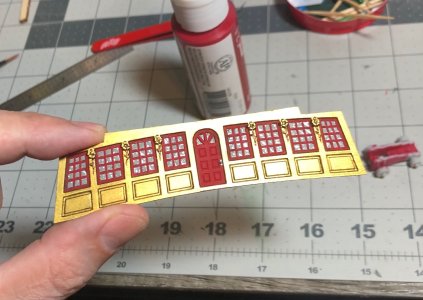
I added the glass to the galley wall. Next I can glue it in place and start on the sides. It is not fully dry, so there are still some cloudy areas.
IMG_7784.jpeg
That’s it for now…
 
Trial painting on the one I am not using…ROTF
Testing adding a wash to see how it looks and selecting the paints.
View attachment 513870View attachment 513871View attachment 513872
Not sure about the cannon, may have to primer it and paint black. I could always dry brush it some for more realism. I have gun barrel metallic paint that might be just right. Will see. I am tempted to leave them as is. I really hate cannons and carriages, too much work and a lot of tiny rigging and blocks…yikes! But she must have guns captain! Aye!
And the new carriage does not have the facets on the wheels, I reduced the chord height on the STL file for a better resolution file. ;)
I added the glass to the galley wall. Next I can glue it in place and start on the sides. It is not fully dry, so there are still some cloudy areas.
View attachment 513873
That’s it for now…
Nice! Just wait until you do a boatload.Nuestra_611.jpg
 
Thanks Grant.
As I mentioned previously, I work in Engineering with 3D CAD (Pro Engineer/Creo and Solidworks) to design products for the oilfield industry. So creating mechanical and structural models is second nature to me, and something I enjoy. Give me a set of calipers or a dimensional drawing and I can make an exact model of anything. And of course I can design my own parts or models from scratch. And I have also done printing in plastic at work for prototype scaled models, etc. So I am familiar with exporting STL files from a solid model file and how to optimize them.
So what is new to me thus far, is resin printing and working with the slicer program used to do so. If had no previous experience with any of these softwares, or creating models in 3D, this would be a daunting task with a large learning curve. But fortunately my line of work has prepared me to use this technology, and I have a good understanding of what’s required and why. So I already feel confident about creating and printing my own parts. The possibilities are endless, so I’m excited about utilizing it. ;)
Good morning Dean. Your CAD experience is so beneficial - it would be cool if you could transfer some of that IP to me.. ROTF . I think splicing on Chitubox or in my case Lychee has a gentle Learning curve compared to the actual CAD work. I have made some very simple designs on Fusion however I have the Bounty figure head coming up which at this stage will turn out more like a clown than the lady of the seas. Cheers Grant
PS: awesome cannons - you have this sorted.
 
Trial painting on the one I am not using…ROTF
Testing adding a wash to see how it looks and selecting the paints.
View attachment 513870View attachment 513871View attachment 513872
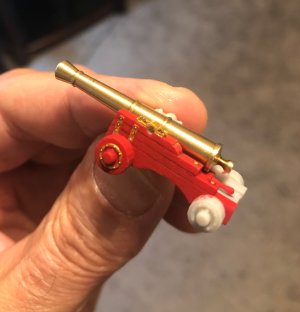
Not sure about the cannon, may have to primer it and paint black. I could always dry brush it some for more realism. I have gun barrel metallic paint that might be just right. Will see. I am tempted to leave them as is. I really hate cannons and carriages, too much work and a lot of tiny rigging and blocks…yikes! But she must have guns captain! Aye!
And the new carriage does not have the facets on the wheels, I reduced the chord height on the STL file for a better resolution file. ;)
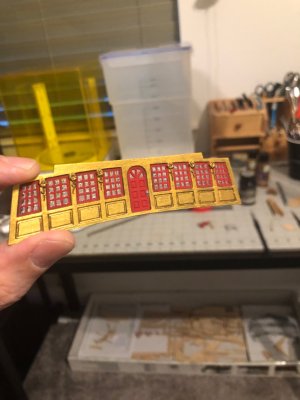
I added the glass to the galley wall. Next I can glue it in place and start on the sides. It is not fully dry, so there are still some cloudy areas.
View attachment 513873
That’s it for now…
Nice looking carriages, Dean. I prefer black iron parts, but that’s IMHO. Copper bolts are right but the other parts are now to ‘conspicuous’. Although it corresponds with the color of the lists on the bulwark.
Regards, Peter
 
Good morning Dean. Your CAD experience is so beneficial - it would be cool if you could transfer some of that IP to me.. ROTF . I think splicing on Chitubox or in my case Lychee has a gentle Learning curve compared to the actual CAD work. I have made some very simple designs on Fusion however I have the Bounty figure head coming up which at this stage will turn out more like a clown than the lady of the seas. Cheers Grant
PS: awesome cannons - you have this sorted.
Thanks Grant.
 
Nice looking carriages, Dean. I prefer black iron parts, but that’s IMHO. Copper bolts are right but the other parts are now to ‘conspicuous’. Although it corresponds with the color of the lists on the bulwark.
Regards, Peter
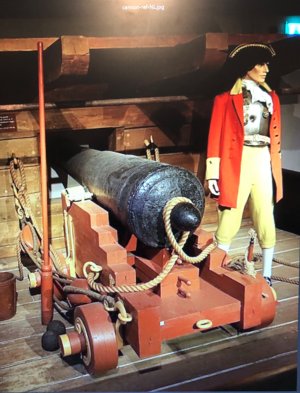
Thanks Peter, if you saw the reference of a cannon I used, they were painted red and yellow, like their uniforms.

IMG_7749.jpeg
I don’t want to paint the hardware yellow, so I figured gold was the next best choice! ;)
 
I'm not buying what you're selling, Dean. ROTF ROTF ROTF
But your artistic sense surely exceeds mine so you do you!
Lol…I’m the captain mate! Aye!
The whole theme on the ship is black, red and gold…so it only makes sense I go with red and gold for the carriages. No yellow! ROTF

Ps - I don’t like black hardware…it’s for peasants…we use gold on our ship! ROTF
 
All joking aside, if I don’t use silver or gold for the hardware, I can’t do a wash for added detail on the bolts. I could dry brush black with some dark grey to bring out the detail, but red and black would not pop like red and gold. So those are my thoughts, and I want to stick with the red and gold theme, with black being used sparingly. So that’s that’s my path moving forward. ;)
 
After the glass dried on the windows…
IMG_7787.jpeg
Next it was glued on the ship, then I added a piece of trim up top…
IMG_7790.jpegIMG_7792.jpeg
The trim was painted gold. Next I have to design the sides that will be curved and at an angle. That should be fun.
Then the balcony floor will be planked in preparation for the upper piece, columns and railings. Then many carvings will follow!
IMG_7793.jpeg
In the end it will be something similar to this…
IMG_7797.jpeg
 
Meanwhile I continue to work on the first cannon carriage to see if it is what I like. I think it fits the theme well.
IMG_7839.jpegIMG_7840.jpeg
So I will finish painting it and get it ready to be rigged. When I’m not working on the upper gallery. I bounce around because there is so much to do!
Once I finish the galleries and and all the carvings. I will add the two rear cannons and rudder. Then the stop chains and the aft will be completed. Then I can focus on the cannons, after which I can start adding all of the ship furnishings, railings and ladders.
Then will be the hull to add the support boards for the dead eyes and then add the cannon doors…70 of them…with Lion heads. Geez, then I have to finish the beaks head and I can start on masts and rigging. As much as I have done, I have that much more to do. But I have to stay focused and stop doing side projects. :(
 
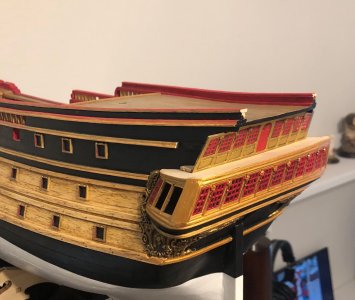
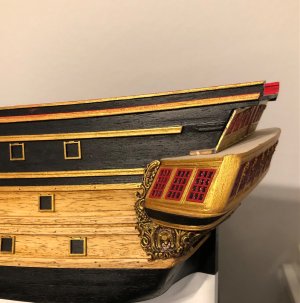
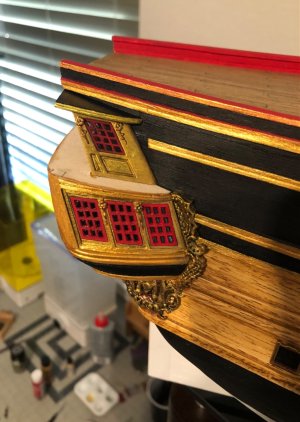
The upper galley starboard side has been completed. I added the wall with window and the roof. I am tempted to add the next carving, which is a wolf, however I fear it will get in the way of me planking the floor of the balcony.
So I think I will do the port side and plank the balcony next.
View attachment 514354View attachment 514355View attachment 514356
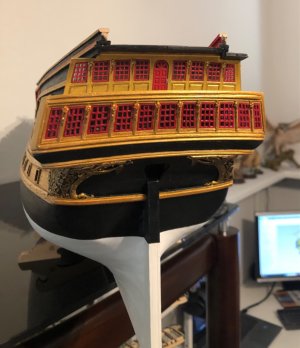
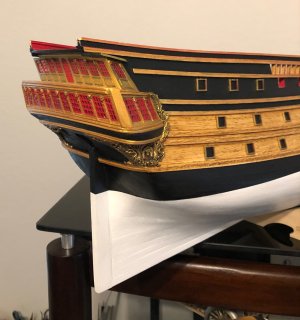
And an overall of current progress…
View attachment 514357
The gallery looks very nice and straight, Dean. A real eye catcher.
Meanwhile I continue to work on the first cannon carriage to see if it is what I like. I think it fits the theme well.
View attachment 514358View attachment 514359
So I will finish painting it and get it ready to be rigged. When I’m not working on the upper gallery. I bounce around because there is so much to do!
Once I finish the galleries and and all the carvings. I will add the two rear cannons and rudder. Then the stop chains and the aft will be completed. Then I can focus on the cannons, after which I can start adding all of the ship furnishings, railings and ladders.
Then will be the hull to add the support boards for the dead eyes and then add the cannon doors…70 of them…with Lion heads. Geez, then I have to finish the beaks head and I can start on masts and rigging. As much as I have done, I have that much more to do. But I have to stay focused and stop doing side projects. :(
The painting of the cannon carriages looks now more subtle.
Knowing what you still have to do has it’s pros and cons…… ;)
Regards, Peter
 
The gallery looks very nice and straight, Dean. A real eye catcher.

The painting of the cannon carriages looks now more subtle.
Knowing what you still have to do has it’s pros and cons…… ;)
Regards, Peter
Thank you Peter.
Straight is an illusion with these galleries…ROTF. For example, the lower back gallery wall has a large curve at the bottom, it angles back from the side view and curves around a large radius from the top view. The lower sides angle inwards and curve around a radius. The upper gallery wall has a large curve at the bottom and angles back from the side and is curved from the top. The sides angle in and backwards creating a compound angle at the corner, equivalent to an upside down pyramid shape. Then the upper section with the carvings will be curved to follow the same curve as the lower gallery and balcony deck, and angle back. The railings will follow that curve and the columns will be at the same angle backwards. Making it all come together into something cohesive and elegant is becoming a little bit of a challenge. The camera doesn't make all of this very obvious, like in person. ;)
 
Last edited:
Back
Top