-

Win a Free Custom Engraved Brass Coin!!!
As a way to introduce our brass coins to the community, we will raffle off a free coin during the month of August. Follow link ABOVE for instructions for entering.
-

PRE-ORDER SHIPS IN SCALE TODAY!
The beloved Ships in Scale Magazine is back and charting a new course for 2026!
Discover new skills, new techniques, and new inspirations in every issue.
NOTE THAT OUR FIRST ISSUE WILL BE JAN/FEB 2026
You are using an out of date browser. It may not display this or other websites correctly.
You should upgrade or use an alternative browser.
You should upgrade or use an alternative browser.
Occre Pacific 231 wood and brass train [COMPLETED BUILD]
- Thread starter Ken
- Start date
- Watchers 22
-
- Tags
- completed build occre
- Joined
- Dec 16, 2016
- Messages
- 1,143
- Points
- 493

Hi Heinrich, Thanks for that, I find that an interesting build is like a good book, it’s difficult to put down and this is a good kit. I’m further ahead than my current log, I can’t stop to post so next time I think that you’ll be surprised at the progress, now if only those instructions were better!
- Joined
- Jun 29, 2020
- Messages
- 59
- Points
- 68

Wow! What a lovely project. I built an Occre tram Lisboa some time ago, an early kit from them. The precision was impressive and produced a very handsome 1:32 model. I am impressed by the photographic depiction of the Walscheart's valve gear. If the build renders same it will be a very impressive build indeed. Build a showcase for it. Lehmann Gross Bahn 1:32 track will make a great base for it. Looking forward to the thread. Happy Days hey!!!
- Joined
- Dec 16, 2016
- Messages
- 1,143
- Points
- 493

Hello Everyone, I know that I don’t need to say it again but I will, so thank you all for following my build and for your kind comments, they do make the effort of doing this log worth while.
The build is continuing apace and I’m still very impressed with the quality and fit of this kit. The first thing that I’ll say is that plan A of my paint method is a none starter. The rear section with the cabin attached needs to be attached now to be able to continue, it has a beam the length of the underside, a mesh over the whole of the top surface and edging around the entire chassis and pistons over the join, so it’s plan B, when I’ve thought of what that consists of I’ll let you know. I’ve glued all three parts of the chassis together, added the stepped section at the front, and a sort of skirt at the rear, put the 4x2 strip around the edge, brass sheeted the wheel arches, made up and fitted the front and rear bogey supports and sheeted the upper surface with a plastic mesh. The mesh when painted will look like machined anti slip surface, quite a good way of doing it. I haven’t shown a picture of the wheel arches and some other stuff yet as I need to download them from my camera.
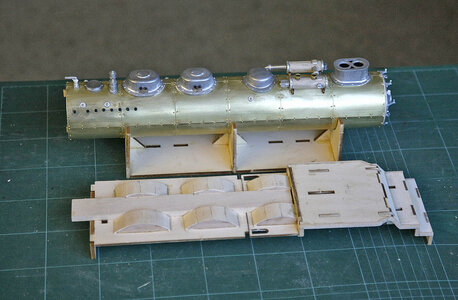
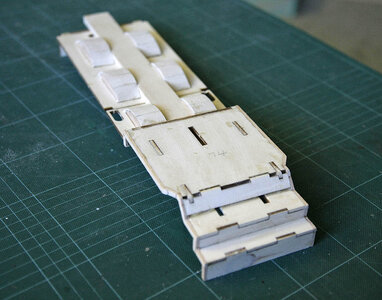
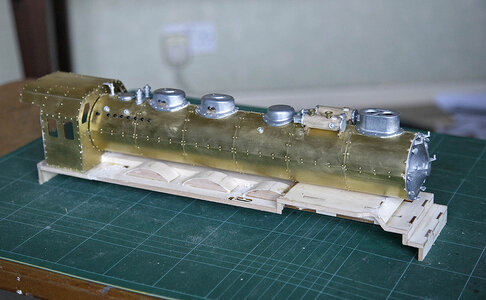
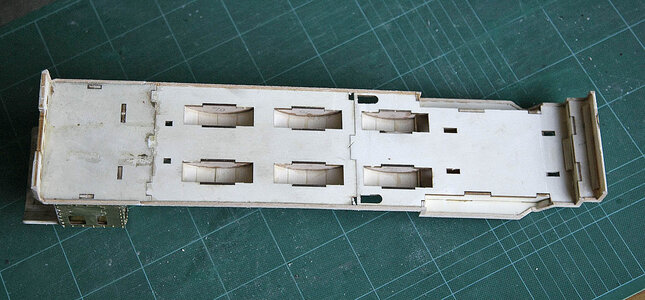
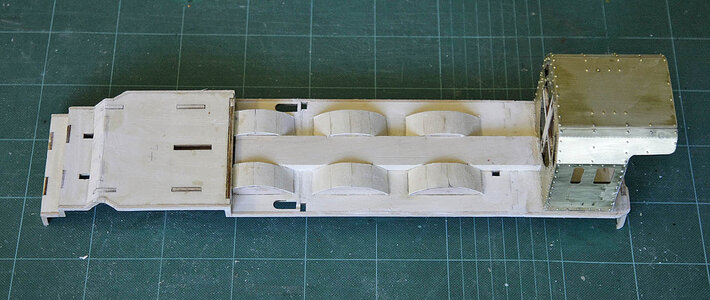
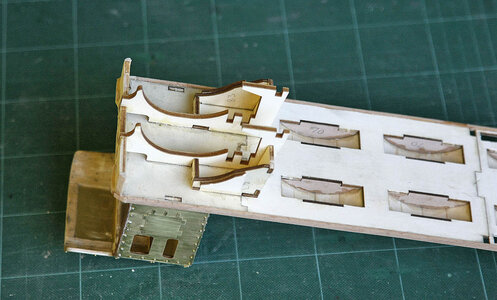
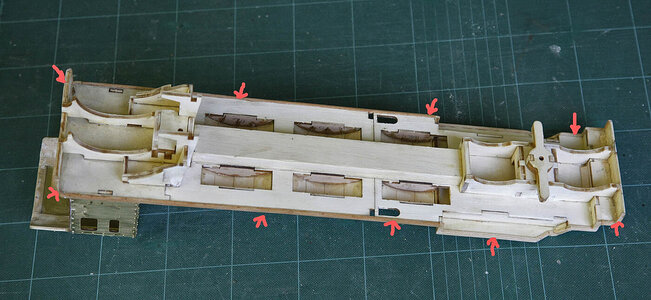
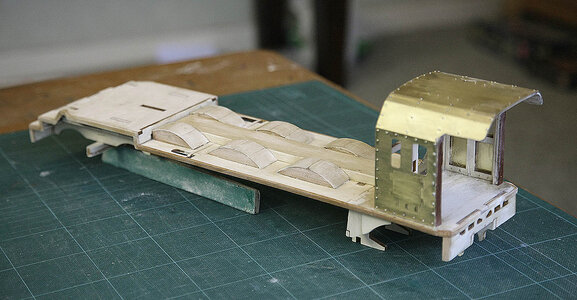
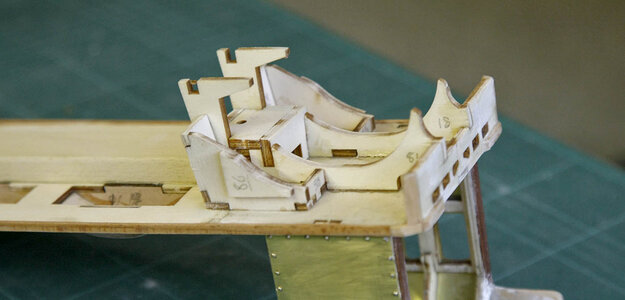
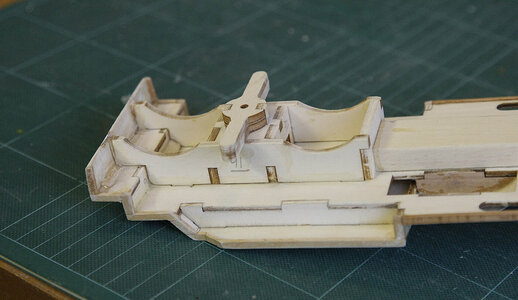
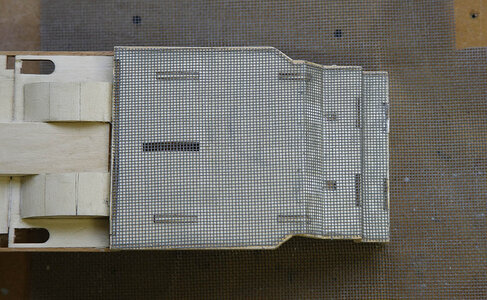
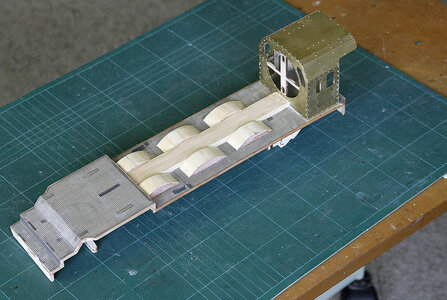
The build is continuing apace and I’m still very impressed with the quality and fit of this kit. The first thing that I’ll say is that plan A of my paint method is a none starter. The rear section with the cabin attached needs to be attached now to be able to continue, it has a beam the length of the underside, a mesh over the whole of the top surface and edging around the entire chassis and pistons over the join, so it’s plan B, when I’ve thought of what that consists of I’ll let you know. I’ve glued all three parts of the chassis together, added the stepped section at the front, and a sort of skirt at the rear, put the 4x2 strip around the edge, brass sheeted the wheel arches, made up and fitted the front and rear bogey supports and sheeted the upper surface with a plastic mesh. The mesh when painted will look like machined anti slip surface, quite a good way of doing it. I haven’t shown a picture of the wheel arches and some other stuff yet as I need to download them from my camera.


Wow, just catching up, missed the train, hope I can grab a seat at the next station stop. Your progress is great. Love the size of the model. I've got a fairly large G scale layout in my basement.
Jan
Jan
Last edited:
Kurt Konrath
Kurt Konrath
Keep chugging away at it, and it will be hauling freight down the road in now time.
- Joined
- Dec 16, 2016
- Messages
- 1,143
- Points
- 493

Hi Jan, welcome, yes we can always squeeze another passenger aboard,. I don’t think any introductions are needed as I’m sure that you know most of those onboard already, it’ll be good to have someone who knows a bit about model trains around as I’m on a very steep learning curve.Wow, just catching up, missed the train, hope I can grab a seat at the next station stop. Your progress is great. Love the size of the model. I've got a fairly large G scale layout in my basement.
Jan
- Joined
- Dec 16, 2016
- Messages
- 1,143
- Points
- 493

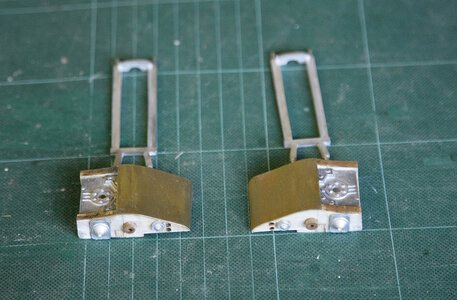
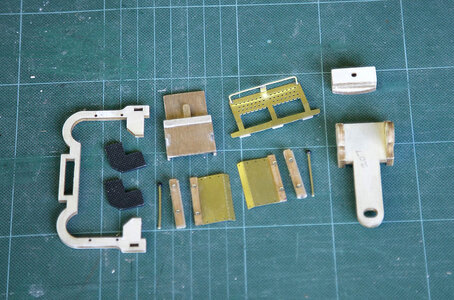
Hello, This is just a small update. Again things are going well, I have made a good start on what I believe are steam chests, I can’t go further with them until they have been painted. I had to anneal the brass for these as it was just too springy to make the tight curves. I have shown a picture of progress on some smaller items, the rear doors for the cabin and part of a bogey which will be covered in brass so that it will have a brass to brass facing and a small platform which sits on top of the cab.
Just for interest I’ve shown the tools that I’m using for the brass work, you may notice that I’ve faced one hammer with a piece of wood so as not to mark the brass
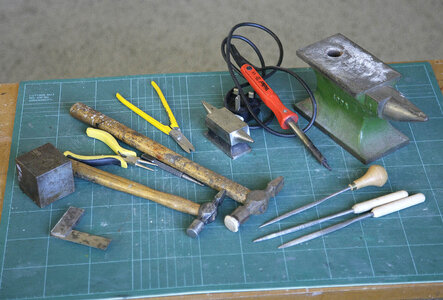
Just for interest I’ve shown the tools that I’m using for the brass work, you may notice that I’ve faced one hammer with a piece of wood so as not to mark the brass


Hi Ken this is an awesome looking kit and you are doing a great job with it. I would be interested to know how you annealed the brass.
- Joined
- Dec 16, 2016
- Messages
- 1,143
- Points
- 493

Hi Tony. Thanks for that, and yes an excellent kit. I hadn’t annealed metal before so was quite surprised at how easy and effective it was. as I mentioned I couldn’t get the brass sheet to form around the curves evenly and the very tight curve at the bottom just kept springing away from the frame I ruined one of the sheets in trying. I had read about annealing so decided to give it a try. I held the sheet over a flame, ( my wife’s cooker ) until it changed colour almost turning red but not quite then dunked it in water. It didn’t at first appear to have done anything but when I tried bending it the spring had gone and it stayed the shape that was induced. I then laid the sheet on a hard surface, put a touch of cyno on the top edge of the frame, when set, pressing down on the frame I rolled it over the brass sheet and because the spring had gone it stayed the correct shape. I’ll call it a learning curve.Hi Ken this is an awesome looking kit and you are doing a great job with it. I would be interested to know how you annealed the brass.
- Joined
- Dec 16, 2016
- Messages
- 1,143
- Points
- 493

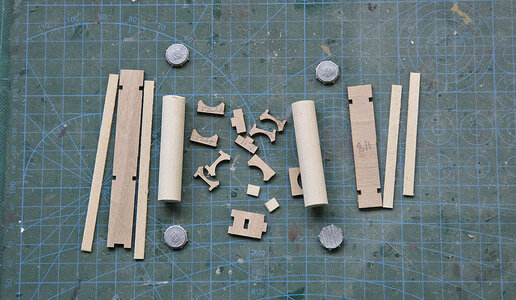
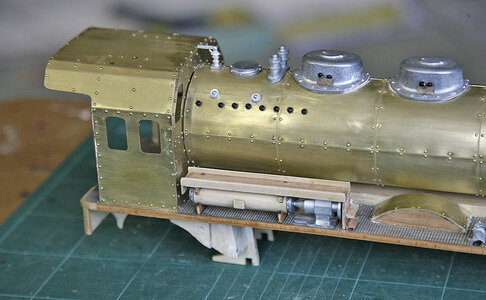
Hello All. We’re moving out of the station now so take your seats. This post shows the making and fitting of some sort of steam container, I know nothing of its purpose, just following the instructions. You’ll also notice the brass covers on the wheel arches. It’s a similar fitting on the other side but a slightly different design, I’ll be making that up today.


- Joined
- Dec 16, 2016
- Messages
- 1,143
- Points
- 493

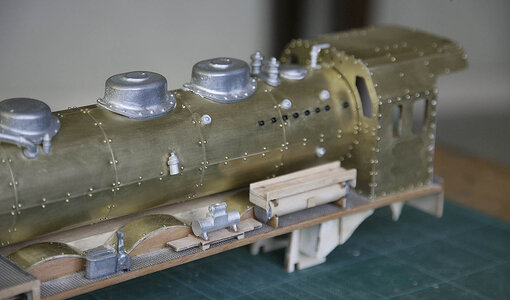
Hello Again. In my post yesterday I said that I was to make a similar steam container for the other side, well I finished and and here it is, mounted, along with a few cast parts.
Jan, I'm sure that others would be very pleased to see the pictures of your large scale rail layout. I would be happy for you to show them here on my log, we all love to see pictures and hear of members modelling interests.
Jan, I'm sure that others would be very pleased to see the pictures of your large scale rail layout. I would be happy for you to show them here on my log, we all love to see pictures and hear of members modelling interests.

Ken, that would be great. I think there are several pictures of my “ever in progress layout” here and there on the Forum. I believe there are other model rail enthusiasts on the Forum also.Jan, I'm sure that others would be very pleased to see the pictures of your large scale rail layout. I would be happy for you to show them here on my log, we all love to see pictures and hear of members modelling interests
Your “Pacific” is really starting to take shape, adding one of the Occre 1/32 passenger cars would be a nice addition
Jan
- Joined
- Dec 16, 2016
- Messages
- 1,143
- Points
- 493

Hello Everyone. Thank you for following and the many likes. The build is still going well with no insurmountable issues, the quality remains impressive.
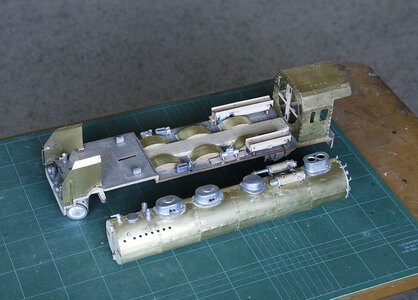
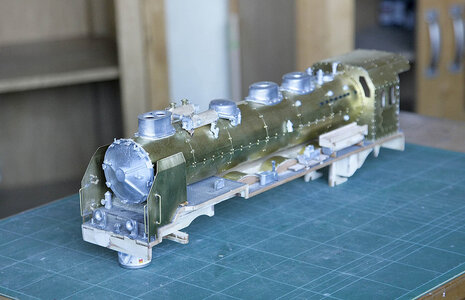
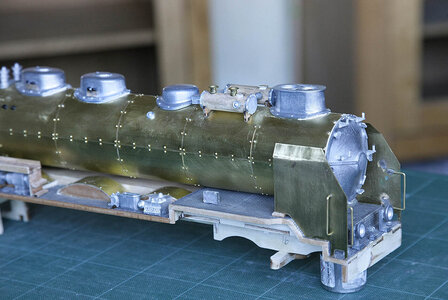
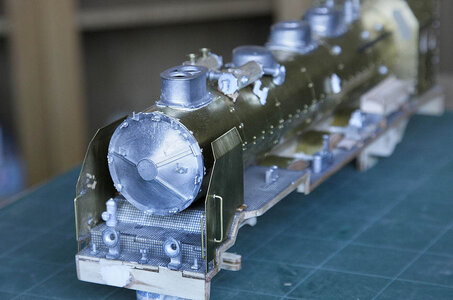
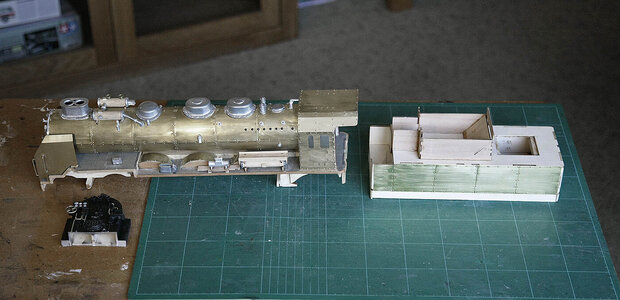
I’ve more or less finished this stage of the boiler, cab and chassis so now thoughts move on to painting it. I’ve decided to paint the boiler and cab green, I’ll then mask the cab and the rear ¾ of the boiler then spray the rest black, I’ll need to prepare and then prime it. For primer I’m just going to use an auto acrylic primer from a can then use Tamiya gloss through my airbrush. For the moment I’ll put it to one side and start building the tender to a stage that it too is ready to paint, and then do them all together.
I’ve studied the instructions for the tender and it looks to be much more difficult than the train, almost like a 3D labyrinth, that I can’t quite figure out yet.


- Joined
- Dec 16, 2016
- Messages
- 1,143
- Points
- 493

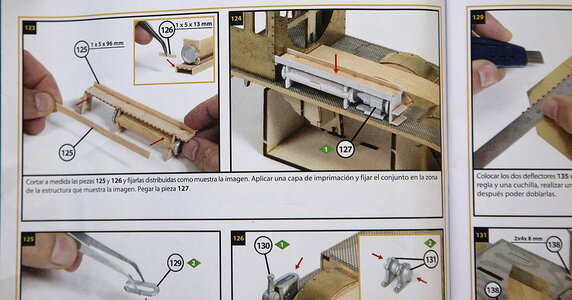
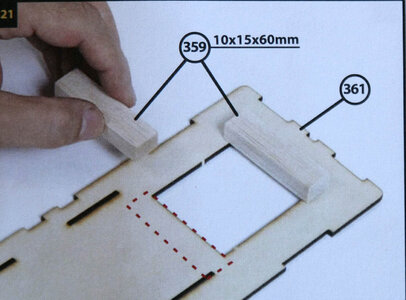
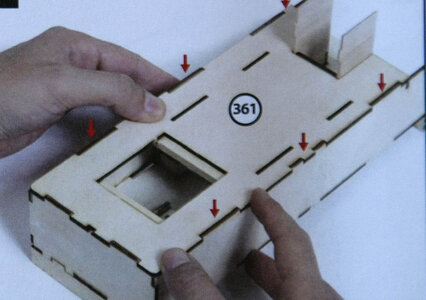
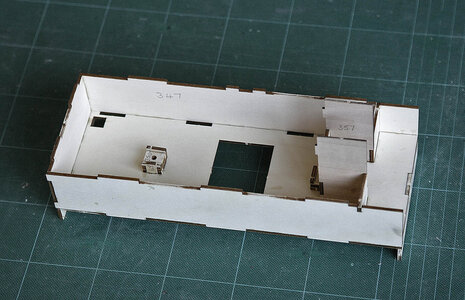
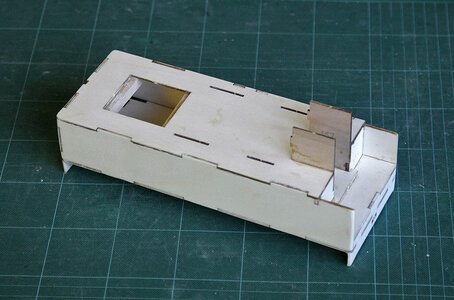
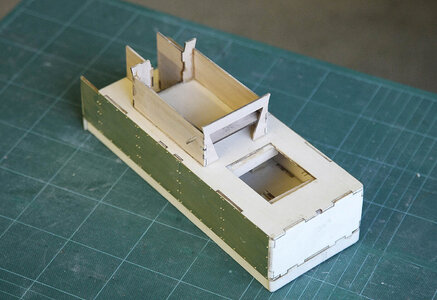
Hello Everyone. Again thanks for responses. The journey continues, I’ve now started the tender. At first I thought that this part would be a simple straight forward box like structure but as I mentioned earlier it is far from it and having done quite a bit of dry assembly to try and understand the method in the designers head I realise that it is more difficult and detailed than the train itself. It’s now coming together fine, but the instructions remain poor and sometimes wrong. The kits design is excellent and when you look at the accurate cut and fit of the parts you’ll see that they are top rate but it’s a pity that this isn’t followed through with their instructions. I’ve shown two pictures from the manual, the first is quite explicit in the placing of the beam, the second shows that it was illustrated wrong, and now being on the inside of a box it is annoying to correct. I don' think that they were proof read by someone actually building this model solely from these instructions.
After that rant I can say that all is going well, I just need to be careful.
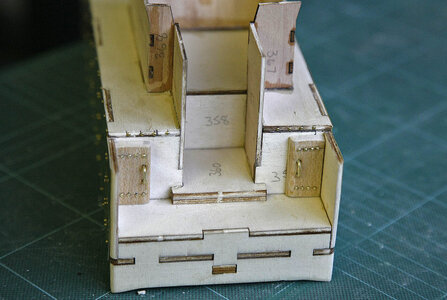
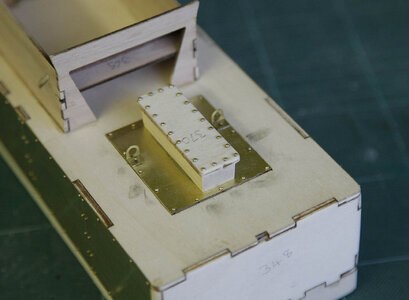
After that rant I can say that all is going well, I just need to be careful.


Looks very good, Ken
- Joined
- Dec 16, 2016
- Messages
- 1,143
- Points
- 493

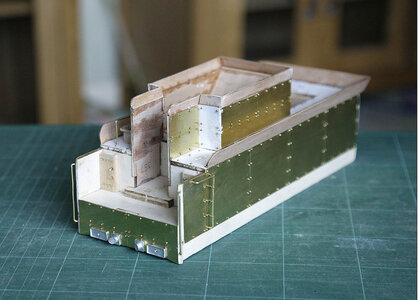
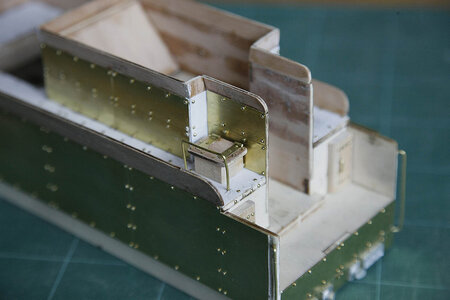
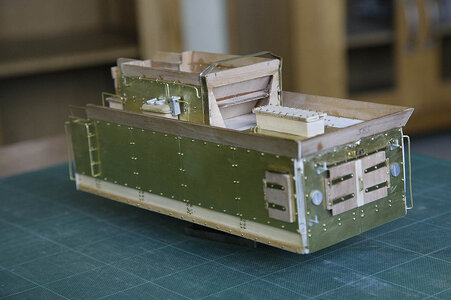
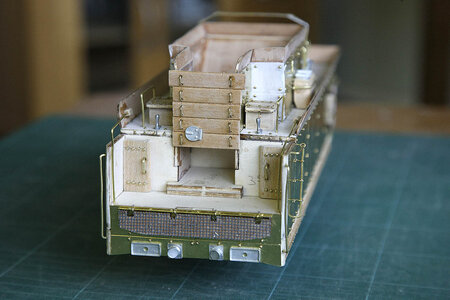
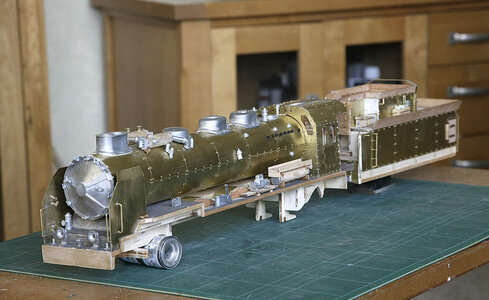
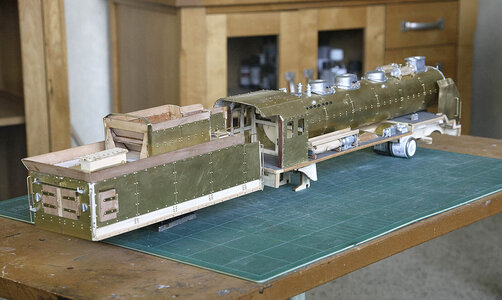
Hello Everyone. We’re at full speed now so I don’t want anyone trying to jump off this fast moving train. I think the pictures show what I have done better than I can explain. One issue that I thought I might have was not having enough brass sheets. There are two different sizes and the instructions don’t tell you which size that you should use on each section, as some needed to be cut to shape it was easy to use a larger piece in error. As I neared the final part of the panelling I realised that I had only just enough large pieces to complete the deck and that these would need cutting to shape in a tricky area, if I messed up one I wouldn’t have enough to finish. I decided to use plasticard instead, cut and drilled identical to the brass sheet provided so that the whole deck would have the same texture and not a mix, once painted nobody would know. It worked out well.
As we’re on a railway theme I’ve added a picture of our local preserved station Hadlow Road, a couple of miles from where I live.

As we’re on a railway theme I’ve added a picture of our local preserved station Hadlow Road, a couple of miles from where I live.


Plasticard, a brilliant solution to avoid a possible shortage of material. Love the bottom photo with the old phone booth. Is this an old picture as it seems today the phone booth would be an anachronism?
Ok I didn't read the last line of your post 'preserved station Hadlow Road' explains everything.
Ok I didn't read the last line of your post 'preserved station Hadlow Road' explains everything.
Last edited:
Looking great, Ken. And a nice solution whit your ad-on's.
Regards, Peter
Regards, Peter
Vey nicely done. That will be great display piece when you are done.
Jan
Jan


