Over bending is a good idea because it will straighten out easily but if it is not bent enough there is a strong likelyhood of the plank breaking when trying to put an extra bit more bend in it. It happens quite often with my bending tool, pressure is the operative word.
-

Win a Free Custom Engraved Brass Coin!!!
As a way to introduce our brass coins to the community, we will raffle off a free coin during the month of August. Follow link ABOVE for instructions for entering.
You are using an out of date browser. It may not display this or other websites correctly.
You should upgrade or use an alternative browser.
You should upgrade or use an alternative browser.
Panart: San Felipe 1:75 Scale Build Log [COMPLETED BUILD]
- Thread starter Donnie
- Start date
- Watchers 66
-
- Tags
- completed build
Looking good Donnie.
Thanks Gary and Eric.
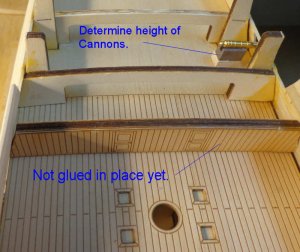
I realized that the Cannons are sitting on the raw deck. There will be another layer of real deck planking that I forgot about. So I need to add about 1mm if I really wanted to be precise. The additional deck should not warrant having to relocate holes, but I will see.
I realized that the Cannons are sitting on the raw deck. There will be another layer of real deck planking that I forgot about. So I need to add about 1mm if I really wanted to be precise. The additional deck should not warrant having to relocate holes, but I will see.
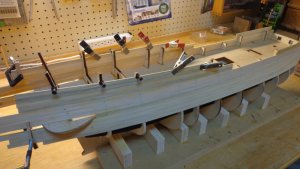
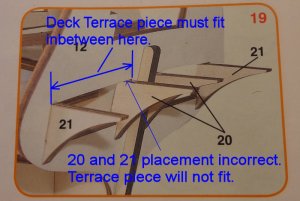
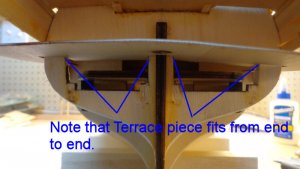
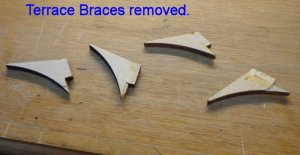
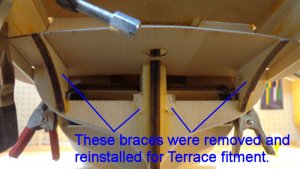
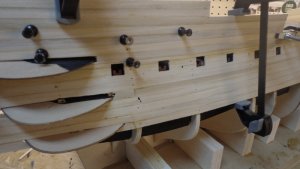
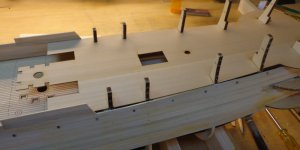
My next step is and was a total mess. I had to cut out the braces for the Terrace or Deck for the Gallery. I installed the braces per instructions when building the frame. But, when I got to install the Terrace piece, its shape would not fit because the braces were installed wrong. I also had to cut out some planking to get the Terrace to fit and look correct, then I reinstalled the braces. The braces should not have been installed at that time, but waited later. I hope that you all can see the sequence of events and the problems that I ran into.
The first image is from the instructions.
The first image is from the instructions.
Last edited:
Thanks for the tips. I will try to remember this when i do the San felipe myself. Nice of you to share this with us.
Shape and glue a sliver in there with a slight force fit.
Yep, I thought about that, but the terrace piece is false decking look. The amount of the gap, I would have to somehow mimic the false deck planking strips to blend in.
I can tell by the images of the instructions that they did something similar, but they probably have enough scraps of false deck planking to fill in the gap, where I don't have any false decking scrap. I will think of something.
I wrote mantua help desk with an image and will see what they say. This should be interesting.
Nice job so far, Donnie! That's the bad part about not planking the deck and having them come with simulated planks..little margin to correct stuff like that. Ugh... I'm sure with your skill and talent you will come up with a solution that works just fine. Onward through the fog!
Thank you UnderSea4me,
I appreciate the encouragement. The picture instructions are nice, but some of them are out of order. I am having to remove some pieces that previously were glued down. At any rate....
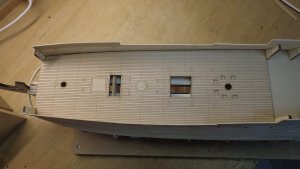
According to instructions, it is time to glue in the False Deck. Reason is that there are Upper Deck Support Beams that will be glued on top of this Deck. I like the False Deck, however, I know that most of you would cringe at the thought of using it. The thing is that it has printed outlines of where the deck furnishings go.
Last edited:
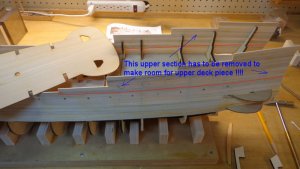
WHY oh why didn't I read a few pages forward. Now, a whole section is going to have to be cut out to make provisions for the upper deck piece. The steps BEFORE had clearly shown ALL the planking up to the very top........however, pages over into the instructions DO not show that. They show the installation of the upper deck, THEN to continue the planking on upwards to the top !!!! Come on folks and shame on me for not looking just a few pages forward.
I also learned a lesson again BEFORE I glued another piece down. The beam support for the upper decking shows clearly in one picture to install it in one location, but if I went by instructions, the Beam support would be clearly in the way of "Steps" that go from the lower to the upper deck. The beam support must be installed way way aft of the ship. Come on Panart. Make up your mind about where you want to glue items !!!!!
I also learned a lesson again BEFORE I glued another piece down. The beam support for the upper decking shows clearly in one picture to install it in one location, but if I went by instructions, the Beam support would be clearly in the way of "Steps" that go from the lower to the upper deck. The beam support must be installed way way aft of the ship. Come on Panart. Make up your mind about where you want to glue items !!!!!
Last edited:
HI Donnie
I found out the hardway with Panart kits, with the Gun deck kit especially . Great kit parts but the instructions a different matter. The Photo instructions and plan and instructions all differed as the had modified the kit over time , but not the plans / instructions / photos. The net result was different details and out of sequence parts between all three, Plus the plans are in Italian and need google translate.
I found that I had to cross ref all three most of the time and definitely read ahead.
Its all doable, but yes you have to re read and compare all the info. Well done so far.
Paul
Donnie, a builder following the instructions step by step would not be expected to read forward a number of steps,
however, and this is no reflection on you or any modeller for that matter, it is good to spend some days reading and re-reading the destructions before one starts to even dry fit parts.
I have done that and still found that I stuffed up, remember that this programs you for for future models and helps other modellers.
Regards
Eric
Thank you Paul and Eric...I was thinking I was the only one....
Hi JScolum,
you are 100% correct. I am not thinking properly.
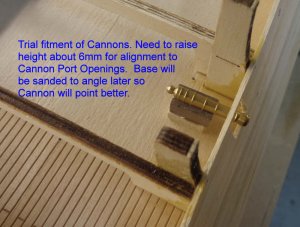
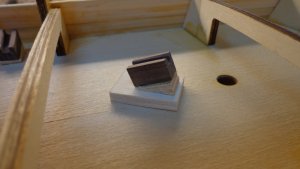
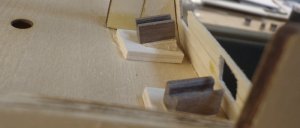
However, I must move on to repair. I also this time try to think AHEAD !! This time I see that I need to mount the false cannon stumps to the mid deck before it is covered up. You will see that I am doing this. At the same time, the false stumps need to be raised by 6mm, so I modified the height of the cannon supports (stumps) so that the Cannon will be outward straight in line with the Port Frame opening.
It is a mess ---
Donnie
Last edited:
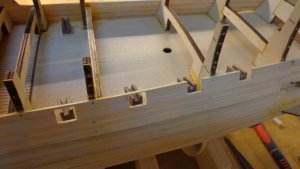
Ok, I am shifting my attention to the Cannons, since the mid rear deck (can't think of the technical term) is going to cover up the cannons, I thought I should try to think ahead.
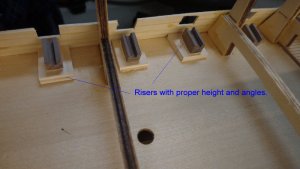
I found that I needed to make some risers and also the risers needed to have a certain angle to them. This is what I have come up with so far. I hate modifying kits. I hate making revisions like this because in the back of my mind I am thinking "am I doing something wrong, or is the manufacture not think about this stuff"
Well, I can tell you that at least from some of the images of the manual, the top main deck in the middle, the cannons are squeezed into position and horribly pointing downward. Well, I don't want this to look this way.
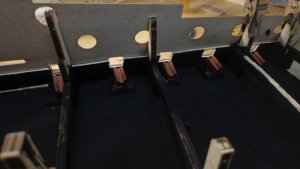
The false carriages will be painted red and the Cannons will be painted flat black.
Last edited:
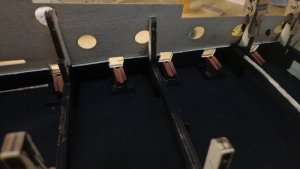
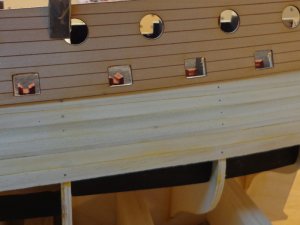
Continue to work on Cannon placement adjustments. The deck has been painted black as obvious as I do not want any light reflections. I painted the dummy Carriages Red. The Cannons will be painted Flat Black, but not shown here yet.
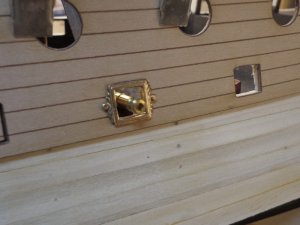
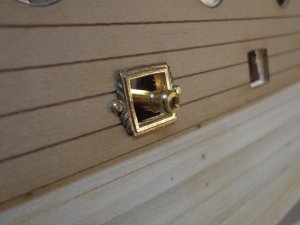
To assist in the best protrusion of the Cannons, I have one Port Frame installed temporarily (mocked up). If I were to make the adjustments without the lazer cut upper bulwark, and also the Port Frame, then when these pieces would be added, the Cannon would not be sticking out as much.
I am not sure if I should now glue the Cannons in place as I have a long way to go with planking. I was anxious to get this part done correctly, and to try and think ahead of the situation.
When this is done, then I will finally be able to glue on the upper deck piece...sorry, don't know the technical name for this deck - shame on me.
Last edited:
Hi Donnie
Looks good.
Have you considered using brass blackner for the guns and brass parts you wish to blacken like Casey Brass Black, Its used by Gun hobbyists.
Its works great and looks better than painting.
10:1 ratio with water for a soak till black, rub back then do again. Only need to clean brass in vinegar first. No primer, no paint coming off...
For deck info
https://en.wikipedia.org/wiki/Deck_(ship)
Cheers
Paul
Hi Donnie, are you going to leave the simulated planking as is or will you be planking over them with coloured strips?
Regards
Eric
PS. you do like the black paint I noticed, it is still giving me problems on the Mayflower, glue don't stick to well to it.
Regards
Eric
PS. you do like the black paint I noticed, it is still giving me problems on the Mayflower, glue don't stick to well to it.


